Create an Inspera submission link in Learn.UQ (Ultra)
For quizzes or school-based exams (e.g. mid-semester exams), students should access these via an Inspera submission link in their Learn.UQ course. Note: You need to have Created a question set ready in the Author page in Inspera.
Two steps involved are:
- Create an Inspera LTI link in the relevant Learn.UQ course
- Complete creating the Test in Deliver in Inspera.
Create an Inspera link in Learn.UQ course
- Access your Learn.UQ course.

- Click the plus (+) button in the relevant assessment folder to add content.

- Select the Content Market option from the dropdown menu.

- Click on the plus (+) button on the Inspera Assessment icon.

- The Inspera link will be added to the assessment folder. Note: the link is hidden from the students by default.

- Click on the three dot (...) next to the Inspera Assessment link.
- Select the Edit option.

- Edit the name of the assessment task; e.g. Week 2 Quiz
- Check the box Create Gradebook entry for this item to create a column in your Learn.UQ course Gradebook.
- Delete the Due date and time.
- Enter the Maximum points.
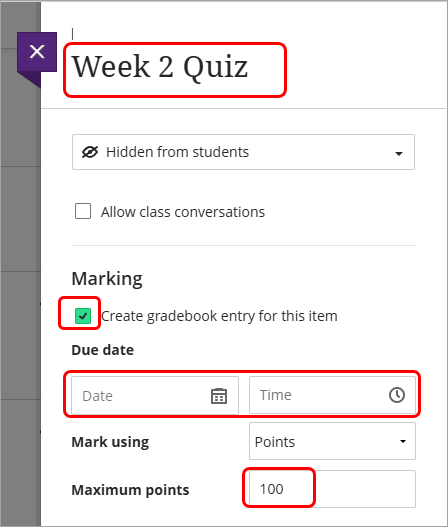
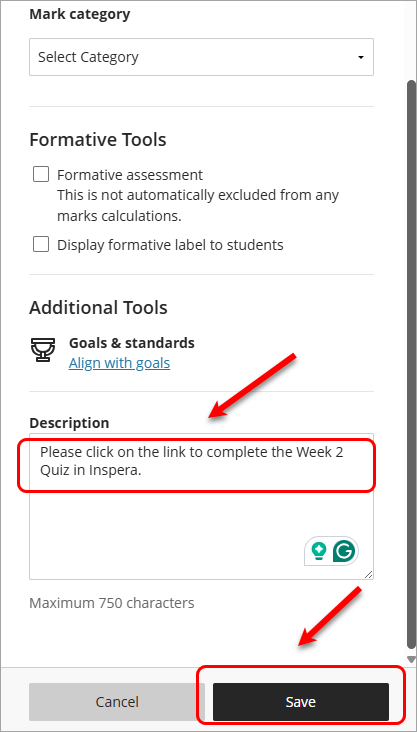
- Scroll down, enter a brief instruction into the Description textbox. For example: Please click on the link to complete the Week 2 Quiz in Inspera.
- Click on the Save button.
Complete creating the Test in Deliver in Inspera
- Click on the Inspera Assessment link. This will bring you to the Deliver page in Inspera and create a test here. You will need to enter a relevant name, add the required Question Set and complete the setup.

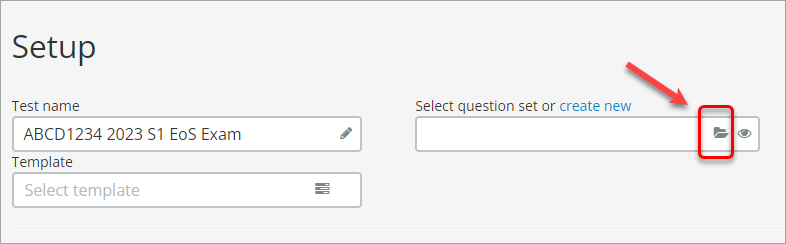
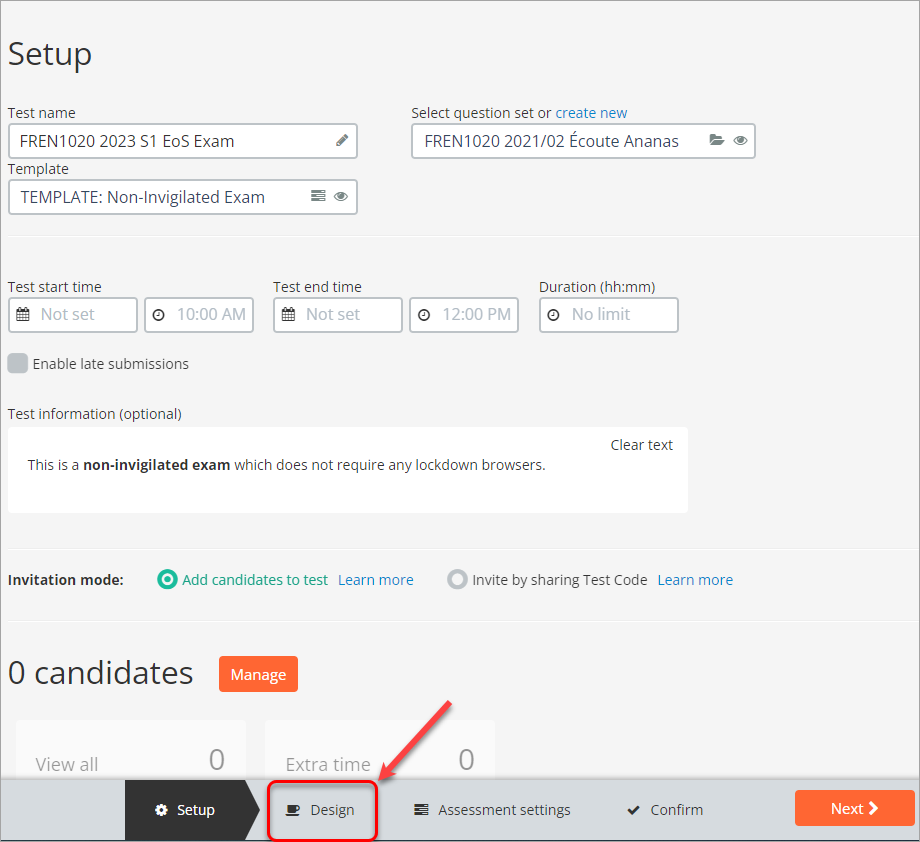
- Enter the assessment name in the Test name text box, following the naming convention.
- Select a relevant Template.

Note: Refer to the table below to identify the appropriate template
| Template Name | Use this template for: |
|---|---|
| Exam Templates | |
TEMPLATE: Safe Exam Browser (SEB) | Invigilated on-campus exams. This template requires students to have Safe Exam Browser installed. |
| TEMPLATE: Non-Invigilated Exam | Non-invigilated open book off-campus exam |
| Other assessment templates | |
| TEMPLATE: Quiz (Submit once) | Quizzes and other assessment types where the student will only access the assessment once. Refer to the Assessment Tools guide for tool recommendations for different assignment types. |
| TEMPLATE: Assignment (Ongoing submission) | Assignments and other assessment types where the student may continue to return to the assessment multiple times before the due date. Refer to the Assessment Tools guide for tool recommendations for different assignment types. |
| TEMPLATE: Assignment (Submit once WITH late submission enabled) | Assignments and other assessment types where the student may continue to return to the assessment multiple times before the due date. Refer to the Assessment Tools guide for tool recommendations for different assignment types. |
Note: For details of template setting refer to Inspera exam templates (PDF) and Inspera assessment templates (PDF).
- Select the required Question set. You have Created a Question Set on the Author page.
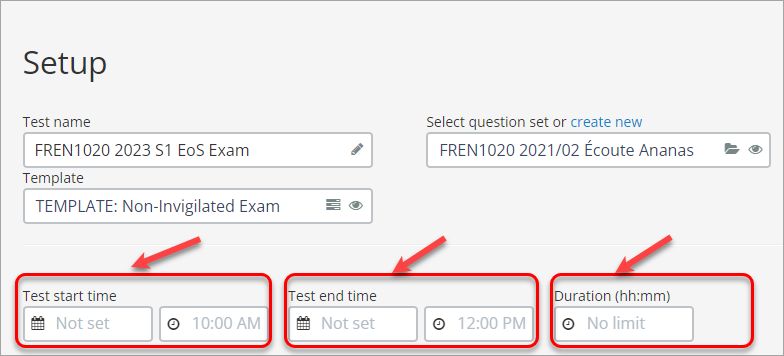
- Set the Duration (hh:mm) as:
= Working time + Planning Time (+ an additional 15 minutes if using a file upload question).
Note: It is important to include the duration as students will not see a countdown timer while
completing the assessment if a duration is not set.
- Set the Test Start Time (date and time) according to your scheduled exam time.
- Set the Test End Time (date and time) as:
= Test Start Time + Duration (+ an additional 30 minutes if using Inspera Exam Portal lockdown browser)
Note: Exams using lockdown browsers may experience some technical difficulties getting started so an
additional 30 minutes should be allowed to accommodate troubleshooting time.
Note: You do not need to add/enroll students to the test because when students click on the Inspera link in their Learn.UQ course, it will enroll them in the test.
- Click on the Design button to apply assessment design settings.
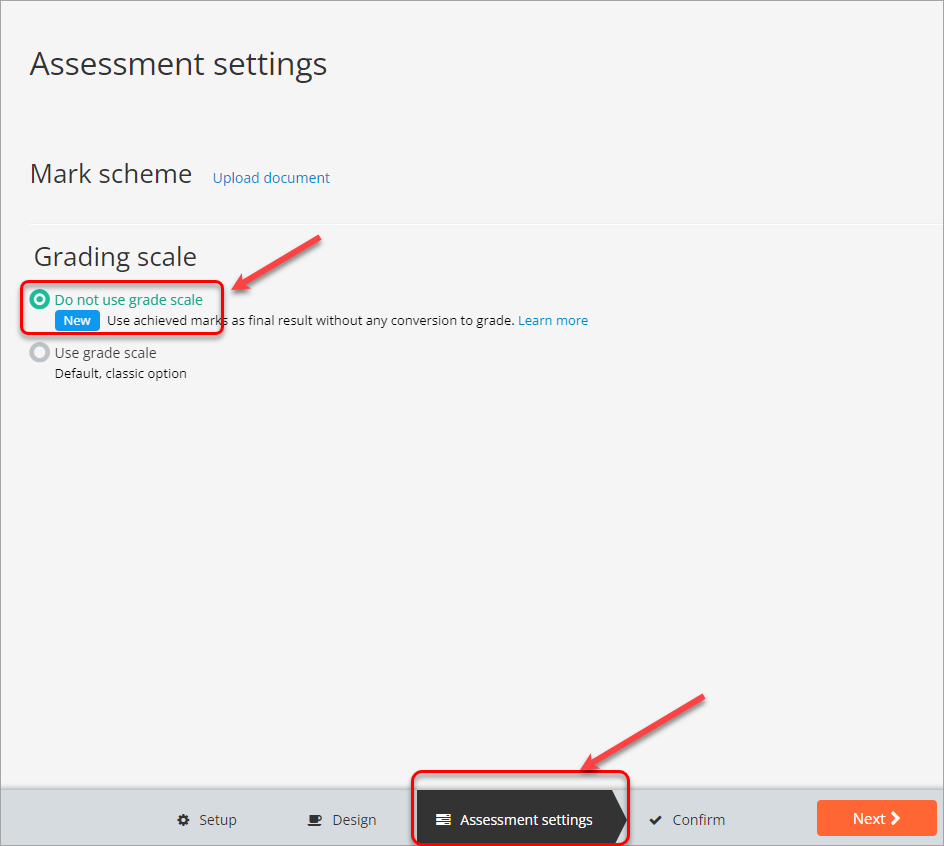
Click Assessment Settings on the toolbar at the bottom of the screen and make sure Do not use grade scale is selected so that marks are transferred to your Grade Centre as raw marks rather than grades.
- Click Confirm to perform a final review of all settings. Once you’ve reviewed the Confirm page, click Activate test.

- Post an announcement in Learn.UQ instructing students to click on the Inspera LTI link in the course site to self-enrol. Students who require extra time as an Alternative Exam Arrangement (AEA) will need to be enrolled in advance so that their extra time can be applied. Refer to the next step Pre-enrol students with AEA/TZA.
Pre-enrol students with AEA/TZA (if required)
- Download the AEA Enrolment Template and follow the instructions to create a .csv file for students with AEAs.
- Click on the Deliver tab and select your test from the list.
- Scroll down to the Candidates heading and click on the Manage button.
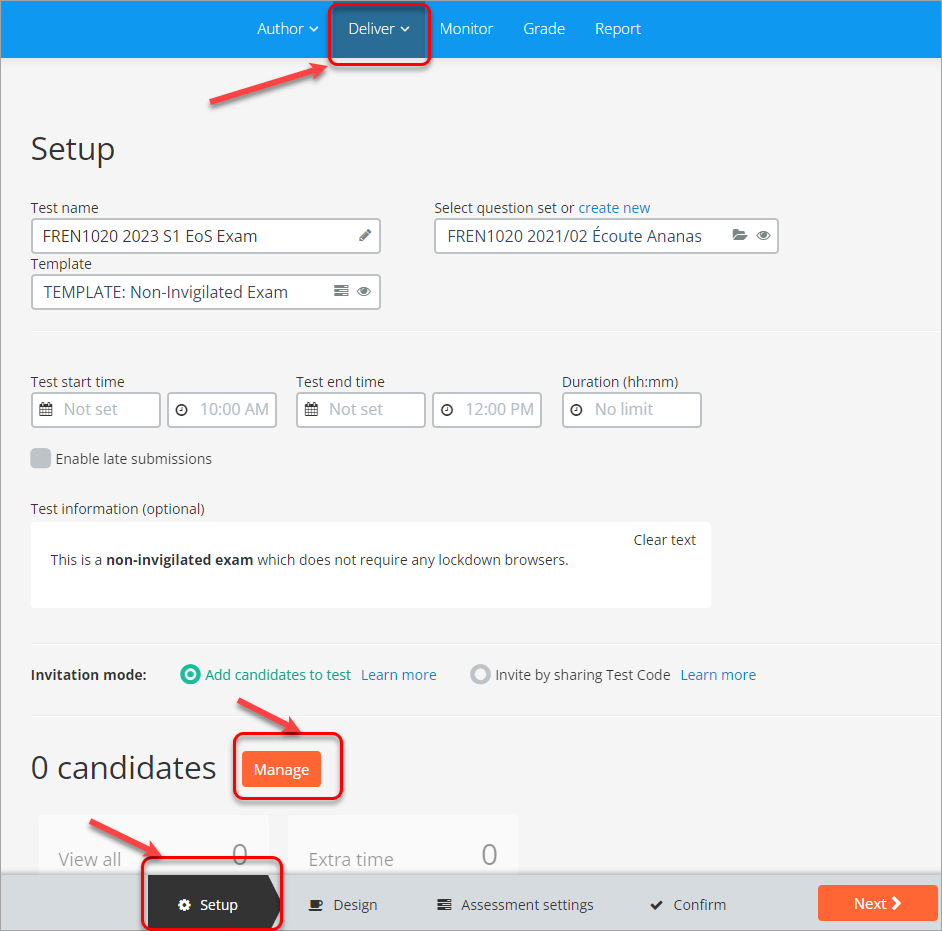
- The Candidates window will appear.
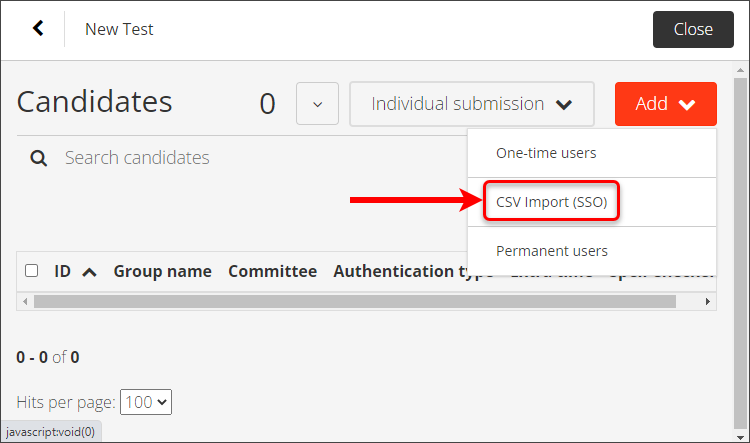
- Click on the Add button.
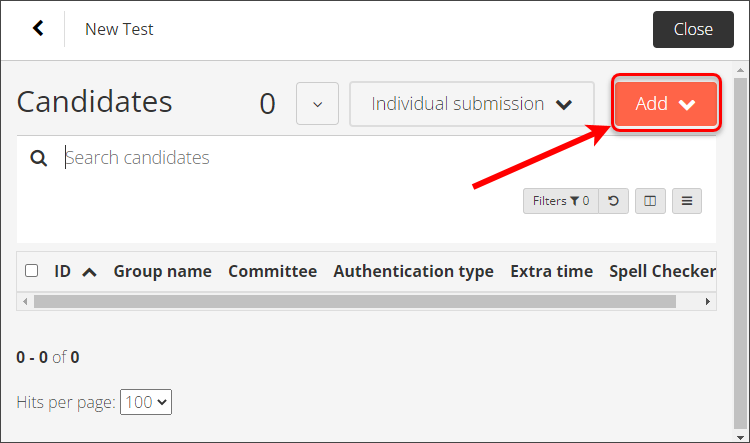
- From the drop-down menu, select CSV Import (SSO).
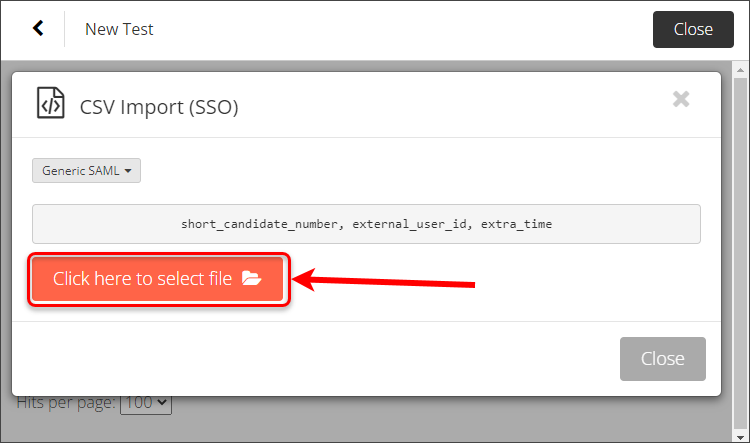
- Click on the Click here to select file button in the CSV Import (SSO) dialogue box.
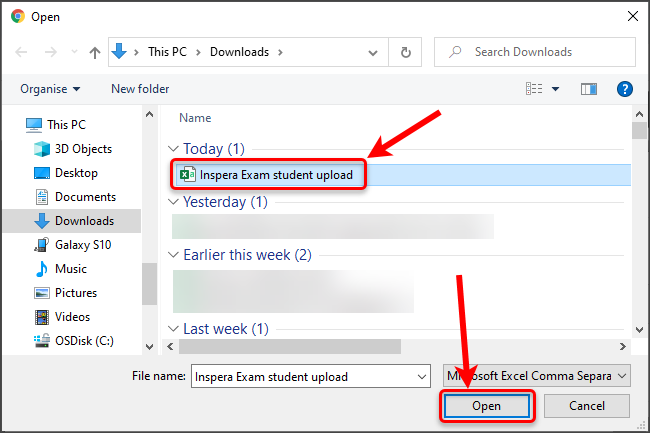
- Select the .csv file you saved earlier.
- Click on the Open button.
- The file will upload and a message will display if the students have been successfully added.
- Click on the Close button.

- The student(s) username (e.g., s1234567) will appear in the Candidates list.
- Click on the Close button to return to the main assessment setup page.
