Enable After-test settings in Inspera (Original)
After test settings define the date and the type of information to be released to students once the test results are confirmed. These settings can be enabled after the completion of marking.
You can check what students can see in their report to make sure all released details are intended.
Enable After-test settings
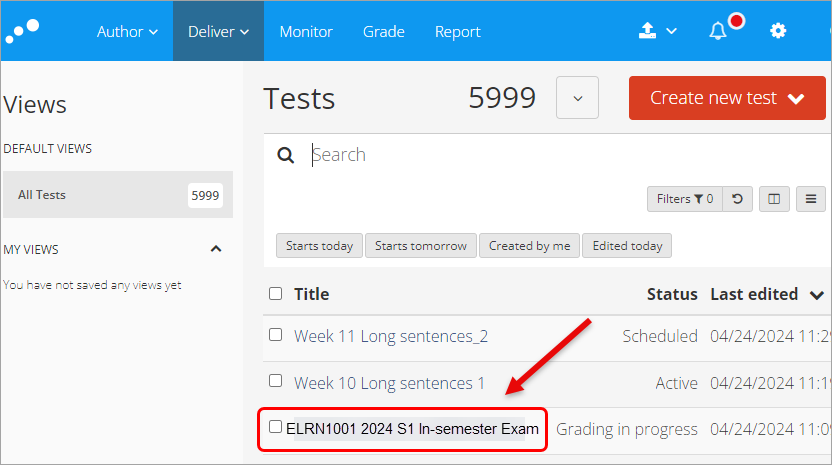
- Access your test from Deliver.
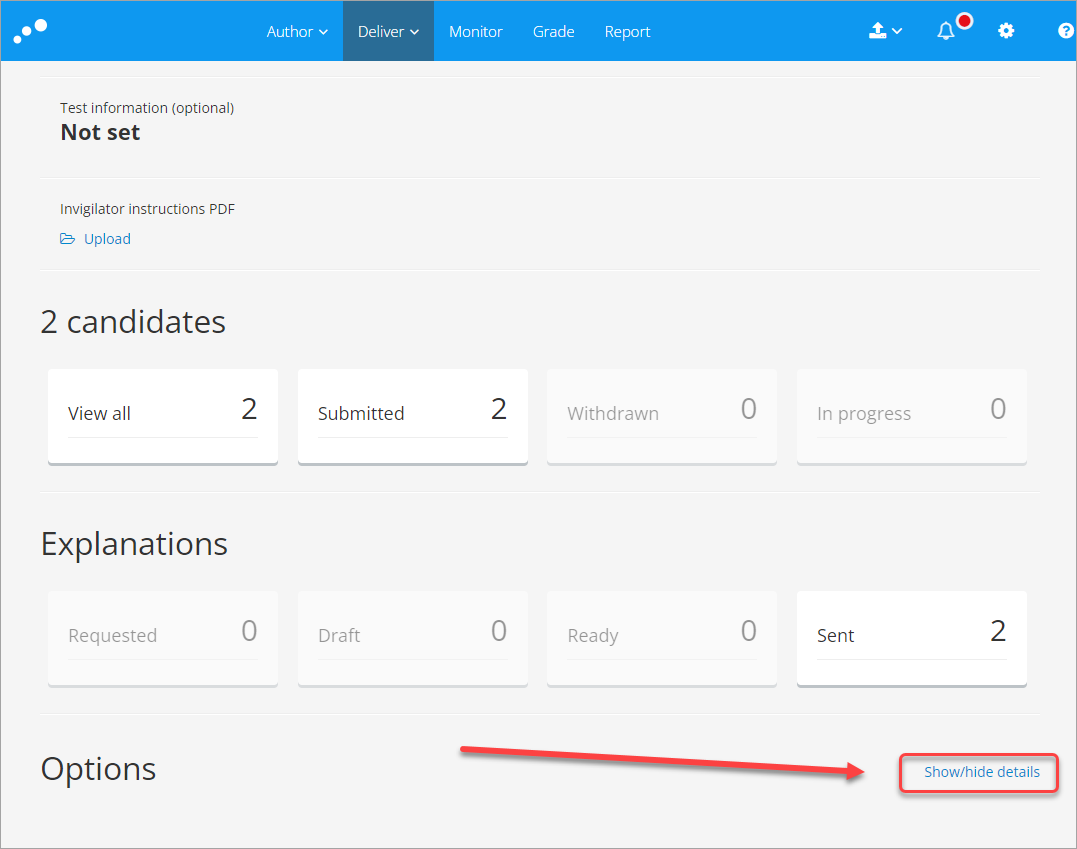
Scroll down to the Options section, click on the Show/hide details link.
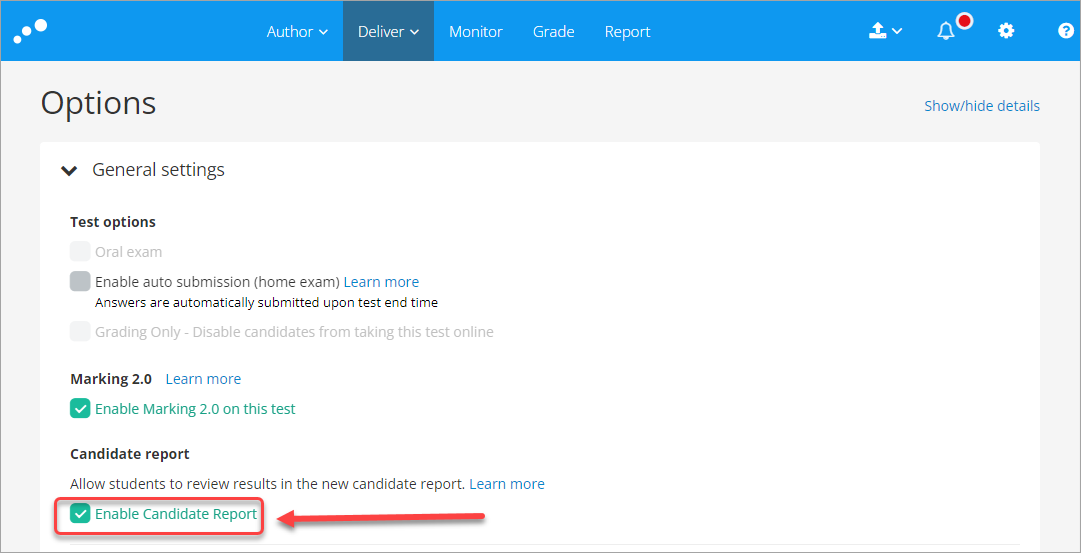
General settings
- Check the Enable Candidate Report checkbox if you want students to be able to access the report on their submission from Inspera dashboard once it is available.
After test
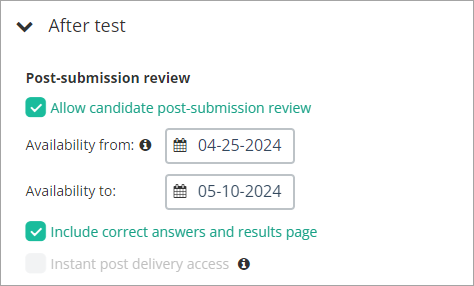
Post-submission review
- Check the check box Allow candidate post-submission review if you allow students to view their submission on the Inspera dashboard.
- Select the dates for the post-submission be available for
- If no date is set, there is no time limit, and students will always have access.
- Check the check box Include correct answers and results page if you want students to view the correct answers and the results page of their submission.
- The correct answers for automatically marked questions will be visible in the submission review.
- On the submission summary page, status of the answers (correct/wrong/unanswered) for each of the questions and achieved marks for automatically marked questions will be visible.
- Leave the box Instant post delivery access unchecked:
- If enabled, students may view or download their submission immediately after submitting, even if the test end time has not passed.
- Please note that if instant availability is enabled an available from date restriction cannot be selected.
- Also, students will not be able to see marks or feedback on any manually marked questions as they won't have been marked yet.
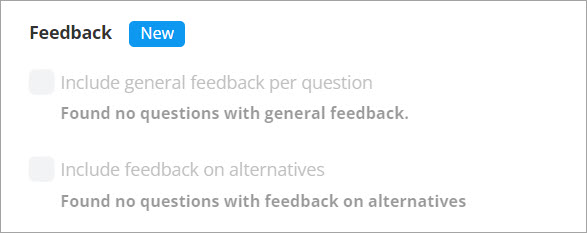
Feedback
- General feedback refers to pre-written feedback that is built into the questions at the time of authoring them.
- Include general feedback per question: will be available to select if you have provided general feedback on any question in your question set.
- Include feedback on alternative: will be available to select if you have provided feedback on alternatives on any question in your question set.
Results page
- This setting makes the results page available for students, allowing them to see the results of the submission immediately after they submit their test.
In the submission summary page, columns for status of the answers (correct/wrong/unanswered) and achieved marks for automatically marked questions will be available.
Therefore, we recommend not enabling this setting to prevent students from taking the screenshots of their answers.

In case you do allow students to see the results of their submission, please note that the two settings of auto submission and results page cannot be enabled at the same time.

Final Results and Marks
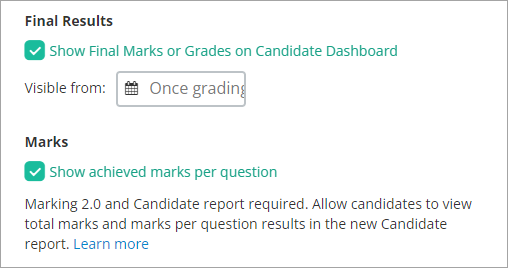
- Check the checkbox on the Show Final Marks or Grades on Candidate Dashboard to allow students to see their final (total) marks on their Inspera dashboard.
- Optionally, you can select the release date on the final results.
- Check the checkbox on the Show achieved marks per question to allow students to view their achieved marks per question.
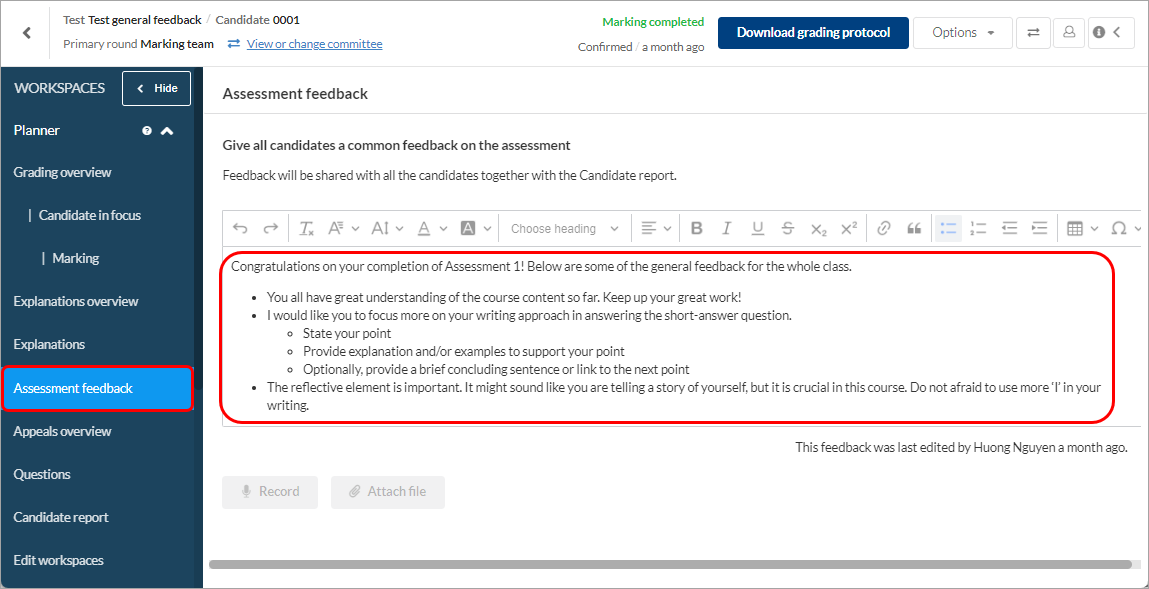
General feedback for assessment
When you finish the marking, you can compose general feedback and make it available for students in the Candidate report. It is similar to the feedback you give the class when you announce that the test results have been available.
- Enable the setting:
- Enable general feedback for assessment and
- Share assessment feedback with candidates

- Enter your general feedback in the Grade page > Assessment feedback
Comments
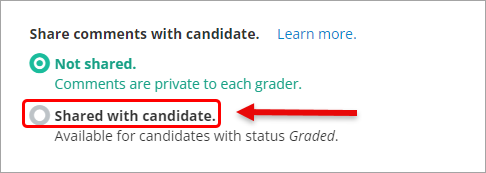
Comments refer to the annotations you provided when marking students' responses on manually-marked questions.
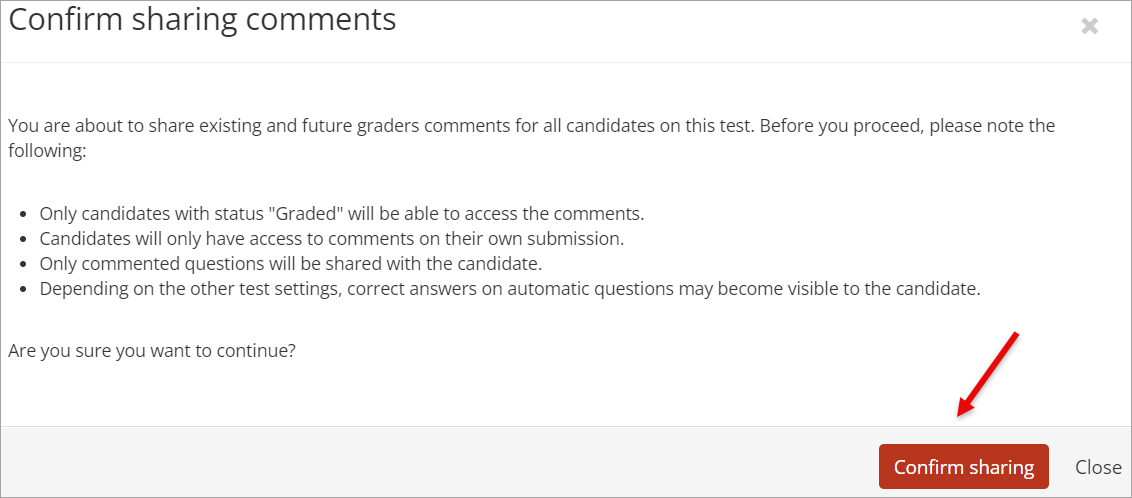
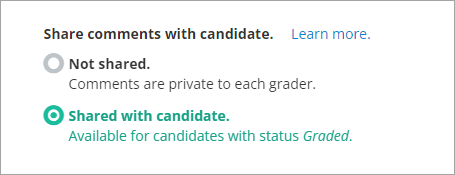
- Select the radio button for the setting Shared with candidate. This allows students to read the annotations you provided when you marked their responses.
Comment settings
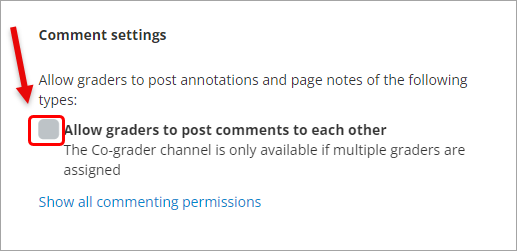
- This setting only impacts graders, allowing them to use the annotations and page notes functionalities to post comments to each other without sharing to students. This functionality is useful when graders do moderation.
- Check the check box on Allow graders to post comments to each other setting.
- Optionally, click on the Show all commenting permissions link for more information.
View Candidate report
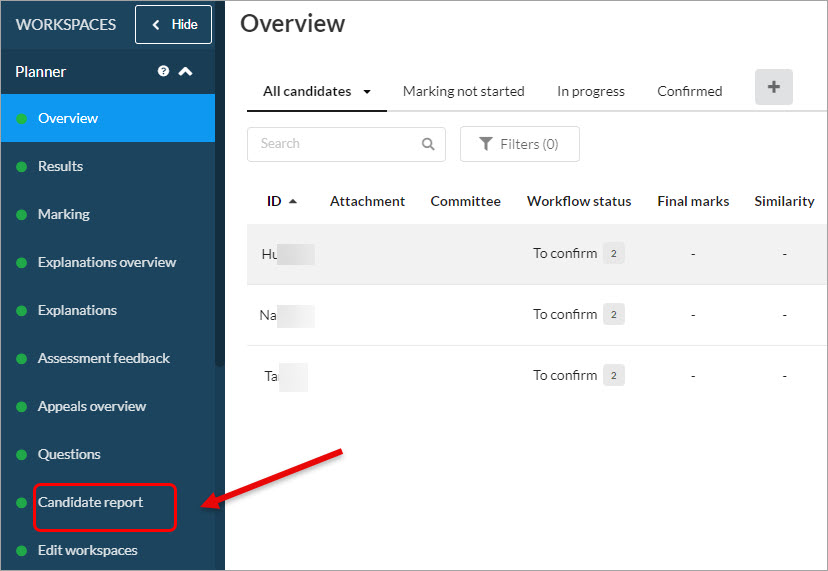
- Access your test Workspaces.
- Click on the Candidate report tab.
- Enable the toggle View report as candidate Name.

All the information you have enabled in the After-test settings will be displayed.
If you need to change any settings, access your test in Deliver and make any required adjustment, following the Enable Inspera After test settings guide.
- Academic Integrity & Assessment Security in Inspera
- Access Inspera
- Access your Inspera test for marking
- Add graders to an Inspera test
- Add media content to questions in Inspera
- Add one-time users to an Inspera test
- Add the Assumption and Queries question in an Inspera exam
- Adding Resources (pdf files, links) to a Question Set
- Adding staff (contributors) to an Inspera assessment
- Adding the Academic Integrity Statement to your assessment
- Additional pages required for Inspera exams
- Alternative method for downloading Final Marks from Inspera
- Answer key corrections - MCQ
- Apply Alternative Exam Arrangements (AEAs) and Time Zone Adjustments in Inspera
- Assign questions to graders in Inspera
- Complete an Inspera test as a student
- Confirm grades in Inspera
- Copy a question set from Inspera Training to Inspera Admin (Original)
- Create Inspera practice exam with Safe Exam Browser
- Create an Inspera submission link in Learn.UQ
- Create an Inspera test in Deliver
- Create bands and criteria
- Create marking committees in Inspera
- Create marking committees using CSV
- Creating Questions
- Downloading responses to Assumptions and Queries
- Edit question weight in Inspera
- Enable After-test settings in Inspera
- Enrol students in Inspera test using CSV file
- Explanations on student responses
- Export questions from Blackboard to Inspera (Original)
- Exporting a Question Set to PDF
- False Start
- Filter functionality in Inspera marking
- Flag students in Inspera test
- Getting started with Inspera
- Grading workflow for Planners and Graders
- Incident Adjustments for students who experience technical delays
- Inspera Assessment Design Settings
- Inspera Assessment Environments and their Purposes
- Inspera Assessment User Roles
- Inspera Assessment access methods for students
- Inspera Exam Requests
- Inspera Grade Workspaces
- Inspera Observed User Testing
- Inspera Question Set Version Control
- Inspera Recommended Assessment - Standard (non-exam) assessment - webpage
- Inspera Rubrics
- Inspera School-based Exams
- Inspera Test settings
- Inspera analytics
- Inspera central on-campus and non-invigilated exams (Original)
- Inspera marking navigation
- Inviting students to an assessment via Test Code
- Late submissions and extensions in Inspera Assessment
- Manually marked questions: Mark and feedback
- Monitor Assessment
- Name and label questions in Inspera Assessment
- Navigate Inspera
- Override scoring of questions in Inspera
- Pilot an Inspera assessment
- Question sets in Inspera Assessment
- Sections in Question Sets
- Sharing a question set in Inspera Assessment
- Student Arrives Late
- Supporting students to use Inspera Assessment
- Things to look for in review
- Transfer results from Inspera to your Learn.UQ course
- Turnitin similarity report in Inspera
- View student responses in Inspera

