Manually marked questions: Mark and feedback (Ultra)
This guide provides instructions on different aspects of marking the manually marked question type:
Mark:
- Enter and edit marks
- Mark the manually marked questions, using a mark scheme
- Mark the manually marked questions, using a rubric
- Mark the manually marked questions, using a band and criteria
Flag student's responses
Feedback:
- Highlight
- Annotation
- Page note
- Explanations of mark
Enter and edit marks
Video Guide
Enter and edit marks in Inspera (YouTube 1m48s)
- In the Grader workspace, click on the Marking tab.
- Use the questions filter functionality to navigate to the required question.
- Enter the mark by either:
- Entering the score in the Marks textbox.
- Or selecting the appropriate mark from the Marks drop-down menu.
In case you need to adjust the mark, the Override scoring of manually-marked questions guide provides detailed instructions.
Mark using mark scheme
If the question has a Mark scheme created during the Question set creation phase, it will appear following the marking area for perusal.
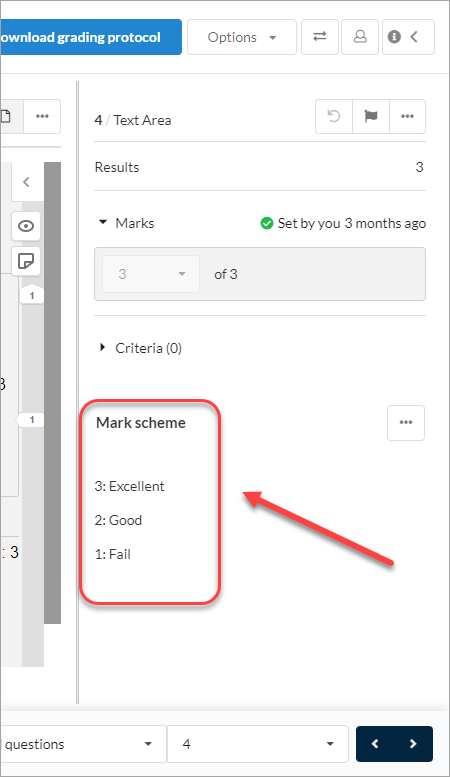
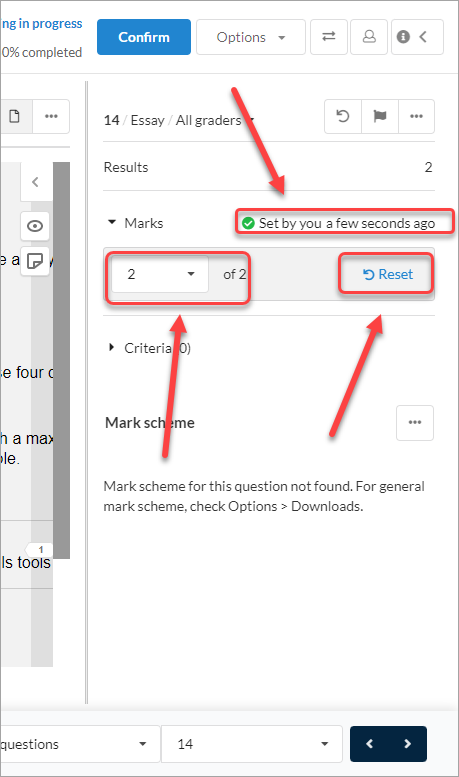
- The text Set by you appears to indicate the question has been marked.
Note: If a marker has amended the mark, the you in the Set by you text will be replaced with the marker's name.
- If you need to amend the mark, click on the Mark textbox and repeat Step 3.
- If you need to reset to the original mark, click on the Reset button.
- Enter the adjusted mark.
Mark using rubric
Refer to the Inspera rubrics guide for detailed instructions on creating rubrics and marking using a rubric.
Mark using bands and criteria
Refer to the Bands and Criteria guide for detailed instructions on creating bands and criteria and marking using bands and criteria.
The Bands and Criteria must be created in conjunction with the associated question, otherwise the Bands and Criteria marking area will not be available.
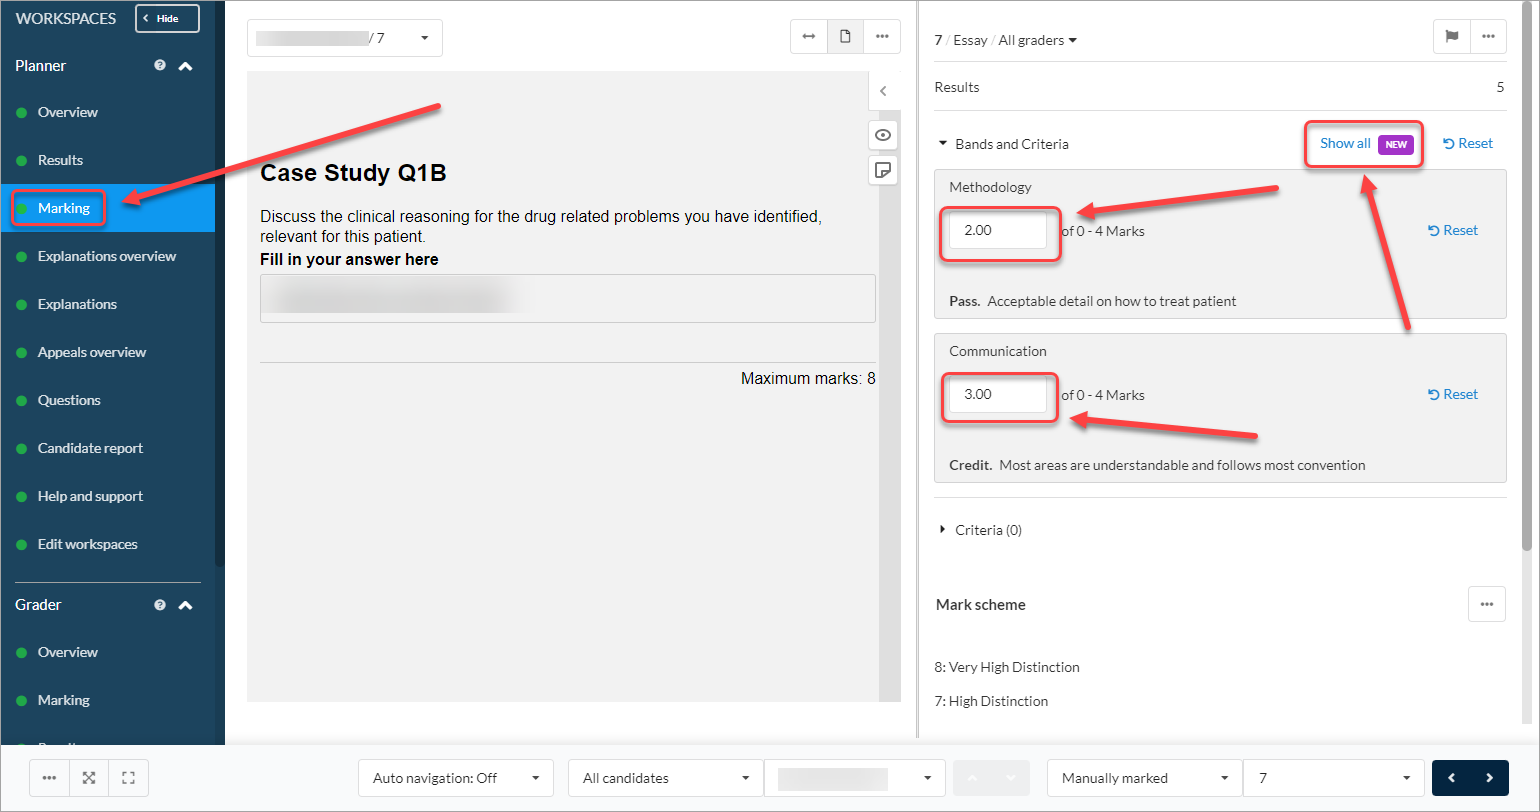
- In the Grader section, click on Marking.
- Navigate to a manually marked question.
- Enter the marks for each Criterion in the Criterion textbox.
Tip: Click on the Show all link to see the Bands for easier reference.
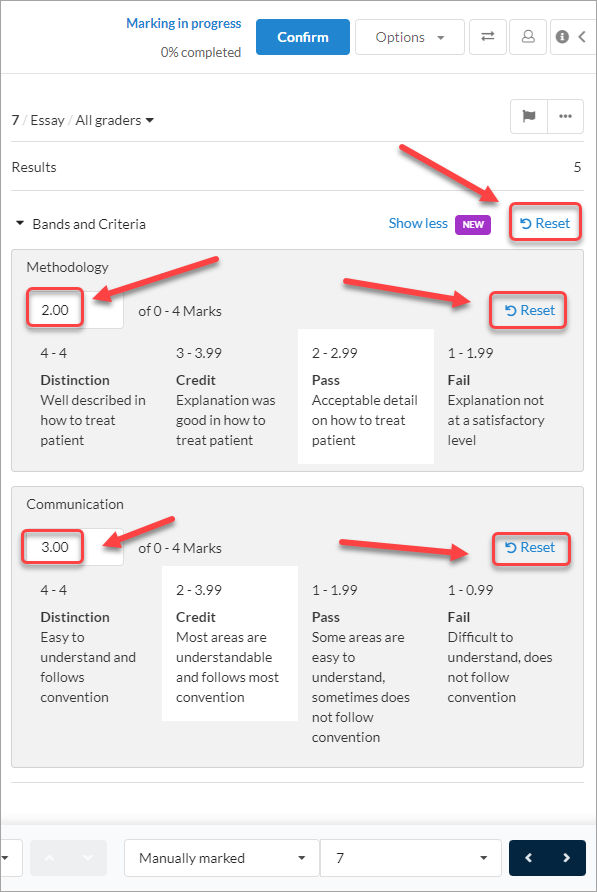
- Optionally, to reset to the original mark, click on the Reset link in either:
- Next to the Bands and Criteria heading.
- Next to the required Criterion/s.
- Enter the admended marks for each Criterion in the Criterion textbox as required.
Flag student responses
When marking, a student's response can be flagged if further investigation (e.g. response with high similarity score) or moderation is required.
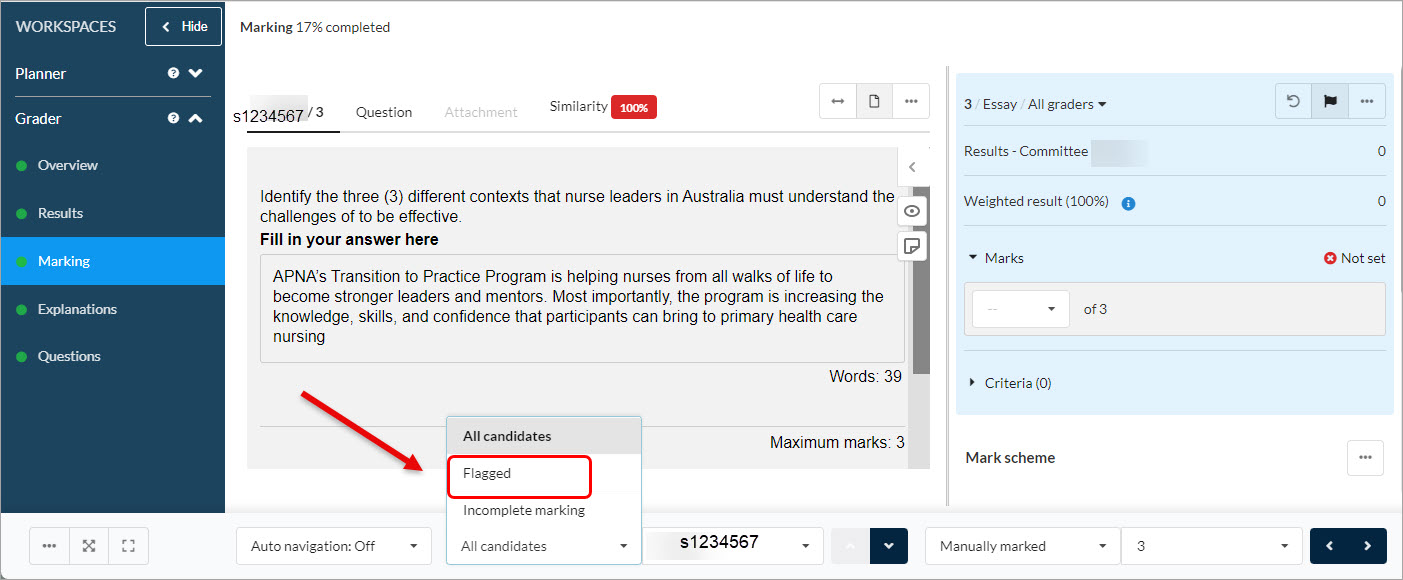
- Click on the flag icon on the question.
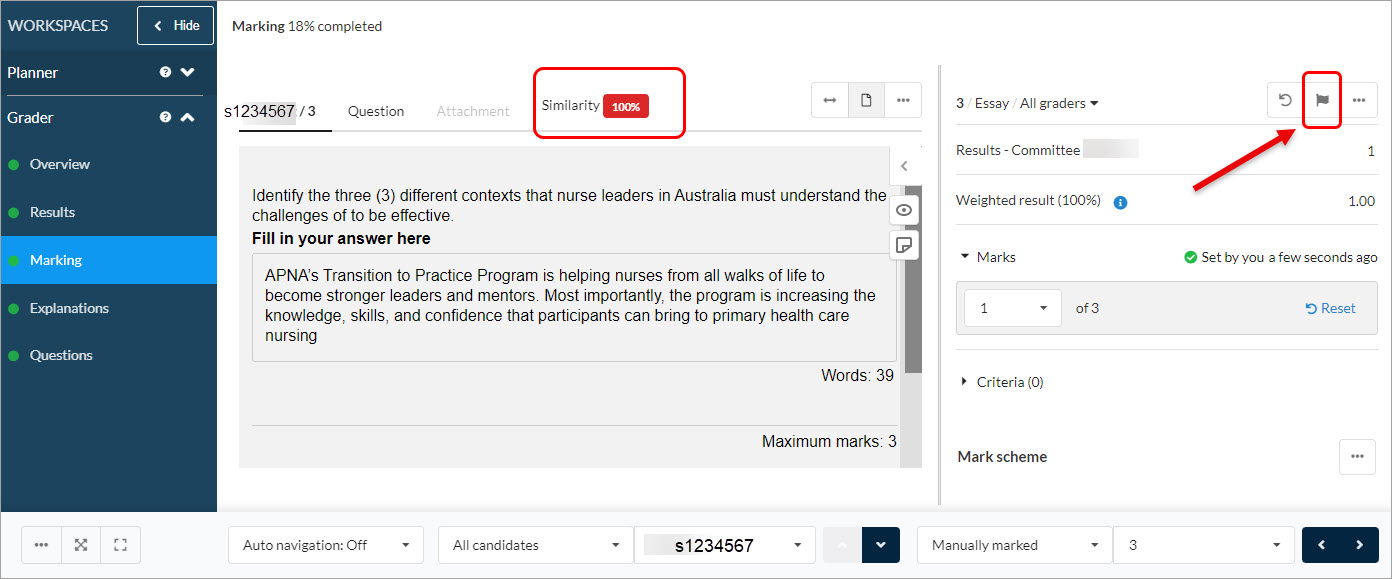
- The marking area of the question will changed to light blue colour.
- During moderation process, click on the All candidates tab.
- Select the Flagged candidates.
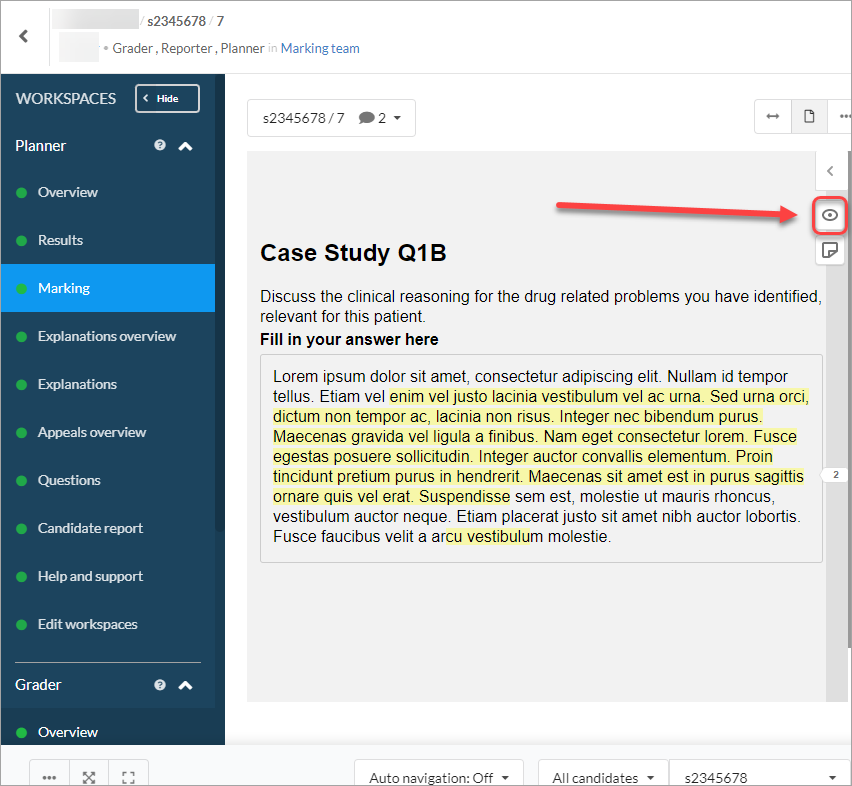
Highlight student responses
Create highlight
Note: Highlights can be made on all question types.
Note: Highlights appear in the annotations section and does not appear for the student.
- In the Grader section, click on Marking.
- Navigate to a student's answer.
- Click and drag across the required section.
- Click on Highlight.

Delete highlight
Note: Highlights cannot be edited and require deletion before a new highlight can be created. Editing will enable annotations to be added to highlighted text.
- Click on the highlighted text.
- Click on the Delete icon.
- Click on the Delete button.
Search for highlighted text
- Click on the Select nearby annotations tab.

Show/hide highlights
- Click on the show highlights icon to hide or show the highlights.
Annotate student responses
Annotation on student responses is to provide in-text feedback on student responses. It is optional but will be helpful for students to improve their understanding and performance in the next assessment.
Note: Annotations are not automatically available to the students. This function needs to be activated in the After-test settings in Deliver (Step 11).
Create annotation
Note: Annotations can be made on all question types.
- In the Grader section, click on Marking.
- Navigate to a student's answer.
- Highlight the required text.
- Click on Annotate.
- Enter your feedback in the provided textbox.
Tip: Use the text editor for additional editing capabilities.
- Select either Student or Only me from the Save drop-down menu.
Note: The selected option will appear with a red vertical bar.
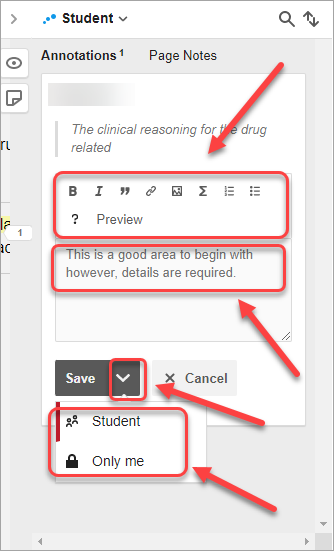
- Click on Save.
Additional annotation options
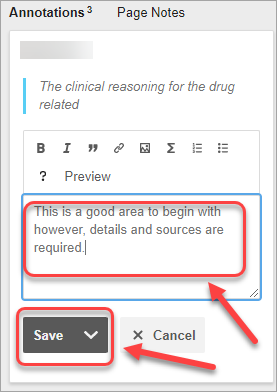
Edit annotation
- Click on the edit icon.
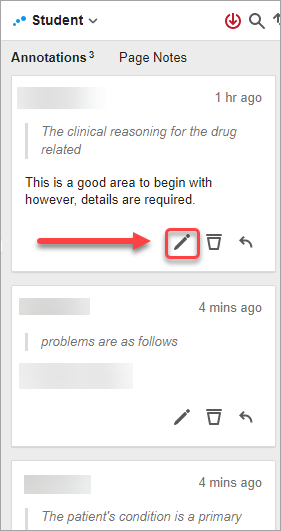
- Enter your amended annotation.
- Click on the Save button.
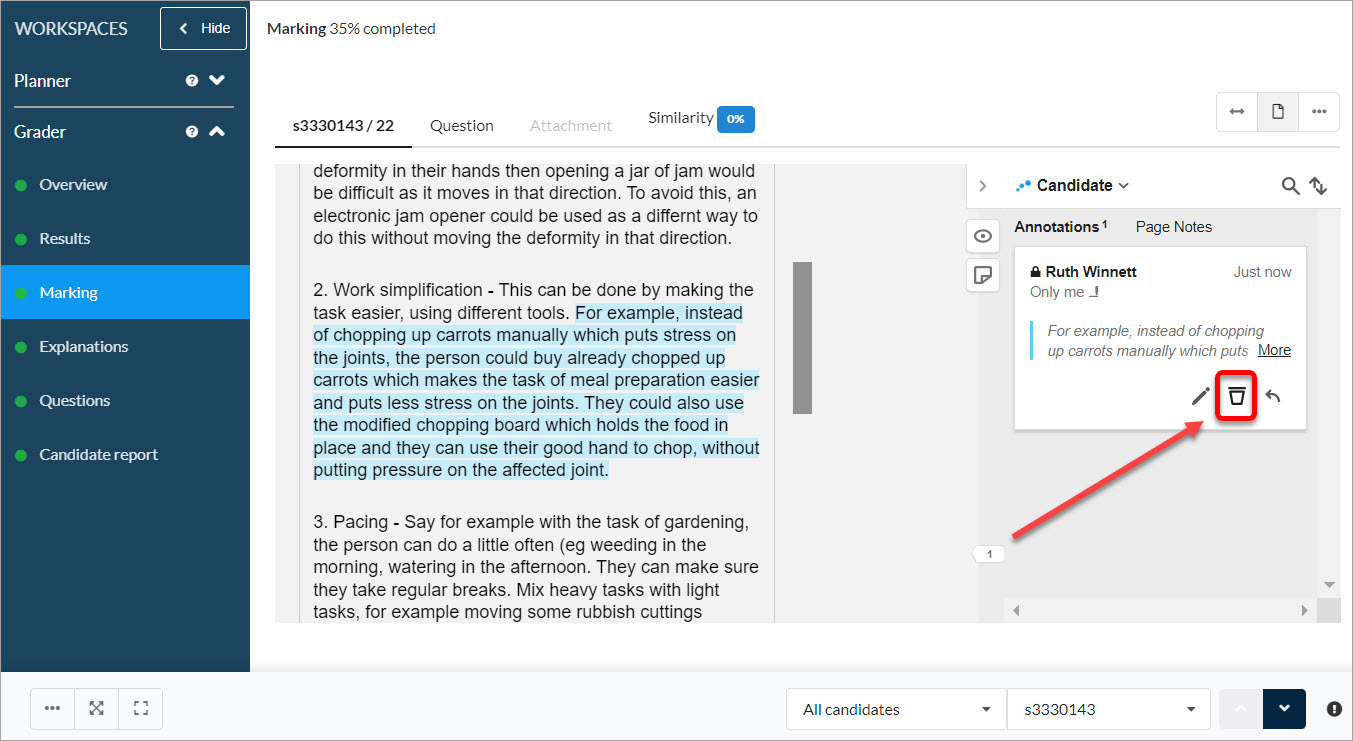
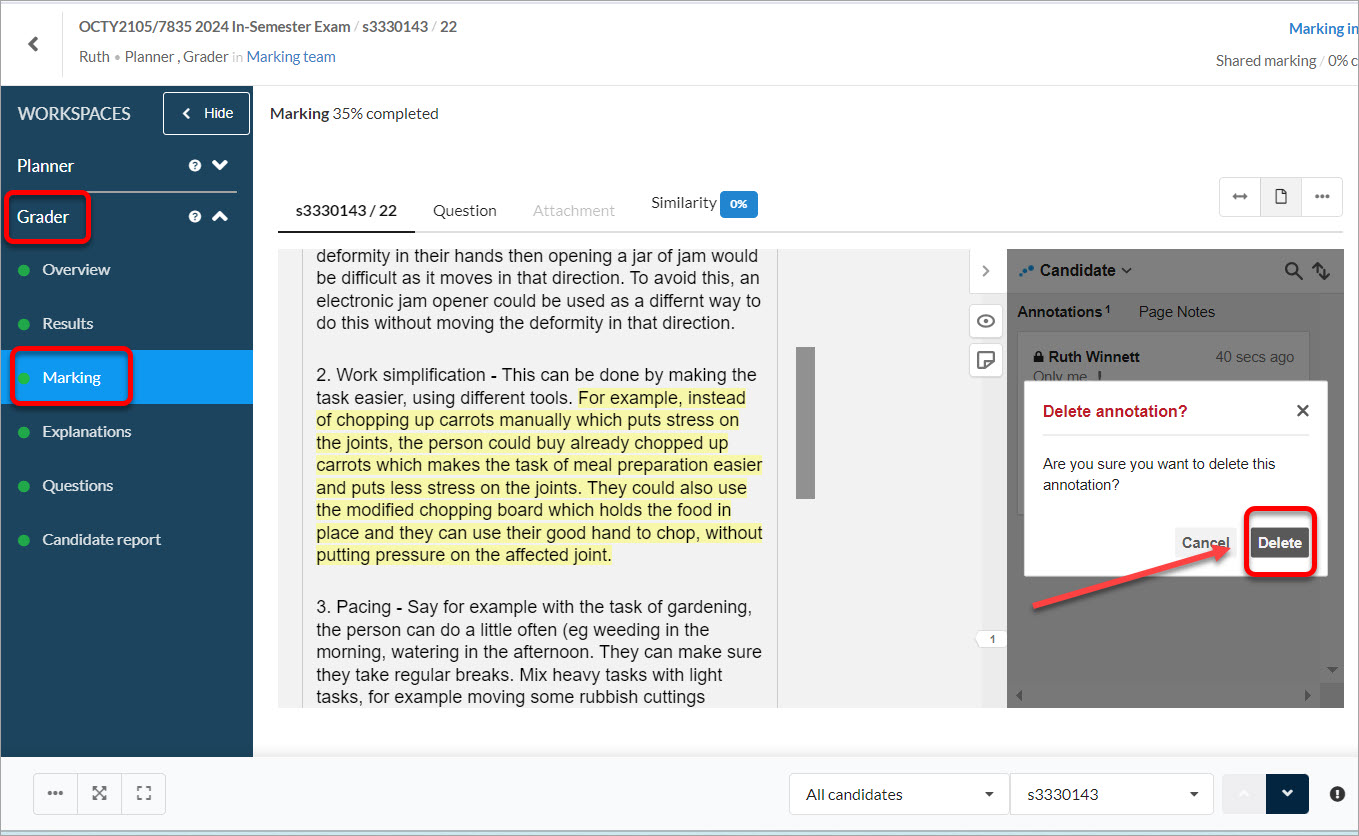
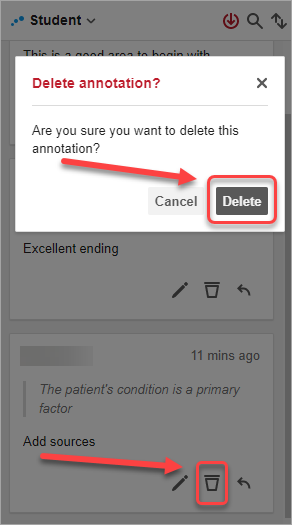
Delete annotation
- Click on the Delete icon.
- Click on the Delete button.
Note: If there were replies to the annotation, they will be deleted as well.
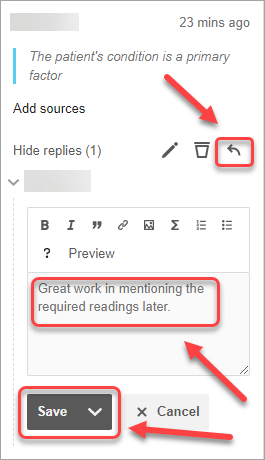
Reply to annotation
If another marker has made an annotation, you are able to reply to it.
- Click on the reply icon.
- Enter the reply in the textbox.
- Click on the Save button.
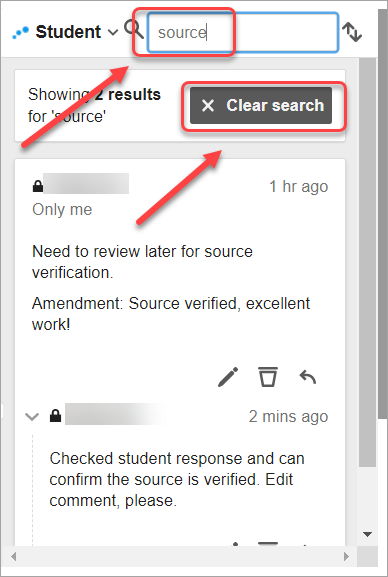
Search for annotations
- Click on the search annotations icon.
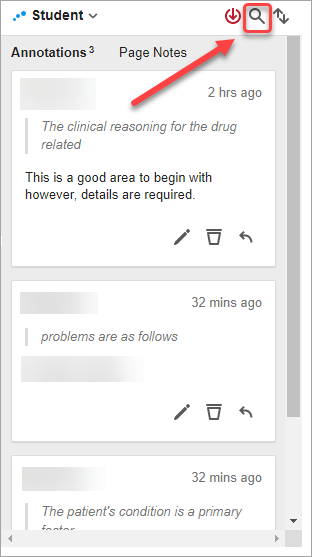
- Enter the word/s that were entered in the annotation.
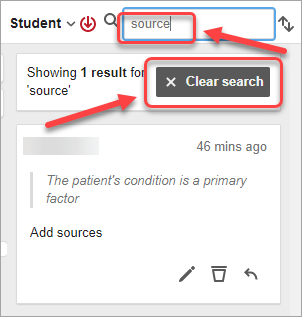
- Tap on the keyboard's Enter key or equivalent to reveal the annotation with the entered word/s.
- To show all annotations, click on the Clear search button.
Insert page notes
The Page notes area is for graders to provide an overall feedback on extended responses. It is optional but will be helpful for students to improve their understanding and performance in the next assessment.
Note: Page notes are not automatically available to the students. This function needs to be activated in Deliver (setting).
Create page notes
Note: Page notes appear in the annotations section and are not available for the student by default.
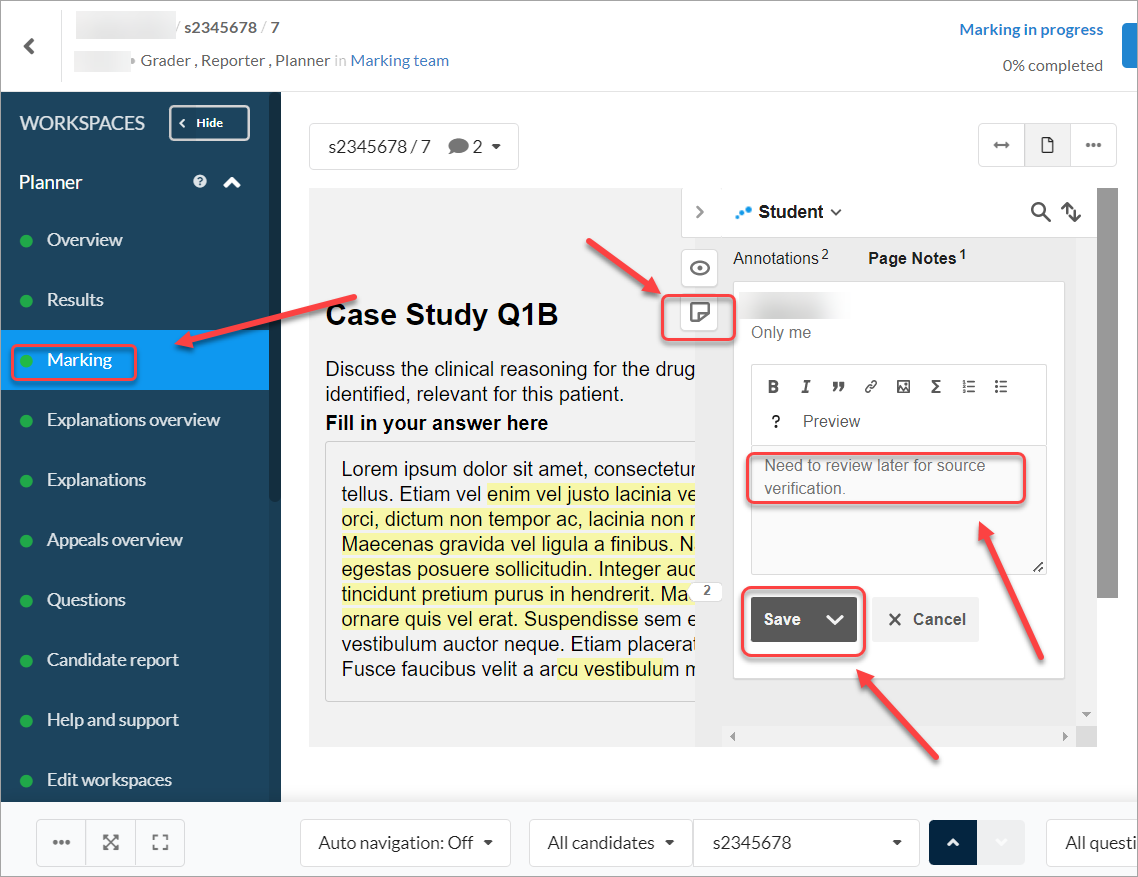
- In the Grader or Planner section, click on Marking.
- Navigate to a student's answer.
- Click on the New page note icon.
- Enter your note in the textbox.
- Click on the Save button.
Additional Page note options
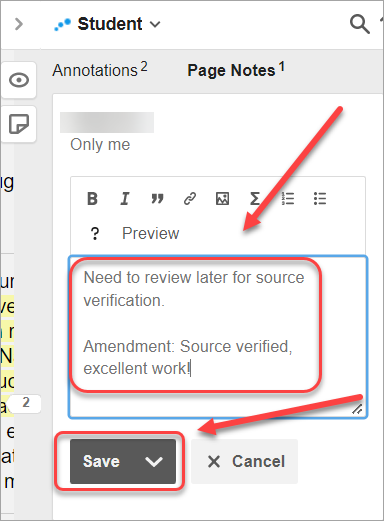
Edit Page note
- Click on the edit icon.
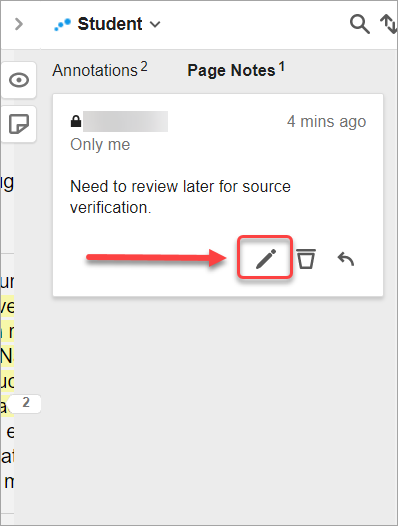
- Enter your amended Private note.
- Click on the Save button.
Delete Private note
- Click on the delete icon.
- Click on the Delete button.
Note: If there were replies to the annotation, they will be deleted as well.

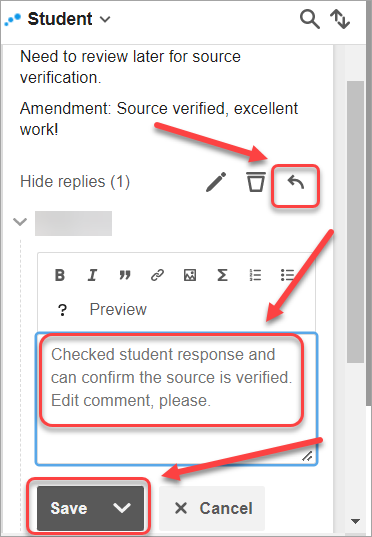
Reply to Private note
If another marker has made an annotation, you are able to reply to it.
- Click on the reply icon.
- Enter the reply in the textbox.
- Click on the Save button.
Search for Private notes
- Click on the search annotations icon.

- Enter the word/s that were entered in the Private note.
- Tap on the keyboard's Enter key or equivalent to reveal the Private note with the entered word/s.
- To show all Private notes, click on the Clear search button.
- Academic Integrity Review in Inspera (Ultra)
- Access Inspera (Ultra)
- Access your Inspera test for marking (Ultra)
- Add Academic Integrity Statement to Inspera assessment (Ultra)
- Add Resources (pdf files, links) to an Inspera Question Set (Ultra)
- Add graders to an Inspera test (Ultra)
- Add media content to questions (Ultra)
- Add one-time users to an Inspera test (Ultra)
- Add staff (contributors) to an Inspera assessment (Ultra)
- Add the Assumption and Queries question in an Inspera exam (Ultra)
- Additional pages required in Inspera exams (Ultra)
- Answer key corrections - MCQ (Ultra)
- Assign Inspera questions to graders (Ultra)
- Complete an Inspera test as a student (Ultra)
- Confirm grades in Inspera (Ultra)
- Copy a question set from Inspera Training to Inspera Admin (Ultra)
- Create Inspera Questions (Ultra)
- Create Inspera bands and criteria (Ultra)
- Create Inspera marking committees (Ultra)
- Create Inspera practice exam with Safe Exam Browser (Ultra)
- Create a Question Set (Ultra)
- Create a non-exam assessment in Inspera (Ultra)
- Create an Inspera submission link in Learn.UQ (Ultra)
- Create an Inspera test in Deliver (Ultra)
- Create marking committees using CSV (Ultra)
- Download Inspera Exam Assumptions and Queries responses (Ultra)
- Edit question weight in Inspera (Ultra)
- Enable After-test settings in Inspera (Ultra)
- Enrol students in Inspera test using CSV file (Ultra)
- Explanations on student responses (Ultra)
- Export an Inspera Question Set to PDF (Ultra)
- Export questions from Blackboard to Inspera (Ultra)
- False Start (Ultra)
- Filter functionality in Inspera marking (Ultra)
- Flag students in Inspera test (Ultra)
- Incident Adjustments for students who experience technical delays (Ultra)
- Inspera - Apply Alternative Exam Arrangements (AEAs) and Time Zone Adjustments (Ultra)
- Inspera Assessment User Roles (Ultra)
- Inspera Assessment access methods for students (Ultra)
- Inspera Exam Requests (Ultra)
- Inspera Exam Viewing (Ultra)
- Inspera Examination Information Sheets (Ultra)
- Inspera Examination Information Sheets (Ultra)
- Inspera Grade Workspaces (Ultra)
- Inspera Observed User Testing (Ultra)
- Inspera Question Set Version Control (Ultra)
- Inspera Rubrics (Ultra)
- Inspera School-based Off-campus Exams (Ultra)
- Inspera Terminology (Ultra)
- Inspera Test settings (Ultra)
- Inspera analytics (Ultra)
- Inspera marking navigation (Ultra)
- Invite students to an Inspera assessment via Test Code (Ultra)
- Late submissions and extensions in Inspera Assessment (Ultra)
- Manually marked questions: Mark and feedback (Ultra)
- Monitor Inspera Assessment (Ultra)
- Name and label questions in Inspera Assessment (Ultra)
- Navigate Inspera (Ultra)
- Override scoring of questions in Inspera (Ultra)
- Pilot an Inspera assessment (Ultra)
- Review Inspera assessment (Ultra)
- Sections in an Inspera Question Set (Ultra)
- Share a question set in Inspera (Ultra)
- Support students to use Inspera Assessment (Ultra)
- Things to look for in an Inspera assessment review (Ultra)
- Transfer results from Inspera to your Learn.UQ course (Ultra)
- Turnitin similarity report in Inspera (Ultra)
- View student responses in Inspera (Ultra)