Inspera Grade Workspaces (Original)
This guide provides an overview of the Grade Workspaces where the marking occurs. Instructions in this guide include:
- Roles in Workspaces
- Overview area
- Similarity scores
- Results area

Refer to the Inspera Marking and feedback guide for detailed instructions on marking.
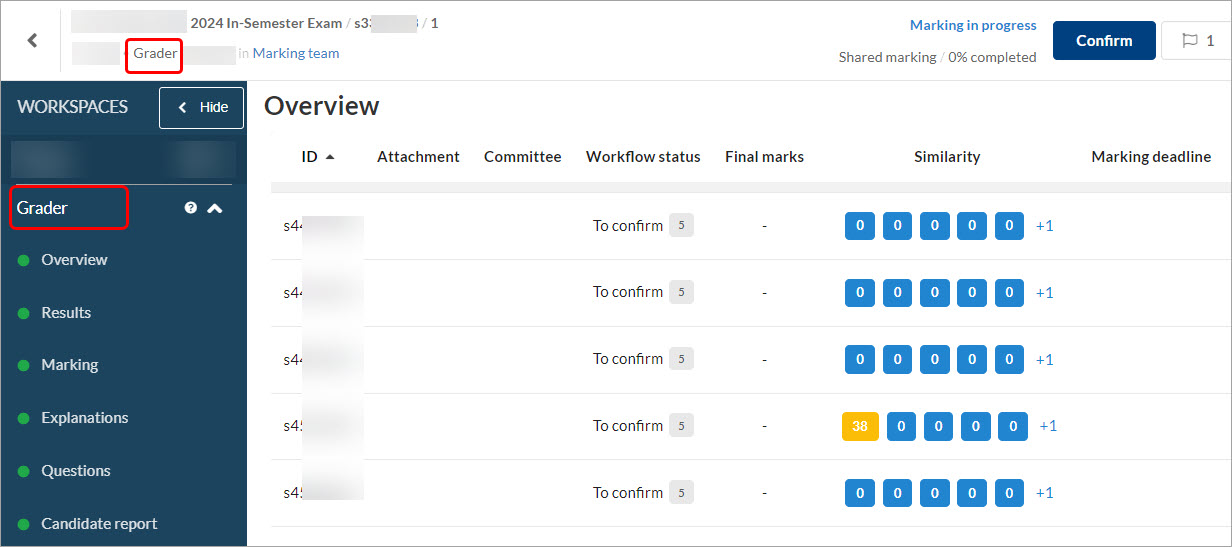
Roles in Workspaces
There are two roles in Inspera Grade workspaces.
- Planner: if you are the planner and you add yourself as a grader, you will see both workspaces
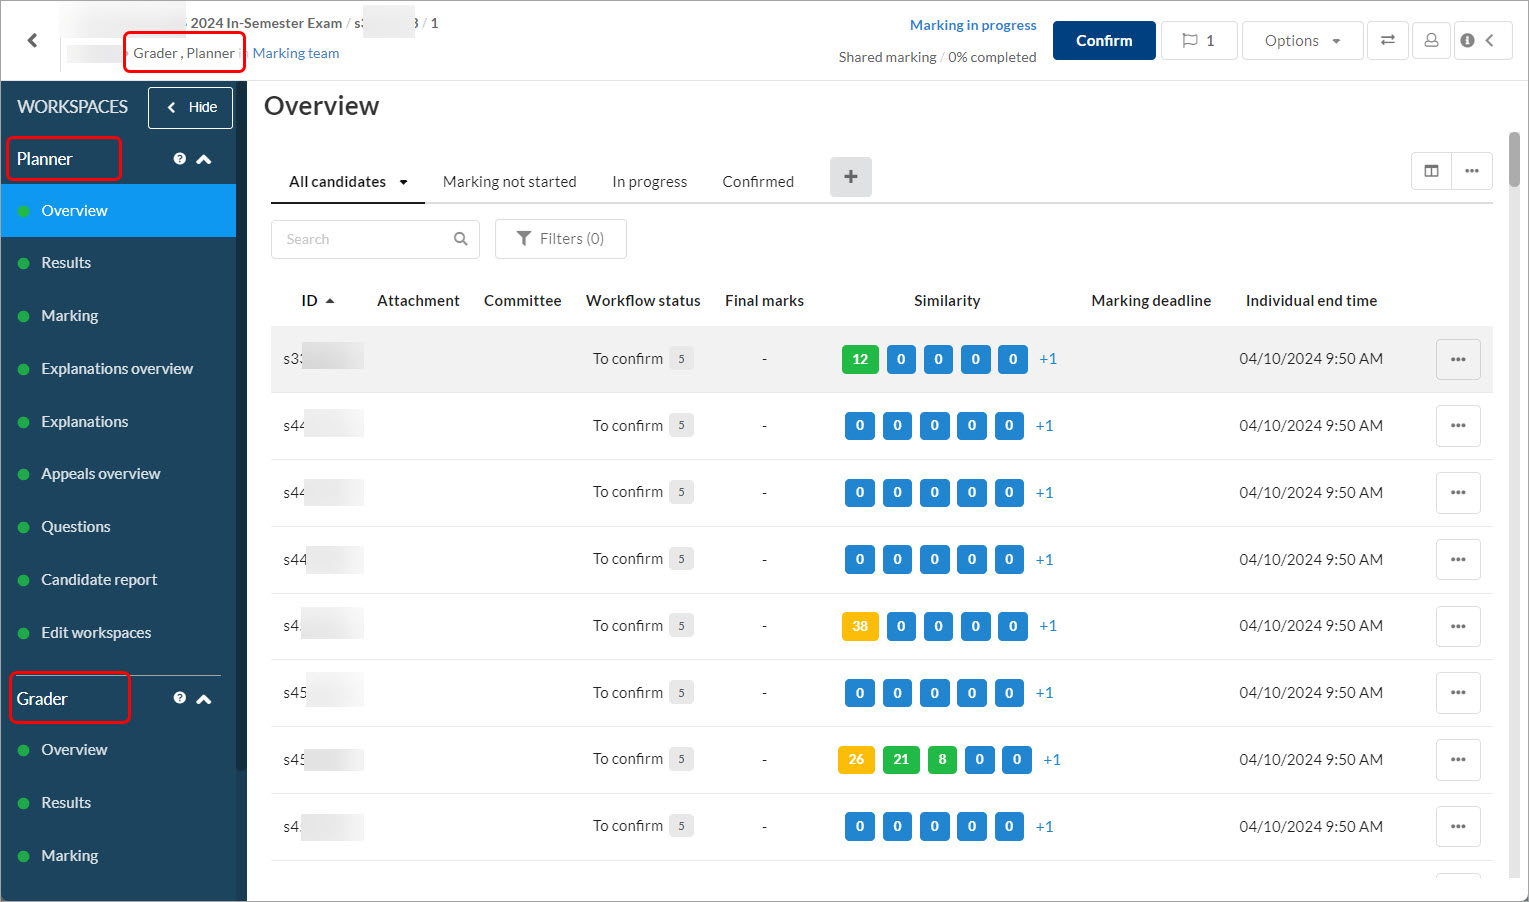
- Grader: if you only have the grader role, you will see grader workspace.
The following menu items are available to both roles:
- Overview - An overview of the status of the graders' marking and the students' marks. Columns can be added or removed for easier navigation and information provided.
- Results - A detailed overview of students' results and the questions' name and status.
- Marking - The marking for student submissions. Note: All marking has to be done in the marking area in Grader workspace.
- Explanations - The area for providing explanations of marks on each question in a student's submission before it is sent to them.
- Questions - A list of all the questions, question titles, question types and marks per question.
- Candidate report (if activated during assessment creation) - Generated after marking has been completed, this area allows the marker to see the final report as students would.
Other menu items include:
- Explanations overview (Planner only) - An overview of which students have requested explanations and its status.
- Appeals overview (Planner only) - The appeals that students have submitted and new marking is required.
- Help and support (Planner only) - This tab shares information about the marking capabilities as well as videos created by Inspera for assistance.
- Edit workspaces (Planner only) - The Planner can edit the sections for markers and students by rearranging order or hiding them from view.
- Getting started (Grader only) - This tab provides information on the marking capabilities as well as videos created by Inspera for assistance.
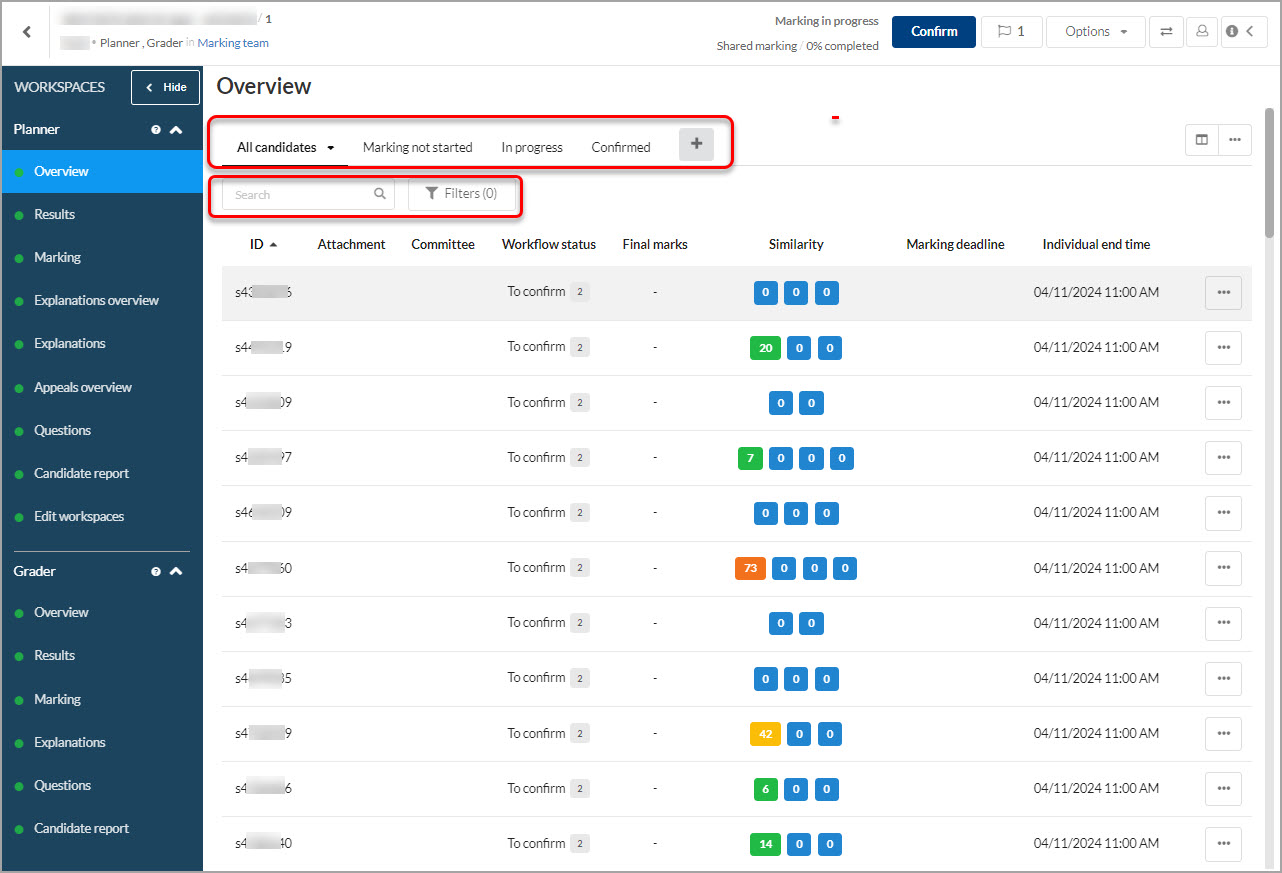
Overview in Workspaces
The Overview area in Workspaces provides an overview of the status of the graders' marking and the actual marking of the candidates.
Candidates can be sorted by:
- the search bar (to search for an individual) or the filters
- whether the marking has not started
- whether the marking is in progress, and
- whether the grade has been confirmed.
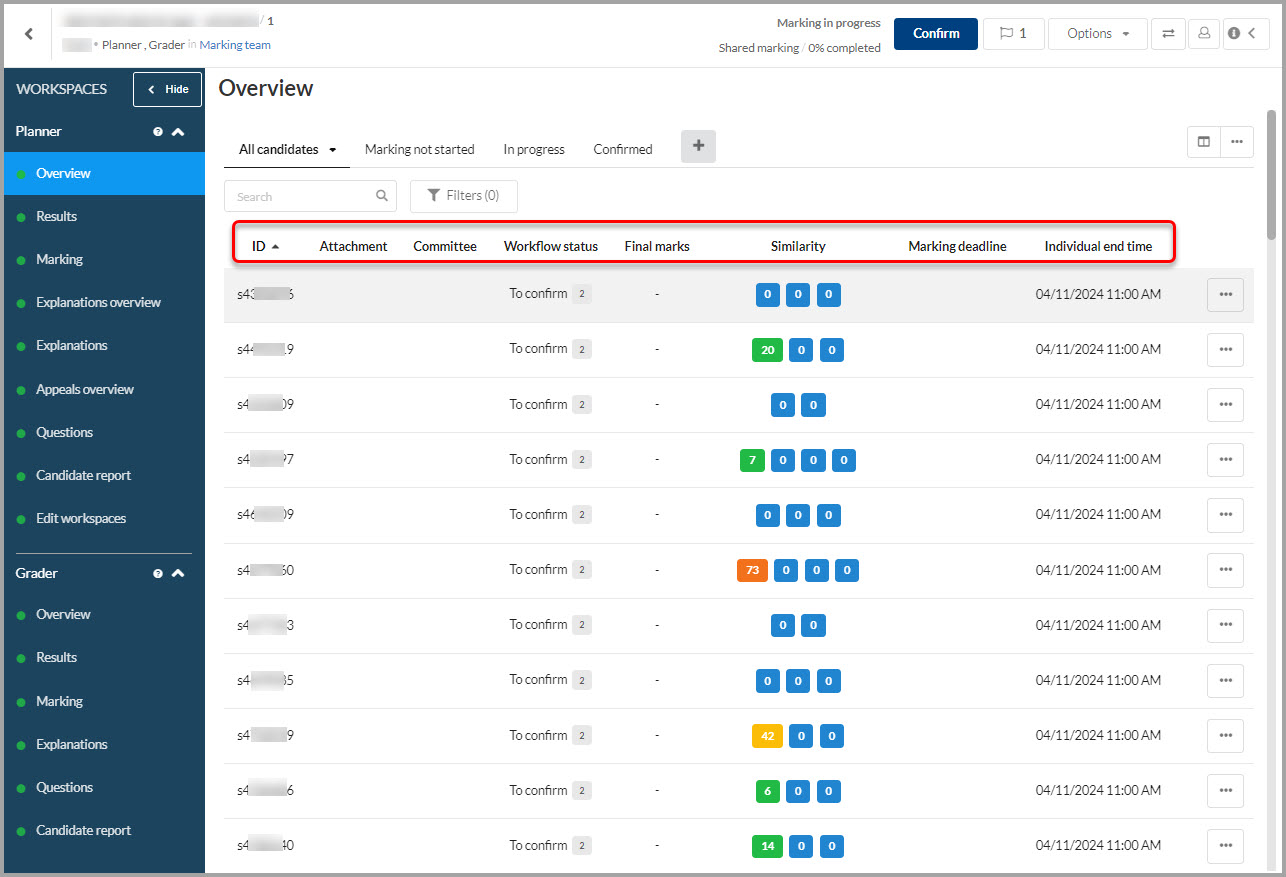
For each candidate that appears row by row, click on the column title to sort by:
- ID / UQ username
- Attachment - if the assessment required the students to attach a file to their submission
- Committee
- Workflow status
- Grades - one grade or all grades set by multiple markers
- Final grade - this column will be empty until the candidate is confirmed
- Similarity scores.
- Marking deadline.
Similarity scores
Before marking the test, you can check the Similarity score in students' responses in this step.
Refer to the Turnitin similarity report in Inspera guide for detailed instructions.
Results in Workspaces
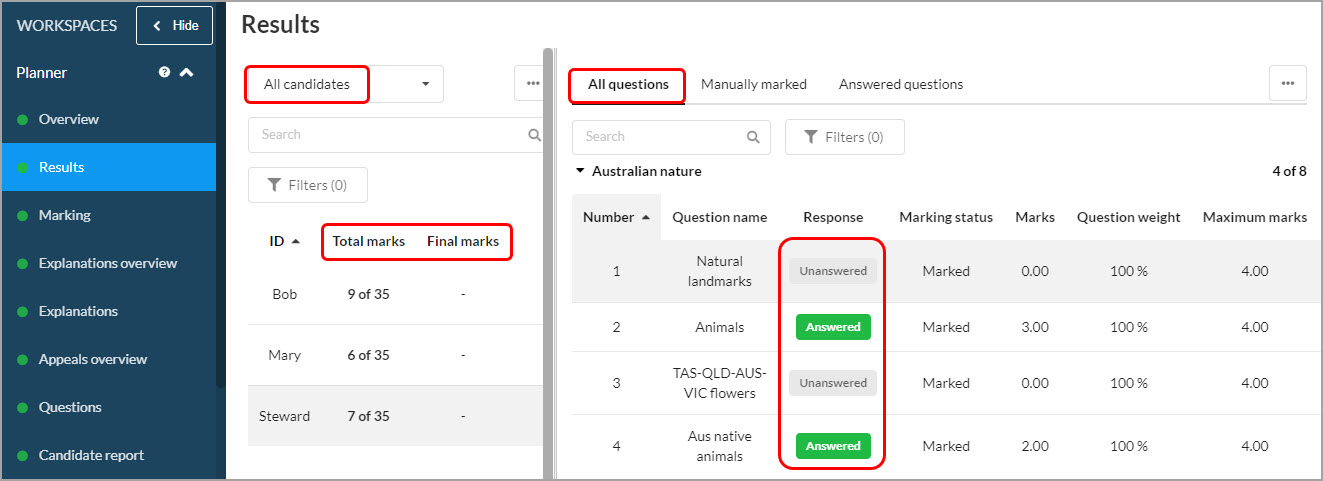
In the Results area in Workspaces, you get a more detailed view of candidates' results and the graders' marking progress.
The candidates area lists each candidate by:
- Total marks: the marks from auto-marked questions and the manually marked questions when they are marked
- Final marks: the total marks become final marks when they are confirmed
The questions area lists each question answered by each student by its number, name, whether it was answered or not, its marking status, marks possible, question weight, maximum marks and question type.
- The responses are marked Answered or Unanswered
- You can click on the manually marked or answered questions to filter
Note: When you click on the Results tab, the first student's responses are displayed on the right. If you want to view any student's responses, you can search by student ID on the candidates area.
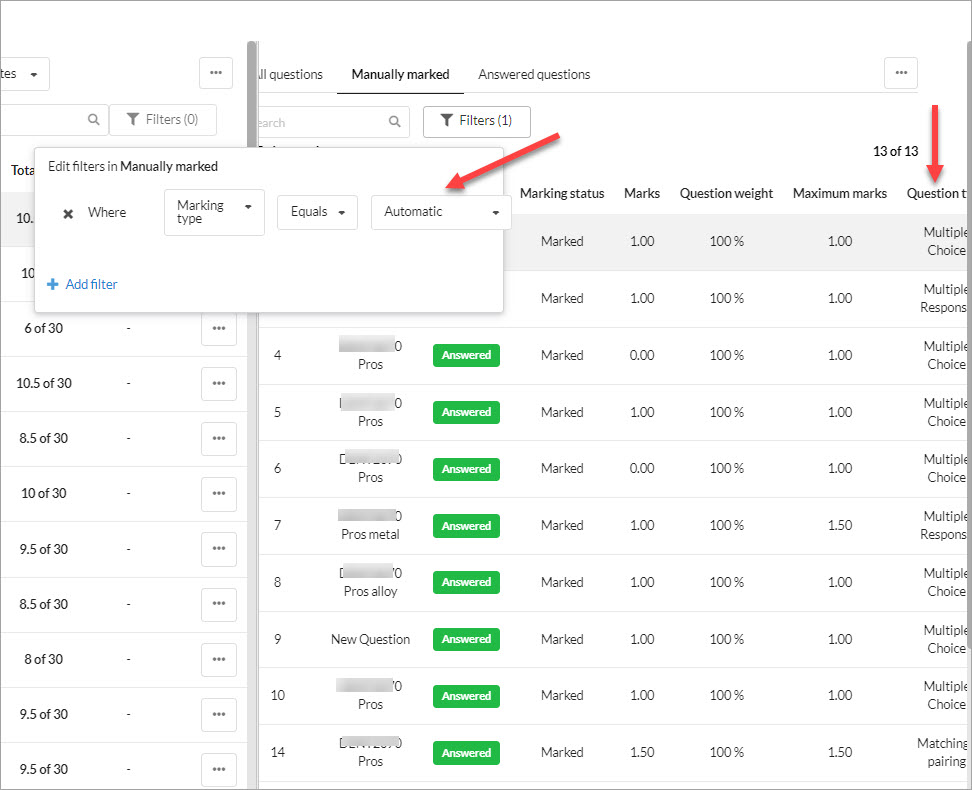
This Results view is useful for its filtering capability and search functionality.
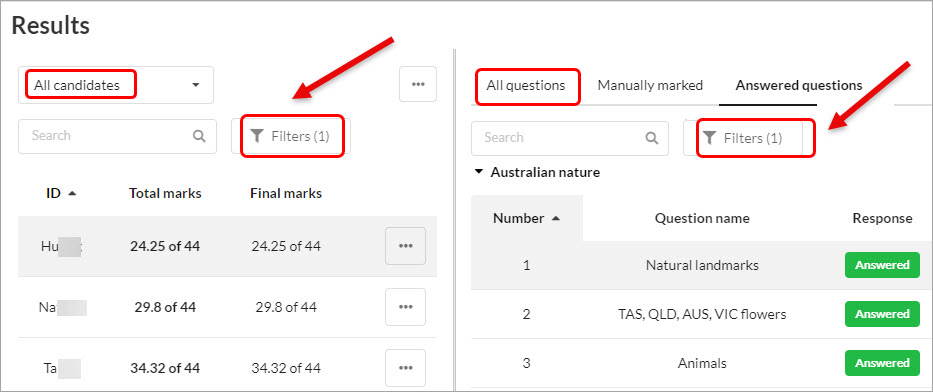
See the example below where the user has filtered the questions to only show the auto-marked ones.
- Academic Integrity & Assessment Security in Inspera
- Access Inspera
- Access your Inspera test for marking
- Add graders to an Inspera test
- Add media content to questions in Inspera
- Add one-time users to an Inspera test
- Add the Assumption and Queries question in an Inspera exam
- Adding Resources (pdf files, links) to a Question Set
- Adding staff (contributors) to an Inspera assessment
- Adding the Academic Integrity Statement to your assessment
- Additional pages required for Inspera exams
- Alternative method for downloading Final Marks from Inspera
- Answer key corrections - MCQ
- Apply Alternative Exam Arrangements (AEAs) and Time Zone Adjustments in Inspera
- Assign questions to graders in Inspera
- Complete an Inspera test as a student
- Confirm grades in Inspera
- Copy a question set from Inspera Training to Inspera Admin (Original)
- Create Inspera practice exam with Safe Exam Browser
- Create an Inspera submission link in Learn.UQ
- Create an Inspera test in Deliver
- Create bands and criteria
- Create marking committees in Inspera
- Create marking committees using CSV
- Creating Questions
- Downloading responses to Assumptions and Queries
- Edit question weight in Inspera
- Enable After-test settings in Inspera
- Enrol students in Inspera test using CSV file
- Explanations on student responses
- Export questions from Blackboard to Inspera (Original)
- Exporting a Question Set to PDF
- False Start
- Filter functionality in Inspera marking
- Flag students in Inspera test
- Getting started with Inspera
- Grading workflow for Planners and Graders
- Incident Adjustments for students who experience technical delays
- Inspera Assessment Design Settings
- Inspera Assessment Environments and their Purposes
- Inspera Assessment User Roles
- Inspera Assessment access methods for students
- Inspera Exam Requests
- Inspera Grade Workspaces
- Inspera Observed User Testing
- Inspera Question Set Version Control
- Inspera Recommended Assessment - Standard (non-exam) assessment - webpage
- Inspera Rubrics
- Inspera School-based Exams
- Inspera Test settings
- Inspera analytics
- Inspera central on-campus and non-invigilated exams (Original)
- Inspera marking navigation
- Inviting students to an assessment via Test Code
- Late submissions and extensions in Inspera Assessment
- Manually marked questions: Mark and feedback
- Monitor Assessment
- Name and label questions in Inspera Assessment
- Navigate Inspera
- Override scoring of questions in Inspera
- Pilot an Inspera assessment
- Question sets in Inspera Assessment
- Sections in Question Sets
- Sharing a question set in Inspera Assessment
- Student Arrives Late
- Supporting students to use Inspera Assessment
- Things to look for in review
- Transfer results from Inspera to your Learn.UQ course
- Turnitin similarity report in Inspera
- View student responses in Inspera