Create Inspera Questions (Original)
Video Guide
Create questions in Inspera (YouTube 5m 40s)
Individual questions can be created in Inspera before they are added to a Question Set.
There are main 3 steps in creating a Question in Inspera:
- Enter the question name
- Enter the question content
- Select the required settings for the question
Question types
Three types of questions are available:
- Automatically marked questions: the correct answer(s) and marks are set for each answer in advance

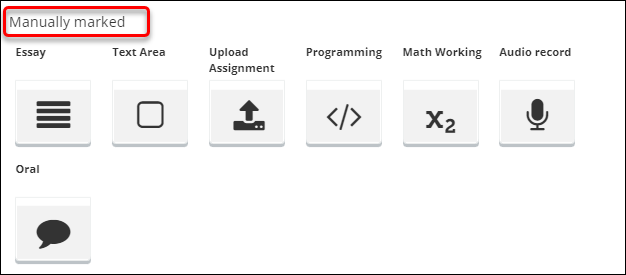
- Manually marked questions: are marked once the assessment is submitted
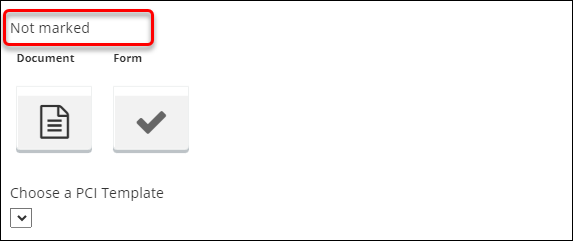
- Not marked questions: these settings are used to add information for a question set such as the Academic Integrity Declaration.
Common question types in Inspera
- Create a not-marked document in Inspera (YouTube 1m 48s)
- Create MCQ (YouTube 4m 13s)
- Create multiple-response questions (YouTube, 2m07s)
- Create matching/pairing questions (YouTube 2m 58s)
- Create graphic gap match questions (YouTube 4m 37s)
- Create inline choice questions (YouTube 2m 07s)
- Create assumptions and queries question (YouTube 1m 54s)
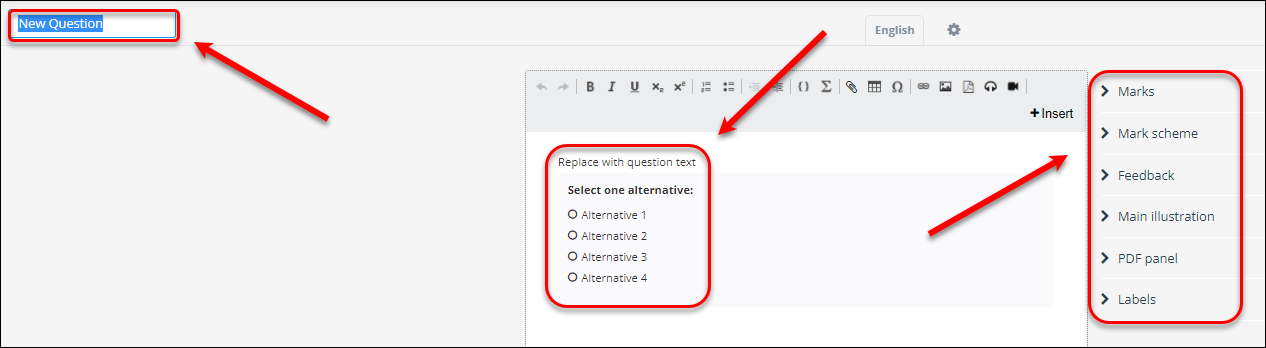
Question name and question content
- Log in to Inspera Assessment (https://uqi.inspera.com/admin).
- Select Question from the Author drop-down menu.
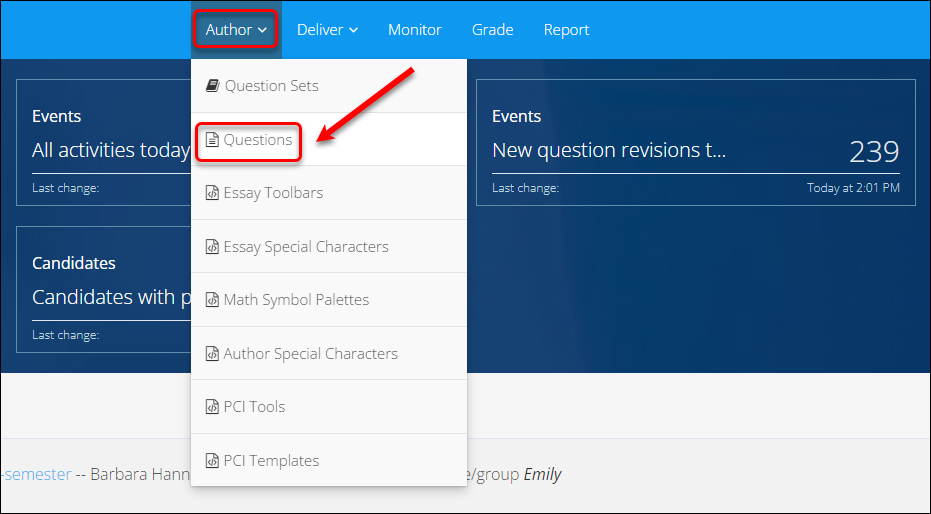
- Click on the Create New button
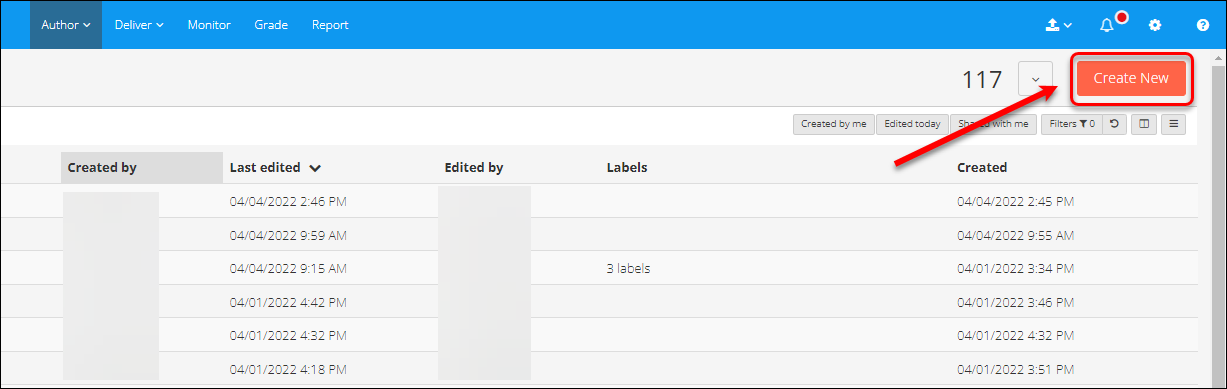
- Select the required question type (e.g. Muitiple Choice)

- Enter the question name.
Tips:
- Each question should have a meaningful name.
- Do not include the full question in the question name
- Do not use numbers (e.g. Q1) in the question name. This will cause problem later if you want to randomise the display of questions

- Enter the question content.
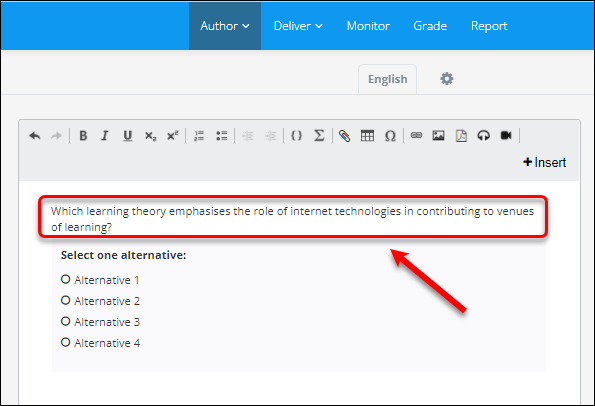
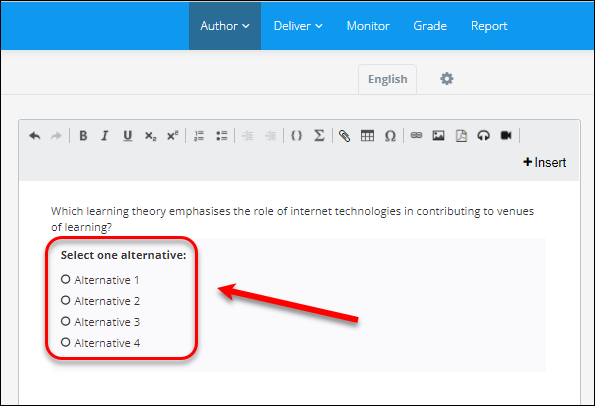
- Click on the Select one alternative button.
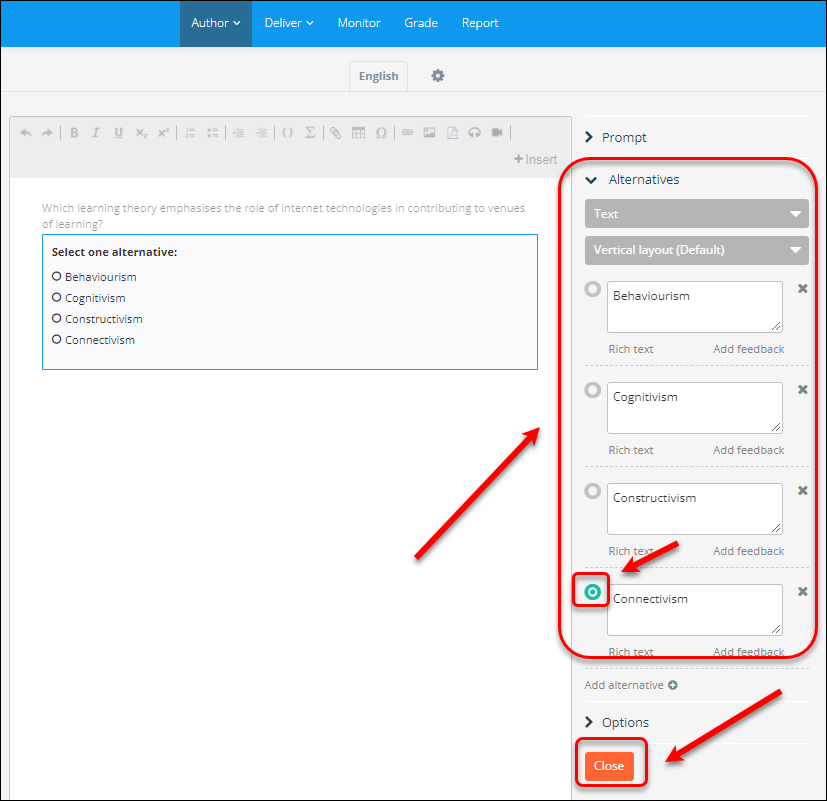
- Enter the alternatives. By default the first option is selected (with the green radio button) as the correct answer.
- Click on the radio button for the correct alternative if the first alternative is not the correct one.
- Click on the Close button.
Considerations
When using Text Entry, Math Entry, Numeric Entry and Numerical simulation question types and you wish to place the input field into the cell of a table, use the following settings:
- Expand input field automatically = enabled
- Specify an "Expected length" on the input field
- Do not define a fixed width on the table (clear the "width" value in the Table Properties and leave it blank).
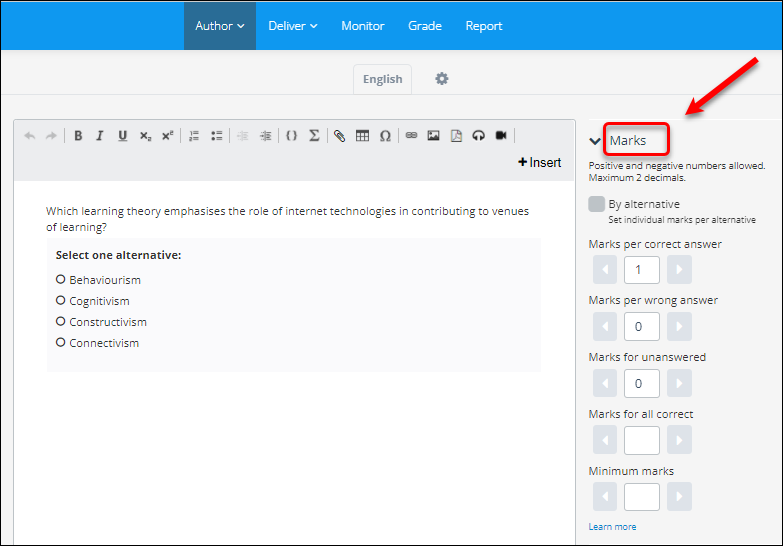
Question marks
For automatic marks questions – marks are set for each answer. By default, the correct answer is given mark 1.
There are options to apply:
- negative marks
- marks per wrong answer
- marks for unanswered
- marks for all correct
- minimum marks
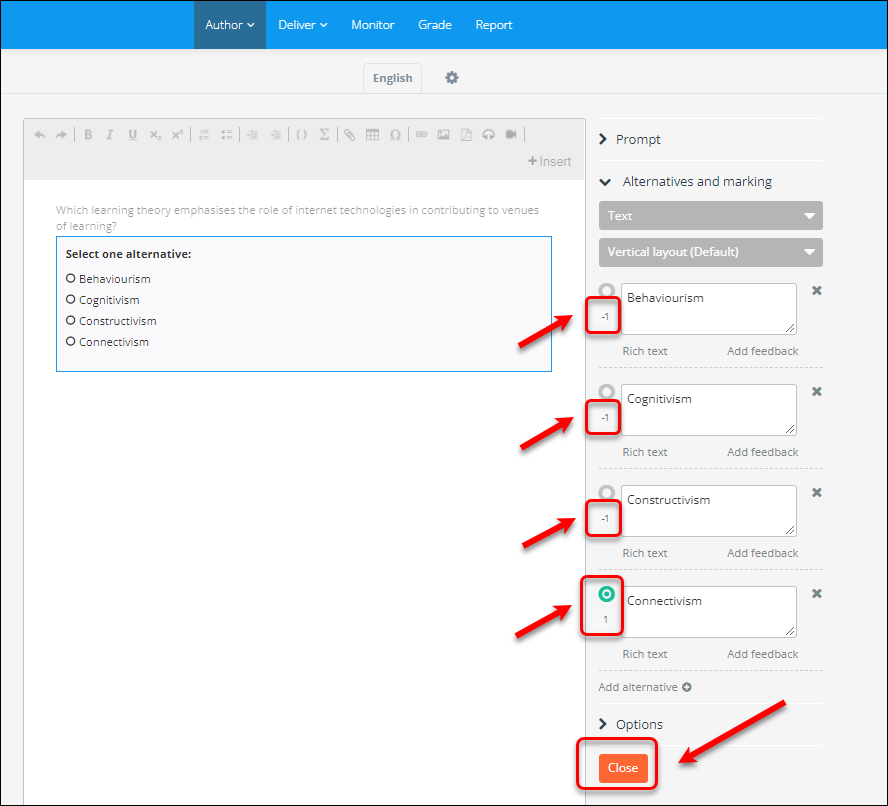
Optionally, individual marks can be set for each alternatives.
- Click on the By alternative button.
- Click on the Select one alternative button.

- Enter the individual marks for each alternative.
- Click on the Close button.
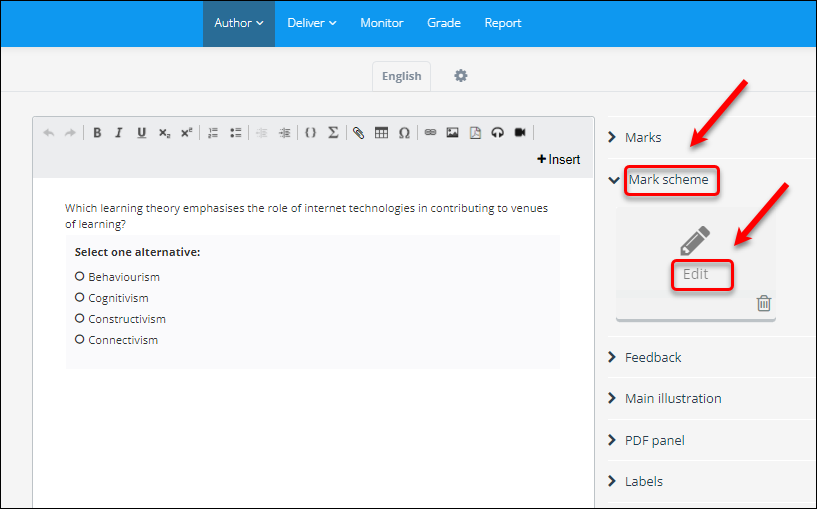
Question mark scheme
Mark scheme is used for manually marked questions to provide guidance to markers/graders.
- Click on the Mark scheme button.
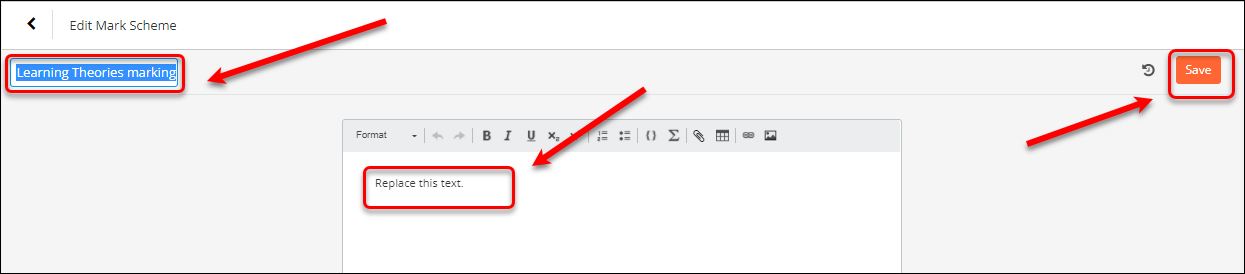
- Click on the Edit button.
- Enter the name of the marker scheme (e.g. Learning Theories mark scheme).
- Enter the guide content to markers.
- Click on the Save button.
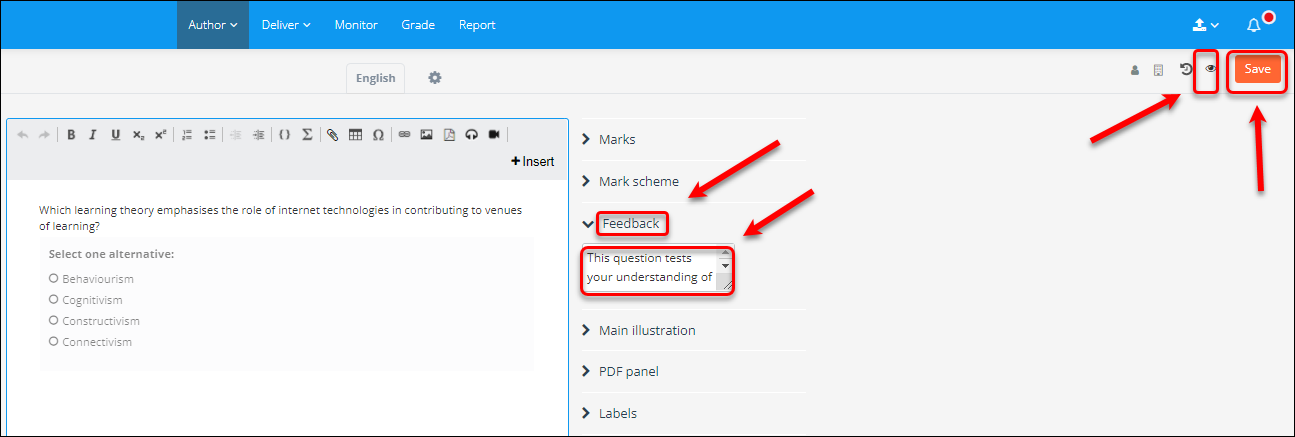
Question feedback
Feedback can be prepopulated at a question level and will be displayed for students when they complete the assessment. You can provide a rationale for the question, a model answer, or refer students to further resources.
Note: This feedback will be available for students when the assessment results are released to them.
- Click on the Feeback button.
- Enter the feedback content.
- Click on the Save button
- Click on the preview (eye) button to test the feedback.
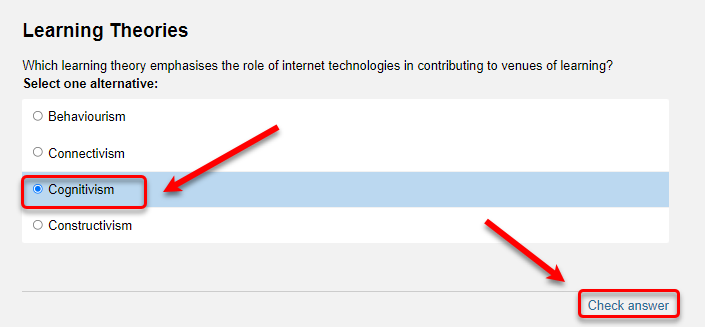
The question is displayed.
- Select one alternative.
- Click on the Check answer button.
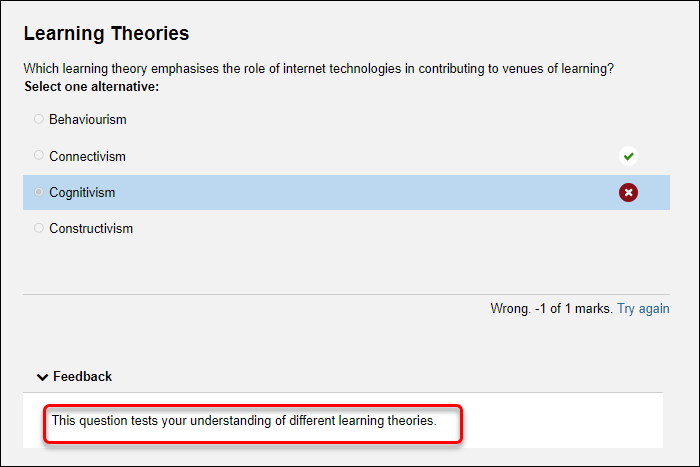
Note: The feedback is displayed when the assessment results are released to students regardless of their answers.
Main illustration
A video, audio or an image can be embedded at the top of the question.
Refer to the Add media content to a question for detailed instructions.
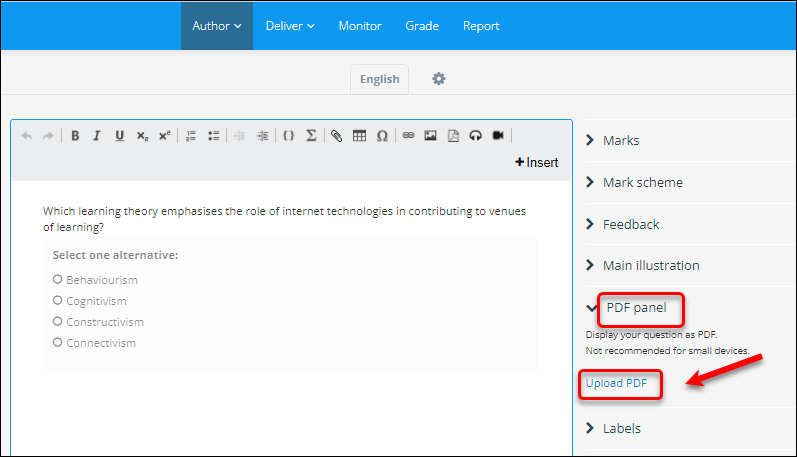
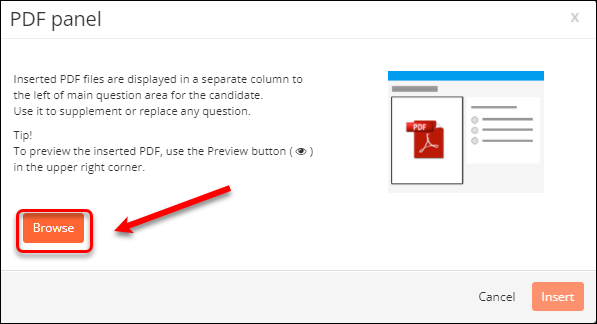
PDF panel
Add a pdf of images (e.g. radiographs) or text (e.g. a case study or rubric) to the left hand panel of the question)
- Click on the PDF panel button.
- Click on the Upload PDF button.
- Click on the Browse button.
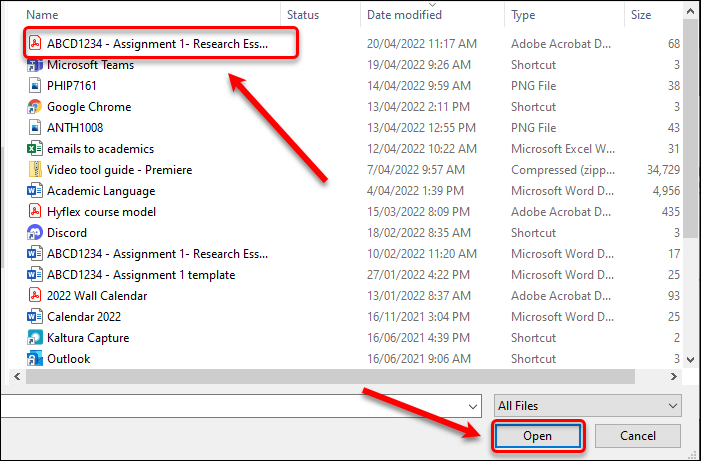
- Select the required file from your device. In this example, a rubric is selected.
- Click on the Open button.
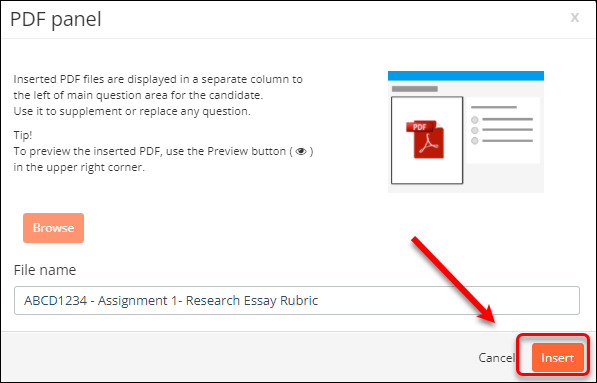
- Click on the Insert button.
- Click on the Save button.
- Click on the preview (eye) button.
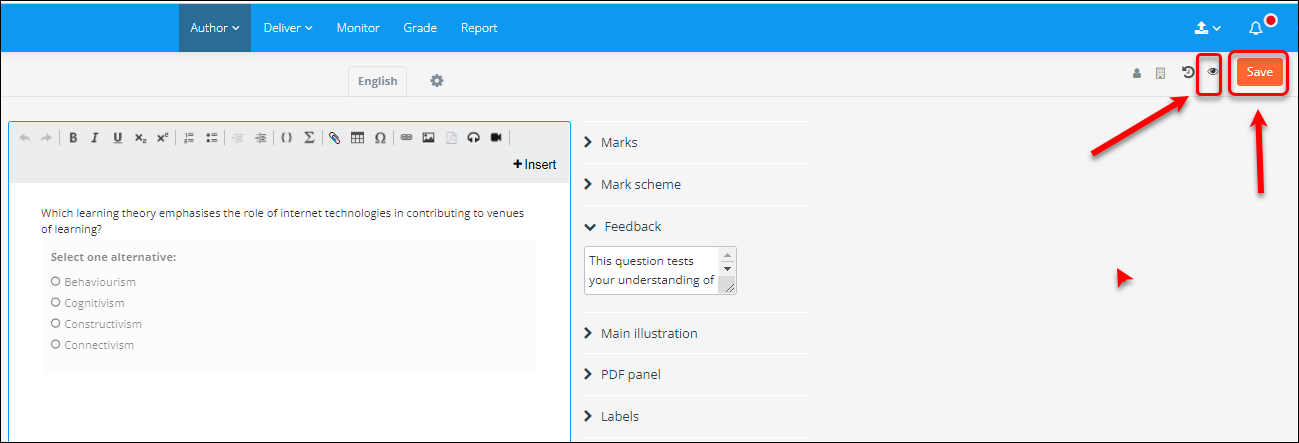
The rubric is displayed on the left pannel of the question.

Other media content can be added to the question.
Label
You can add multiple labels to questions and filter by these.
Add media content to questions
Refer to the Add media content to a question for detailed instructions.
Considerations
When using Text Entry, Math Entry, Numeric Entry and Numerical simulation question types and you wish to place the input field into the cell of a table, use the following settings:
- Expand input field automatically = enabled
- Specify an "Expected length" on the input field
- Do not define a fixed width on the table (clear the "width" value in the Table Properties and leave it blank).
- Academic Integrity & Assessment Security in Inspera
- Access Inspera
- Access your Inspera test for marking
- Add graders to an Inspera test
- Add media content to questions in Inspera
- Add one-time users to an Inspera test
- Add the Assumption and Queries question in an Inspera exam
- Adding Resources (pdf files, links) to a Question Set
- Adding staff (contributors) to an Inspera assessment
- Adding the Academic Integrity Statement to your assessment
- Additional pages required for Inspera exams
- Alternative method for downloading Final Marks from Inspera
- Answer key corrections - MCQ
- Apply Alternative Exam Arrangements (AEAs) and Time Zone Adjustments in Inspera
- Assign questions to graders in Inspera
- Complete an Inspera test as a student
- Confirm grades in Inspera
- Copy a question set from Inspera Training to Inspera Admin (Original)
- Create Inspera practice exam with Safe Exam Browser
- Create an Inspera submission link in Learn.UQ
- Create an Inspera test in Deliver
- Create bands and criteria
- Create marking committees in Inspera
- Create marking committees using CSV
- Creating Questions
- Downloading responses to Assumptions and Queries
- Edit question weight in Inspera
- Enable After-test settings in Inspera
- Enrol students in Inspera test using CSV file
- Explanations on student responses
- Export questions from Blackboard to Inspera (Original)
- Exporting a Question Set to PDF
- False Start
- Filter functionality in Inspera marking
- Flag students in Inspera test
- Getting started with Inspera
- Grading workflow for Planners and Graders
- Incident Adjustments for students who experience technical delays
- Inspera Assessment Design Settings
- Inspera Assessment Environments and their Purposes
- Inspera Assessment User Roles
- Inspera Assessment access methods for students
- Inspera Exam Requests
- Inspera Grade Workspaces
- Inspera Observed User Testing
- Inspera Question Set Version Control
- Inspera Recommended Assessment - Standard (non-exam) assessment - webpage
- Inspera Rubrics
- Inspera School-based Exams
- Inspera Test settings
- Inspera analytics
- Inspera central on-campus and non-invigilated exams (Original)
- Inspera marking navigation
- Inviting students to an assessment via Test Code
- Late submissions and extensions in Inspera Assessment
- Manually marked questions: Mark and feedback
- Monitor Assessment
- Name and label questions in Inspera Assessment
- Navigate Inspera
- Override scoring of questions in Inspera
- Pilot an Inspera assessment
- Question sets in Inspera Assessment
- Sections in Question Sets
- Sharing a question set in Inspera Assessment
- Student Arrives Late
- Supporting students to use Inspera Assessment
- Things to look for in review
- Transfer results from Inspera to your Learn.UQ course
- Turnitin similarity report in Inspera
- View student responses in Inspera