Sections in an Inspera Question Set (Ultra)
Once questions are added to a Question Set, they will be displayed under Section 1 by default.
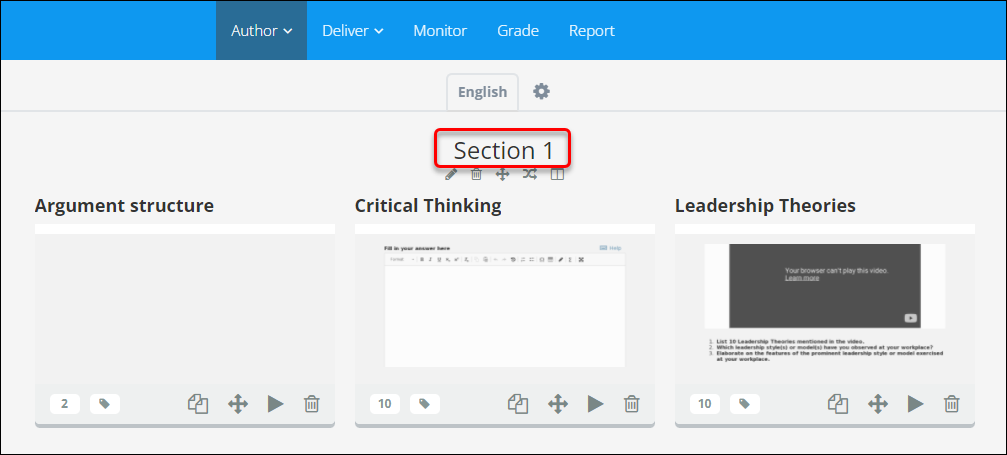
A Question Set can be divided into sections, each of which contains questions related to a content, for example Module 1.
It is best to plan the assessment structure and enter the required Sections with relevant names before adding questions. This is helpful if there are multiple authors contributing to the assessment.
Manage a section
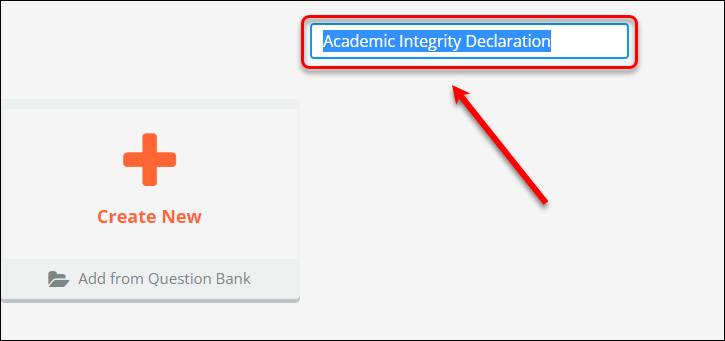
Edit Section name
- Select the pen icon
Note: Select this icon to rename sections as required.
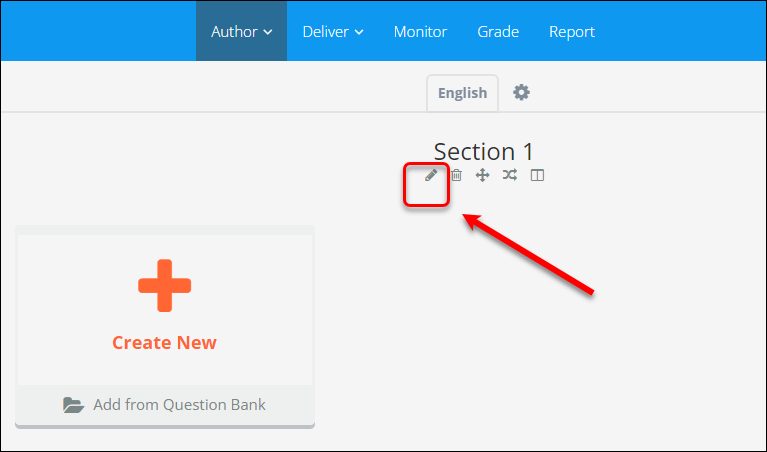
- Enter the Section name
Add a new Section
- Click on the + New section button
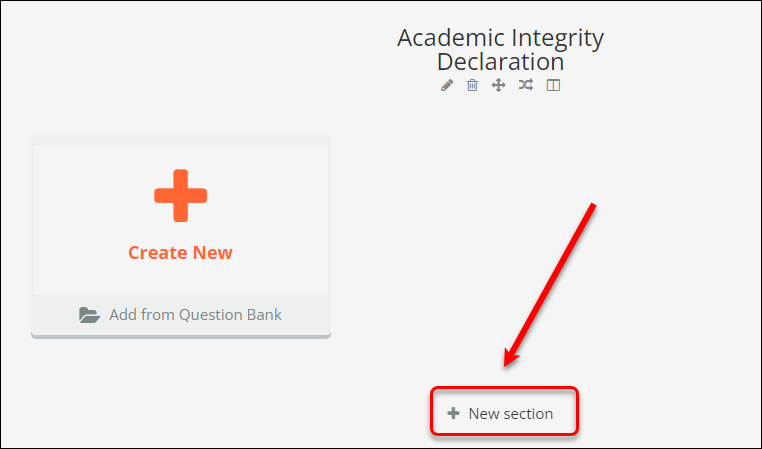
- Follow the steps to Edit Section name
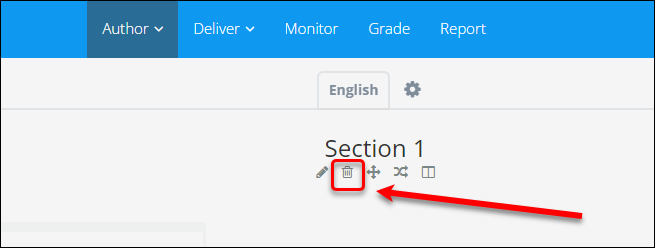
Delete a Section
- Click the bin icon to delete a section
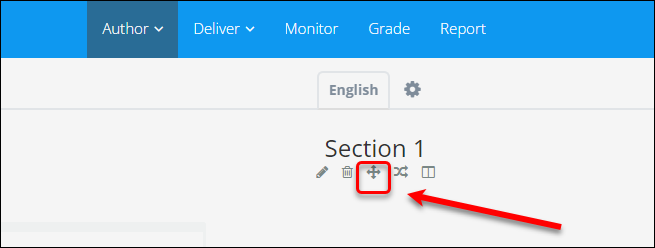
Move a Section
- Click on the four arrow icon
- Drag and drop the section to the relevant location in the set
Tip: Reducing the text size in your browser before moving Sections will allow you to see more of your Question Set on screen, making it easier to move things around. See the instructions.
Randomise questions within a section
Questions can be randomised in a section. This allows better management of the assessment, i.e., one Section might display questions in random order while another section might display questions sequentially.
Note: The maximum marks on each question in this Section have to be the same; otherwise, this option is disabled.
There are two options in randomising questions in a section:
- All questions are randomised
- A number of questions are randomly selected from a section
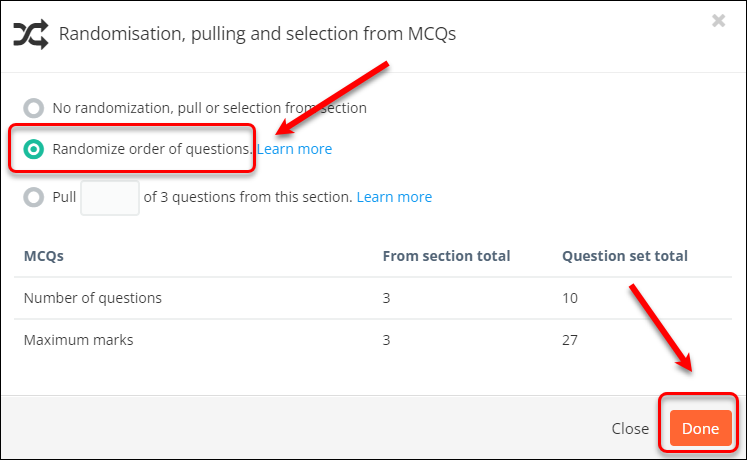
Randomising all questions in a Section
- Click on the crossover-arrows icon

- Select the option Randomise order of questions
- Click on Done button.
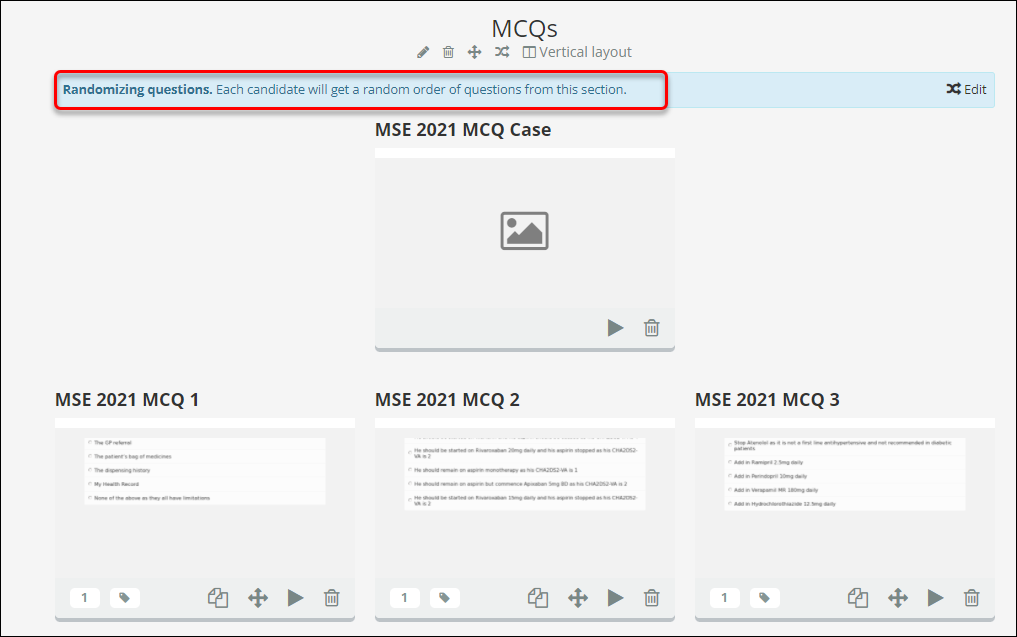
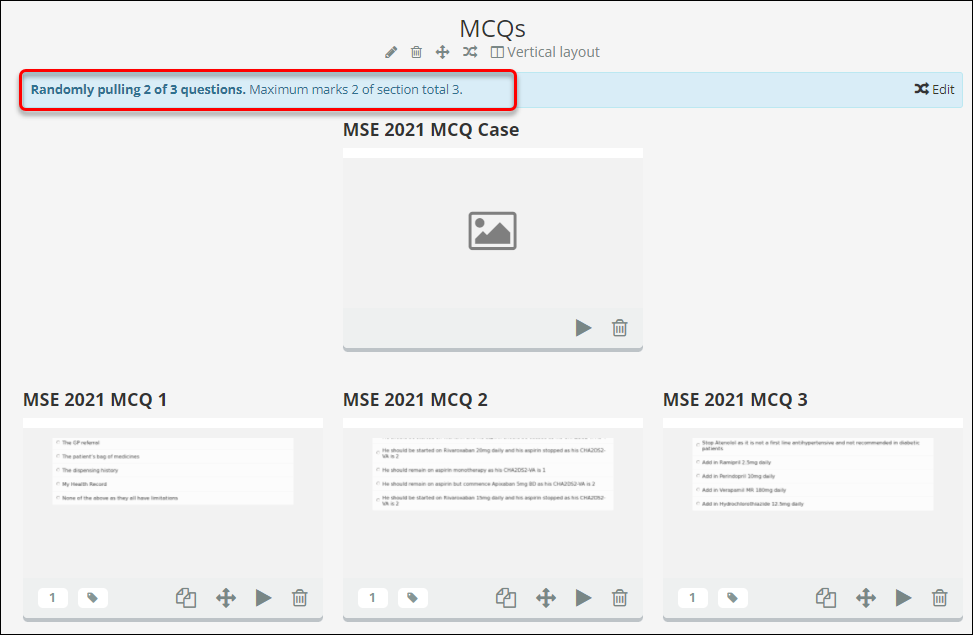
- A message will be displayed, indicating the randomise option selected for the section.
Randomly selecting a number of question from a Section
- Repeat step 1 above
- Select the option Pull [ ] of # questions from this section
- Enter the number of questions to be pulled out from the section in the Pull textbox. # is the total number of questions in the section.
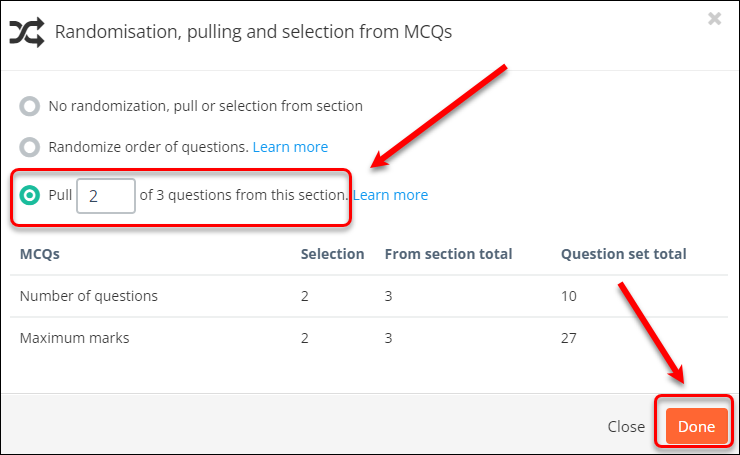
- Click on Done button.
- A message will be displayed, indicating the randomise option selected for the section.
Section layout options
There are five layout options in a section:
- Basic Layout: This is the default setting with one question per page.
- Vertical Layout: All questions within this section will be vertically stacked on one page.
- Basic Layout with left Stimulus: Displays one question per page with a stimulus panel shown at the left of the question
- Vertical Layout with left Stimulus: Displays all questions in this section, vertically stacked, with the Stimulus Panel to the left.
- Vertical Layout with top Stimulus: Displays all questions in this section, vertically stacked, with the Stimulus Panel at the top.
Selec a layout for a section
- Select the book icon
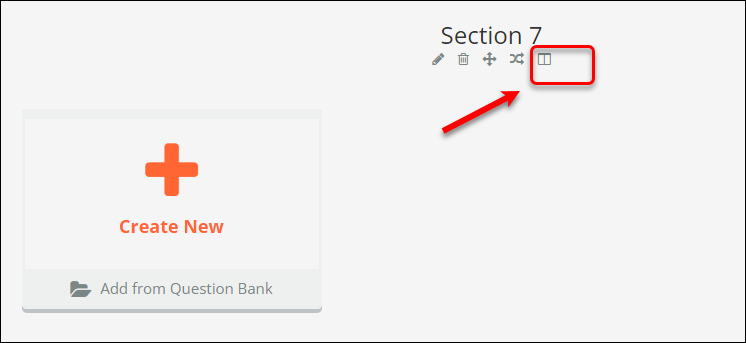
- Select the relevant layout option (e.g. Vertical layout with left stimulus)
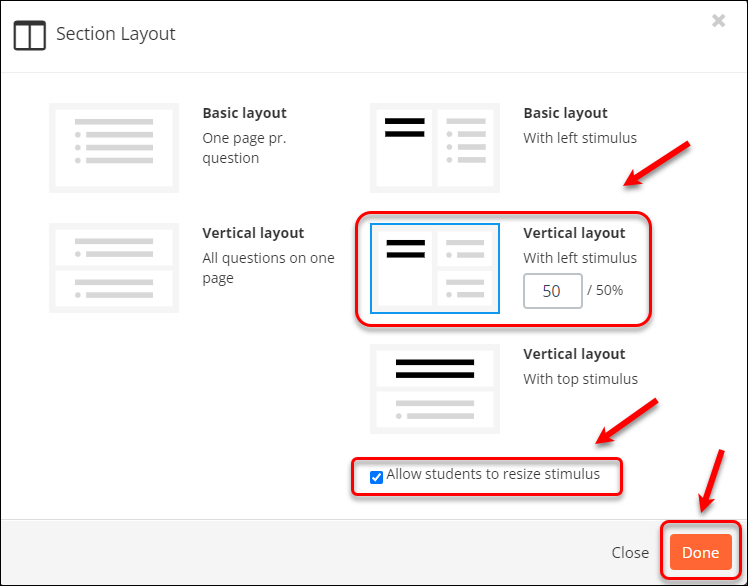
Note: The setting Allow students to resize stimulus is checked by default and it is a recommended design.
- Click on the Done button.
Create a Stimulus Panel
Each section can only contain one Stimulus Panel. There are two main steps to create a stimulus for a section:
- Select a layout option
- Add a stimulus
Video Guide
Section with Stimulus (YouTube 2m 59s)
Select a layout option
- Select the book icon
- Select the relevant layout option (e.g. Vertical layout with left stimulus)
Note: The setting Allow students to resize stimulus is selected by default and it is a recommended design to allow students to resize each of the columns, e.g. to view details in the stimulus.
- Click on the Done button.
Add a stimulus
There are 3 stimulus options:
- Enter the text (instruction) in the textbox
- Select Image from the Main illustration drop-down menu
- Select Embed code from the Main illustration drop-down menu
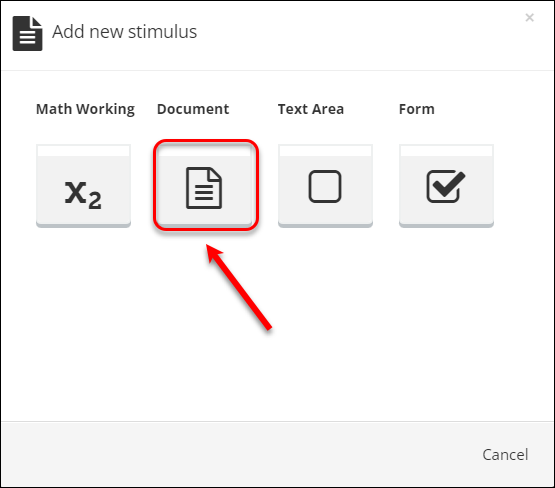
Add a text stimulus
- Click on the plus icon
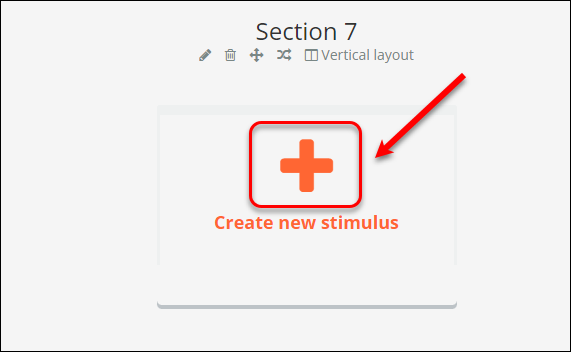
- Select Document (Document is not marked in Inspera)
- Enter the stimulus name (e.g. Digital Story - Task description)
- Enter the text into the textbox
- Click on the Save button

- Click on the eye icon to view the stimulus
Note: Questions are then created or added into the section
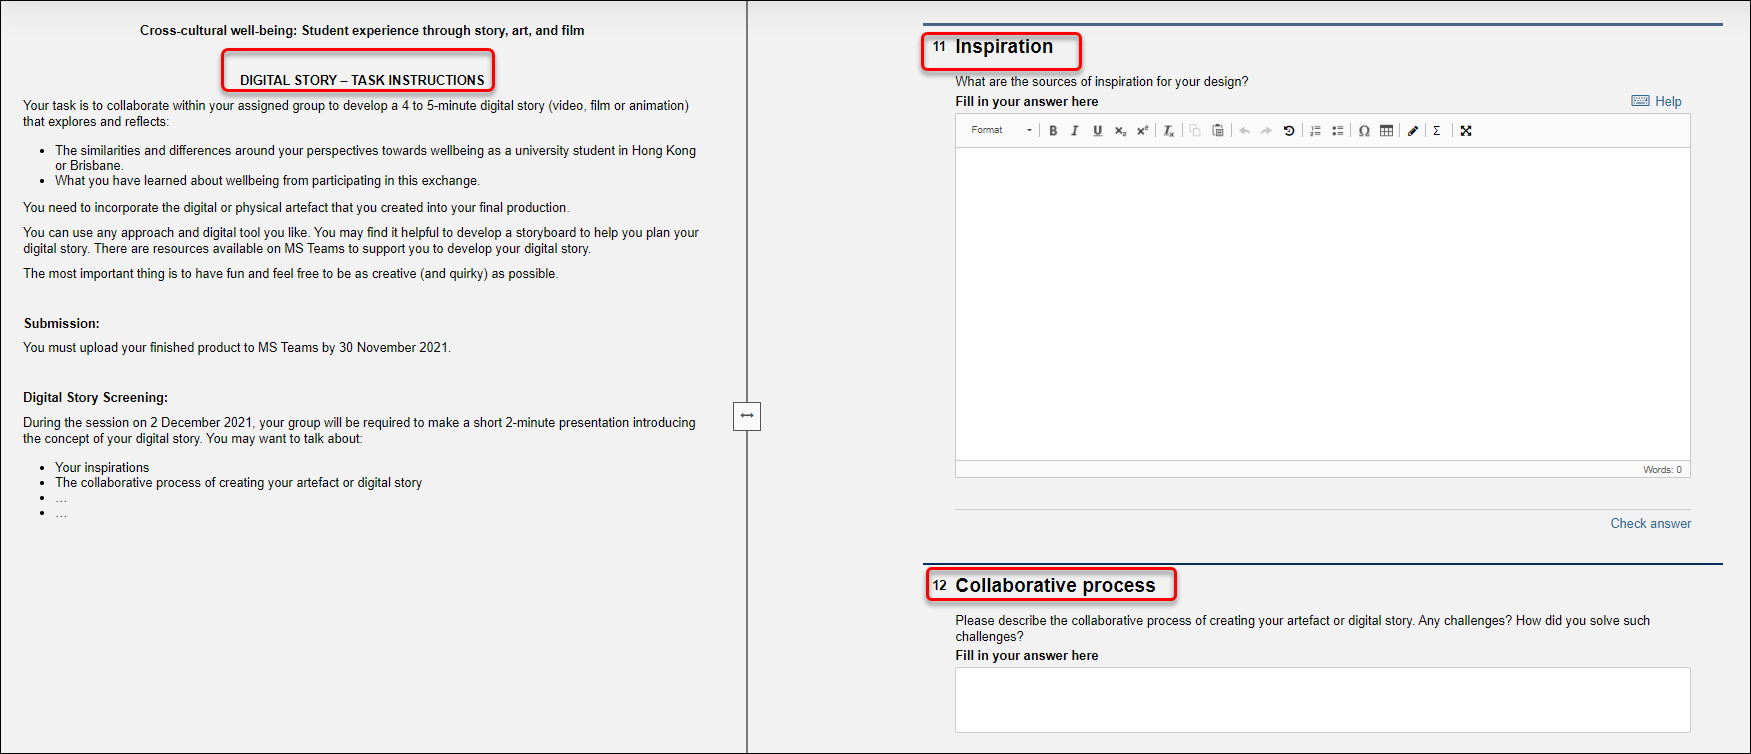
A Section with Vertical Layout with left TEXT Stimulus
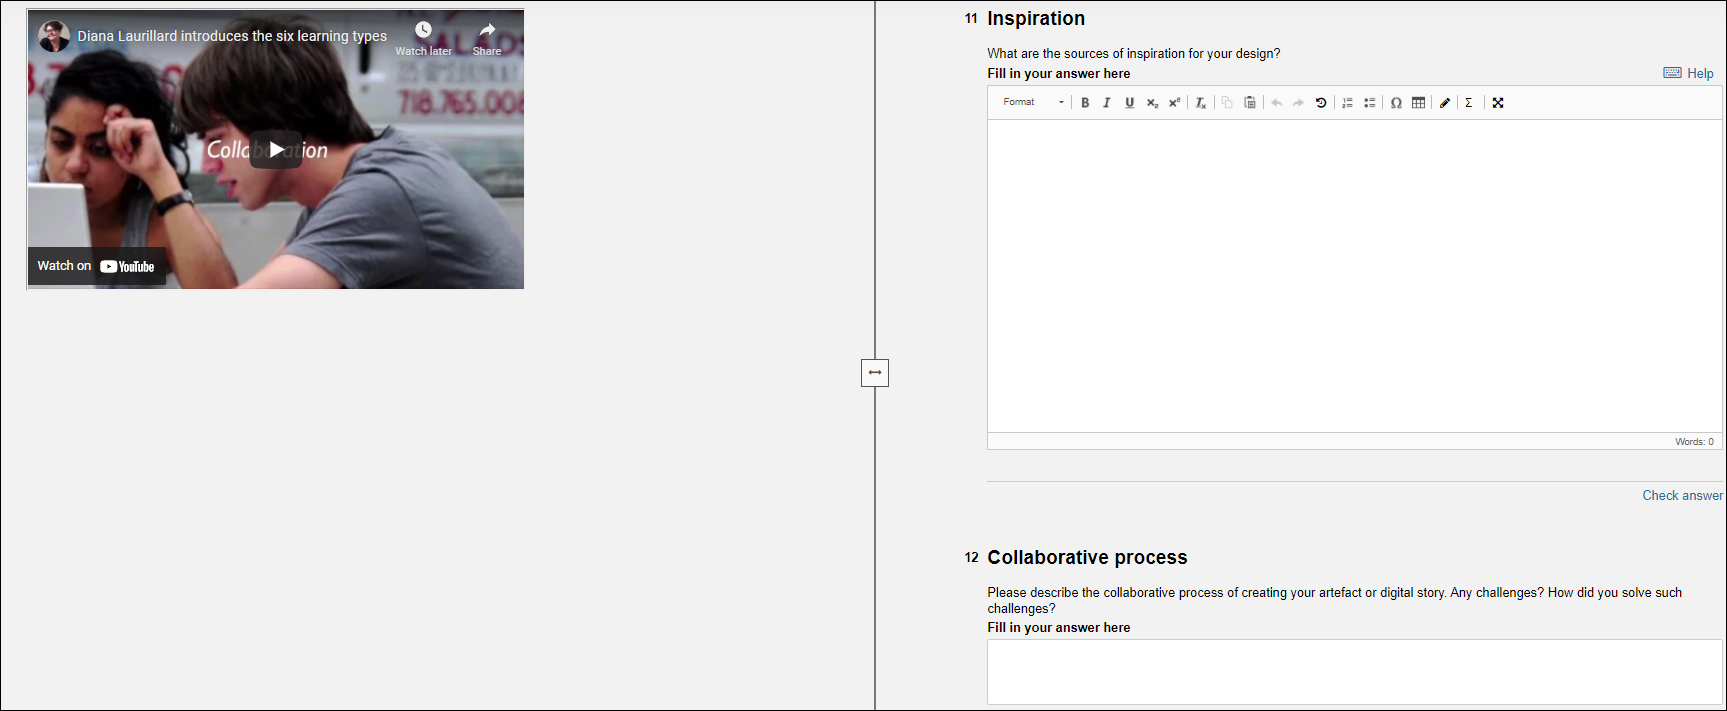
Add an image stimulus
Refer to the Images in Inspera Assessment guide

Add a video stimulus
Refer to the Video and Audio in Inspera Assessment guide
Considerations when using Sections
- You cannot import an entire Section into a Question Set. You need to create the Section, then add questions into it.
- Inspera currently does not allow stimulus panels to be added from the Question Bank. If you wish to re-use a stimulus panel, it will need to be recreated.
- You can choose to hide Section titles from students in the Question Set’s Design settings.
- Academic Integrity Review in Inspera (Ultra)
- Access Inspera (Ultra)
- Access your Inspera test for marking (Ultra)
- Add Academic Integrity Statement to Inspera assessment (Ultra)
- Add Resources (pdf files, links) to an Inspera Question Set (Ultra)
- Add graders to an Inspera test (Ultra)
- Add media content to questions (Ultra)
- Add one-time users to an Inspera test (Ultra)
- Add staff (contributors) to an Inspera assessment (Ultra)
- Add the Assumption and Queries question in an Inspera exam (Ultra)
- Additional pages required in Inspera exams (Ultra)
- Answer key corrections - MCQ (Ultra)
- Assign Inspera questions to graders (Ultra)
- Complete an Inspera test as a student (Ultra)
- Confirm grades in Inspera (Ultra)
- Copy a question set from Inspera Training to Inspera Admin (Ultra)
- Create Inspera Questions (Ultra)
- Create Inspera bands and criteria (Ultra)
- Create Inspera marking committees (Ultra)
- Create Inspera practice exam with Safe Exam Browser (Ultra)
- Create a Question Set (Ultra)
- Create a non-exam assessment in Inspera (Ultra)
- Create an Inspera submission link in Learn.UQ (Ultra)
- Create an Inspera test in Deliver (Ultra)
- Create marking committees using CSV (Ultra)
- Download Inspera Exam Assumptions and Queries responses (Ultra)
- Edit question weight in Inspera (Ultra)
- Enable After-test settings in Inspera (Ultra)
- Enrol students in Inspera test using CSV file (Ultra)
- Explanations on student responses (Ultra)
- Export an Inspera Question Set to PDF (Ultra)
- Export questions from Blackboard to Inspera (Ultra)
- False Start (Ultra)
- Filter functionality in Inspera marking (Ultra)
- Flag students in Inspera test (Ultra)
- Incident Adjustments for students who experience technical delays (Ultra)
- Inspera - Apply Alternative Exam Arrangements (AEAs) and Time Zone Adjustments (Ultra)
- Inspera Assessment User Roles (Ultra)
- Inspera Assessment access methods for students (Ultra)
- Inspera Exam Requests (Ultra)
- Inspera Exam Viewing (Ultra)
- Inspera Examination Information Sheets (Ultra)
- Inspera Examination Information Sheets (Ultra)
- Inspera Grade Workspaces (Ultra)
- Inspera Observed User Testing (Ultra)
- Inspera Question Set Version Control (Ultra)
- Inspera Rubrics (Ultra)
- Inspera School-based Off-campus Exams (Ultra)
- Inspera Terminology (Ultra)
- Inspera Test settings (Ultra)
- Inspera analytics (Ultra)
- Inspera marking navigation (Ultra)
- Invite students to an Inspera assessment via Test Code (Ultra)
- Late submissions and extensions in Inspera Assessment (Ultra)
- Manually marked questions: Mark and feedback (Ultra)
- Monitor Inspera Assessment (Ultra)
- Name and label questions in Inspera Assessment (Ultra)
- Navigate Inspera (Ultra)
- Override scoring of questions in Inspera (Ultra)
- Pilot an Inspera assessment (Ultra)
- Review Inspera assessment (Ultra)
- Sections in an Inspera Question Set (Ultra)
- Share a question set in Inspera (Ultra)
- Support students to use Inspera Assessment (Ultra)
- Things to look for in an Inspera assessment review (Ultra)
- Transfer results from Inspera to your Learn.UQ course (Ultra)
- Turnitin similarity report in Inspera (Ultra)
- View student responses in Inspera (Ultra)