Response Reporting on a Form (Original)
This report will allow you to see what each of your students has answered in an ePortfolio Form.
- Log into the UQ ePortfolio.
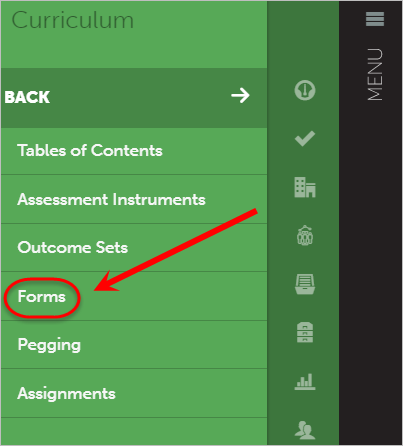
- Click on Menu > Curriculum > Forms.
- Locate and select the desired Form or Journal.
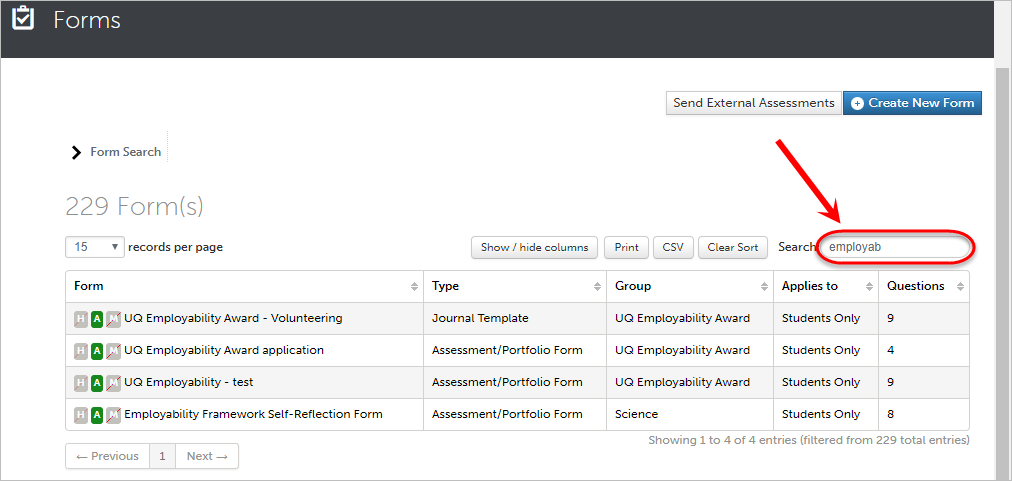
Tip: The search bar can be used to assist in locating your desired form/journal.
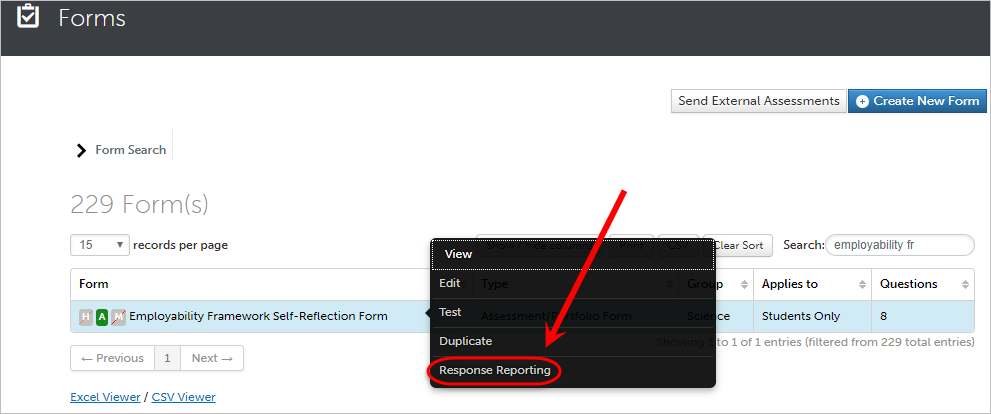
- Click on the desired form/journal.
- Select Response Reporting from the drop-down menu.
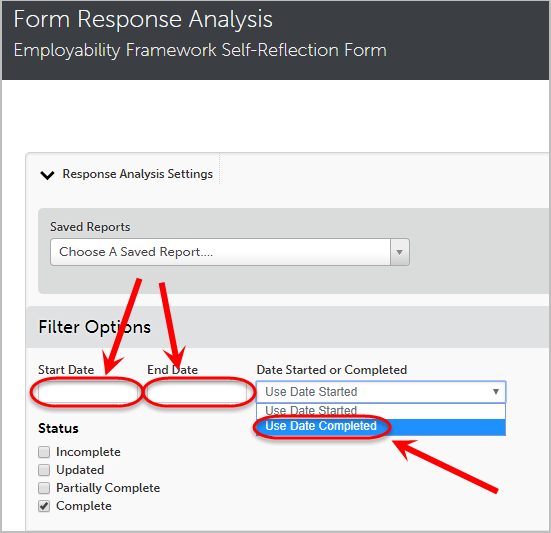
Filter Options
- Select the Start Date field and choose the required date.
- Select the End Date field and choose the required date.
- Select Use Date Completed from the Date Started or Completed drop-down menu.
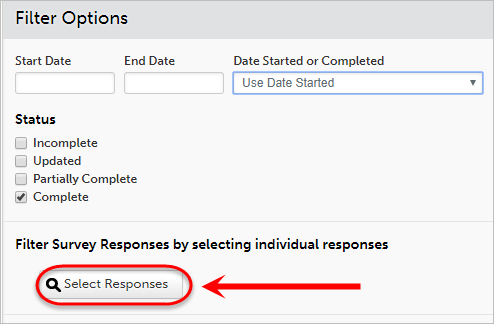
- Click on the Select Responses button under Filter Survey Responses by selecting individual responses if you wish to filter by a particular question.
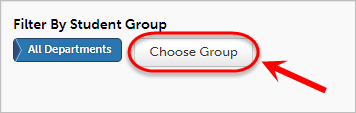
- Click on the Choose Group button under Filter By Student Group if you wish to filter by a course group.
Journal Only Filter Options
- Select the required radio button under Portfolio Submitted Responses.
- If applicable select the required radio button under Supervisor Signoff.
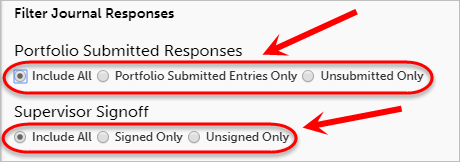
Tip: We suggest for Journal Only Filter Options that the Include All radio button is selected.
Note: For more information on Filter Survey Responses by selecting individual responses or Filter By Student Group, refer to the ePortfolio Response Reporting with Advanced Filters guide.
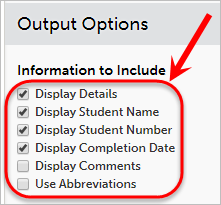
Output Options
- Check the required checkboxes from the Information to Include list.
- Display Details: Must be selected so that student data is displayed.
- Display Student Name: Displays the student's name on the report as it appears in the ePortfolio.
- Display Student Number: Displays the student's username on the report as it appears in the ePortfolio.
- Display Completion Date: Displays the date in which the student completed the Form/Journal.
- Display Comments: This will display comments that are made against a Form/Journal.
- Use Abbreviations: This will substitute Form/Journal headings with applicable Abbreviations (if abbreviations were set up in the form/journal)
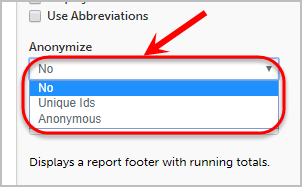
- If required select desired option from the Anonymize drop-down list.
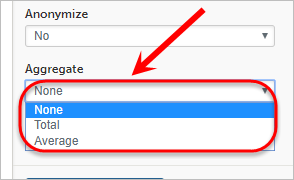
- If required select desired option from the Aggregate drop-down list.
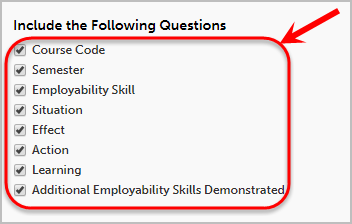
- Check the required checkboxes from the Include the Following Questions list.
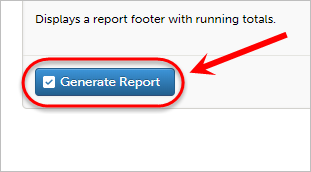
- Click on the Generate Report button.
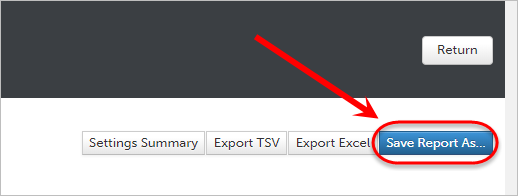
Saving your report
Once your report has generated you can save a copy of the report to your own Saved Report Library by following the below steps:
- Click on the blue Save Report As... button.
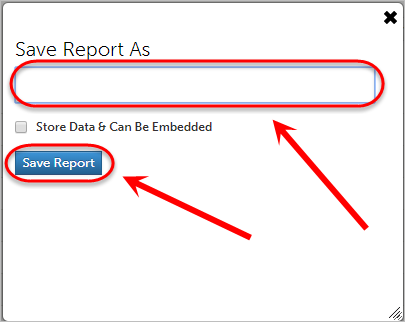
- Enter an informative report name in the Save Report As: textbox.
- Click on the Save Report button.
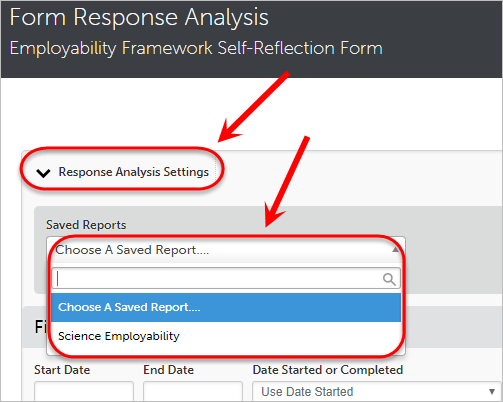
- Your report will be saved under Saved Reports in the Response Analysis Settings drop-down menu.
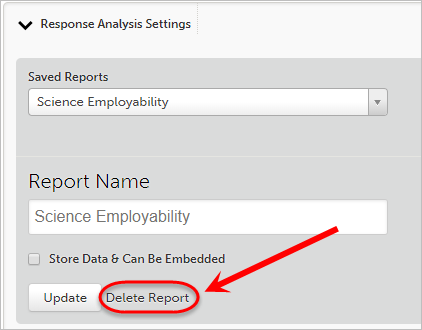
Delete a saved report
- Chose the desired report from the Saved Reports drop-down list.
- Click on Delete Report link under Report Name.
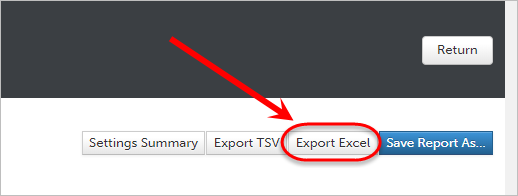
Exporting data to Excel
Once your report has generated you can export the data to excel by following the below steps:
- Click on the Export Excel button.