Quick Start Guide for External Assessors (Original)
Video Guide
Quick Start Guide for External Assessors (YouTube, 2m 49s)
Warning: External Assessors are only provided with access to their accounts while they have work to complete (assessments or surveys/forms). Once they have completed all the work, their account will remain active for 7 days after this date. At this point, they will lose access to their account. If and when new work is sent to them to complete, they will regain access to their account.
Locating emails from the UQ ePortfolio
Emails sent to external assessors will from the UQ ePortfolio are sent by Anthology Portfolio and will have the subject line Work to Assess from UQePortfolio - Last Name, First Name (where the last name and first name of the student would appear).
Accessing the UQ ePortfolio
- Click on the Go to UQ ePortfolio link in the provided email.
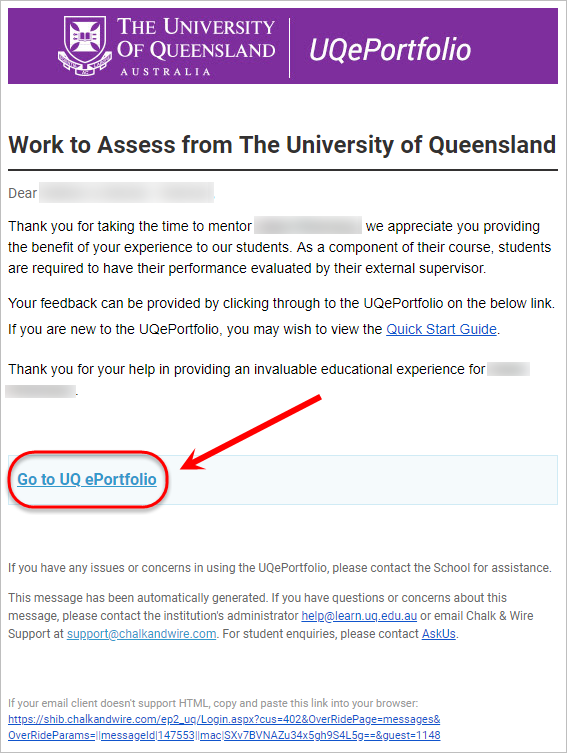
Warning: The link to the UQ ePortfolio will not work in Internet Explorer, please use either Google Chrome, Safari or Microsoft Edge.
Warning: If your email client does not support HTML, the link to Chalk & Wire will not be available for you to click on. Instead, copy and paste the URL provided at the bottom of the email into your browser to access the login page.

- Enter your Email Address on the Guest Login screen.
- Click on the Login button.
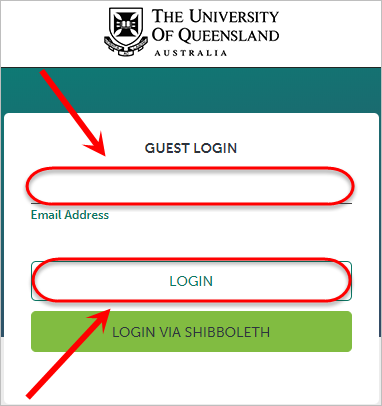
Note: When entering your email address it needs to be entered correctly and is case sensitive.
Understanding the Assesment Interface
Once you have successfully logged into the UQ ePortfolio you will be presented with the assessment interface. Student work will be presented on the left and the assessment (marking) instrument on the right.
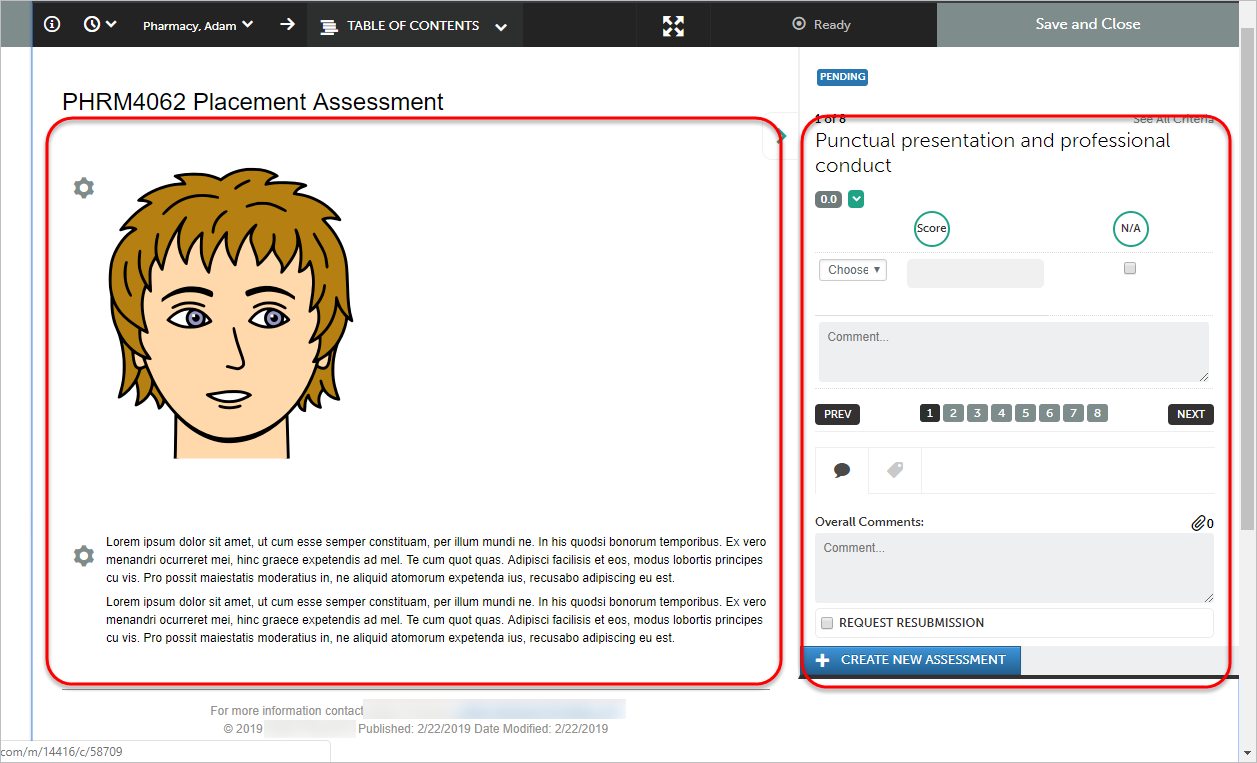
Use the View Full Instrument (four headed arrows) button to view the full assessment instrument (all criterion listed at once) in a full-screen view. Click the button again to return to the regular view.
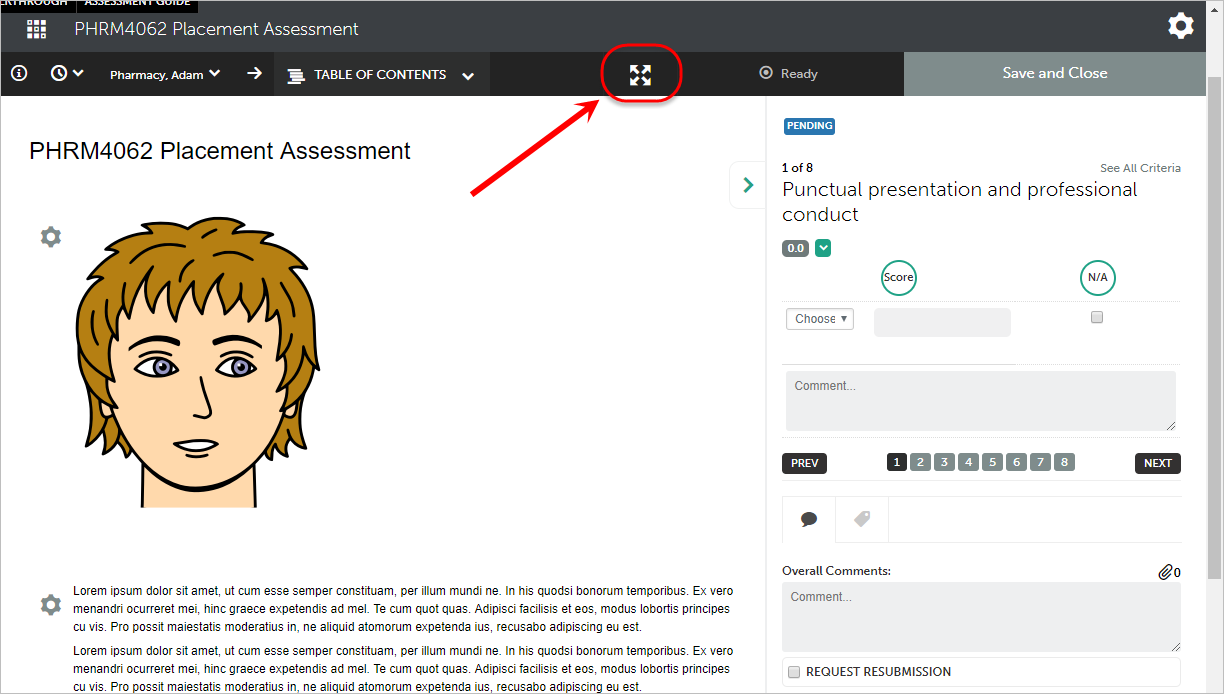
Use the Toggle Instrument (arrow) option to view the student work in a full-screen view. Toggle the instrument back to reveal the assessment interface.
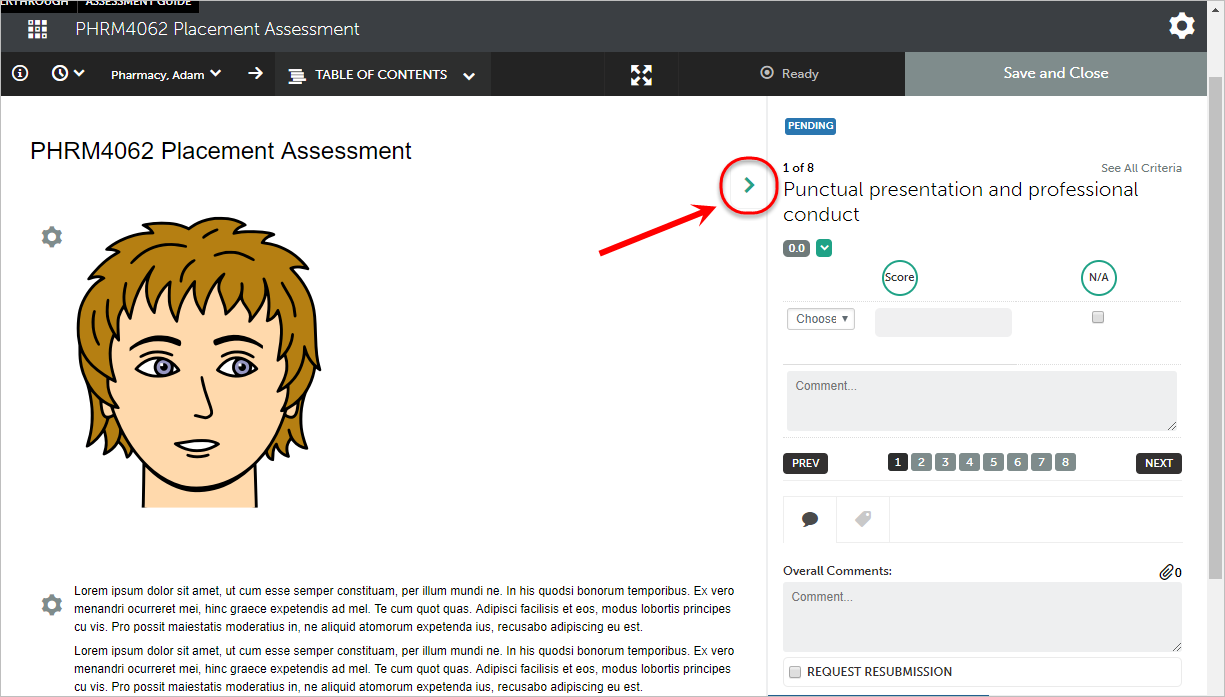
Assess (provide feedback) and Comment on Student Work
Tip: It is easier to assess (provide feedback) using the full instrument view rather than the regular assessing (feedback) view.
- Start with the first criterion.
- Click on the Choose One drop-down list and select the desired performance level.
- Enter a comment in the Comment textbox if desired or required.

Note: If using the regular instrument view, click on the Next or Previous button to move between criterion.
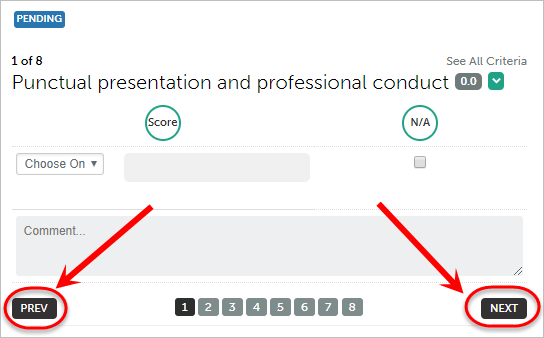
- Repeat steps until all criterion are marked.
- Add an Overall Comment.
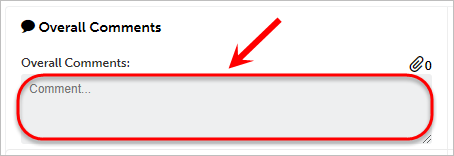
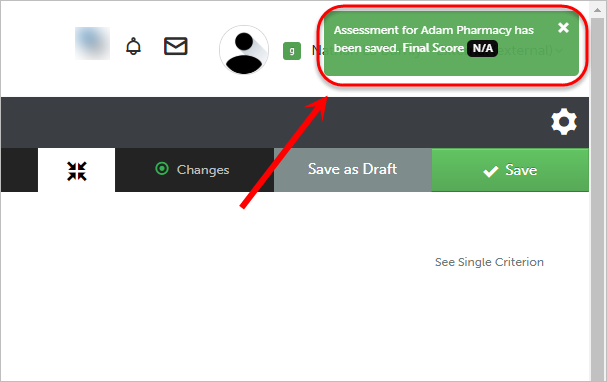
- Click on the green Save button at the top of the screen to complete your assessment.
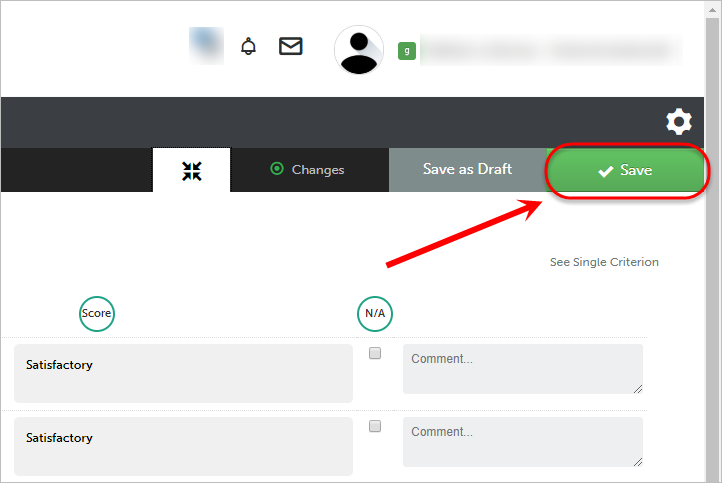
Note: A message will appear in green to indicate that the assessment has been saved, and provide you with the final score.
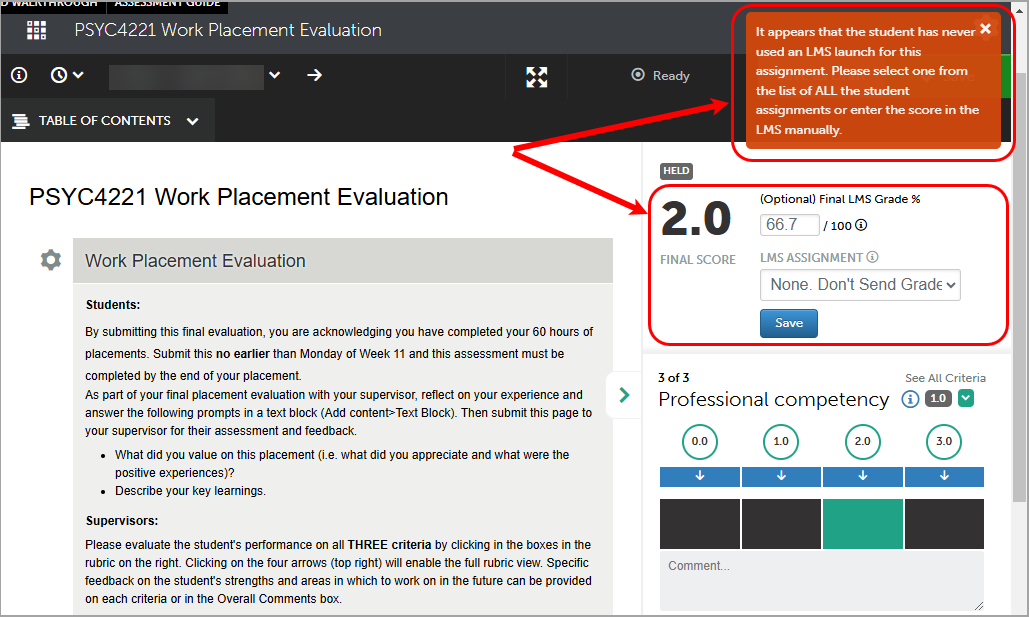
- After you have saved the feedback the following error message will appear on the screen in a red message box.
"It appears that the student has never used an LMS launch for this assignment. Please select one from the list of ALL the student assignments or enter the score in the LMS manually"
This message can be ignored and there is no further action required.
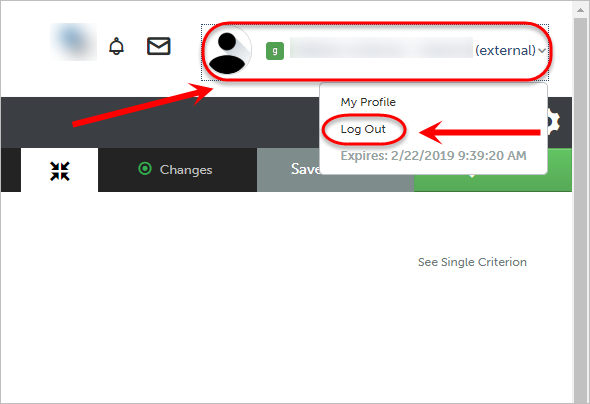
- Once you have finished your assessment, click on your name in the top/right corner of the screen and click on Log Out from the drop-down list.
- If you need to mark additional student's, locate the email for that student and use the link provided in that email.
Warning: Please do not navigate to other areas of the ePortfolio to avoid the release of student results by accident.
