Course and Advisor Groups (Ultra)
Differences between Course Groups and Advisor Groups
Course Groups allow assessors to track their students' assessment results. Course Groups only display the submissions made to the specific course group assessor.
Advisor Groups enable Assessors to view Student results in scenarios where they are not the Assessor. This allows the Assessor to keep track of a specific grouping to students to monitor their progress and successes.
Create a Course Group
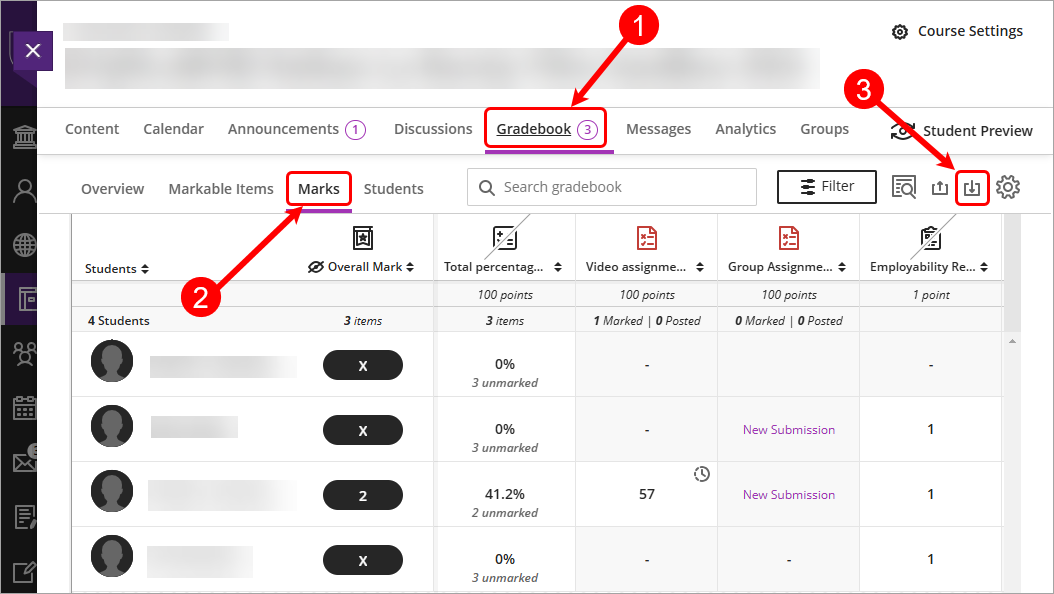
- Select Gradebook from the navigation bar.
- Select Marks from the Gradebook navigation bar.
- Click on the Download Gradebook button.
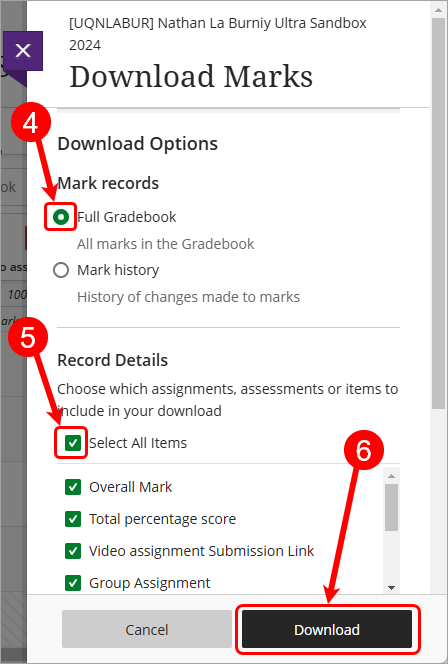
- Select the Full Gradebook radio button.
- Check the Select all items checkbox.
- Click on the Download button.

- Open the Excel spreadsheet then click on the Yes button in the warning window.

- Copy the column contents underneath Username.
Note: Do not copy the "Username" heading.
- Log into the UQ ePortfolio.
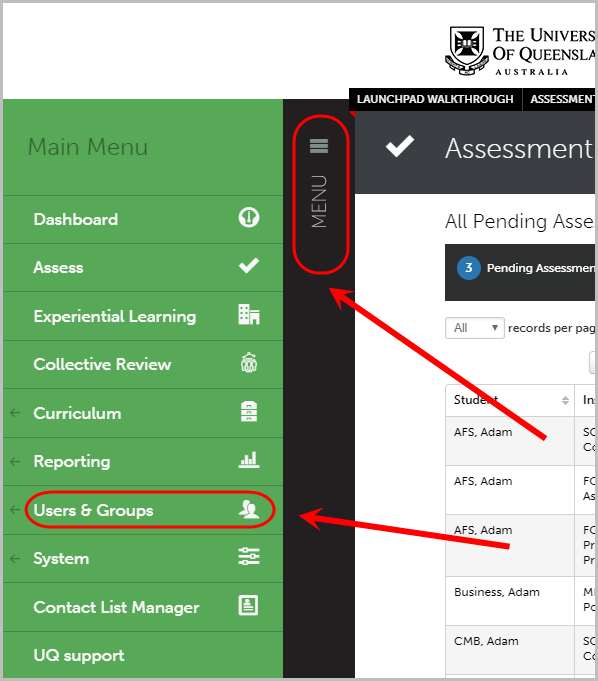
- From the ePortfolio Menu, select Users & Groups.

- Click on Course & Advisor Groups.

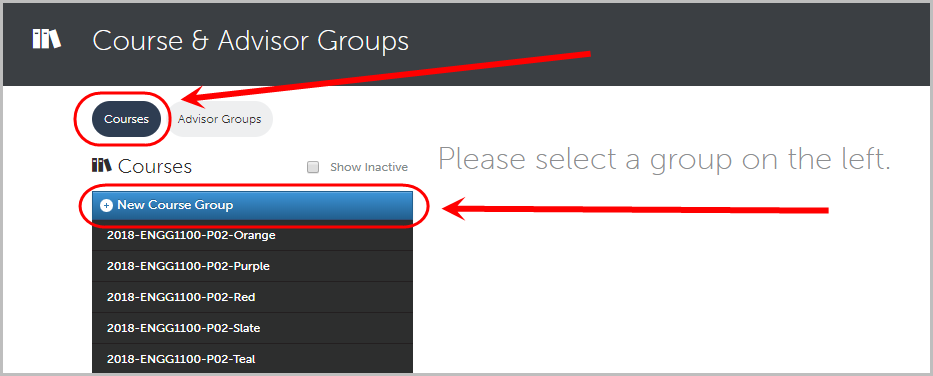
- Click on the Courses tab to create a Course Group.
- Click on the New Course Group button.
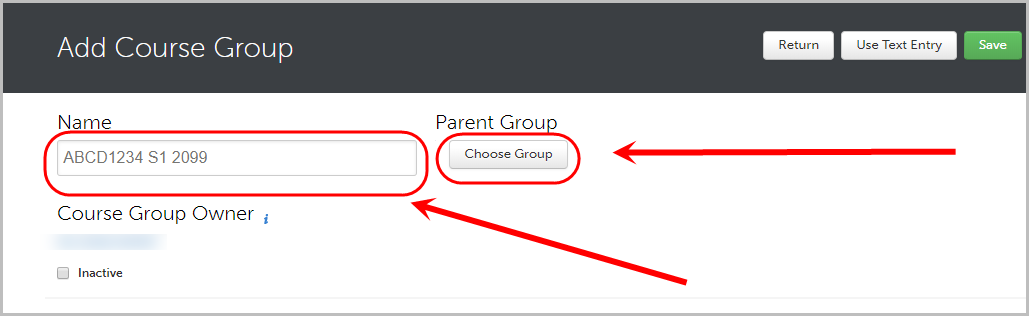
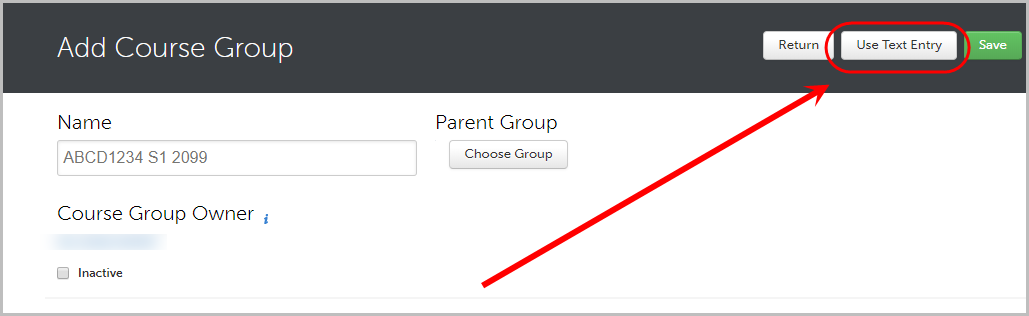
- Enter a name for your group in the Name textbox.
Note: Please use the following naming conventions for your group names.- Course, CourseCode-YYYYSX, i.e. ABCD1234-2018S1
- Tutorial group, CourseCode-YYYYSX-TutXX, i.e. ABCD1234-2018S2-Tut03
- Practical group, CourseCode-YYYYSX-PracXX, i.e. ABCD1234-2018Summer-Prac10
- Project or assignment group, CourseCode-YYYYSX-Projectgroupname, i.e. ABCD1234-2018S1-Project04
- In the section, Parent Group, click on the Choose Group button.
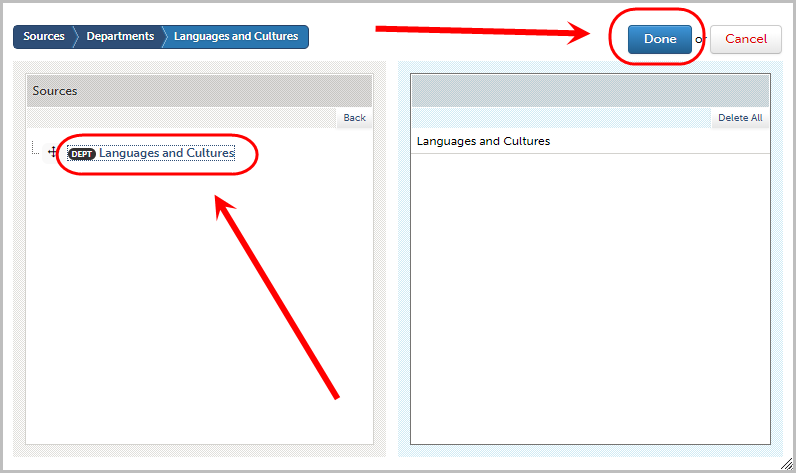
- From the Sources list, click on the Department that the group belongs to.
Note: Your School is known as a Department when using the ePortfolio.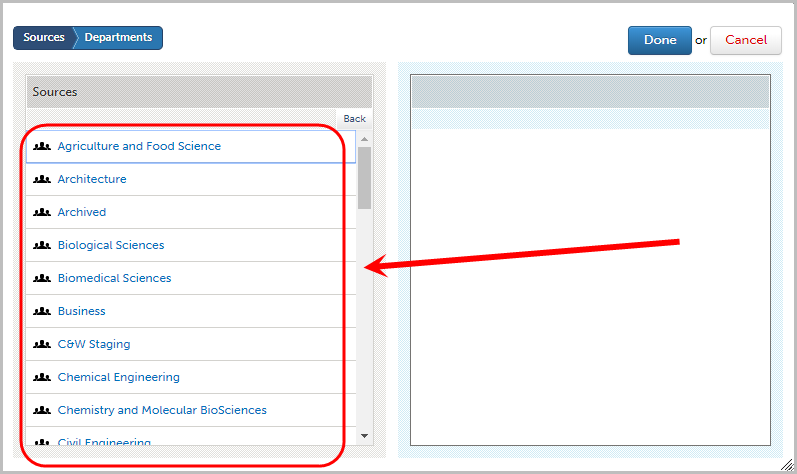
- Select the Department by clicking on the name again, this will move it to the right-hand column.
- Click on the Done button.
- Click on the Use Text Entry button.
- Paste the student usernames in the Enter Text textbox.
- Click on the Save button.
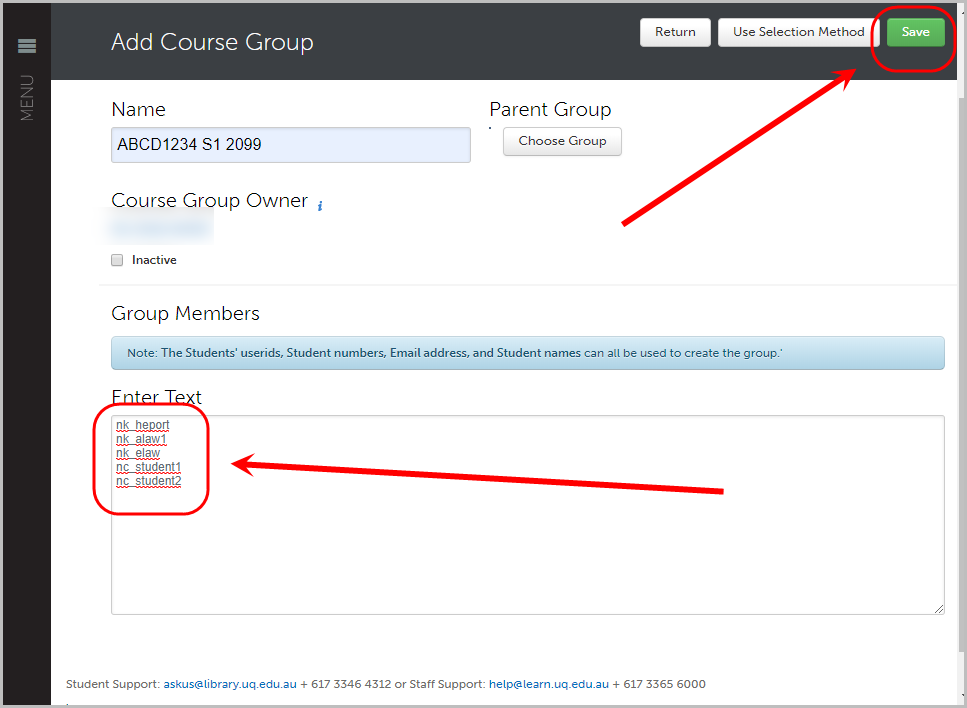
Note: If there is an error, you need to physically remove those usernames from the list as they do not have an account.
Create an Advisor Group
- Select Gradebook from the navigation bar.
- Select Marks from the Gradebook navigation bar.
- Click on the Download Gradebook button.

- Select the Full Gradebook radio button.
- Check the Select all items checkbox.
- Click on the Download button.
- Open the Excel spreadsheet then click on the Yes button in the warning window.

Copy the column contents underneath Username.
Note: Do not copy the "Username" heading.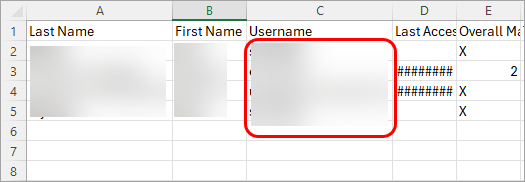
- Log into the UQ ePortfolio.
- From the ePortfolio Menu, select Users & Groups.
- Click on Course & Advisor Groups.

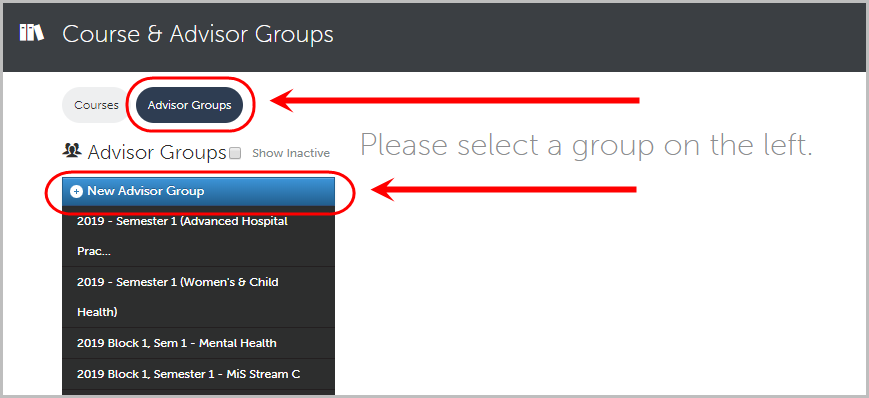
- Click on the Advisor Groups tab to create an Advisor Group.
- Click on the New Advisor Group button.
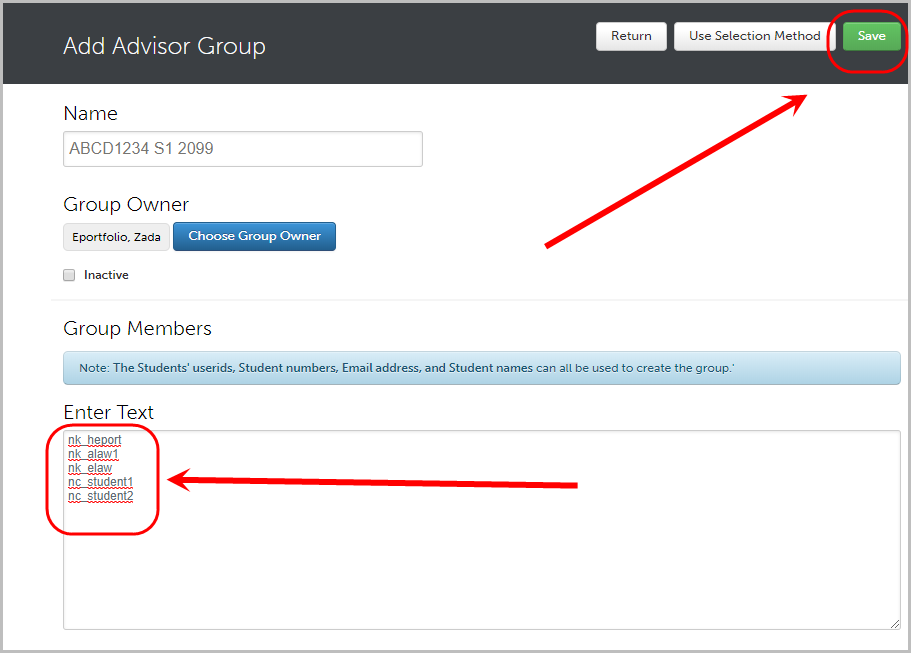
- Enter a name for your group in the Name textbox.
Note: It is recommended you use your course code, semester and year. For example, ABCD1234 S1 2099. - In the section, Group Owner, click on the Choose Group Owner button.
Note: Only complete Step 16 to 20 if a Group Owner is required.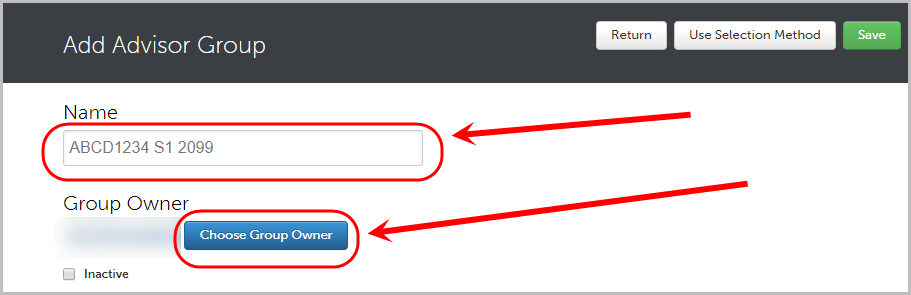
- From the Sources list, click on the Department that the owner belongs to.
Note: Your School is known as a Department when using the ePortfolio.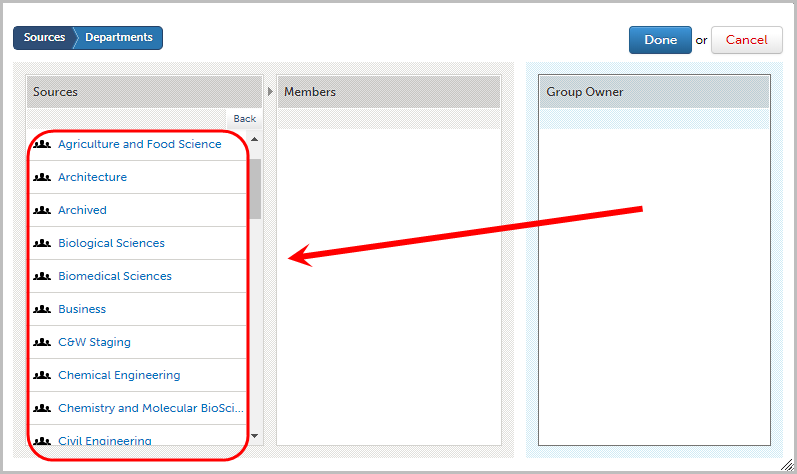
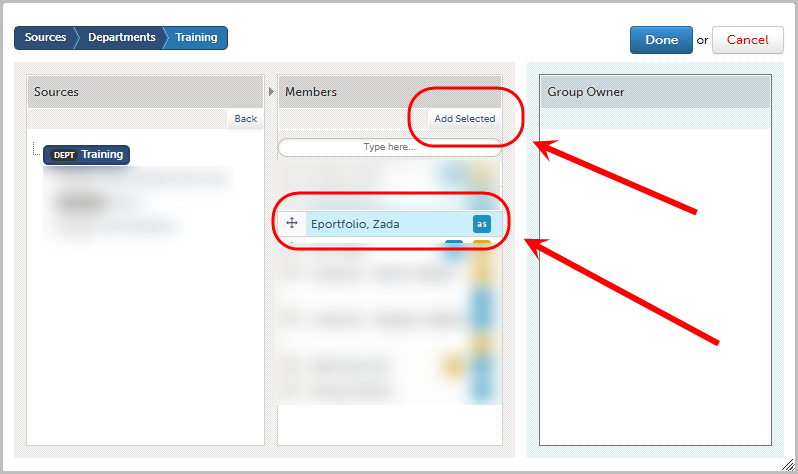
- Select the user from the Members column.
- Click the Add Selected button.
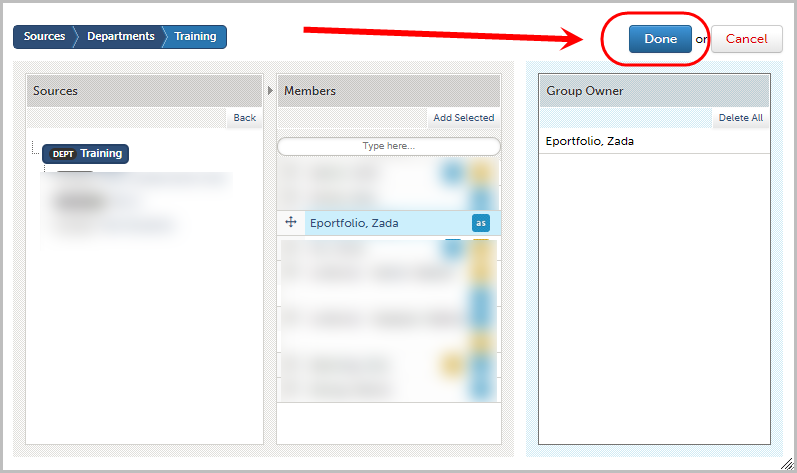
- Click on the Done button.
- Click on the Use Text Entry button.
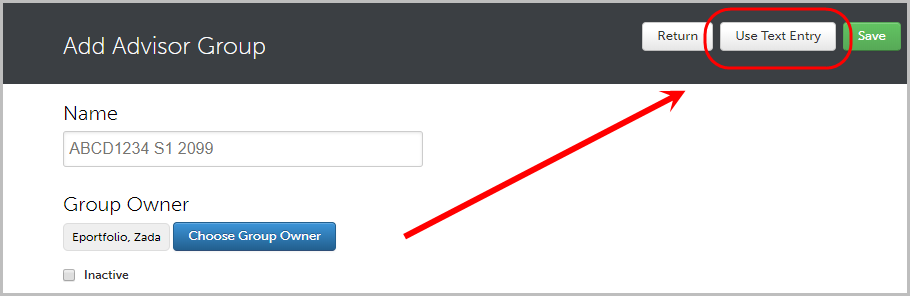
- Paste the student usernames in the Enter Text textbox.
- Click on the Save button.
Note: If there is an error (show image), you need to physically remove those usernames from the list as they do not have an account.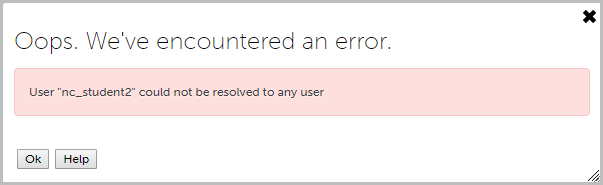
Make a Course or Advisor Group Inactive
Note: You can only make a group inactive if you created the group.
Note: The process to make a either a Course or Advisor group inactive is the same process.
- From the ePortfolio Menu, select Users & Groups.

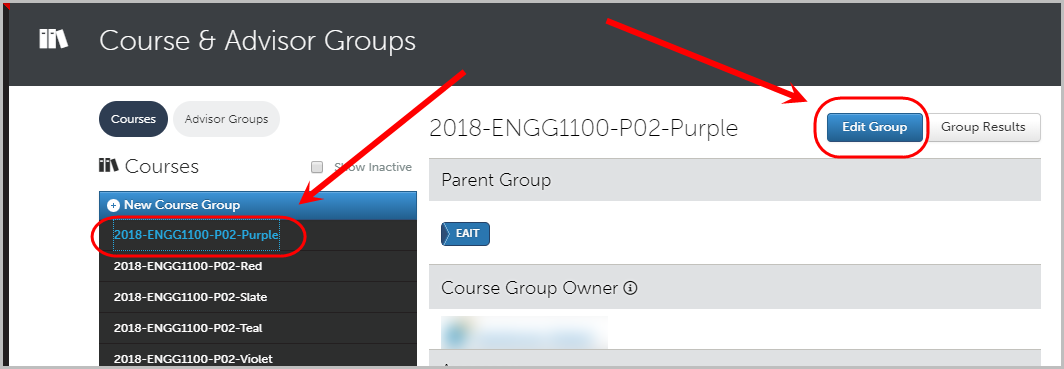
- Click on Course & Advisor Groups.

- Click on the Course or Advisor Group, select the Edit Group button.
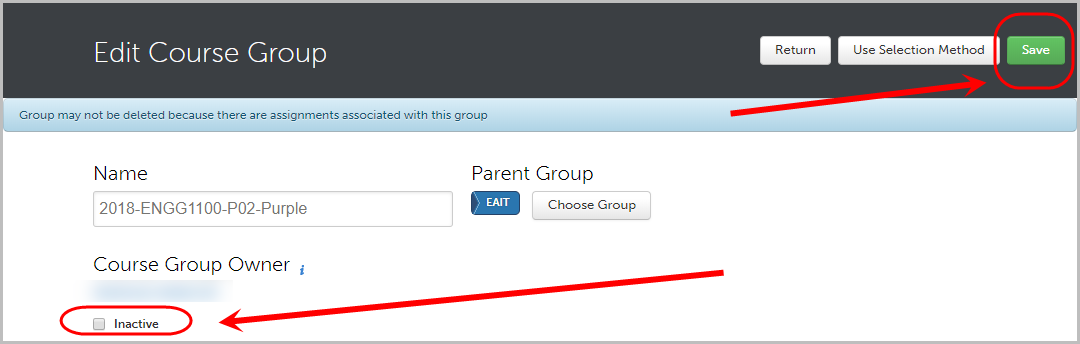
- Check the Inactive checkbox.
- Click on the Save button.
- Checking ePortfolio Links (Ultra)
- Course and Advisor Groups (Ultra)
- Create an ePortfolio Assignment Submission Link (Ultra)
- Create ePortfolio Course Staff Accounts (Ultra)
- Developmental ePortfolio Set up Steps (Ultra)
- Download External Assessor Contact List (Ultra)
- Faculty of Science Employability Framework Marking of Reflections (Ultra)
- Identify External ePortfolio Assessor Accounts added by Students (Ultra)
- Learn.UQ ePortfolio Links (Ultra)
- Locating Results and Submissions for a Single Student in ePortfolio (Ultra)
- Locating Results for an Assessment (Ultra)
- Overall Average for Outcome by Student (Ultra)
- Overall Average for Outcome by Student with Date Intervals (Ultra)
- Performance Level Counts for Criterion on an Assessment (Ultra)
- Quick Start Guide for External Assessors (Ultra)
- Reporting with Assessor Comments (Ultra)
- Response Reporting on a Form (Ultra)
- Results Analytics with Advanced Filters (Ultra)
- Student performance against each Criterion on an Assessment (Ultra)
- Transfer ePortfolio Assignments to other Staff for Marking (Ultra)
- Transfer marks from ePortfolio to Gradebook (Ultra)
- Update an ePortfolio assignment submission link (Ultra)
- View and Update ePortfolio Assessor Pools (Ultra)
- What is an ePortfolio? (Ultra)
- ePortfolio Assessment Instrument (Ultra)
- ePortfolio External Assessor Change Management Plan (Ultra)
- ePortfolio Journal Counts (Ultra)
- ePortfolio Outcome Set Upload (Ultra)
- ePortfolio Overview and Reports (Ultra)
- ePortfolio Peer Assessment (Ultra)
- ePortfolio Response Reporting with Advanced Filters (Ultra)
- ePortfolio Table of Contents (Ultra)
- ePortfolio assessment map (Ultra)
- ePortfolio documents required (Ultra)
- ePortfolio implementation process (Ultra)
- ePortfolio training options (Ultra)