Multiple Choice with Images (Original)
Video Guide
Create a Multiple Choice Question with Images (YouTube, 3m 1s)
Overview
Questions can be added to a test (refer to the Create a Test guide) or pool (refer to the Create a Pool guide).
Images can be used in answers for a range of question types and question feedback.
Warning: There is a known issue whereby images will no longer be available to students after the deployed test's Display Until date/time has passed. To avoid this occuring, consider using the Due Date option instead, which will mark a test as late if completed after the due date and can be graded manually. For more information, refer to the Deploy a Test guide
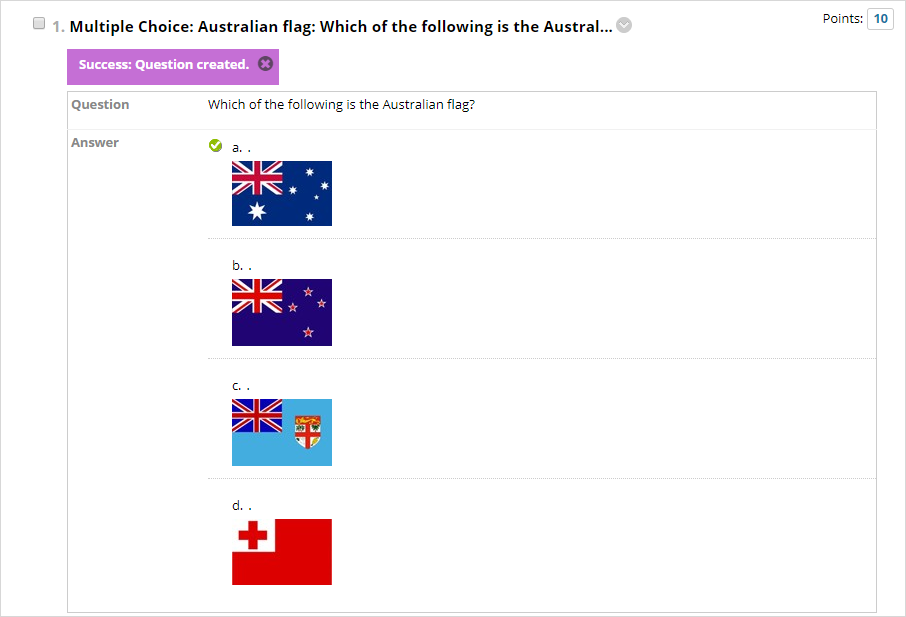
Example question
Which of the following is the Australian flag?
a. |
|---|
Enable the images settings
By default, images are not available to add to answers or feedback.
Note: You are able to add images to the question itself without enabling this setting.
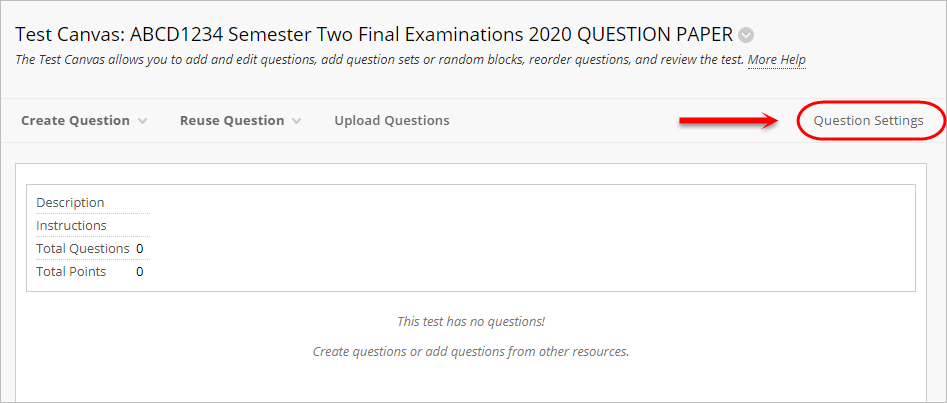
- Click on the Question Settings button.
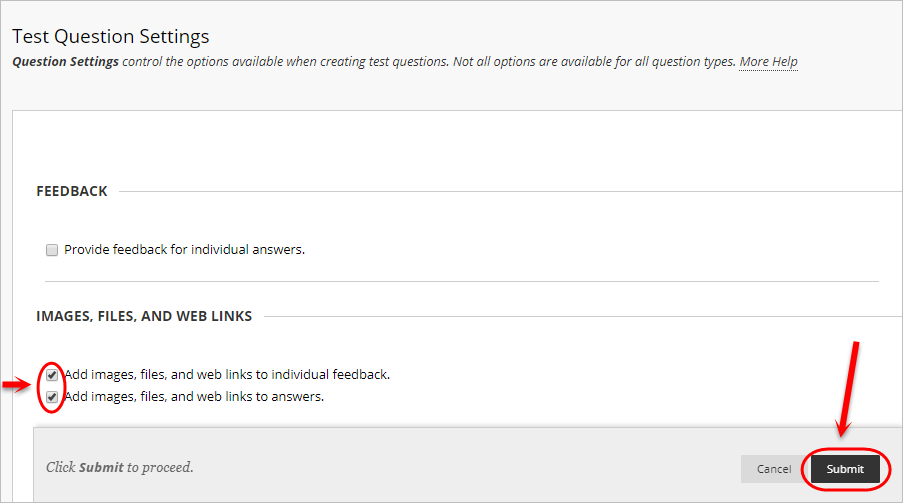
- Check the Add images, files, and web links to individual feedback checkbox.
- Check the Add images, files, and web links to answers checkbox.
- Click on the Submit button.
Tip: After you have finished creating all of your multiple choice questions with images, turn these settings off by unchecking the checkboxes for the options stated in Step 2 and 3 in this section.
Select question type
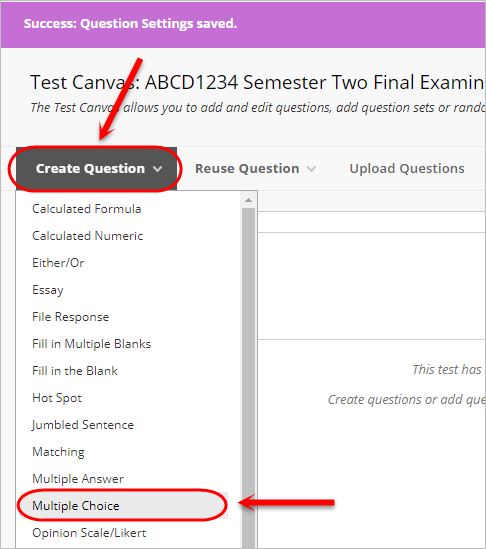
- Click on the Create Question button.
- Select Multiple Choice from the drop-down list.
Question
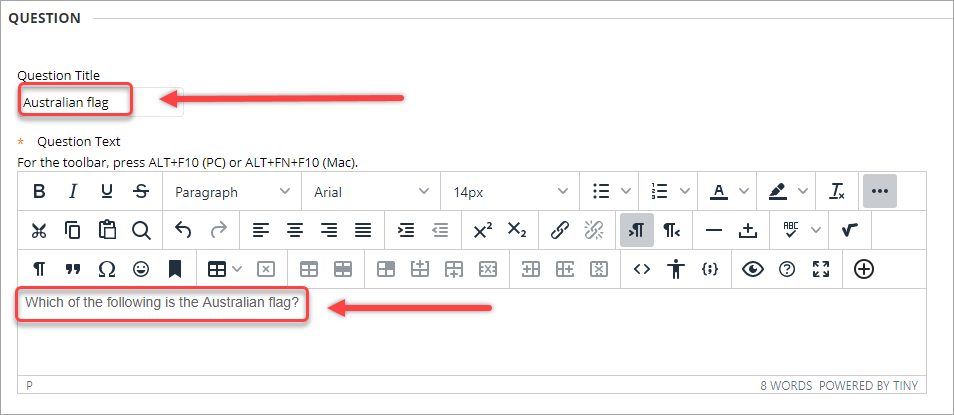
- Optionally, enter a title for the question in the Question Title textbox.
- Enter the question in the Question Text textbox.
- Optionally, to add an image within the Question Text textbox, refer to the Insert an Image using the Text Editor guide.
Options
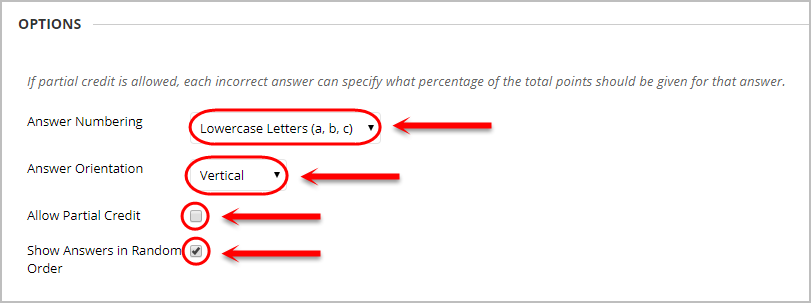
- Select the required option from the Answer Numbering drop-down list.
Note: Ensure you choose the same option consistently.
- Select Vertical from the Answer Orientation drop-down list.
- Do not check the Allow Partial Credit checkbox, as it is not relevant for multiple choice questions.
- Optionally, check the Show answers in random order checkbox to limit collusion/cheating in summative assessments.
Answers
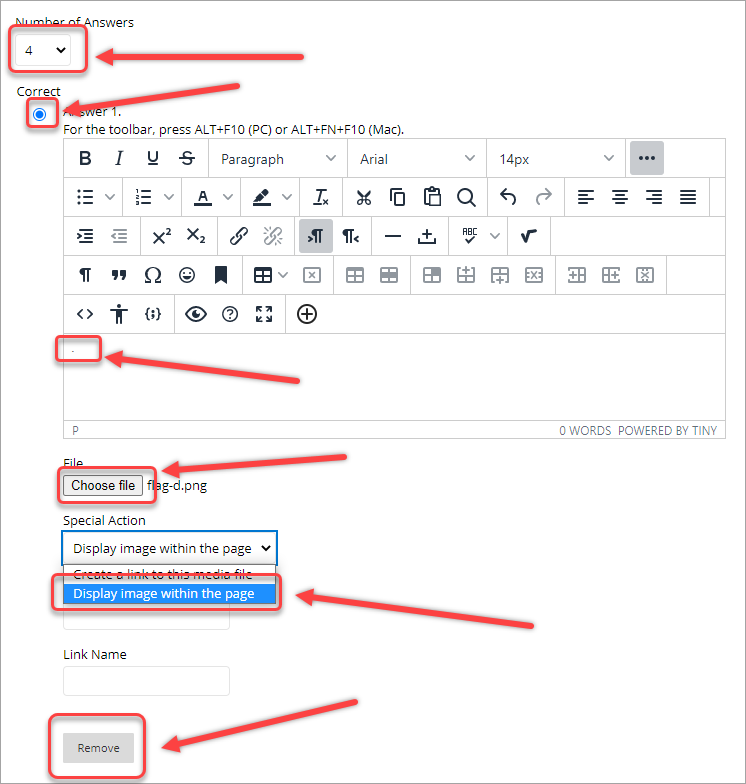
- Select the required number from the Number of Answers drop-down list.
Tip: If you require less than four answer options, click on the Remove button to delete an answer option.
- Optionally, enter text in each Answer textbox.
Important: Answer textboxes require at least one character to be entered. In the case that you want images to be displayed without text, include a fullstop (.) in each answer textbox.
- Click on the Choose File button and select the required image file.
- Select Display image within the page from the Special Action drop-down list.
Note: It is recommended that you compress each image to reduce the file size and image dimensions before including them in the test. For more information, refer to the Create Small File Size guide.
- Select the Correct radio button for the correct answer.
Feedback (optional)
Note: Providing specific correct or incorrect response feedback is optional.
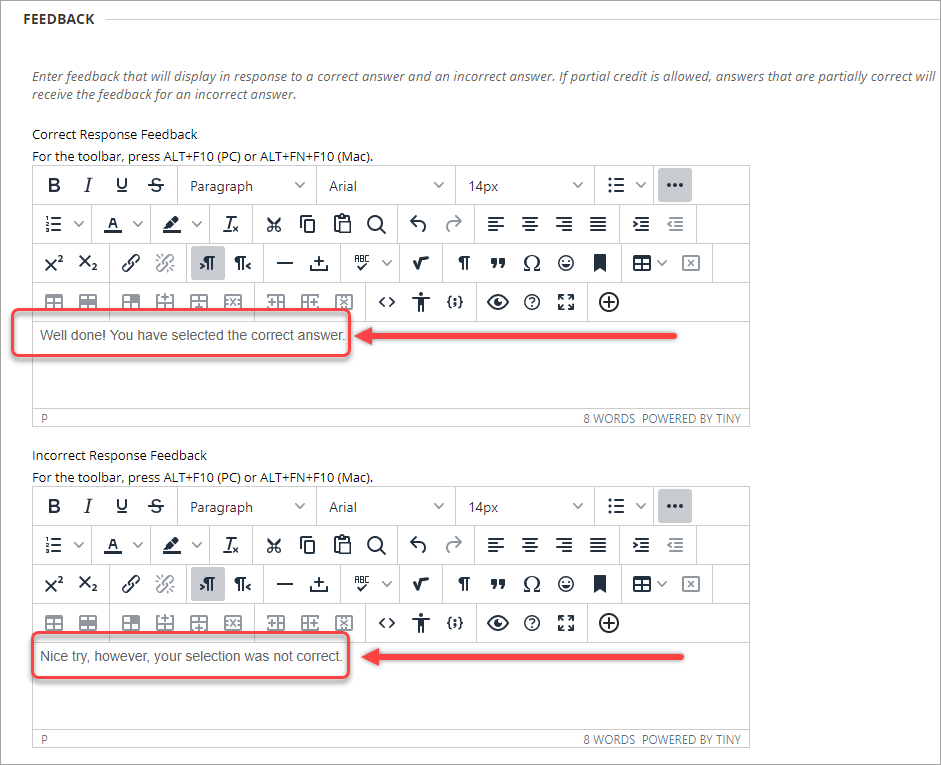
- Enter correct response feedback in the Correct Response Feedback textbox.
- Repeat the process for the Incorrect Response Feedback textbox.
Categories and Keywords (optional)
Adding categories and keywords to questions allows you to search your tests and pools for questions by topic, category, level of difficulty or keyword.
Add a new topic/category/level of difficulty/keyword:
- Click on the Add button.
- Enter a word in the Add Tag textbox.
- Click on the OK button to submit.
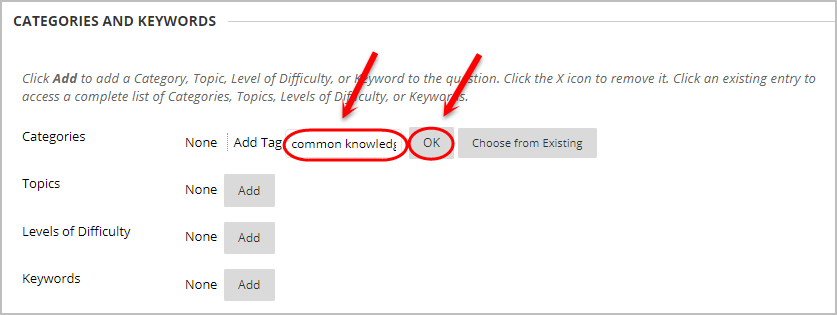
Add an existing topic/category/level of difficulty/keyword:
- Click on the Add button.
- Click on the Choose from Existing button.
- Select a word from the drop-down list.
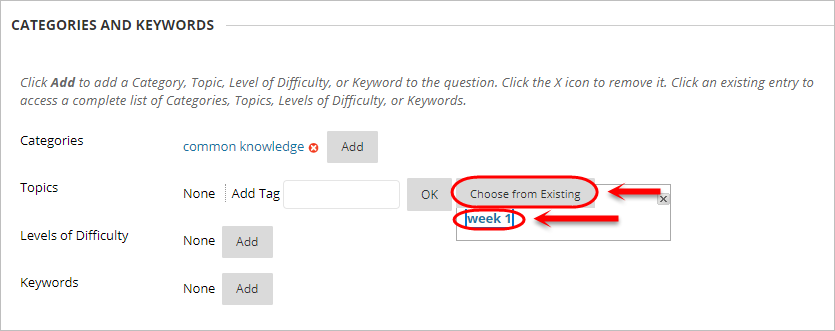
Tip: Click on the (x) button to delete a topic/category/level of difficulty/keyword.
Instructor Notes (optional) and Submitting
- Enter any notes for the marker in the Instructor Notes textbox.
Note: Instructor Notes cannot be viewed by students.
- Click on the Submit button.
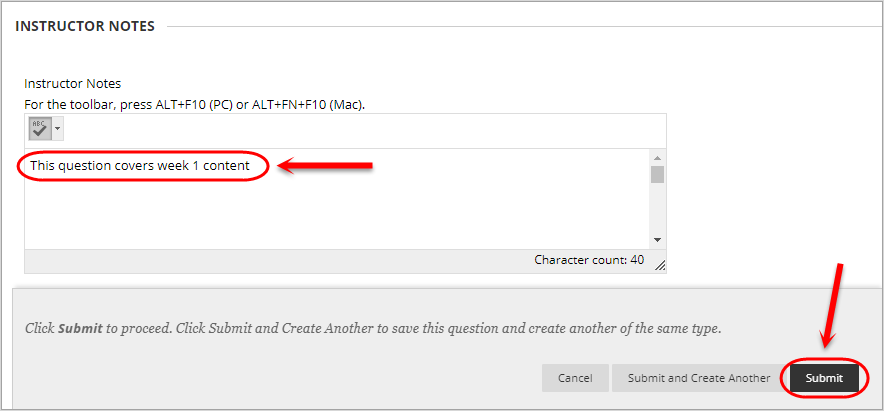
- The question will be added to your test or pool.
