Insert an Image using the Text Editor (Original)
Open text editor
- Open the text editor (can be found in Items, Announcements, Discussion Board, Blogs, Journals, Wikis, Assignments and the Grade Centre).
- Click on the 3 dots to expand the text editor.

Add image from a website
- In your internet browser, locate the image.
- Right-click on it and click on Copy image.
- Paste it into the text editor.
- For more information on editing the image, refer to the Edit image section.
Add image/s from harddrive
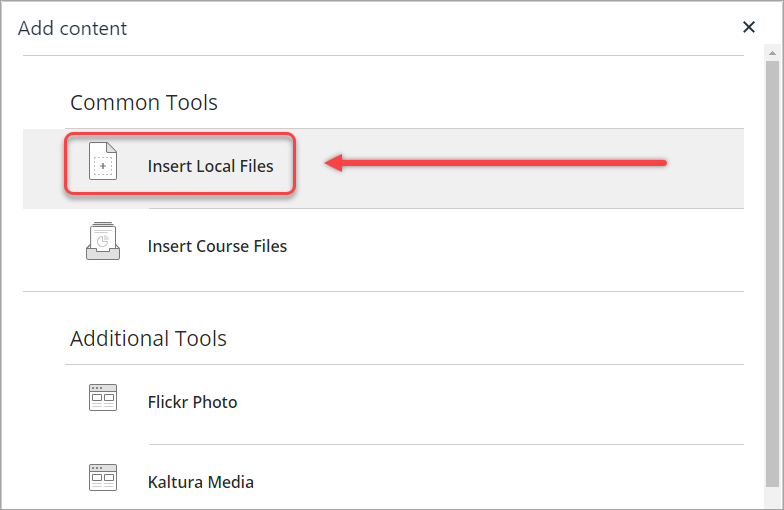
- In the text editor, click on the Add content button.

- Click on Insert Local Files.

- Locate the appropriate image or images (for the latter, using Shift or Control on your keyboard then the left-click on your mouse allows multiple images to be selected).
- Click on the Open button.
- For more information on editing the image, refer to the Edit image section.
Edit image
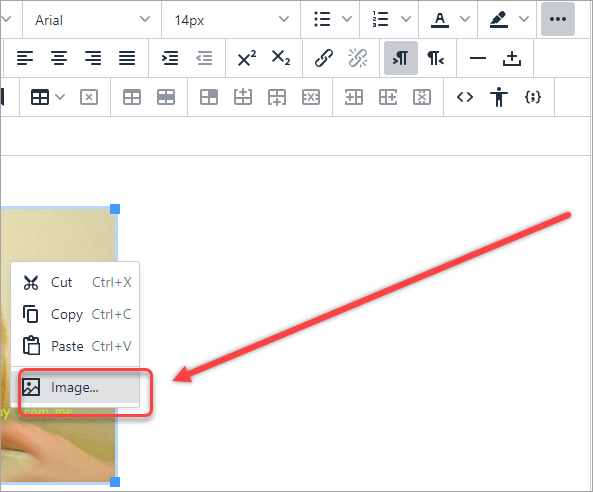
- Right-click on the image in the text editor and click on Image....

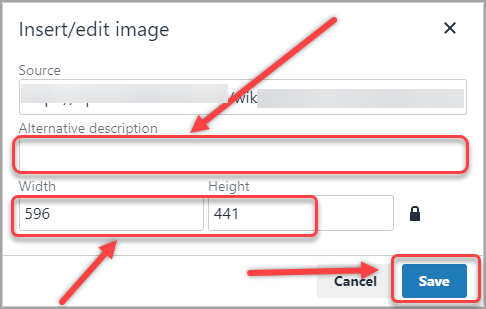
- Enter a description in the Alternative description textbox.
Note: It is recommended that you enter both a description and title for all images for accessibility reasons.
- Enter the width and height (in pixels) in the Width and Height textboxes respectively.
Note: The height will change automatically if the width is changed and vice versa.
Tip: If you are embedding an image within a Blackboard test question, it is recommended that images are limited to a maximum width of 600 pixels and a maximum height of 150 pixels where possible.
- Click on the Save button.

Add a web link to the image (optional)
- Click on the image.
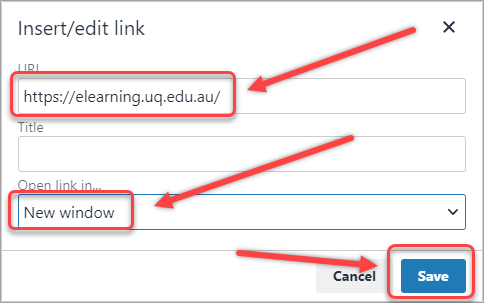
- Click on the Insert/edit link icon.

- Paste the web link in the URL textbox.
- Select New Window from the Open link in... drop-down list.
- Click on the Save button.

Tip: Links can be added to Library catalogue items (such as videos). Every item in the Library catalogue has a stable URL (Record ID) that can be used as a link in Learn.UQ (Blackboard). Refer to the UQ Library catalogue – streaming video guide on the Video and Audio Content tool page
