Create a Column (Original)
Video Guide
Create Column (YouTube, 2m 20s)
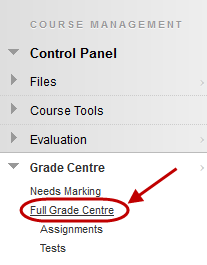
- From the Control Panel select Grade Centre > Full Grade Centre.
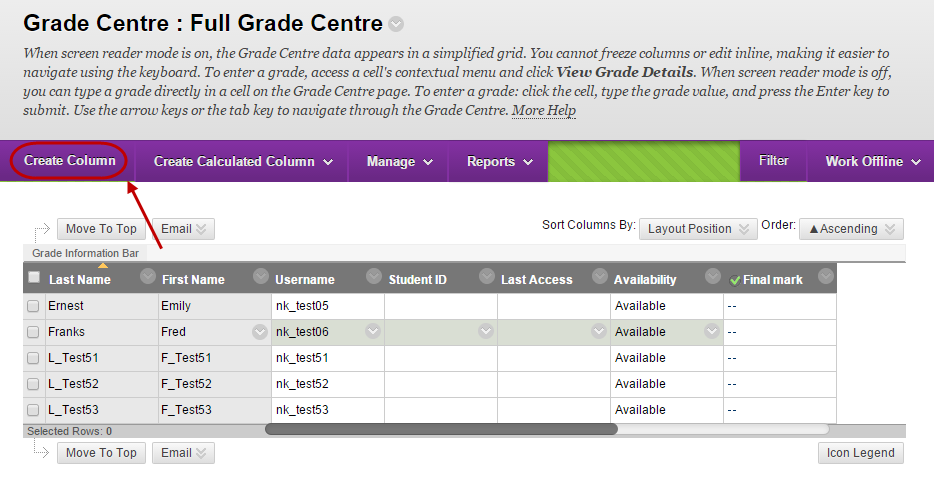
- Click on the Create Column button.
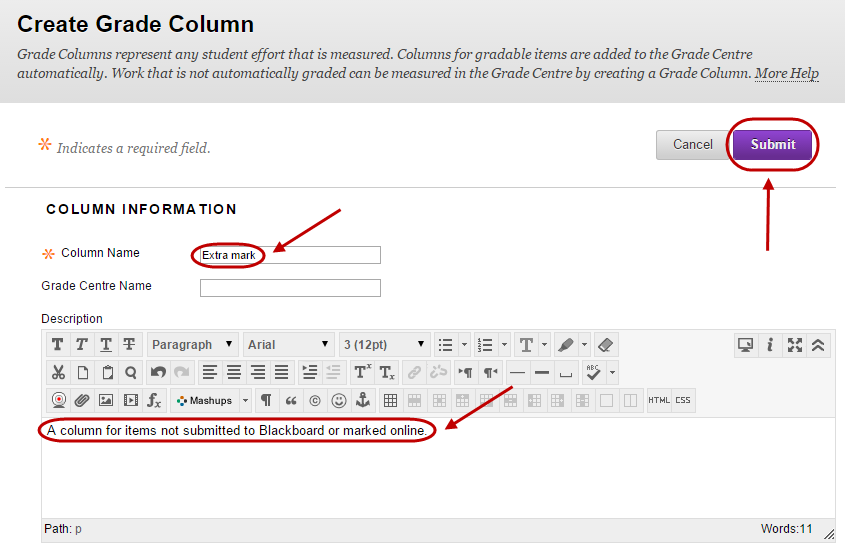
Column Information
- Enter a title for the column in the Column Name textbox.
- Optionally, enter an abbreviated title for the column in the Grade Centre Name textbox.
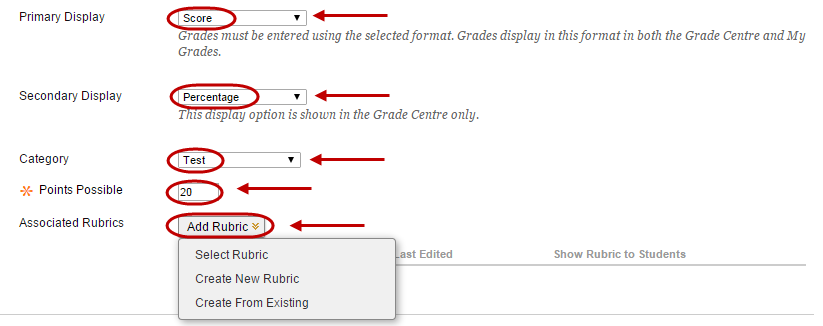
- Select the format the marks must be entered in from the Primary Display drop down list.
- Score: The number entered is displayed.
- Letter: You can enter a letter grade (A+ to E-) or if you enter a number it is converted to a letter grade.
- Text: Any text entered is displayed.
- Percentage: The number entered is displayed with a percentage sign.
- Complete/Incomplete: If any number is entered a green tick is displayed.
- Optionally, select another display option for the marks from the Secondary Display drop down list.
Note: The secondary display option (i.e. percentage) is only displayed in the Grade Centre, it cannot be viewed by students in My Grades.
Note: It is possible to create your own Grading Schema that will be listed as an option in the Secondary Display drop down list. (Refer to the Create a Grading Schema guide).
- Optionally, specify the classification of mark to be stored in the column from the Category drop down list.
Note: Categories can be used to create a Smart View, for example a smart view of all test marks. Categories can also be used in a Weighted Column to apply a calculation to a particular set so columns, for example all tests may be combined to weigh 20% of the final mark.
Note: It is possible to create your own Category that will be listed as an option in the Category drop down list. (Refer to the Create a Category guide).
- Either enter the mark the item is out of in the Points Possible textbox OR
- Click on the Add Rubric button.
- Select Select Rubric from the drop down list.
Note: Refer to the Rubric tool page for instructions on how to set up a rubric.
Dates
- Enter the due date using the Date Selection Calendar and enter the due time using the Time Selection Menu.
Note: The due date and time can be viewed by students in My Grades.

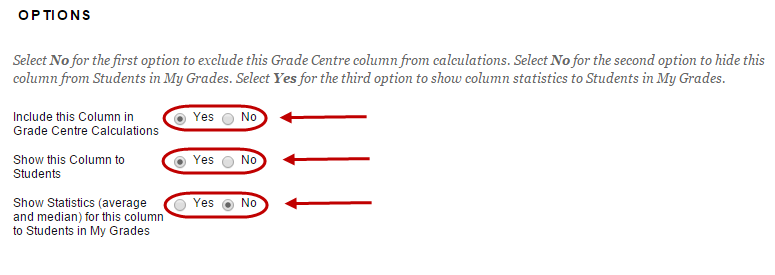
Options
- Select the required Include this Column in Grade Centre Calculations radio button:
- Yes: Makes the column available to for inclusion in calculations.
- No: The column is not available for inclusion in calculations.
- Select the required Show this column to students radio button:
- Yes: Students can view their own mark entered in this column using My Grades.
- No: Students cannot view their own mark entered in this column using My Grades. i.e. Select this option to hide the column from the students until all marks are finalised. (Refer Hiding marks from Students guide)
- Select the required Show Statistics radio button:
- Yes: Students can view the average and median mark for this column using My Grades.
- No: Students cannot view the average and median mark for this column using My Grades.
Submit
- Click on the Submit button.
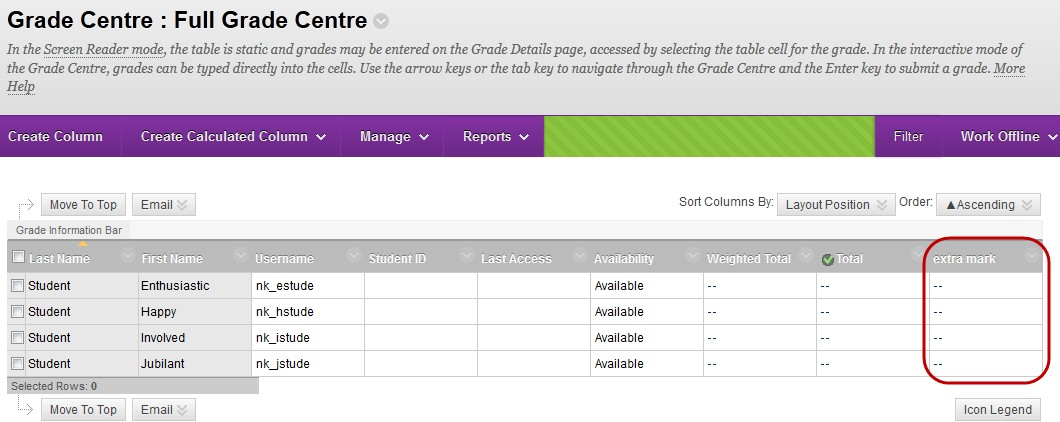
Entering marks
Refer to the Enter marks only and Enter marks, feedback and attach documents guides.
