MCQ Direct Upload to Grade Centre (Original)
Video Guide
Introduction
The email forwarded to course coordinators after paper based MCQ tests have been marked includes a spreadsheet for uploading the results to Grade Centre. This spreadsheet will have the word “blackboard” in the file name to help identify it from the other files received in the email.
Tip: When submitting your MCQ response sheets to ITS make sure you complete the special instructions section if your MCQ answers are worth more than 1 mark, this will save you time when uploading results.
MCQ Marks can be uploaded to Grade Centre by following these steps:
- Create column in Grade Centre.
- Backup Grade Centre.
- Identify correct spreadsheet from MCQ Exam Marking Email.
- Review data in spreadsheet.
- Upload to Grade Centre.
Create column in Grade Centre
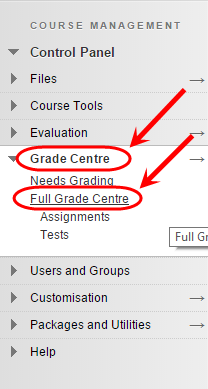
- From the Control Panel select Grade Centre > Full Grade Centre.
- Click on create a column.
![]()
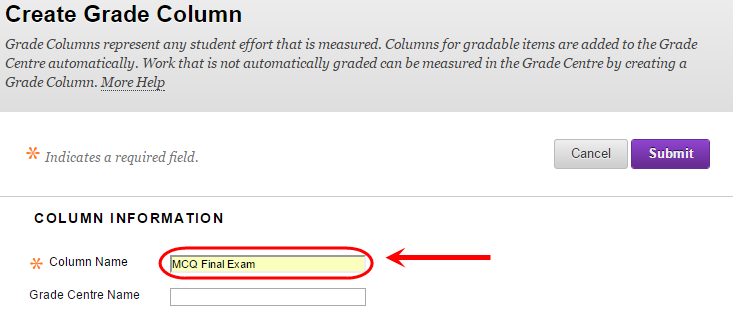
- Enter Column Name.
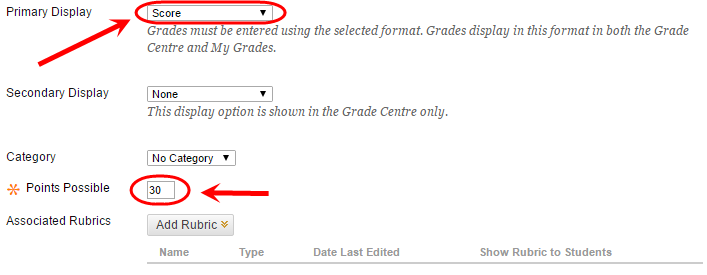
- Set Primary display as Score.
- Set Points Possible to value of your exam.
- Select the required Include this Column in Grade Centre Calculations radio button:
- Yes: Makes the column available to for inclusion in calculations.
- No: The column is not available for inclusion in calculations.
- Select the required Show this column to students radio button:
- Yes: Students can view their own mark entered in this column using My Grades.
- No: Students cannot view their own mark entered in this column using My Grades. i.e. Select this option to hide the column from the students until all marks are finalised. (Refer Hiding marks from Students guide)
- Select the required Show Statistics radio button:
- Yes: Students can view the average and median mark for this column using My Grades.
- No: Students cannot view the average and median mark for this column using My Grades.
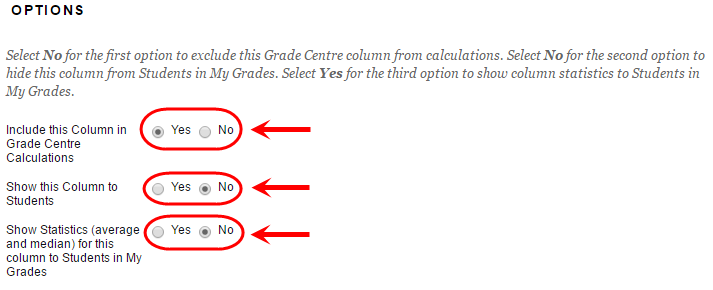
- Click on Submit button.
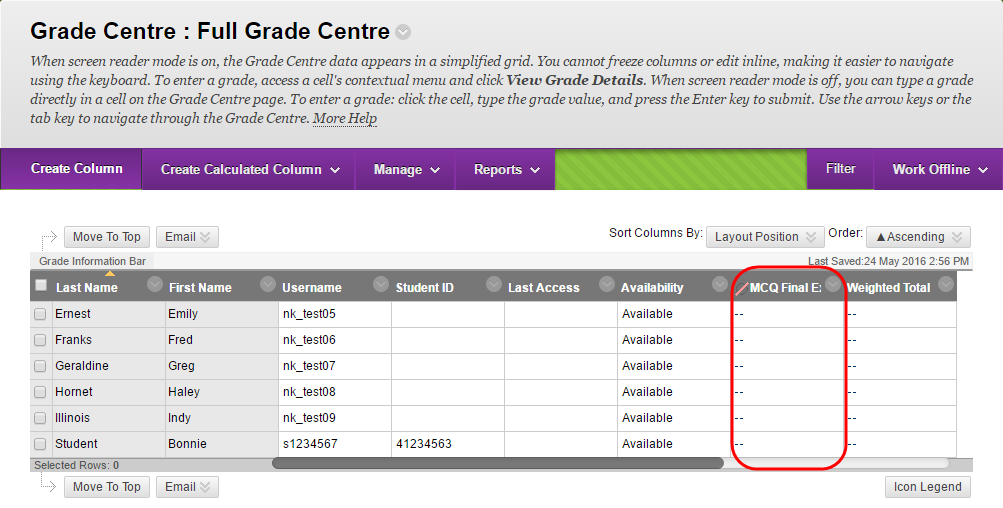
Back up Grade Centre
Warning: Before uploading MCQ data, download a backup copy of Grade Centre.
- From the Control Panel select Grade Centre > Full Grade Centre.
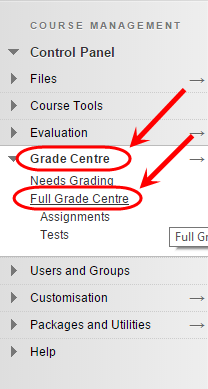
- Hover your mouse on the Work Offline button.
- Select Download from the drop down list.

- Select your Data option for download.
- Select Full Grade Centre.
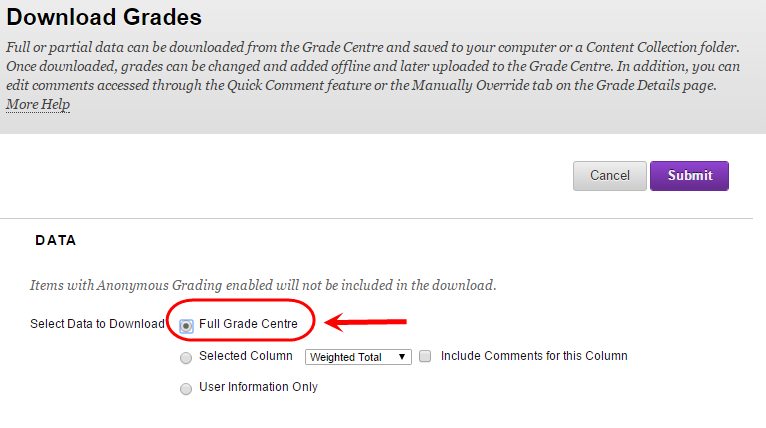
- Choose Comma Delimiter Type to open directly into an Excel spreadsheet.
- Information in hidden columns in your Grade centre can be included by selecting Yes, if not needed, select No.

- Click on the Submit button.
- Click the Download button.

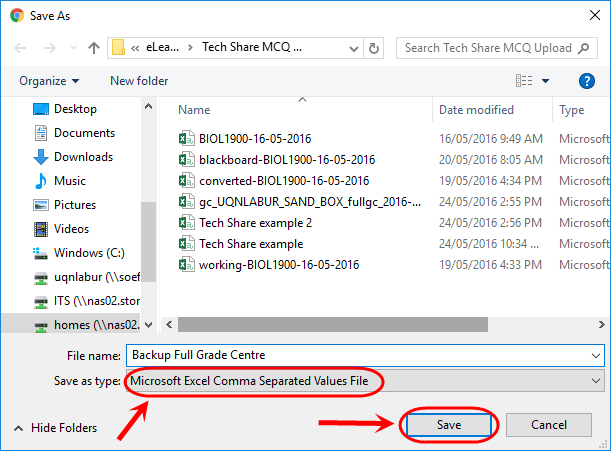
- Save to your computer, Save as type: Microsoft Excel Comma Separated Values File (.CSV).
- Open spreadsheet
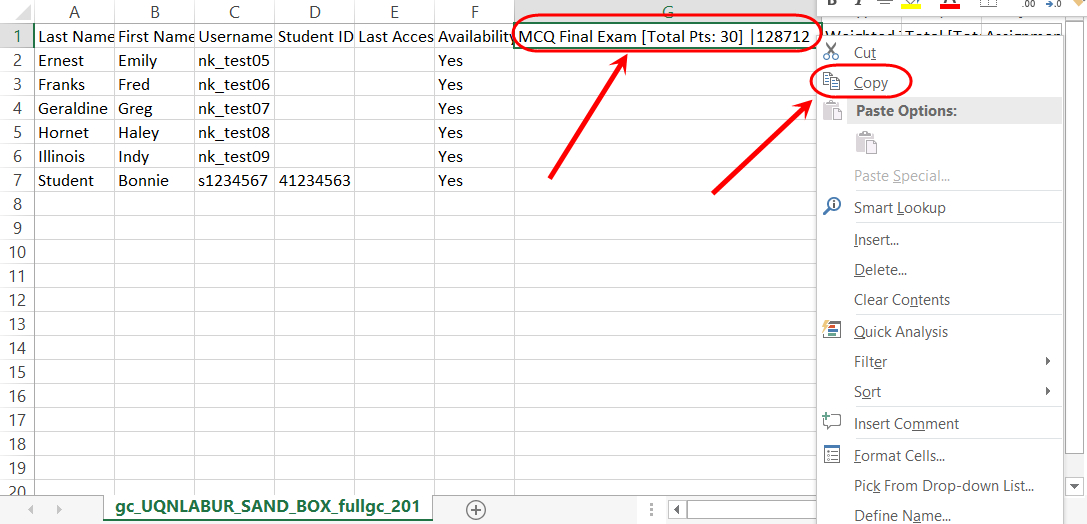
- Click on the heading of the column you created.
- Right click and select Copy.
Identify correct spreadsheet from MCQ Exam Marking Email
- The email you receive from MCQ Exam Marking will contain a number of files.
- The file you will require for direct upload to Grade Centre contains the following: blackboard-course code-date (eg. blackboard-ABCD1234-20-05-2016).

Review data in spreadsheet
- Open spreadsheet titled blackboard-ABCD1234-20-05-2016 in Microsoft Excel.
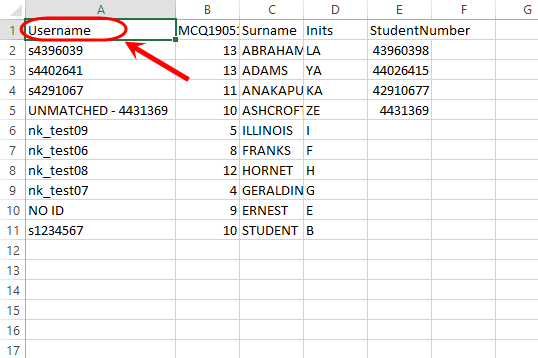
- In Row 1 you will see the following headings:
- Username (this will be the student’s username that they use to log into blackboard eg. s1234567).
- MCQdate-time eg. MCQ20052016-163351 (This column is the Total marks column and is given a unique identifier according to the date and time the MCQ sheets were marked).
- Surname (Student’s surname as recorded on MCQ mark sheet).
- Inits (This is the student’s initials as recorded on the MCQ mark sheet).
- Student Number (This column contains the student’s student number as recorded on the MCQ mark sheet eg. 12345678).
Warning: Username has been generated from the provided student numbers on the MCQ response sheets.
UNMATCHED – (number student provided): Is given to a student that has entered their student number incorrectly on the MCQ response sheet.
‘NO ID’: Is given to student who fails to record a student number on their MCQ response sheet.
- You can sort your spreadsheet to identify those students that have the username’s ‘UNMATCHED’ or ‘NO ID’.
- To sort spreadsheet by ‘Username’ select Cell A1.
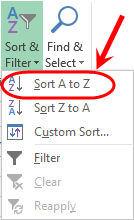
- Click the Sort & Filter button in the Home ribbon of Excel.

- Click on Sort A to Z under Sort & Filter.
- This will help you identify the results that will not upload to Grade Centre.
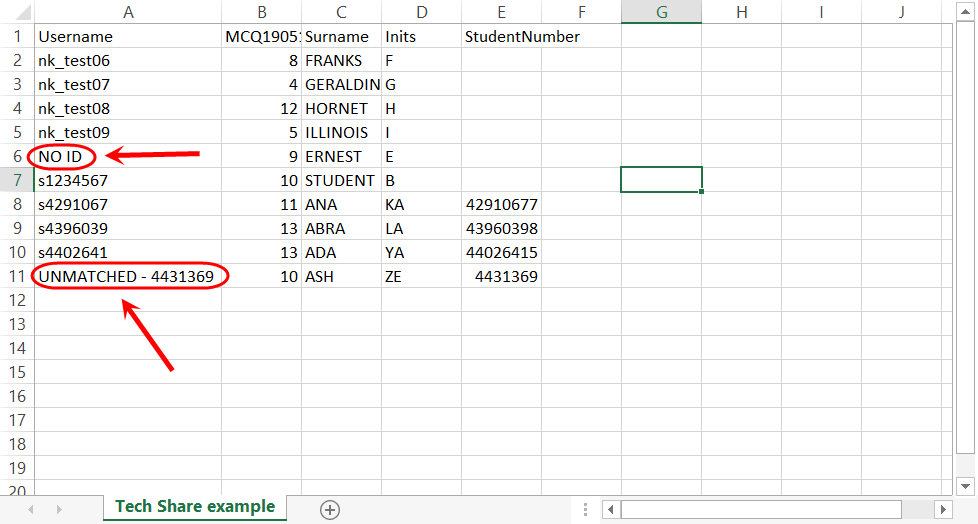
- Before uploading select column Labelled MCQ located in cell B1.
- Right click on column and paste heading into B1.
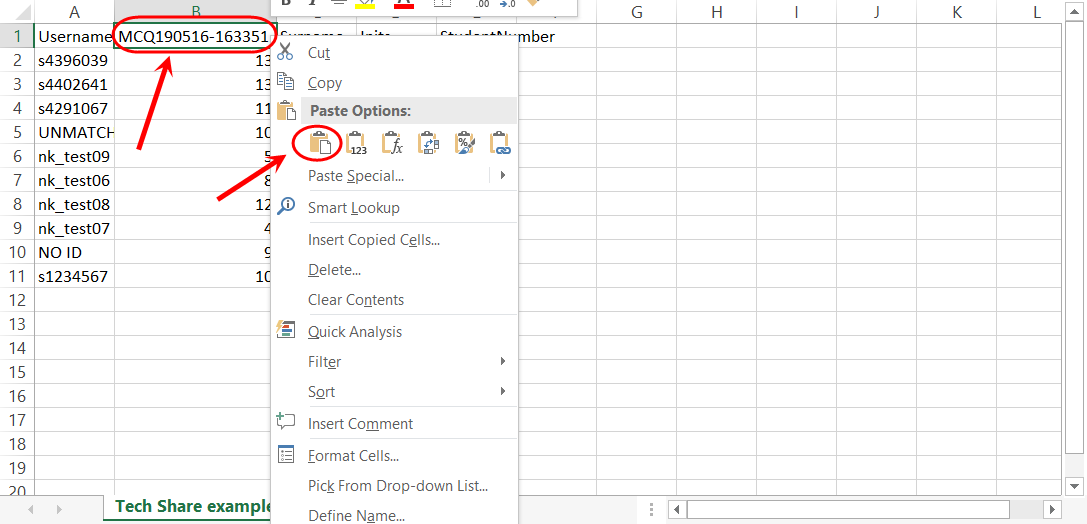
- Your column will now have the heading of your Grade Centre column.
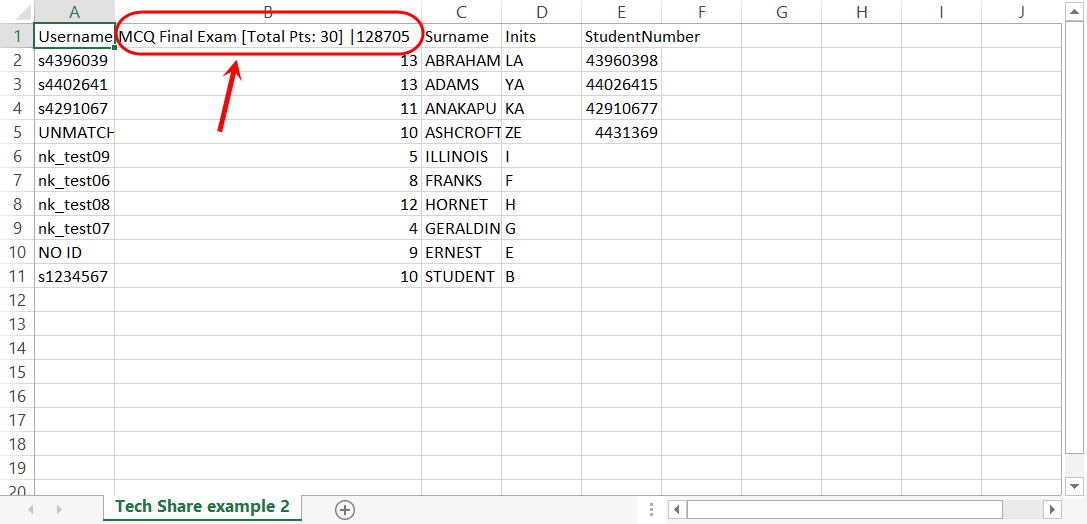
- Save spreadsheet to desktop.
Upload to Grade Centre
- From the Control Panel select Grade Centre > Full Grade Centre.
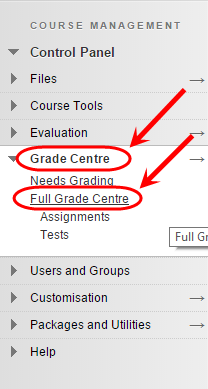
- Click on Work Offline button.
- Click on Upload from the drop down box.

- Click on the Browse My Computer button and locate the spreadsheet file (eg. Blackboard-ABCD1234-20-05-2016.csv).
- Click on the Open button.
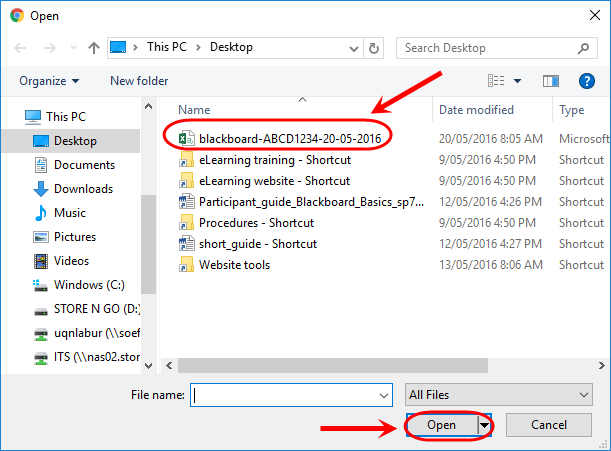
Warning: The spreadsheet file must be a Microsoft Excel Comma Separated Values File (.CSV).
- Check you have selected the correct file.
![]()
- Click the Submit button.
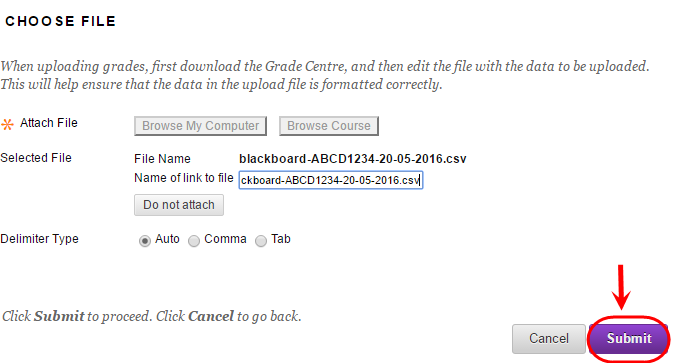
- The Upload Grades Confirmation page will appear.
- In the Upload column place a tick next to the row that contains the MCQ Final Exam. Uncheck all other boxes.
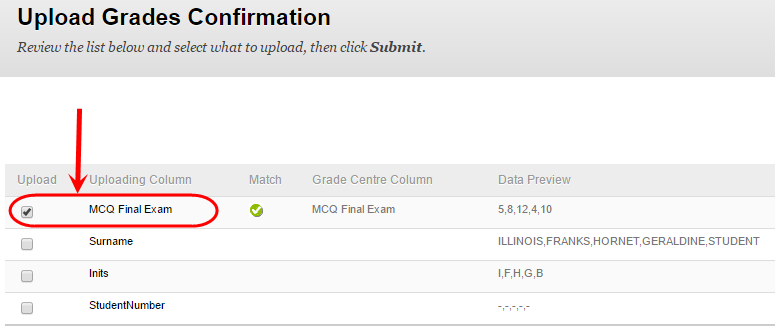
- Click the Submit button.
Warning: A red error box at the top of screen will appear advising those Usernames that do not match up with those in Grade Centre. You will need to enter these results manually. (The below image is an exaggerated example).
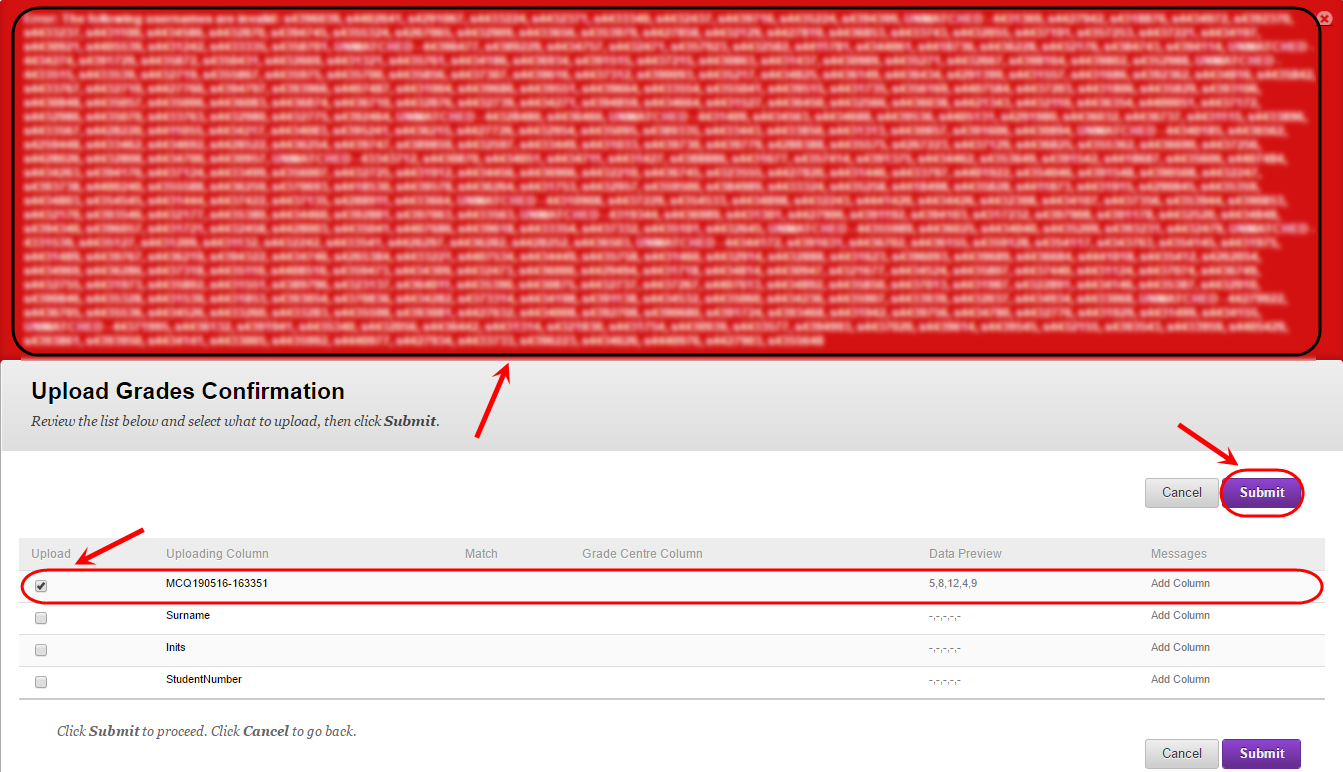
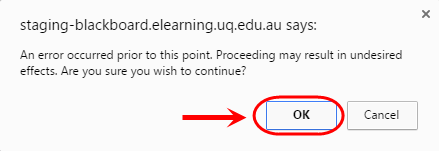
- If you had a red error box display, a warning box will appear click the OK button to continue.
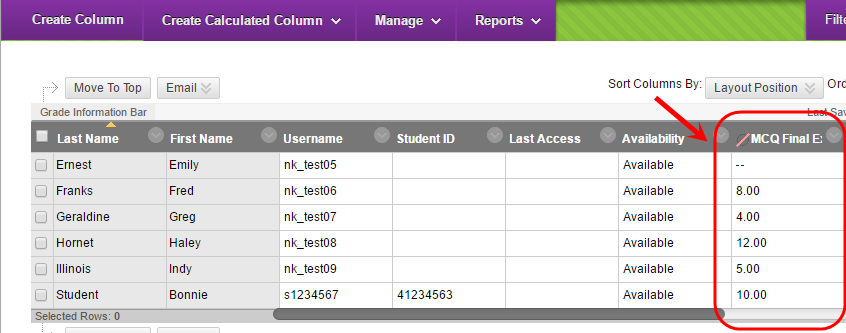
- The MCQ Final Exam column will now be populated with the results.
