Mark Gradebook history report (Ultra)
What is the Mark history report?
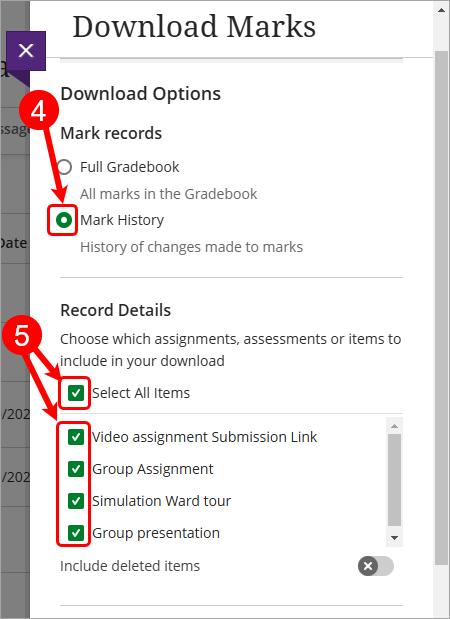
The Mark history report is a report available within Gradebook that will give you a complete history of all the marks attributed to the whole Gradebook or individual columns within Gradebook.
Why would I use the Mark history report?
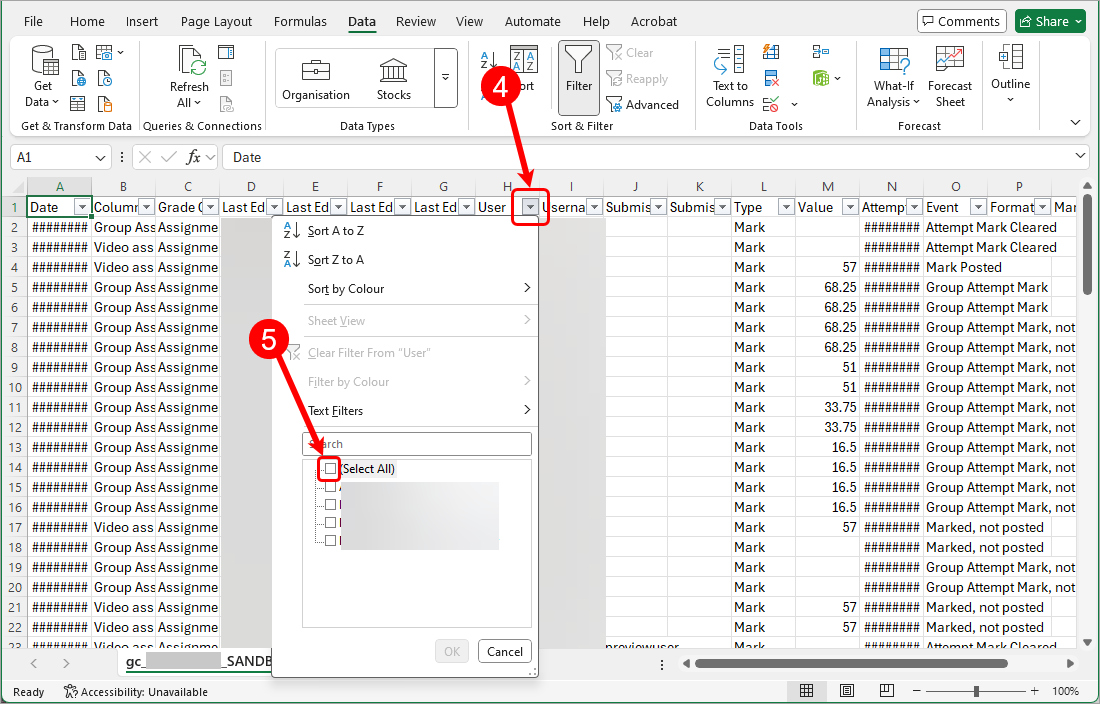
The mark history report allows staff to review the complete history of marks within Gradebook. This can be used to investigate descrepencies within Gradebook or to check if marks have been changed without authorisation. It can also be used to review the marks of students that have withdrawn from the course.