Enter Marks using a Rubric (Original)
Video Guide
Mark non-submission work using a rubric (YouTube 1m 47s)
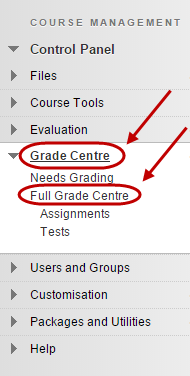
- From the Control Panel, select Grade Centre > Full Grade Centre.
Note: You can also create Smart Views so you can select to view only a particular tutor group/s. For more information, refer to the Smart Views for tutorial, seminar and practical groups guide).
- Create a new column.
Note: For more information, refer to the Create a column guide.
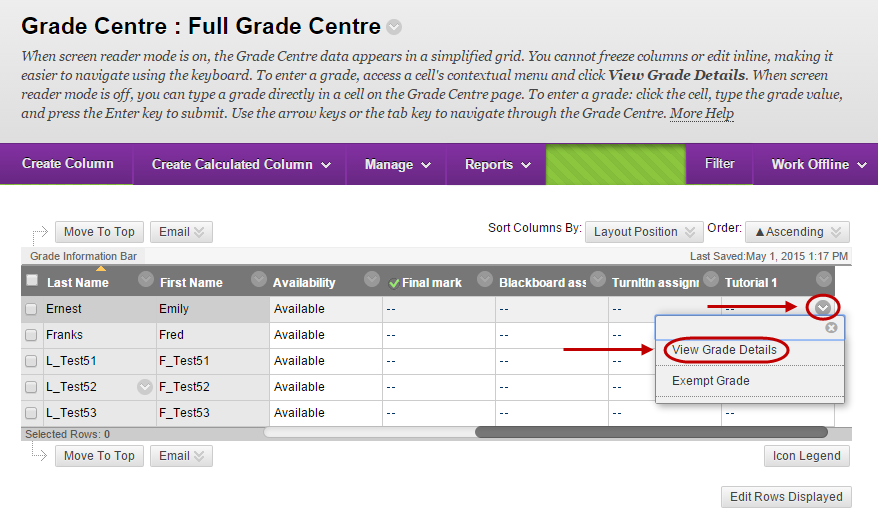
- Hover on the required cell and click on the arrow button.
- Select View Grade Details from the drop-down list.
Rubric
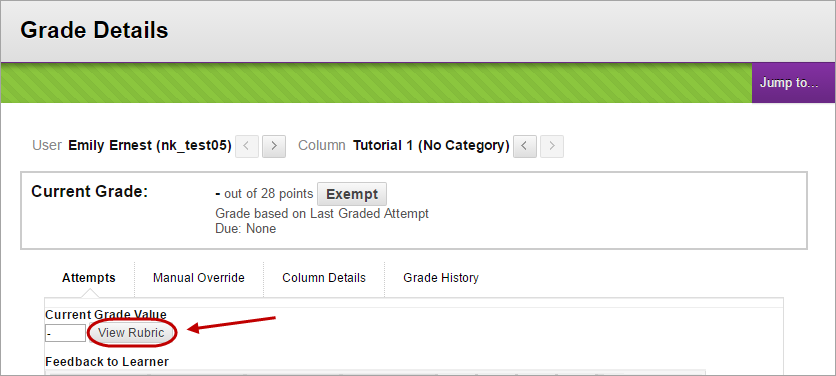
- Click on the View Rubric button.
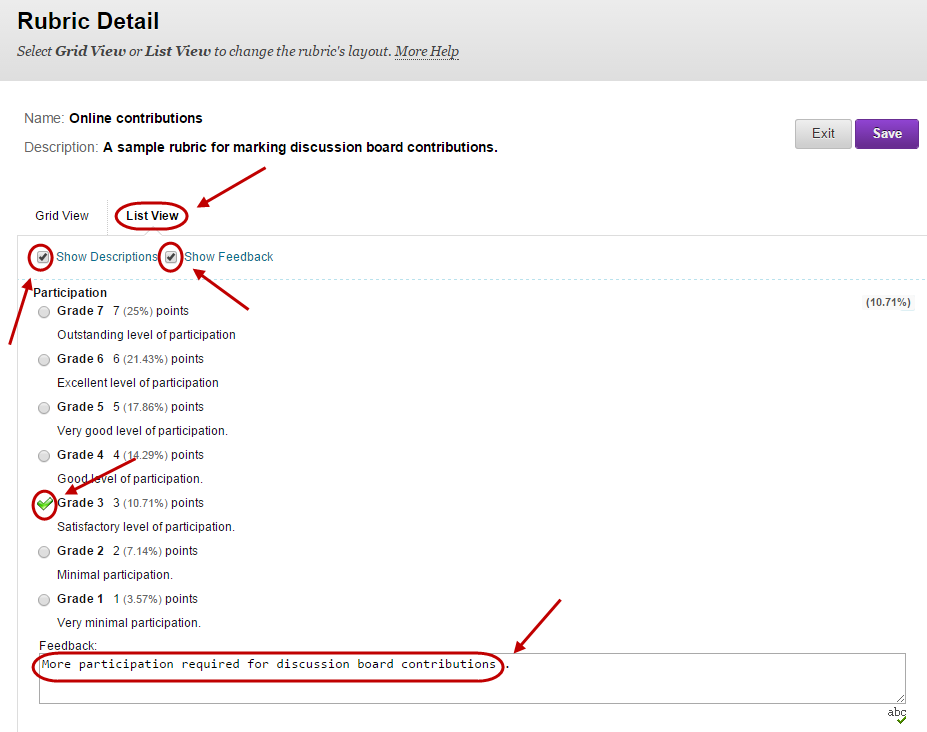
Note: The rubric can be viewed in either Grid View or List View.
Note: In the following example, a Points Range rubric has been used.
- Click on the List View tab.
- Optionally, check the Show Descriptions to display the criteria descriptions.
- Optionally, check the Show Feedback if you wish to give feedback for individual criteria.
- Select the radio of the standard you wish to award.
- If a Points Range rubric has been used select the mark you wish to award from the drop-down list.
- Optionally (if the Show Feedback checkbox is selected), enter feedback on the student’s achieve for that criteria.
Overall feedback
Total
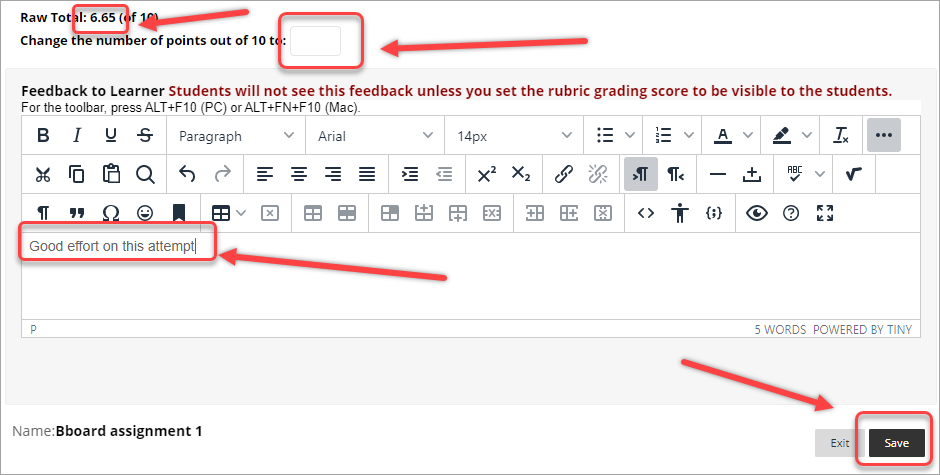
- The marks are automatically totalled and shown as the Raw Total.
Note: The Change the number of points out of X to textbox allows you to override the automatic total and enter another mark. If you use this option and then change marks in the criteria section, the mark entered in the Change the number of points out of X to textbox does not automatically update.
- Enter feedback in the Feedback to Learner textbox.
- Click on the Save button.
Current Grade Value
- The Raw Total from the rubric will automatically be entered in the Current Grade Value textbox.
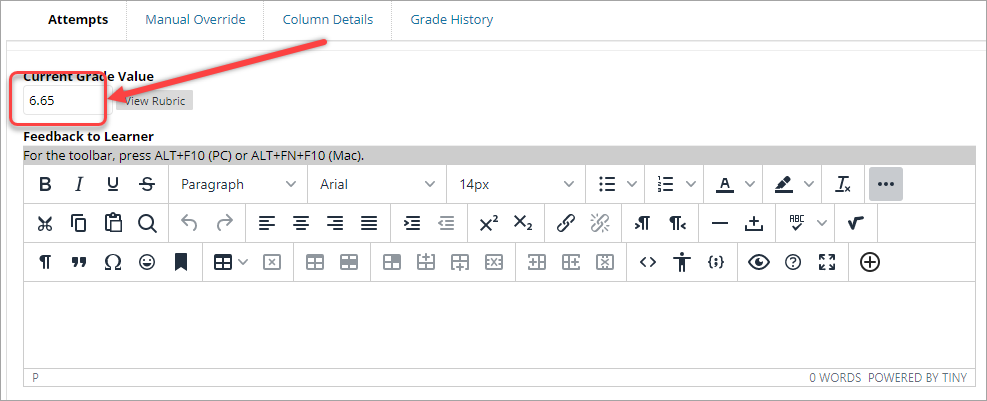
- Click on the Save button.
Grading Notes
- If required, enter marking notes in the Grading Notes textbox.
Note: Information entered in this textbox is not viewable by students.
- Click on the Save button.

Navigate to next student
- Click on the left or right arrow buttons to navigate to the next student
- Alternatively, click on the Jump to… button.
- Select the required student from the User drop-down list.
- Click on the Go button.

