Create a Padlet
3. Modify the Padlet Settings
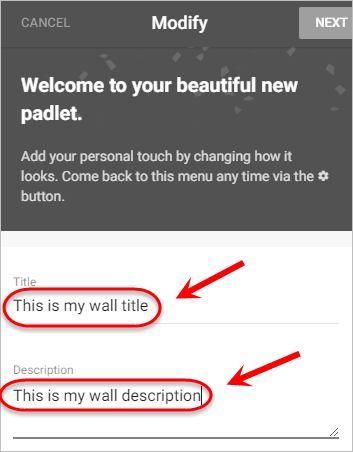
- Enter a title and description for your Padlet.
Tip: Include the question or topic for students to discuss as the title and instructions on how to participate in discussion as the description.
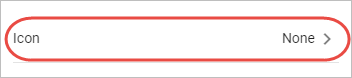
- Optionally, select Icon to choose an icon.
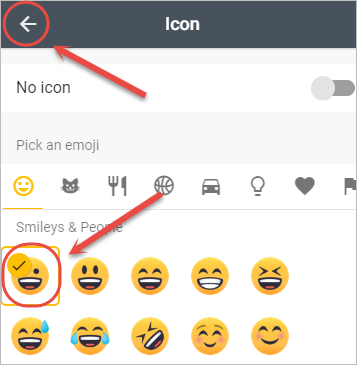
- Optionally, select your desired icon and then click on the arrow to go back.
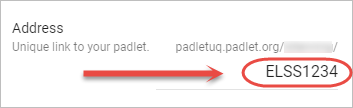
- Change the address of your padlet to a relevant title, such as your course code or weekly topic (i.e. ELSS1234).
Note: The address should be short and simple as it will become part of the link you distribute to students (e.g. padletuq.padlet.org/elearninguq/ELSS1234).
Tip: Use your course code as the Padlet address and reuse the same Padlet each week after exporting/deleting the content. Refer to the guide Exporting and Reusing a Padlet for more information.
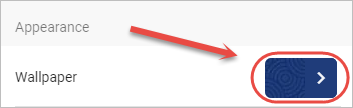
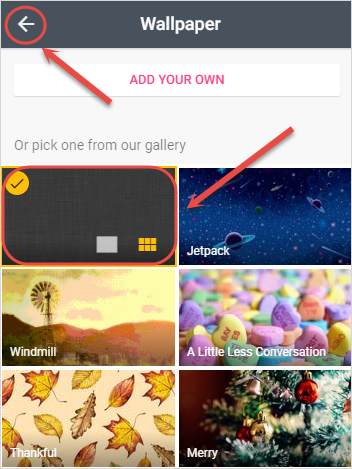
- Optionally, click on the default wallpaper button to choose a different wallpaper.
- Optionally, select your desired wallpaper and then click on the arrow to go back.
Tip: Choose a simple Wallpaper that won't distract students.
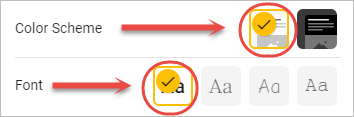
- Optionally, select either light or dark for the Colour Scheme options.
Tip: If you have a dark wallpaper, select the light colour scheme, and vise vera.
- Ensure the first font style is selected, as it appears best on all screens.
- Optionally, turn on Attribution if you would like author names above each post.
Note: Author names will only appear if students login via their Office365 account to access the Padlet. Refer students to the student guides on how to Access PadletUQ on a Smart Device and Access PadletUQ on a Computer.
- Select FIRST for New post position if you would like new posts to appear first.

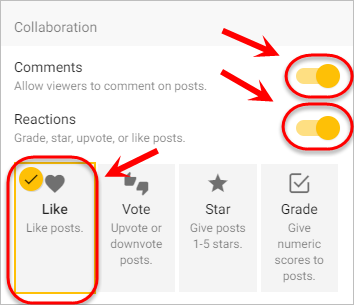
- Optionally, turn on Comments if you would like users to comment on other posts.
- Optionally, turn on Reactions if you would like users to be able to Like, Vote, Star or Grade posts, ensuring the selected option has a yellow tick.
Reactions
|  | |||
| Ideal For | Liking a post to show positive feelings. | Voting a post to show agreement or disagreement. | Rating a post based on a 1-5 star rating to show quality. | Grading a post based on a numeric score to show quality. |
| Example | View an Example | View an Example | View an Example | View an Example |

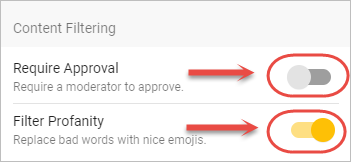
- Ensure Require Approval is turned OFF.
- Optionally, turn on Filter Profanity to have common swear words replaced by emojis.
- Click on the NEXT button to complete the process.
![]()
- Click on the START POSTING button to close the side panel.