Create a Turnitin standard rubric (Ultra)
Turnitin standard rubric:
- uses percentages for marking each criterion and each level of performance/scale.
- used to mark an assignment according to its weighting (e.g. 30 points or percent or out of 100 points or percent).
- can be used for the UQ 1-7 grading by using the percentage midpoint in the range for each grade.
Note:
- Turnitin rubrics are different from Blackboard rubrics. It is not possible to use a Blackboard rubric in Turnitin.
- The Marks / Rubrics / Grading Forms Overview guide provides information on the different types of rubrics available in Turnitin.
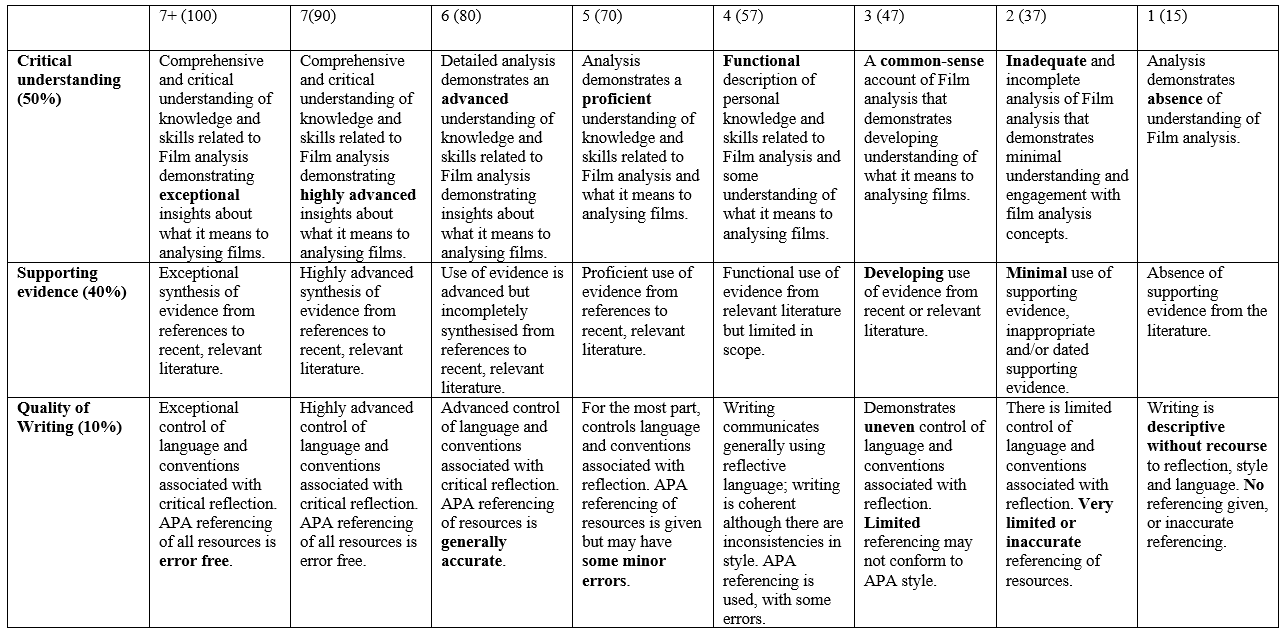
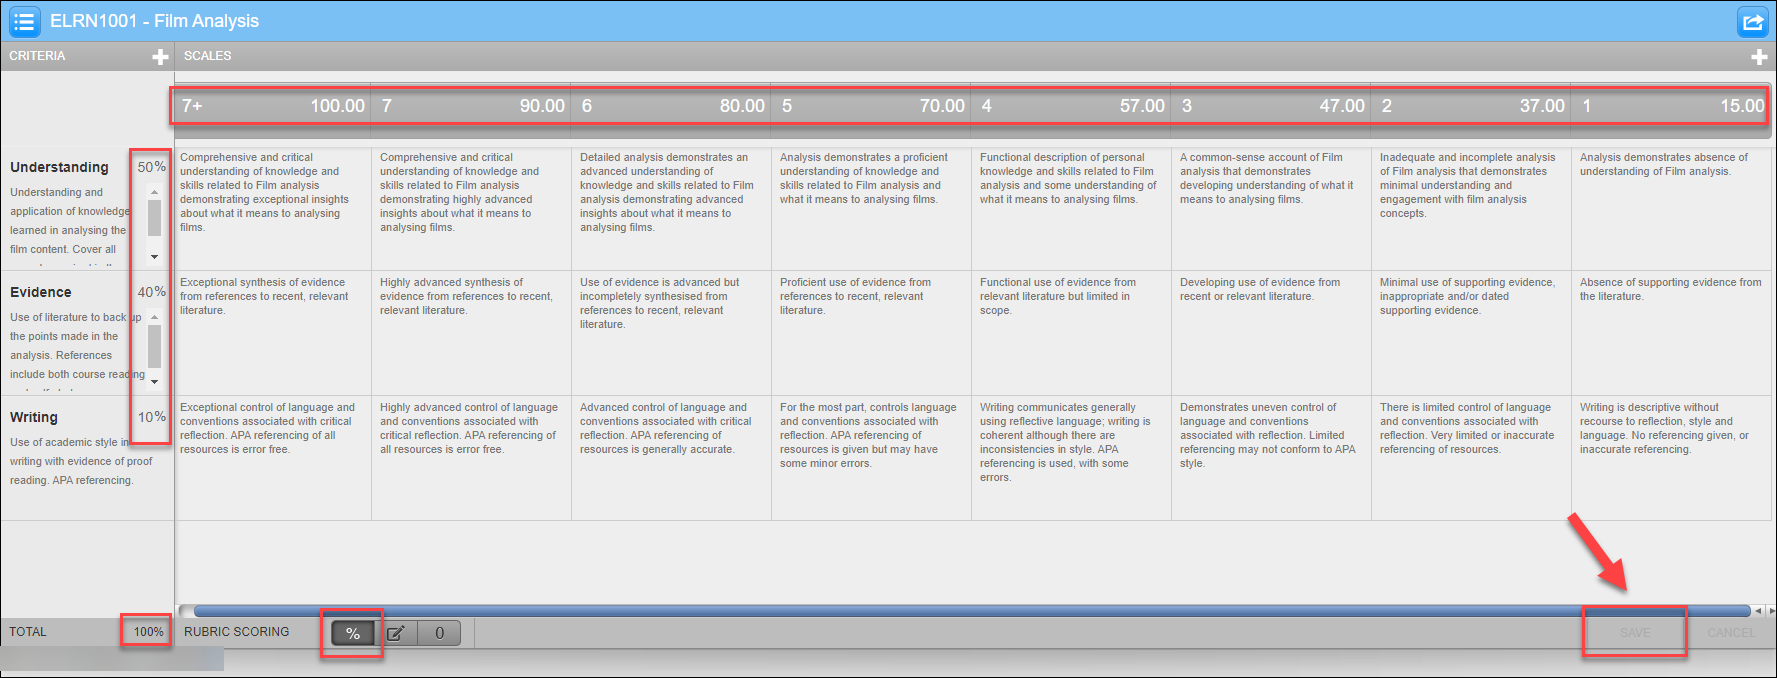
Example UQ 1-7 grading standard rubric
- The below rubric is an example of how a Turnitin standard rubric may be structured.
- The percentage for each grade (1 - 7+) is the midpoint of the range for each grade in the UQ 1-7 grading schema.
- The Grade 3 range for courses varies between schools and is usually either 45% - 49% (midpoint 47) or 47% - 49% (midpoint 48).
- The performance level of 7(90) is optional to allow more precision in marking as the range between 80%-100% is large.
- You can add as many columns as needed. The example illustrated is the most commonly used at UQ and has proved to be very efficient for marking and for students' feedback. For example, add a 0 (0) column at the end of the table for submissions that fail to address the criteria.
- A copy of the sample rubric below can be downloaded here.
Create a Turnitin standard rubric
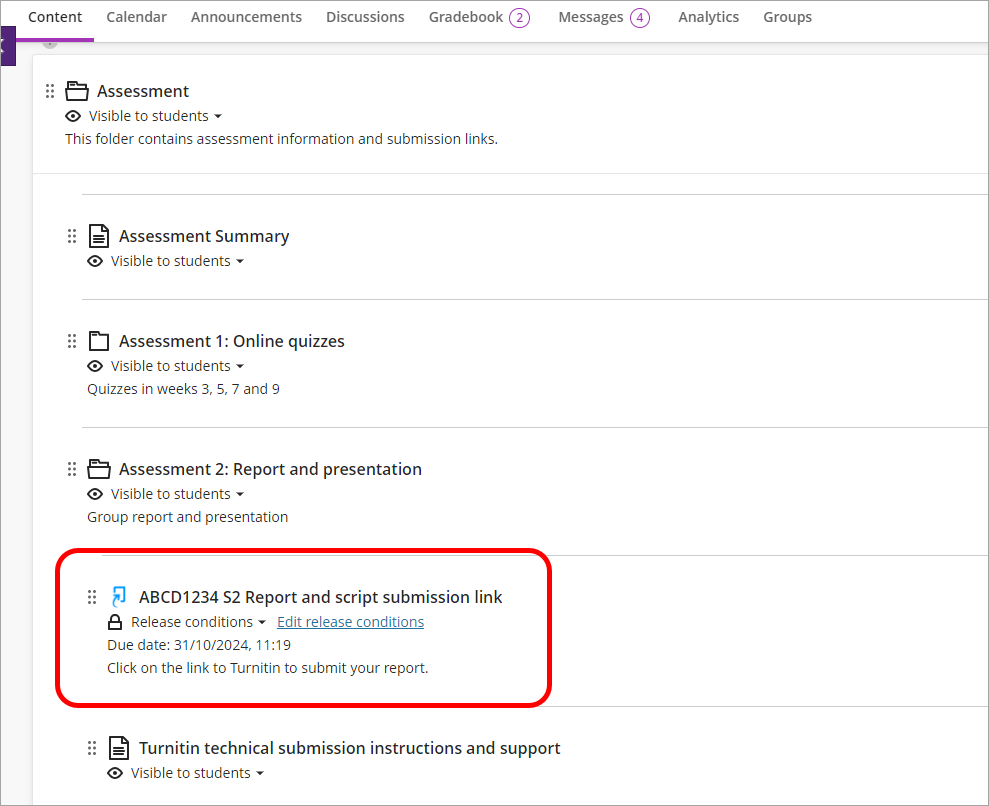
To create a standard rubric, you need to create the submission link. Three main steps are involved:
- Create a Turnitin assignment submission link
- Create a rubric and attach the rubric to the submission link
Step 1: Create a Turnitin assignment submission link
Refer to the Create a Turnitin assignment submission guide for step-by-step instruction.
Step 2: Create a rubric
Note: You should have all the rubric content in a Word document or PDF to upload to the relevant Assessment folder in Learn.UQ for students.
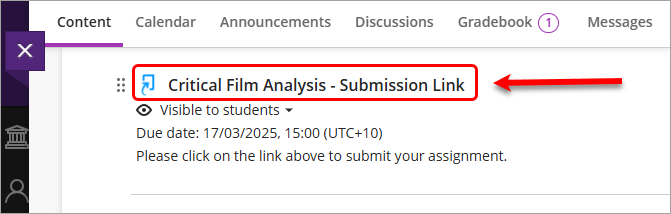
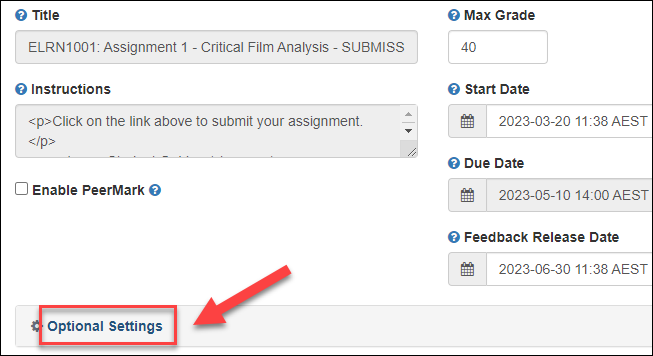
- Click on the relevant Turnitin submission link.
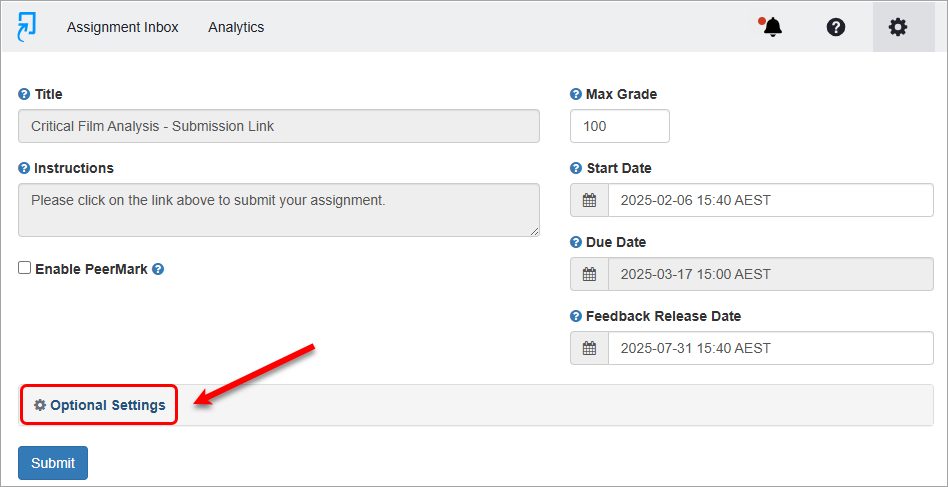
- Click on the cog button to access the submission link settings.

- Click on the Optional Settings button.
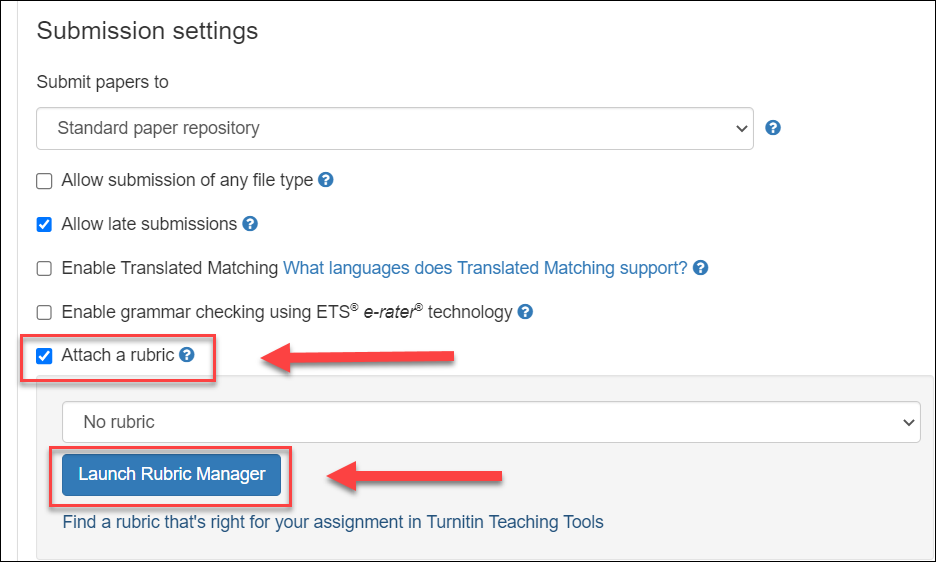
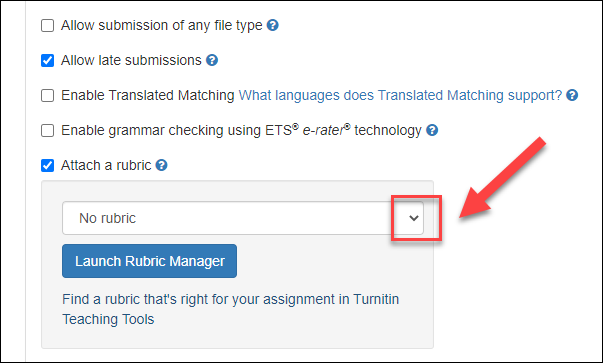
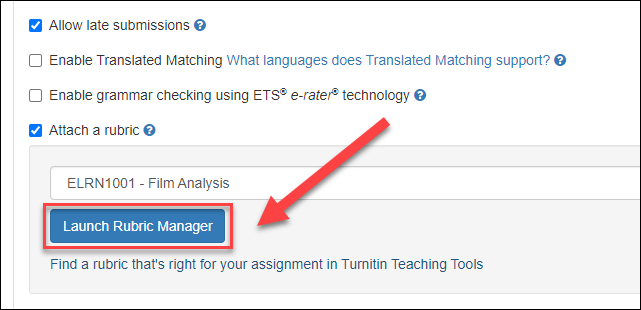
- Check the box Attach a rubric
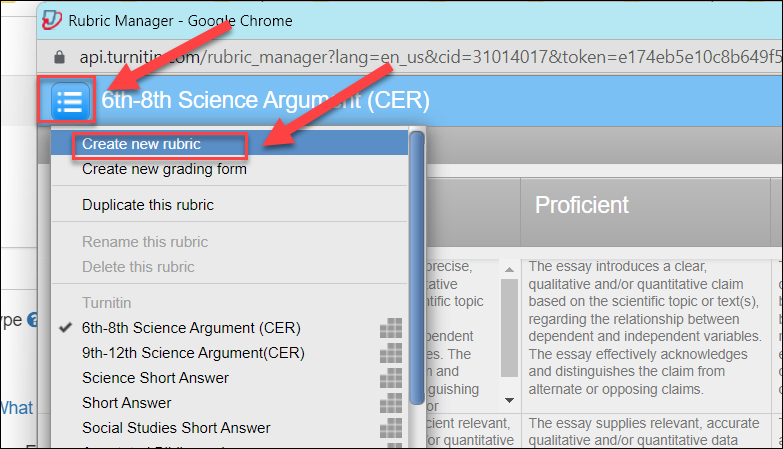
- Click on the Launch Rubric Manager button.
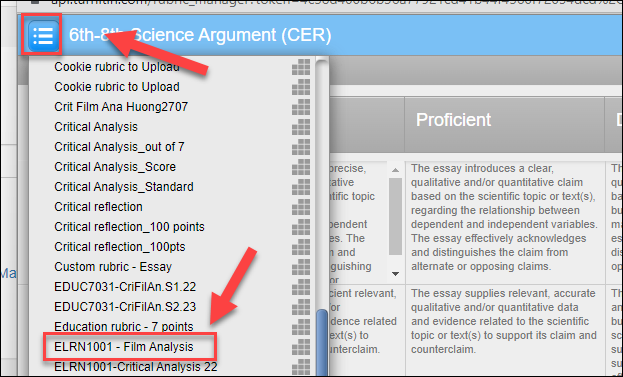
- Click on the menu icon.
- Select the Create new rubric option.
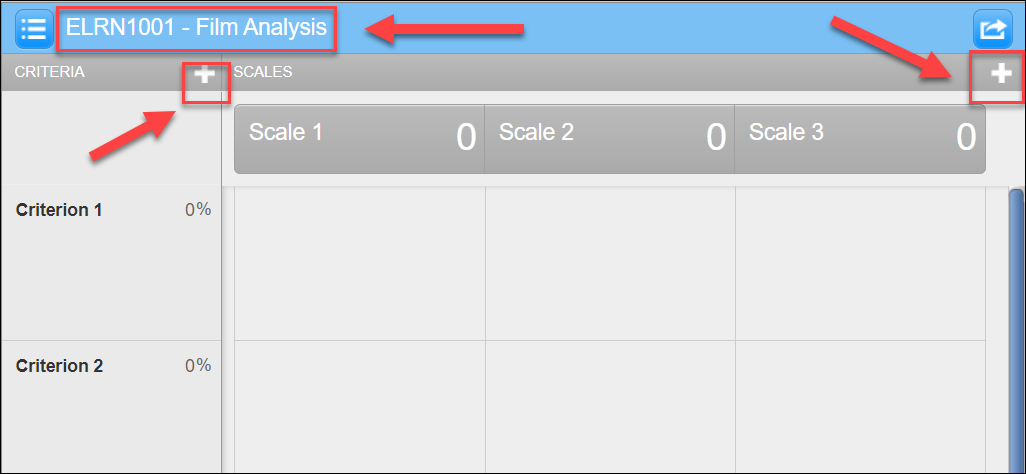
- Enter the rubric name in the Name textbox. Tip: use abbreviate/shorter name due to space limitation.
- Use the plus icon to add more rows (criteria) and columns (scales).
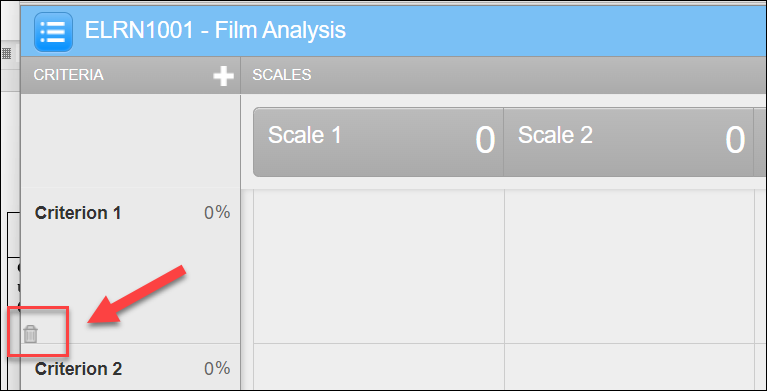
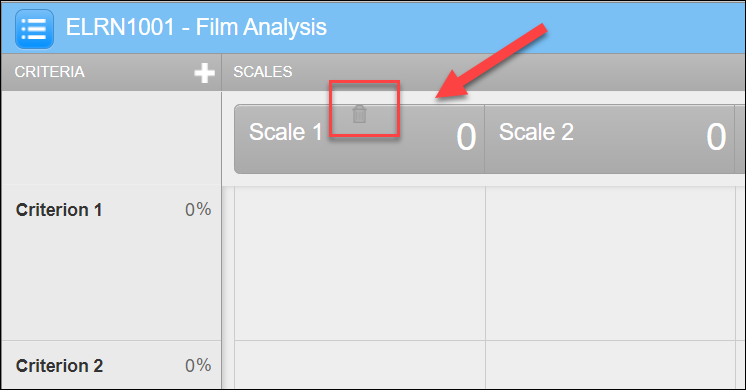
Use the bin icon to delete the unwanted criteria/scales.
- Copy and paste the rubric content to the template. Make sure:
- Each criterion has a percentage.
- All criteria add up to 100%
- Use a short name for each criterion and add a more detailed description underneath the name.
- Scale the percentage for each level of performance (Refer to the example notes).
- Add a descriptor to each grid.
- Click on the Save button.
- Click on the cross button to close the rubric manager. The submission link setting page will be displayed again.
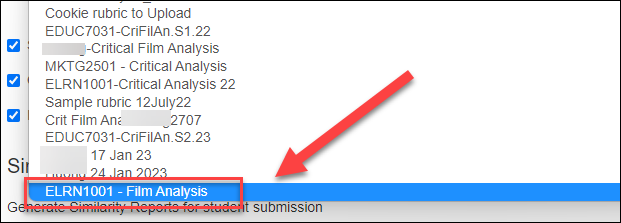
- Click on the down arrow on the No rubric box.
- Select the rubric you created (usually the last in the list).
- Click on the Submit button.

Note: Once you have created the Turnitin assignment submission link with the rubric, you can test the rubric.
Test the rubric
Two options to set up a student submission to test are:
- Submit a sample assignment on behalf of a student (delete after testing).
- Submit a sample assignment using the student preview tool
Two steps are involved:
- Submit a sample assignment
- Mark the sample assignment using the rubric
Submit a sample assignment on behalf of a student
You can use a sample assignment and submit it on behalf of a student in the course to test the rubric.
For more information, refer to the Submit a Turnitin assignment on behalf of a student guide.
Submit a sample assignment using the student preview tool
For more information, refer to the Submit a sample assignment using the student preview tool guide.
Mark assignments using a rubric
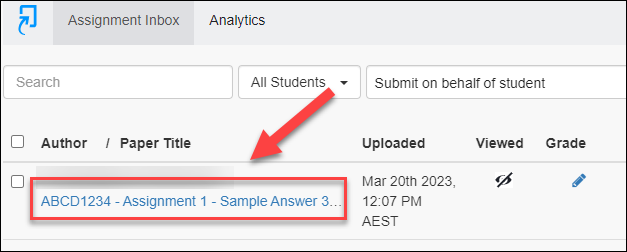
- Click on the submission link from the relevant folder.
- Click on the submitted sample assignment link to start marking.
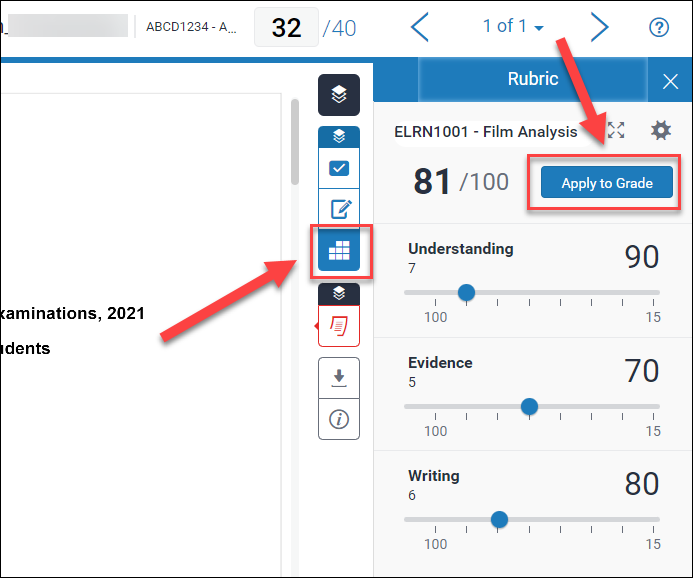
- Click on the rubric icon to start marking the submission with the rubric.
- Slide the scale or select the relevant point for each criterion.
- Click on the Apply to Grade button. The total point will be auto-calculated (out of 100 and out of 40).
For more information, refer to the Turnitin - Mark using a rubric guide.
Edit and/or duplicate the rubric
Two use cases:
- If the rubric has not been used for marking: Access the rubric via Turnitin - Rubric Manager and edit it
- If the rubric has been used for marking: Duplicate the rubric and edit it
Access Turnitin rubrics via Turnitin - Rubric Manager
- Click on the required Turnitin assignment submission link.
- Click on the cog (setting) button.
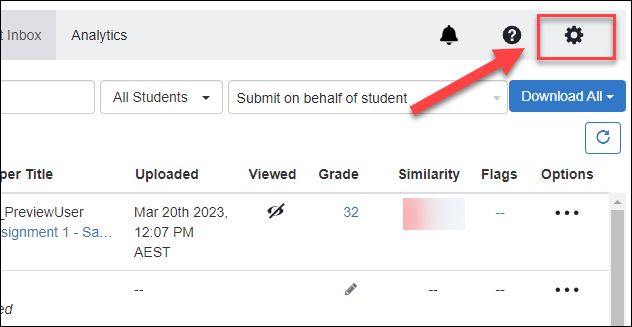
- Click on the Optional Settings button.
- Click on the Launch Rubric Manager button.
- Click on the menu icon.
- Select the required rubric.
The required rubric will be displayed for edit.
Note: If you have used the rubric to mark a sample assignment or mark a student's assignment, you will need to duplicate it, rename it and do the required edition.
Duplicate a Turnitin rubric
For more information, refer to the Managing rubrics guide by Turnitin.
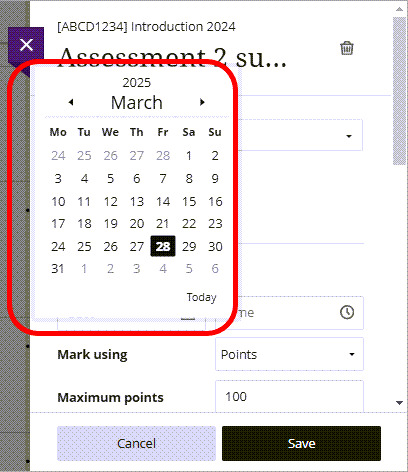
Edit the start date in Learn.uq
In the Turnitin assignment settings, you cannot edit the Start and Due dates. However, this can be done in Learn.uq.
- In your course, navigate to your Turnitin submission link. Click on the three dots to the right.
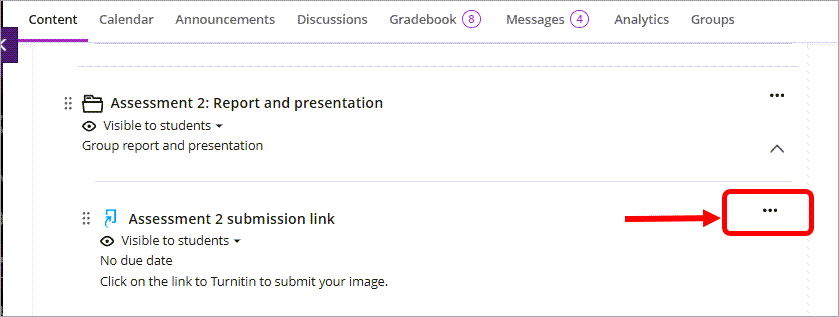
- Select Edit from the drop-down options.
- Enter the new Due date either manually or using the calendar picker (as shown).
- Enter the new Time either manually or using the Time picker (as shown).
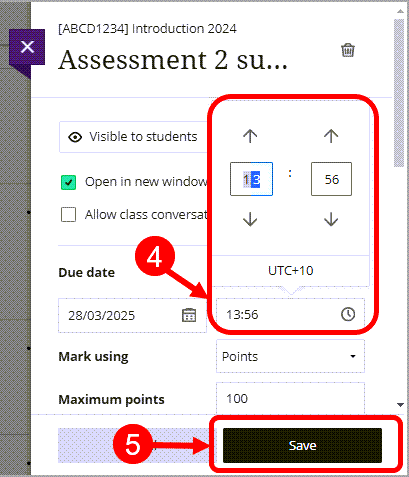
- Click the Save button.
Tip: Click back into the Turnitin submission link to check that the Due date has updated accordingly.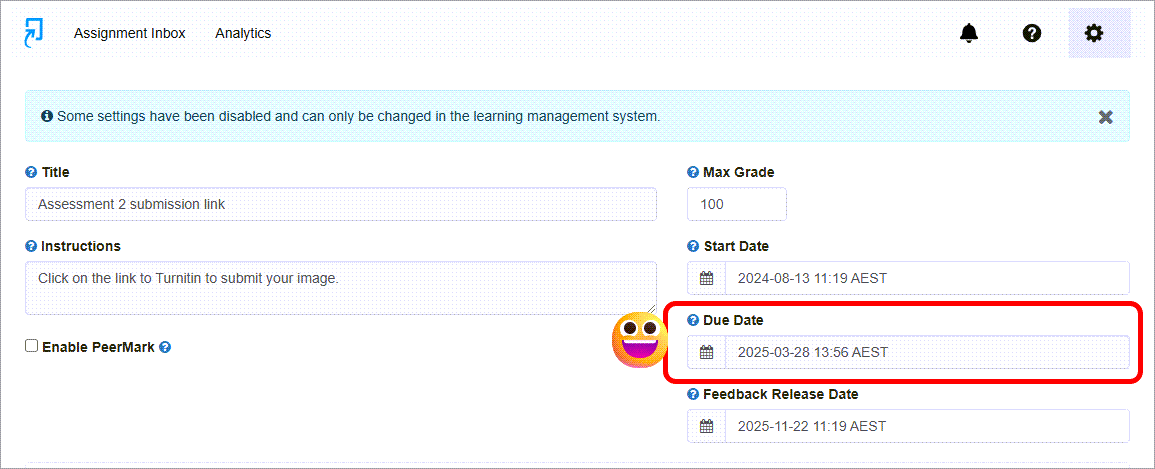
- Access and view the Similarity Report and AI Writing Indicator (Ultra)
- Accidental release of Classic Turnitin marks (Ultra)
- Accidental release of Turnitin marks (Ultra)
- Adding a voice summary comment (temporary workaround)
- Check if a document has used referencing software (Ultra)
- Classic Turnitin - Control the Release of Results (Ultra)
- Convert a Standard points rubric to a Weighted range rubric
- Create Turnitin rubrics - SOE
- Create a PeerMark Assignment (Ultra)
- Create a Turnitin assignment (Ultra)
- Create a Turnitin standard rubric (Ultra)
- Create a Weighted range rubric (based on a UQ Institutional rubric)
- Edit a Turnitin assignment (Ultra)
- Enabling third party cookies (Ultra)
- Gradescope Roster Sync (Ultra)
- Mark Classic Turnitin assignments by group (Ultra)
- Mark Turnitin assignments by group (Ultra)
- Marks / Rubrics / Grading form Overview (Ultra)
- Overview of Turnitin Peer Mark (Ultra)
- Providing feedback in Turnitin overview (Ultra)
- Record marks and view in Gradebook
- Restore a Deleted Turnitin Assignment (Ultra)
- Submit a sample Turnitin assignment using Student Preview tool (Ultra)
- Turnitin - Control the release of results (Ultra)
- Turnitin Paper Request Treatments (Ultra)
- View and sort late Turnitin assignment submissions (Ultra)