EchoPoll - Create courses and link to polling sessions (Ultra)
You can create courses in your EchoPoll dashboard which are integrated to your Learn.UQ courses to enable the class roster and view results in the polling sessions.
The steps involved are:
- access your EchoPoll web environment
- create courses:
- edit course details (optional)
- check course roster (optional)
- link a polling session to a course
Create Courses
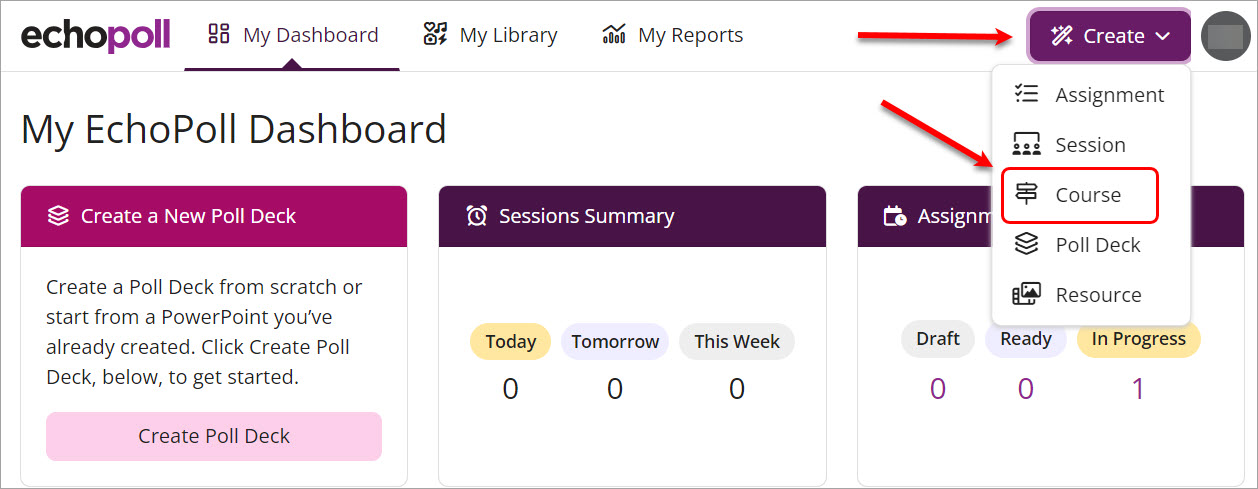
- Your EchoPoll dashboard will be displayed. Click on the Create button.
- Select Course from the drop-down menu.
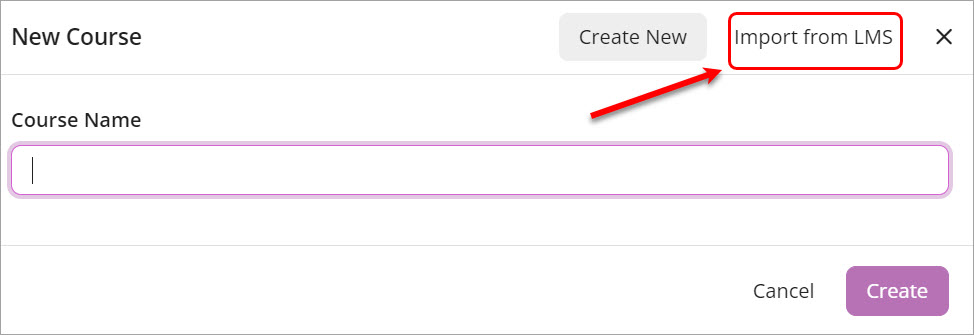
- Click on the Import from LMS button.
- Click on the down arrow.
- Select Learn.UQ from the list.
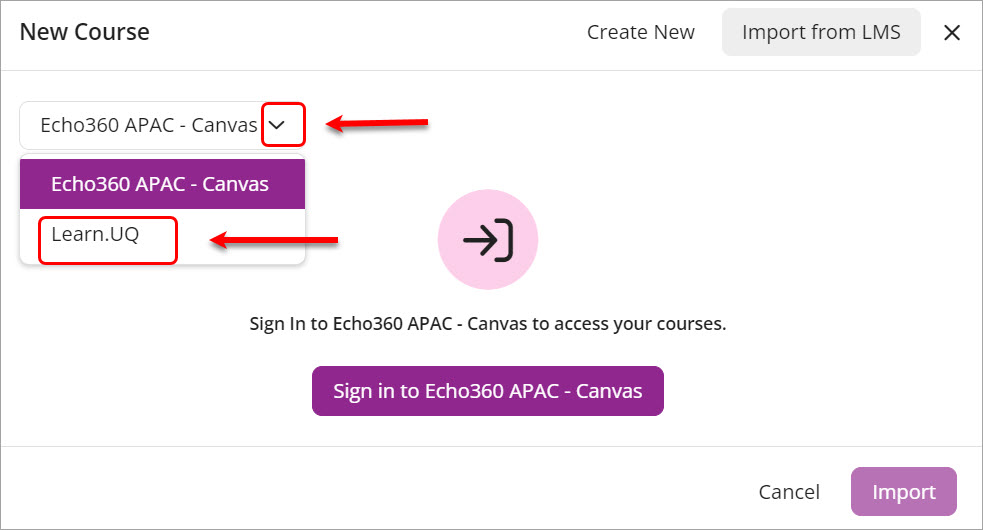
- Wait for the courses to be loaded.

- Enter your course code in the Search box.
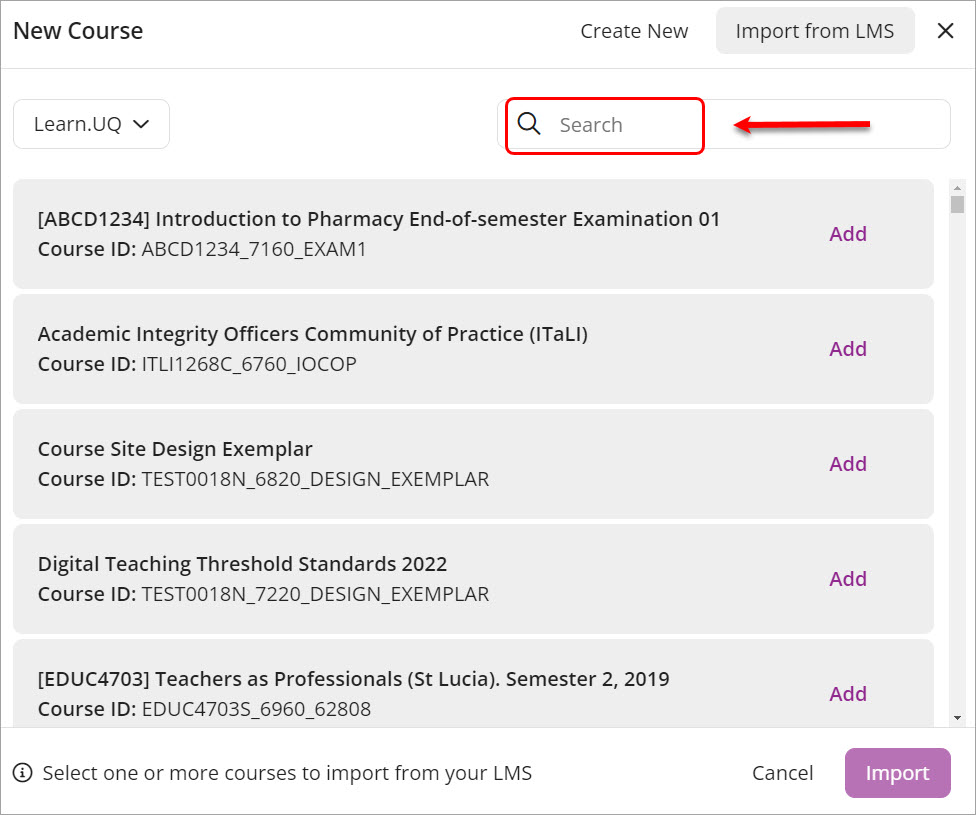
- Click on the Add button to select the required course(s).
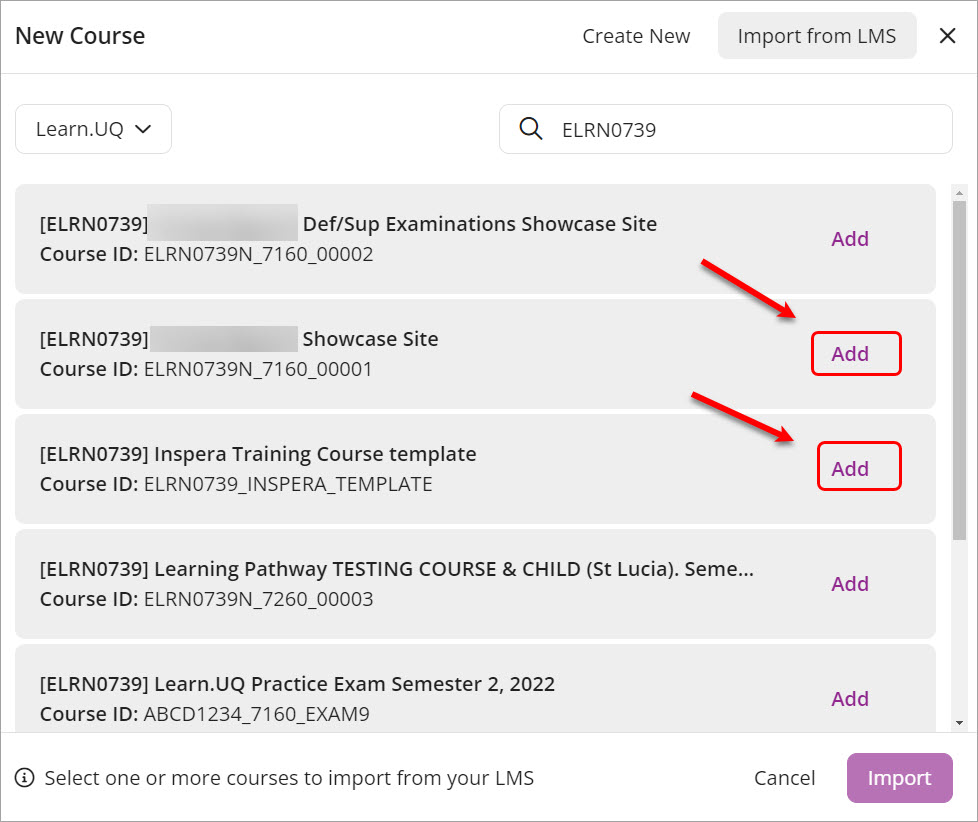
- Click on the Import button.

- Your course(s) will be added to your EchoPoll dashboard.
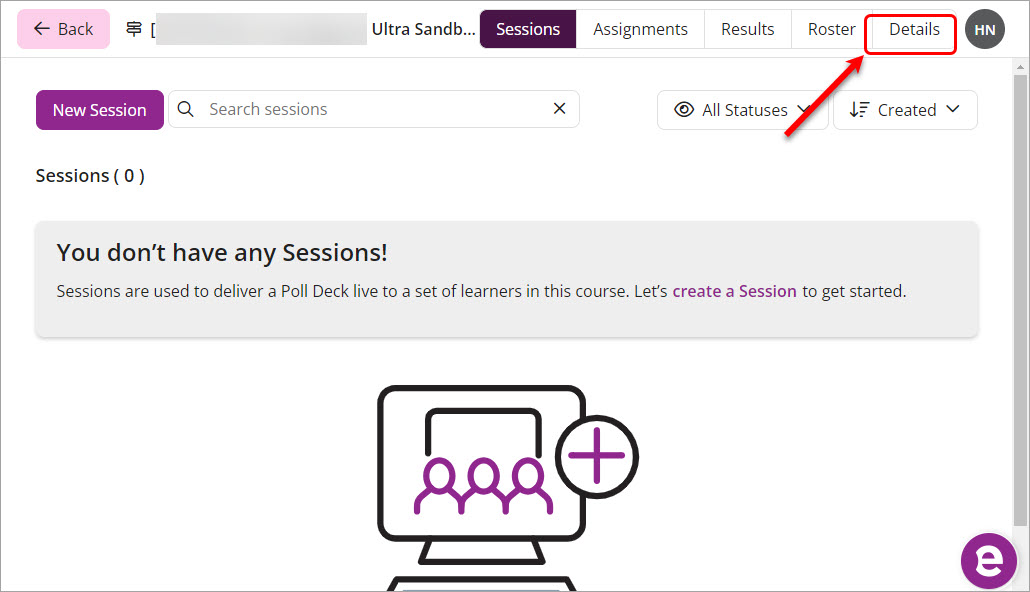
Course Details
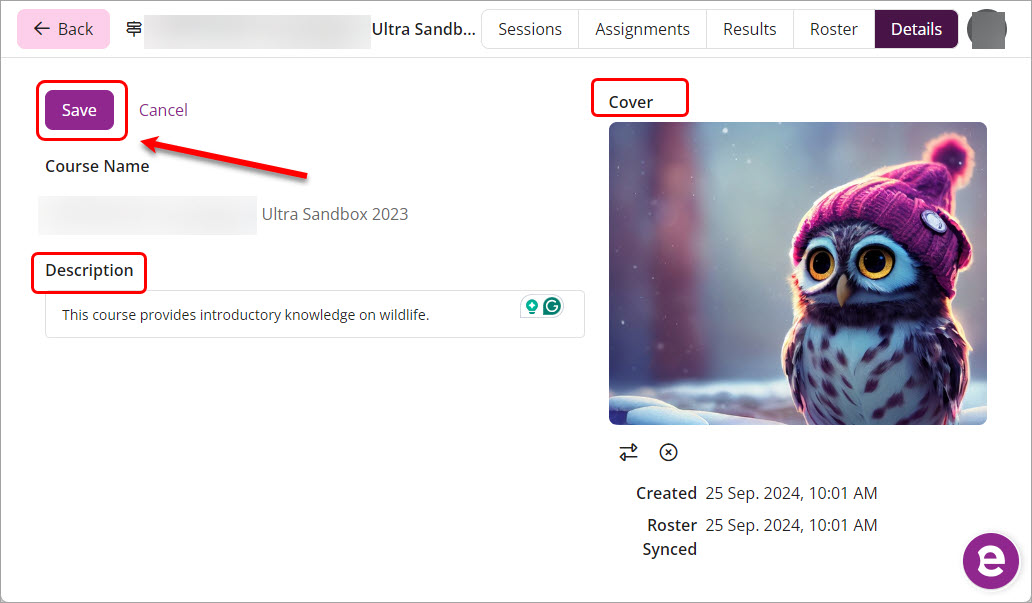
- Optional, click on the Details button.
- Optionally, add:
- a cover image
- a description to the course
Course Roster
- Click on the Roster button to check your course list.
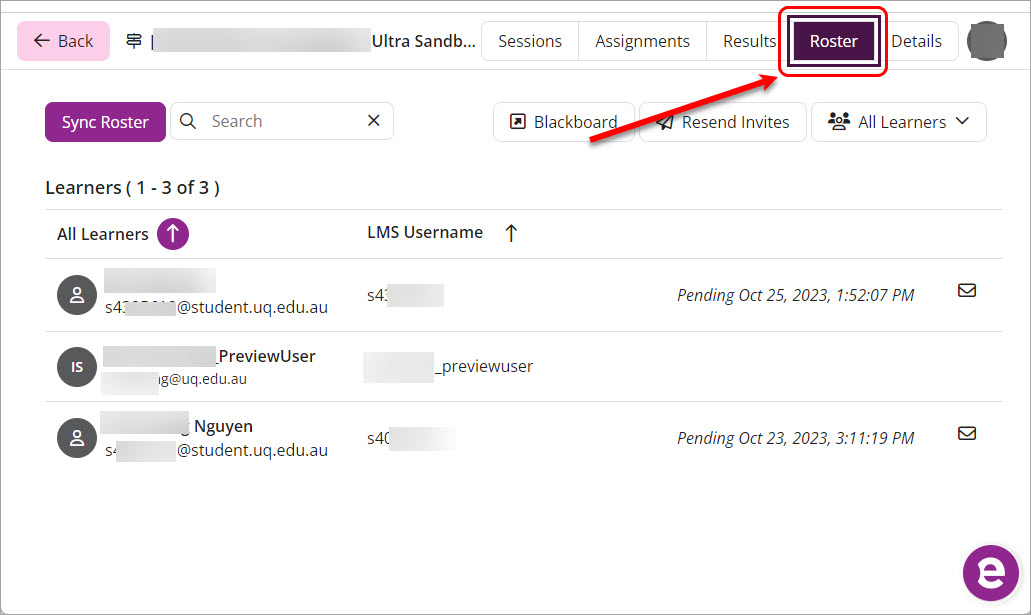
Sync Roster
- Click on the Sync Roster button to update your student list.
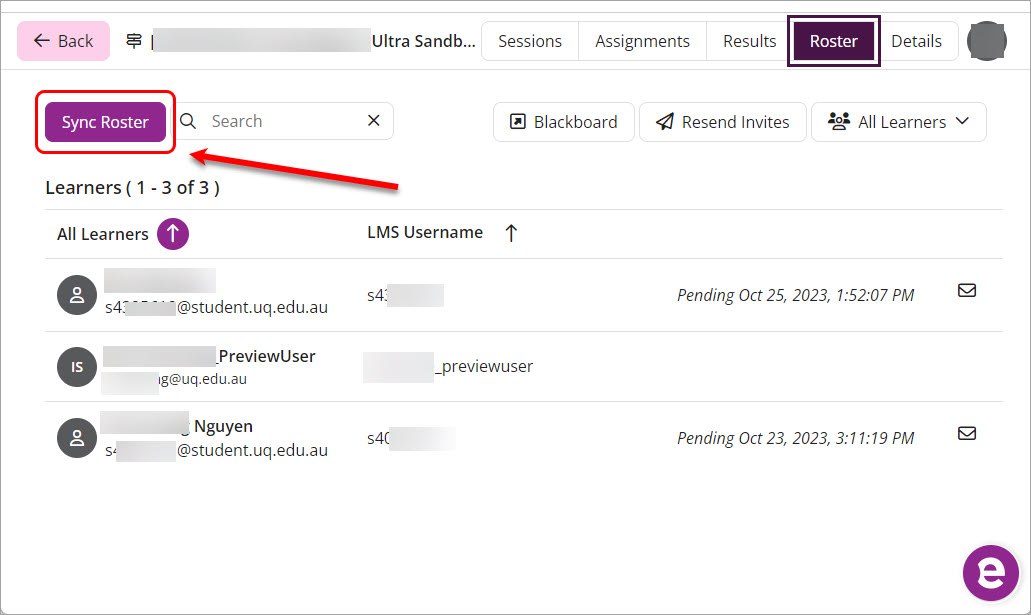
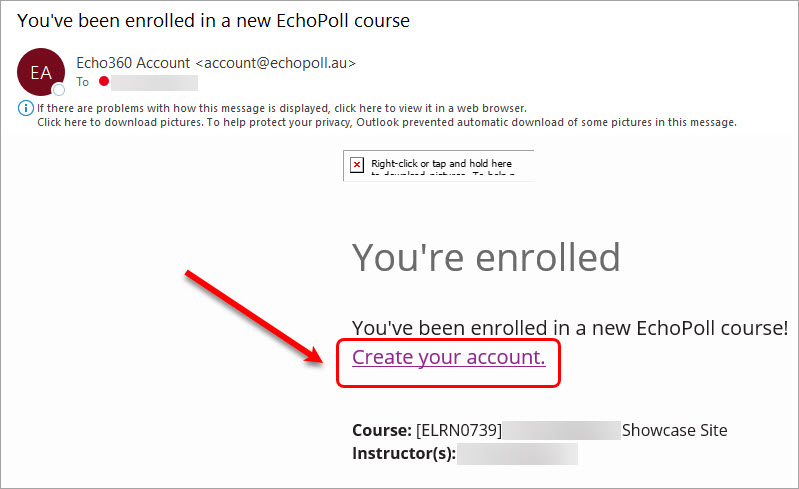
Note: An invitation email will be sent to students to invite them to sign up for an account in EchoPoll. Please provide the Create your EchoPoll account guide for students for detailed instructions.
EchoPoll course list
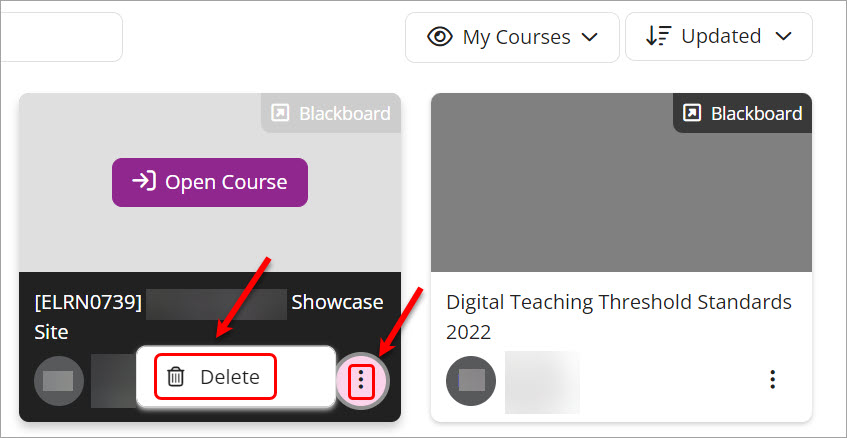
- Click on the Back button to go to your EchoPoll dashboard.
- All courses that you have added will be displayed.
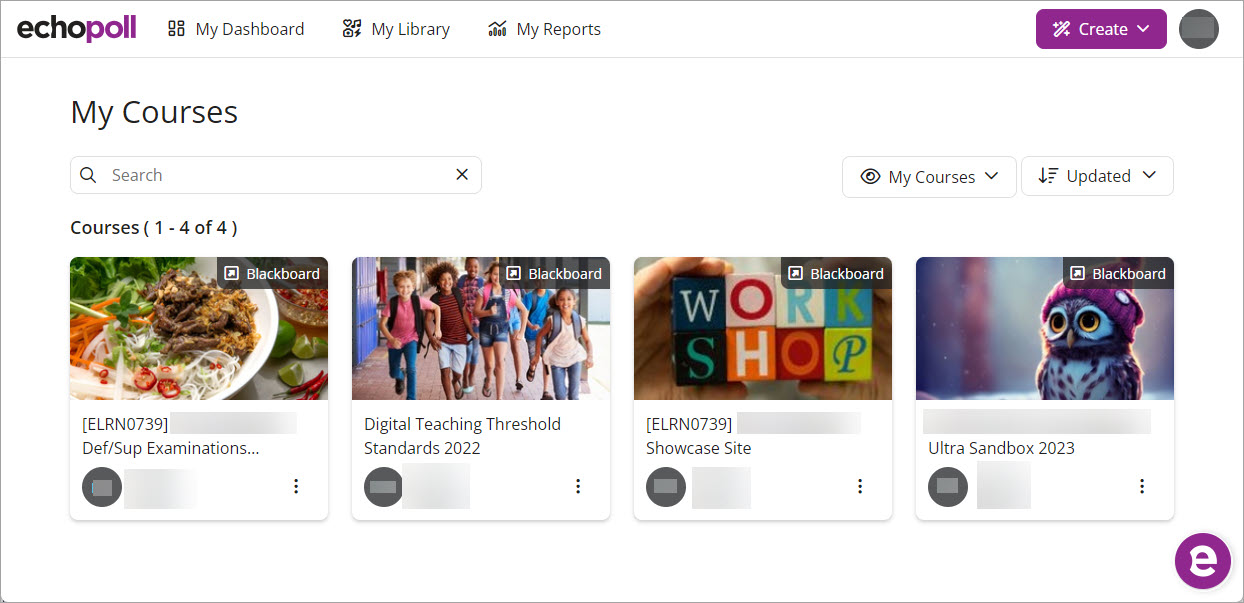
- Hover the mouse over a course you want to view the previous polling sessions you have created for the course.
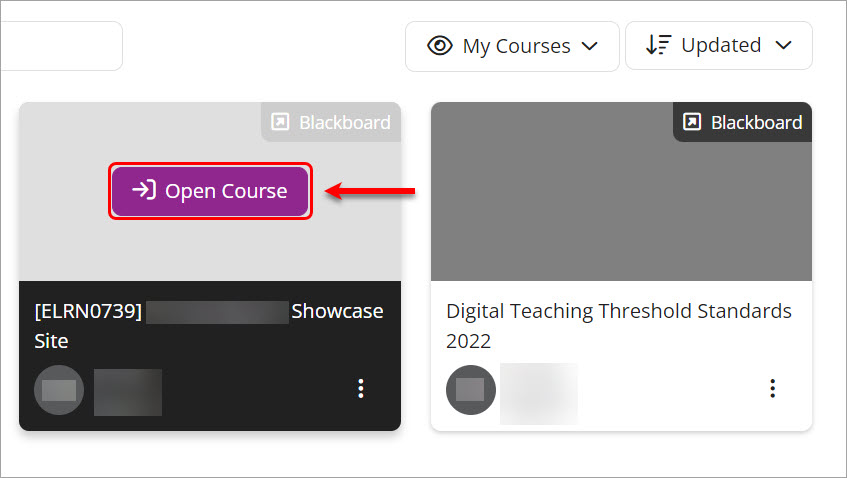
- Click on the Open Course button.
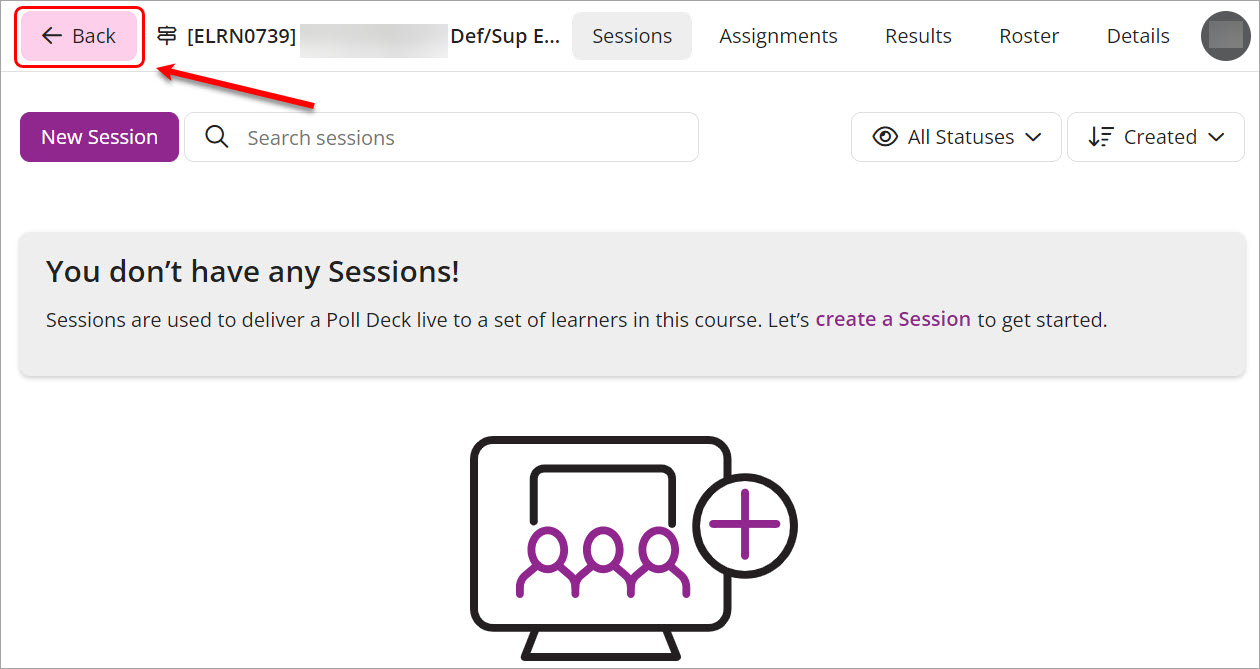
The course sessions will be displayed. You can view the course Results or Roster.
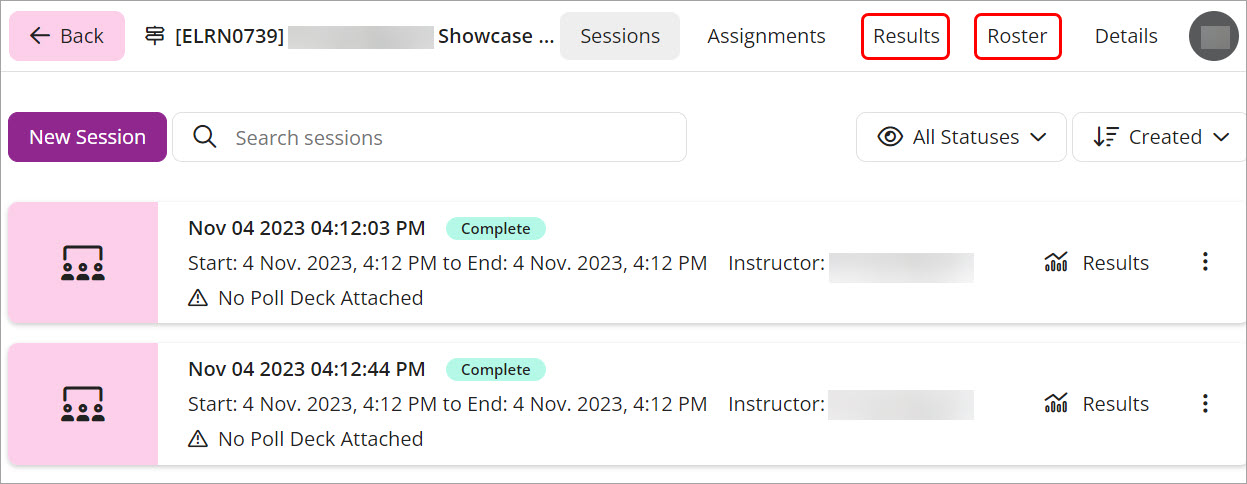
View the course roster by clicking on the Roster button.

Note: Students will receive a notification email that they are enrolled in an EchoPoll course and should click on the Create your account link to sign in to the EchoPoll platform.
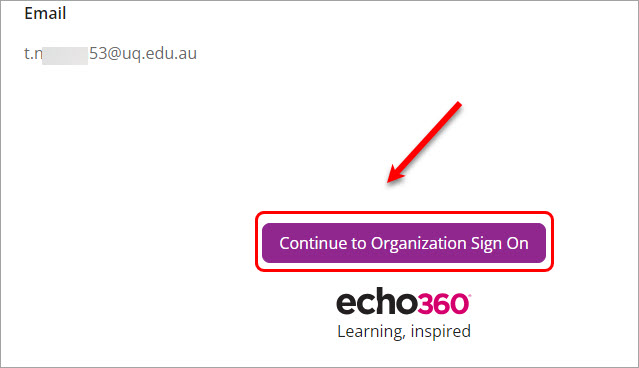
Students will be prompted to continue the sign-in through Single-Sign-On.
- You can delete a course by clicking on the three-dot button. Click on the Delete button.
Link a course to a session
When you start a polling session, you will be able to select the course.
- Open the PPT slide.
- Click on the Start button.
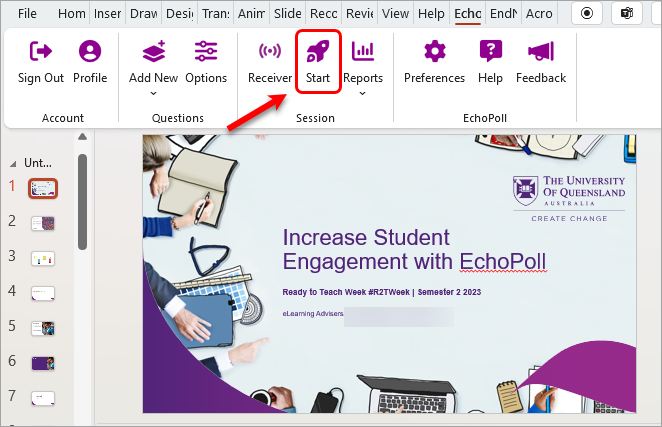
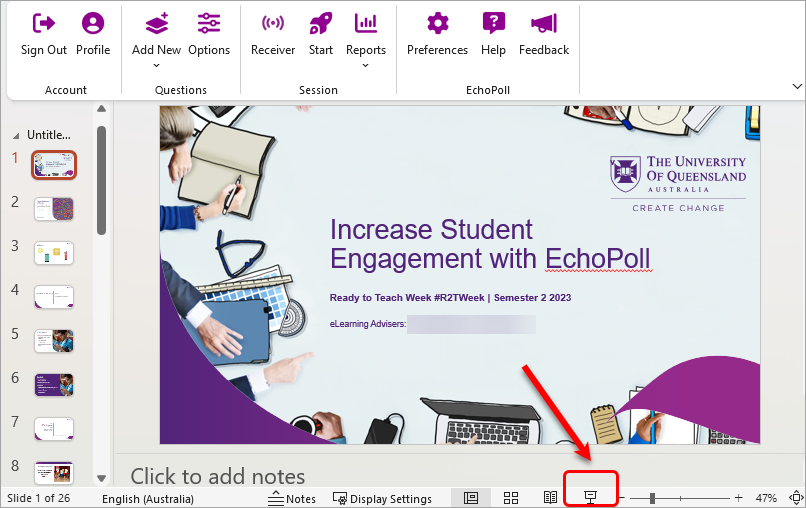
Note: You can also start your polling session by entering the presentation mode.
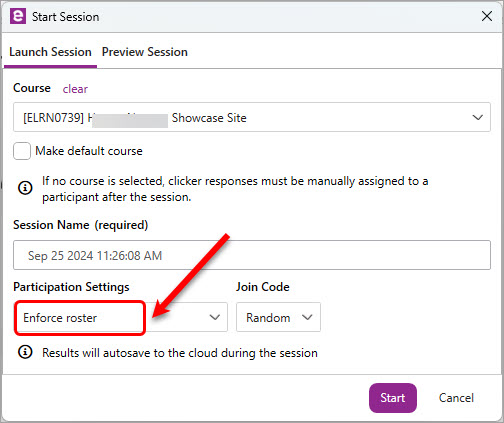
- Click on the down arrow.
- Select the relevant course.
- Click on the Start button.
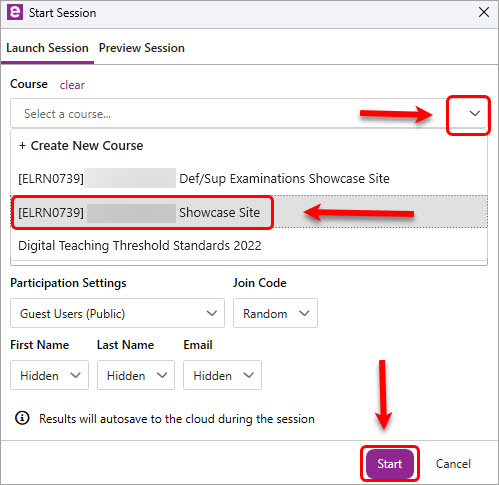
Note: If you want your students' names to be displayed in the poll results, you should select the Class roster for the Participation Settings. Students will need to go through the sign-in steps before accessing the poll.
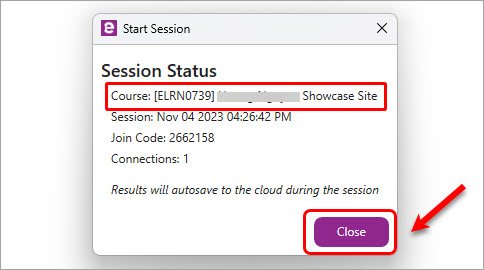
- Click on the Close button to close the notification. Note: Your course name has been added to the session status.
When the session is finished, you can access your dashboard (EchoPoll web environment to view the polling session results).
- EchoPoll - Access (Ultra)
- EchoPoll - Add a join slide (Ultra)
- EchoPoll - Assignment (Ultra)
- EchoPoll - Create a hotspot question (Ultra)
- EchoPoll - Create a multiple choice question (Ultra)
- EchoPoll - Create a multiple select question (Ultra)
- EchoPoll - Create a numeric question (Ultra)
- EchoPoll - Create a short-answer question (Ultra)
- EchoPoll - Create a true/false question (Ultra)
- EchoPoll - Create a word cloud question (Ultra)
- EchoPoll - Create courses and link to polling sessions (Ultra)
- EchoPoll - Enable the Anywhere floating toolbar (Ultra)
- EchoPoll - Global setups in your account (Ultra)
- EchoPoll - Individual question setups (Ultra)
- EchoPoll - Local setups in your PowerPoint (Ultra)
- EchoPoll - Navigating the EchoPoll platform (Ultra)
- EchoPoll - Preview a polling question (Ultra)
- EchoPoll - Reports and Results (Ultra)
- EchoPoll - Resources and feature requests (Ultra)
- EchoPoll - Save the app to taskbar (Ultra)
- EchoPoll - Send polling results to Gradebook
- EchoPoll - Share poll resources from EchoPoll dashboard (Ultra)
- EchoPoll - Sign-in and download the desktop app (Ultra)
- EchoPoll - Start and end your polling session (Ultra)
- EchoPoll - Take Attendance
- EchoPoll - Teams (Ultra)
- EchoPoll - Web environment (Ultra)
- EchoPoll - Workflow for creating a poll in PowerPoint (Ultra)
- EchoPoll app in centrally controlled teaching spaces (Ultra)