Upload an ePortfolio file or document (Original)
Warning: You may not be able to access UQ ePortfolio if you do not have third-party cookies enabled in your browser. Refer to the guide Enable third-party cookies for instructions on how to fix this issue.
Upload a file or document
- Click on the ePortfolio link in your Learn.UQ (Blackboard) course.
- If it is the first time you have used the ePortfolio, you will need to accept the software user agreement (scroll to the end of the page).
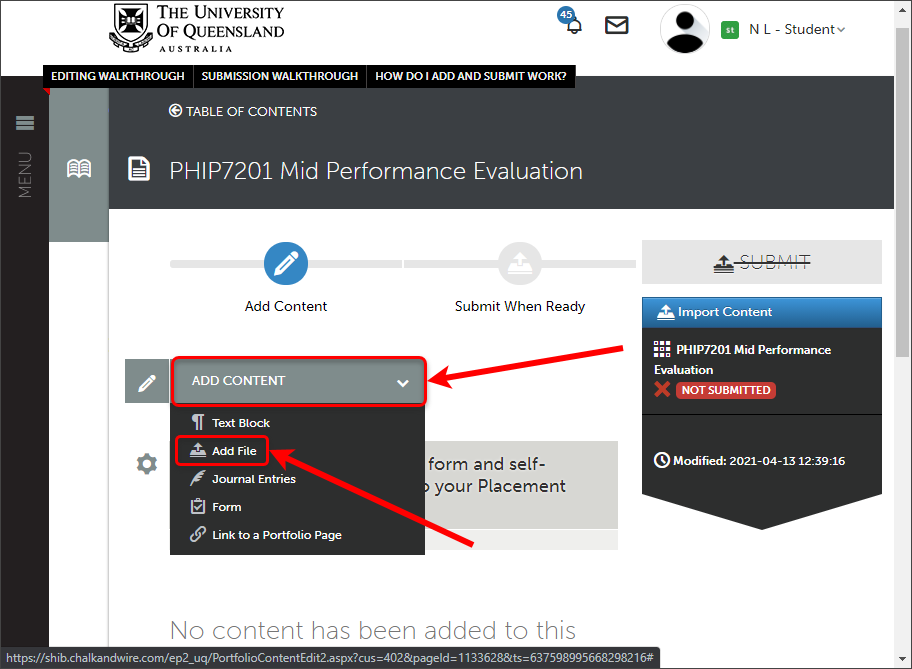
- Click on the Add Content button and select Add File from the menu.
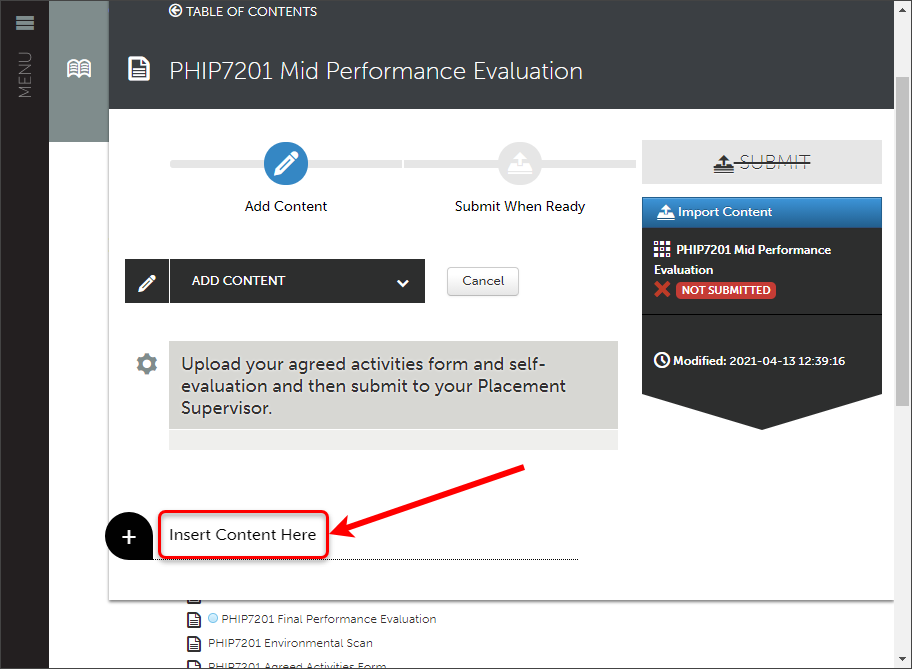
- Click on an Insert Content Here icon.
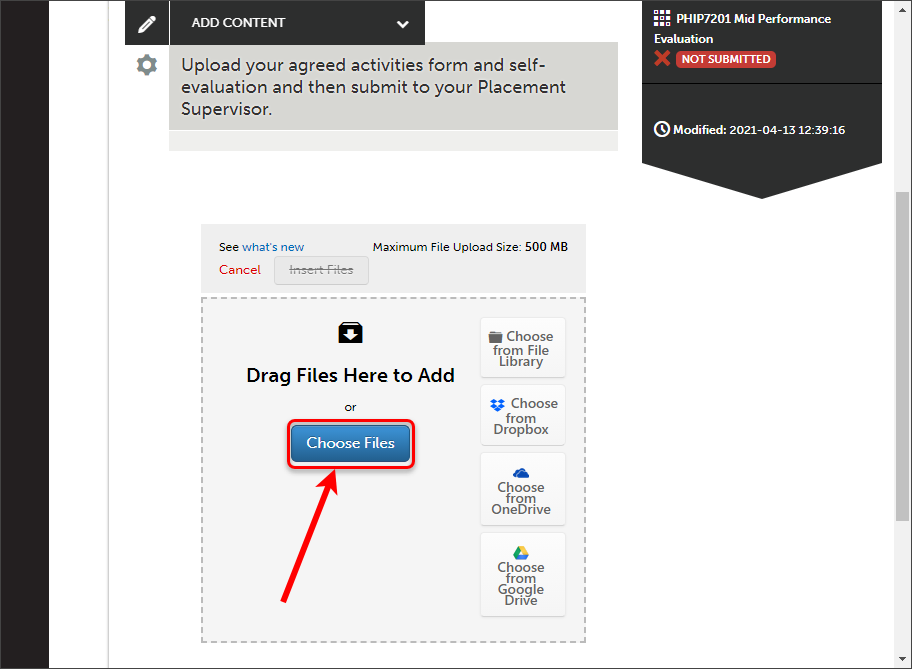
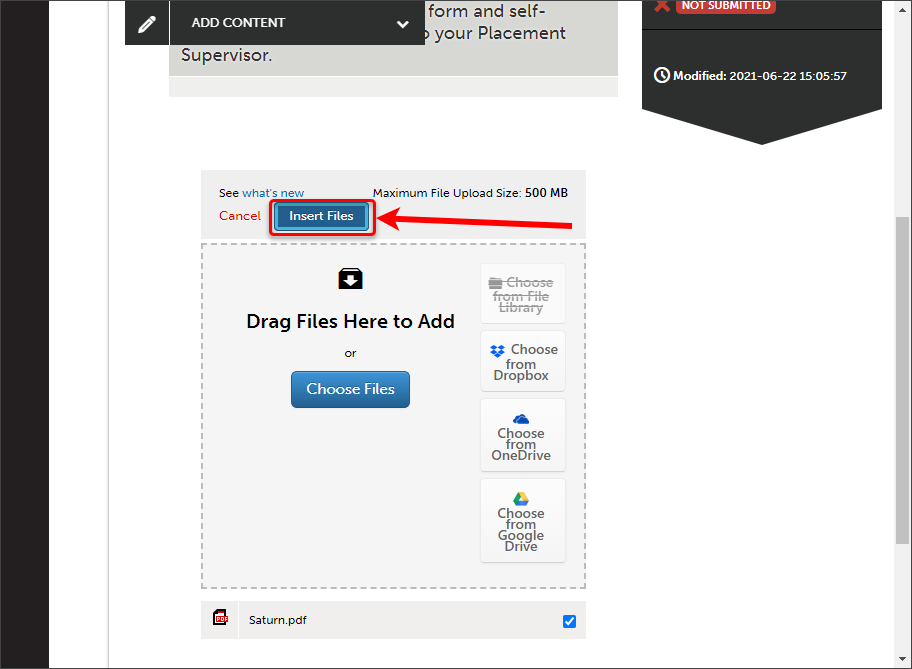
- Click on the Choose Files button; locate and select the required file. Alternatively access files from your File Library (previously uploaded files in the ePortfolio), Dropbox, OneDrive, Google Drive or drag and drop your files into the upload area.
- The file will begin to upload immediately.
Tip: For further information about how long files can take to upload, refer to the Upload speeds guide.
- Once the file has completed uploading, a tick will appear next to the file.
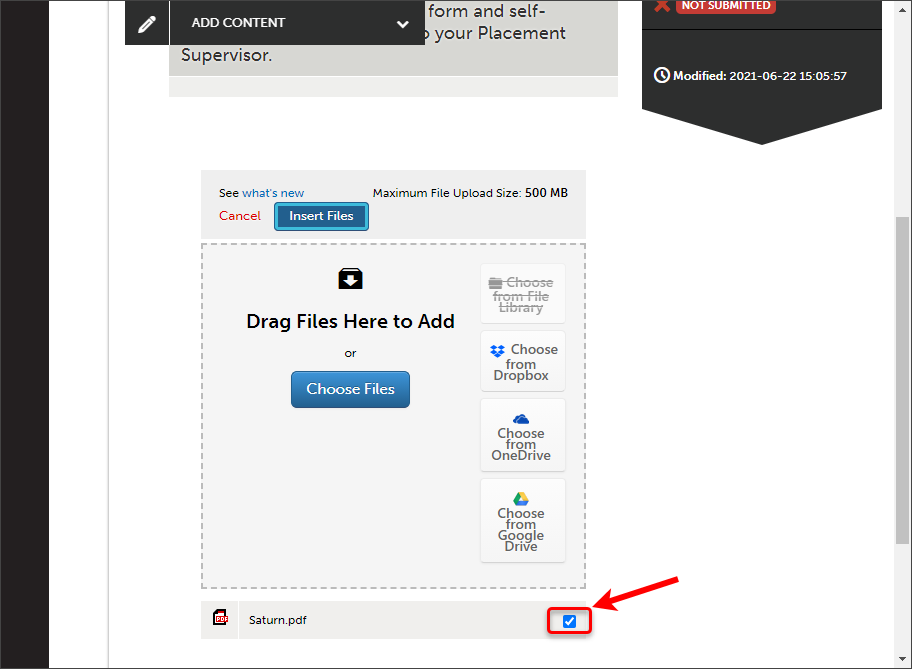
- Click on the Insert Files button.
Warning: You must not navigate away from the page until your file receives a tick and you have inserted it onto the page.
Warning: Your uploaded files to the ePortfolio are not viewable to teaching staff. You must submit work for marking. Refer to the submission guides on the ePortfolio page.
Remove a file from your ePortfolio
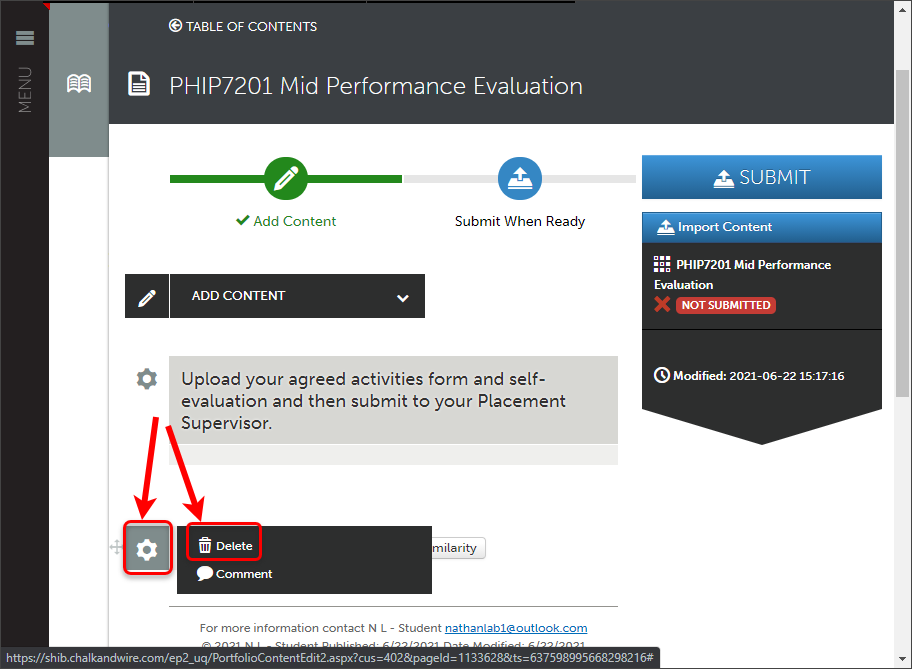
- Click on the cog next to the file and select Delete.
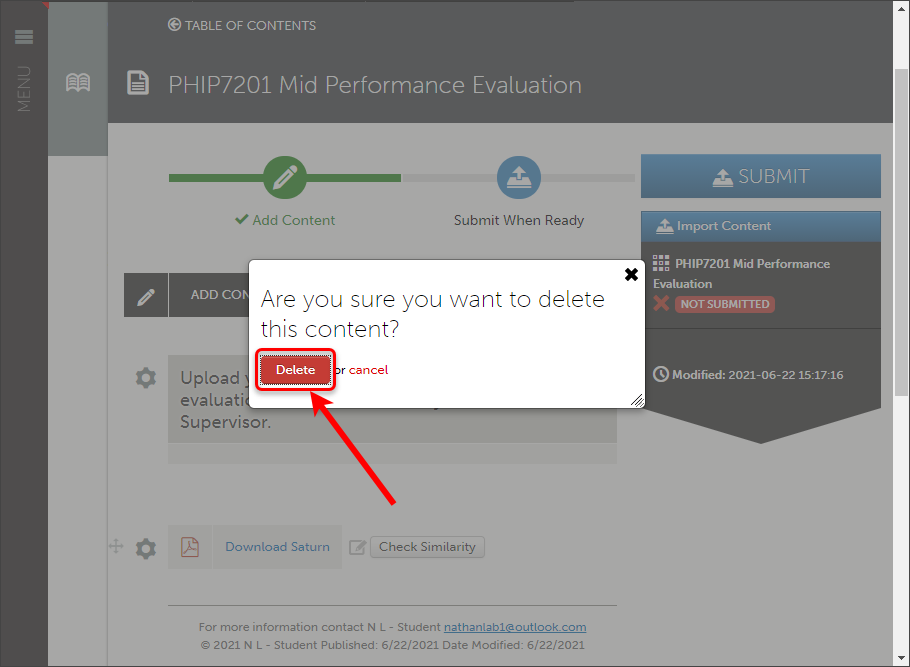
- Click on the Delete button.
Troubleshooting
Prior to uploading a file to the ePortfolio, please ensure you have no brackets i.e ( ) in your document name.
