Schedule a Zoom meeting via Learn.UQ (Original)
Warning: You may need to enable third party cookies in order to access Zoom via your Learn.UQ course site. For further information, refer to the Enabling Third Party Cookies guide.
Warning: Never share Zoom meeting links publicly on social media, even if the event is meant to be public.
Tip: It is recommended that you provide a link to the student Virtual Classroom (Zoom) guides to assist them with setting up and using Zoom.
Create a Zoom Meeting Area
- Navigate to desired location within your Learn.UQ course site where you wish to place the Zoom Meeting Area.
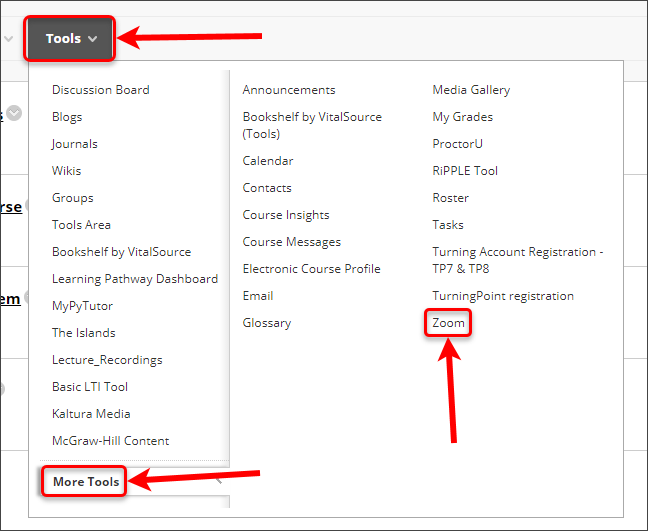
- Hover over Tools > More Tools and select Zoom from the drop-down menu.
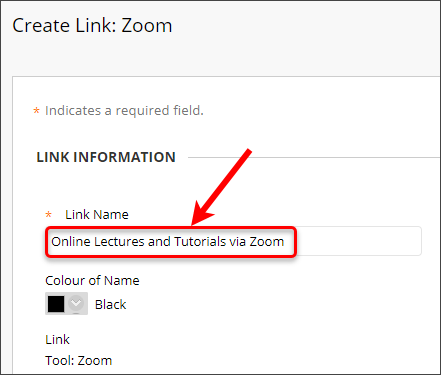
- Enter a Link Name with the format Online Lectures and Tutorials via Zoom.
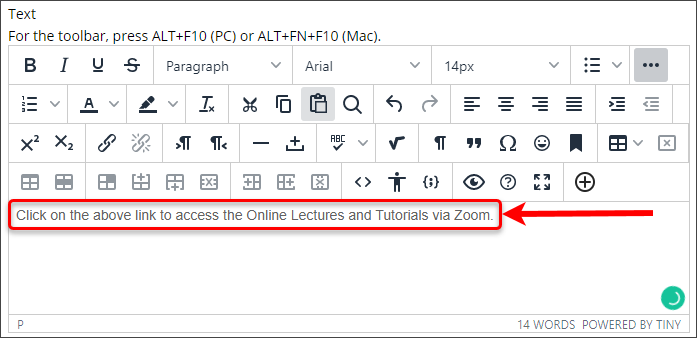
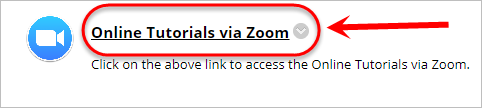
- Add a description in the Text textbox outlining what Zoom will be used for (i.e. Click on the above link to access the Online Lectures and Tutorials via Zoom).
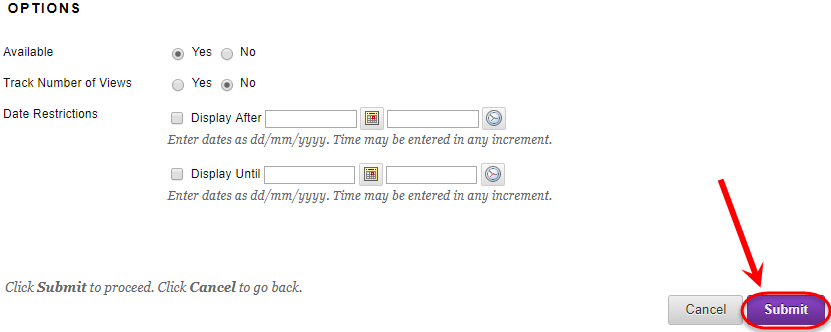
- Click on the Submit button.
- Click and drag the Zoom Meeting Area link directly below the Lecture Recordings link in the Learning Resources folder.

Schedule a Zoom Meeting
Click on the Zoom Meeting Area link in your Learn.UQ course.
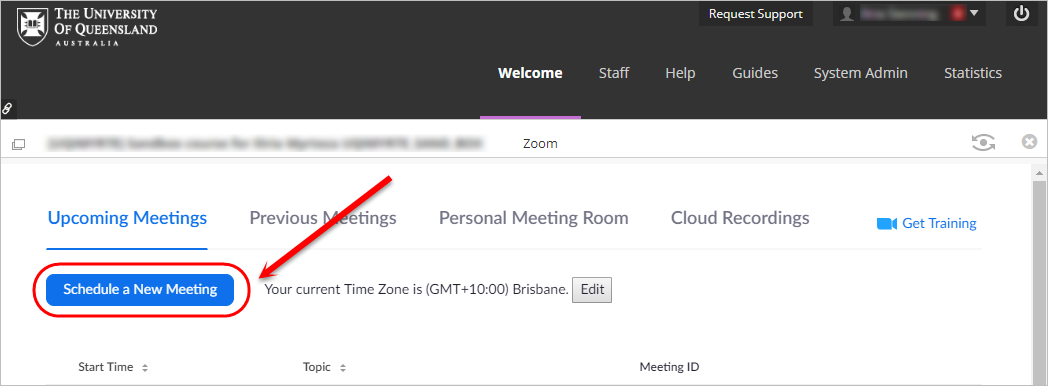
- Zoom will launch automatically within Learn.UQ.
- Click on the Schedule a New Meeting button to schedule a single or recurring Zoom meeting within your Learn.UQ Course.
Note: Any meetings scheduled through the Zoom Meeting Area will have a unique ID based on your course.
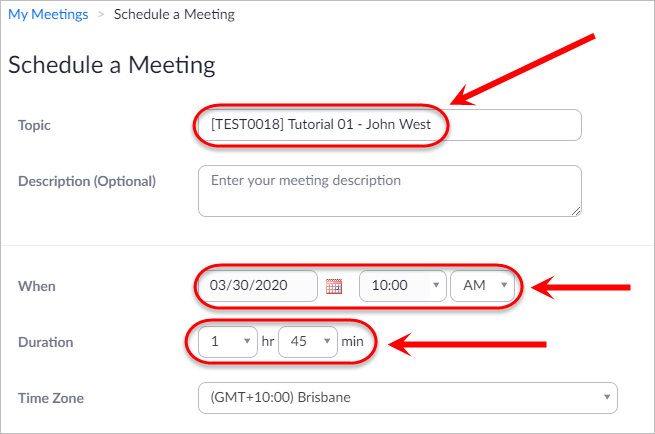
- Enter a title in the Topic textbox with the format [ABCD1234] Sem X Tutorial 01 - Tutor Name (i.e. [ELSS1234] Sem 1 Tutorial 01 - John West).
Tip: As the course code and title is automatically populated, simply delete the course title and add the semester, tutorial and tutor name after the course code.
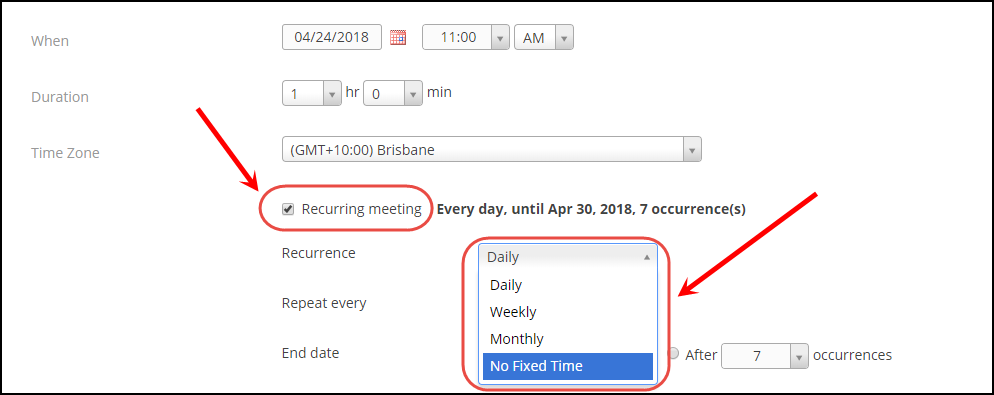
- Select a time and date for the meeting.
- Select a duration for the meeting.
Tip: Set the meeting to 45 mins rather than an hour so that meetings don't sit back to back (i.e 1 hour 45 mins for a 2 hour scheduled tutorial). The meeting does not end automatically and can go over time.
- Optionally, select the Recurring meeting checkbox and the appropriate settings.
Tip: Creating a Recurring meeting with No Fixed Time allows you to use the same meeting for the whole Semester instead of the link changing for each scheduled classroom session.
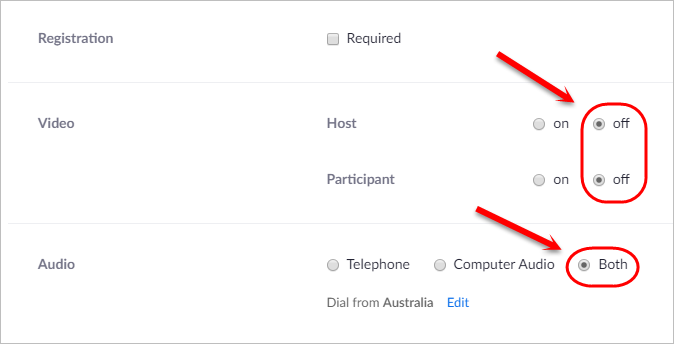
- Select the off radio button for both Host and Participant video to ensure all webcams are off when the meeting begins.
- Select Both in the audio options to allow students to join via both telephone and computer audio.
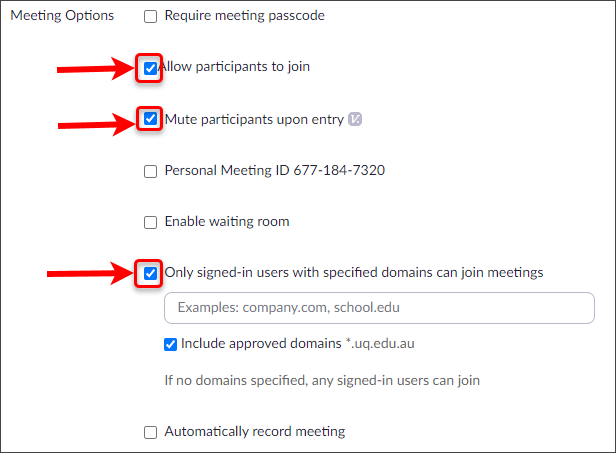
- Check the Allow participants to join checkbox to allow students to enter the meeting prior to the host.
Warning: If you have your meeting setup to record to the cloud automatically and then publish to Echo360, DO NOT check this option. This will stop blank recordings from being published in Echo360.
- Check the Mute participants upon entry checkbox to ensure students' microphones are off when they join the meeting.
- Check the Only signed-in users with specified domains can join meetings checkbox.
Note: If you have a guest presenter attending the meeting, you can add an authentication exception so they can join the meeting. For further information, refer to the How do I allow external Zoom accounts join a restricted Zoom meeting guide (ITS).
- Optionally check the Record the meeting automatically (to the cloud) if you would like to record your session.
Tip: Recording to the Cloud will enable automatic transfer to Echo360 so that you can make the recording available to your students. For further information, refer to the Publishing a Zoom recording to Echo360 guide.
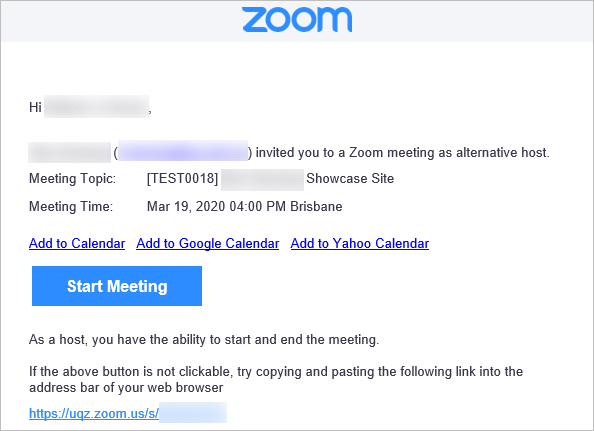
- Enter any staff (i.e. tutors or co-lecturers) who will need to host or join the meeting in the Alternative Hosts textbox.
Note: In order to add a staff member as an alternative host, they will need to have activated their UQ Zoom account. This means that they will need to have logged into Zoom with their UQ credentials. For further information, refer to the Installing Zoom guide. When attempting to add an alternate host you will need to use a staff member's email address based off their name f.lastname@uq.edu.au, you will have to confirm with them exactly what this is as it may have their full first name or there may be a number at the end. You can not use school-specific email aliases such as @business.uq.edu.au.
Warning: Alternate hosts will receive an email that will contain their access link and a calendar invite for the scheduled meetings, they should use the link in the email to start the meeting. Only the creator of the meeting and students will see all the meetings listed in the Zoom meeting area.
- Click on the Save button.
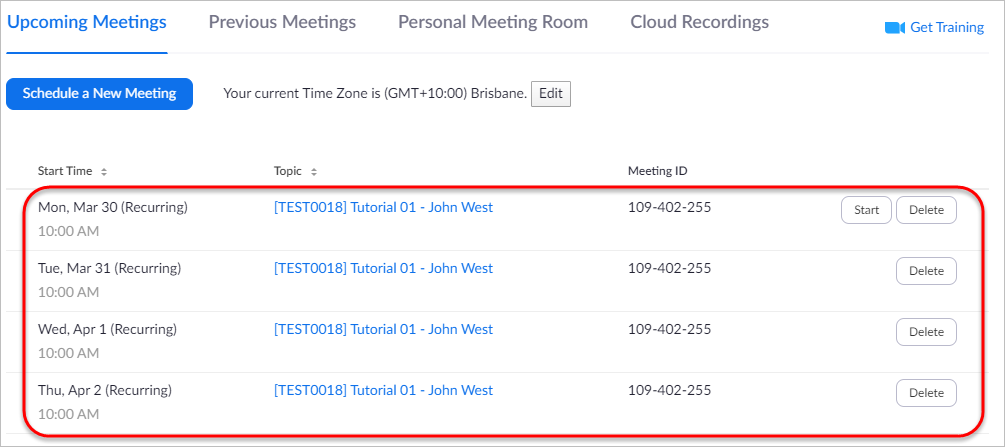
- The meetings will then be scheduled and can be accessed by students through the Zoom meeting link in your Learn.UQ course.
Note: Students will only be able to view any Zoom meetings you create within your Learn.UQ course using this method. Any other meetings scheduled separately through the Zoom application or web interface will not appear in this list for students. You can use the student preview tool to check the student view, for further information, refer to the Using the Student Preview Tool guide.