- Schedule your meeting as per the Schedule a Zoom meeting via Learn.UQ guide.
Tip: You must turn on the Only signed-in users with specified domains can join meetings option to ensure students sign in with their UQ credentials.
- Once scheduled go to https://uqz.zoom.us
- Login with your UQ username and password.
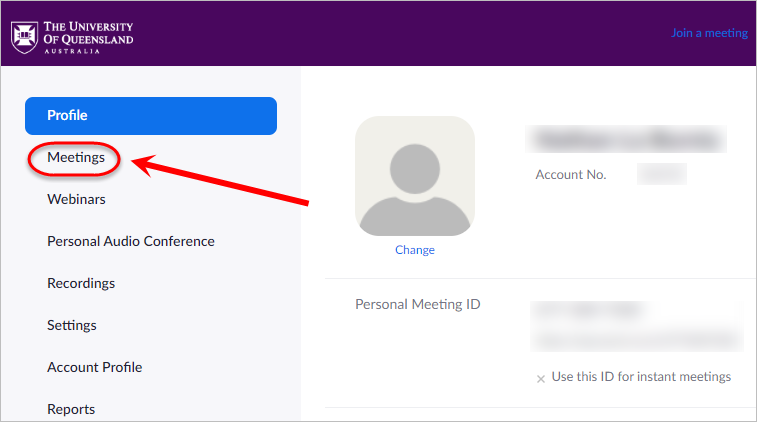
- Click on Meetings.
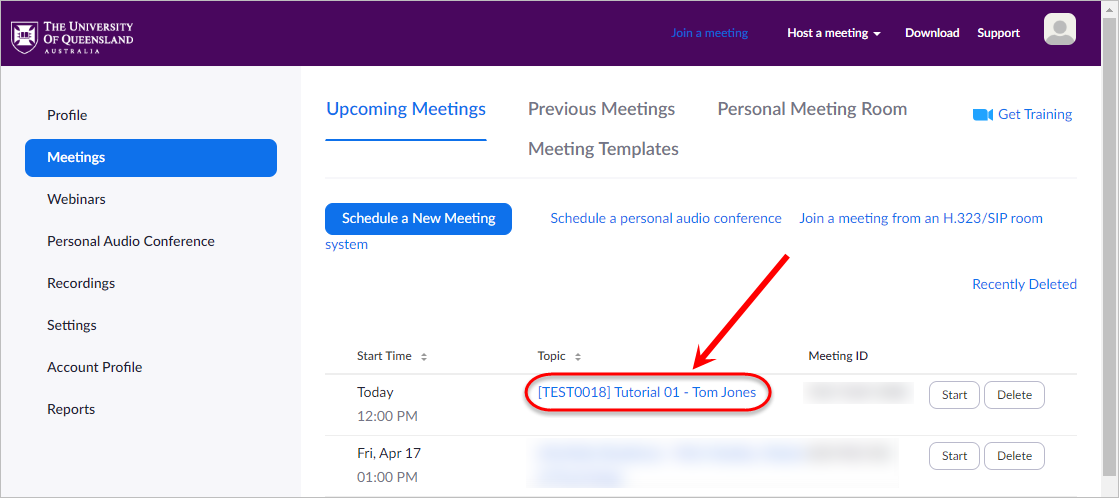
- Locate the meeting and click on the Topic Name to access the Manage screen.
- Click on the Edit this Meeting button.
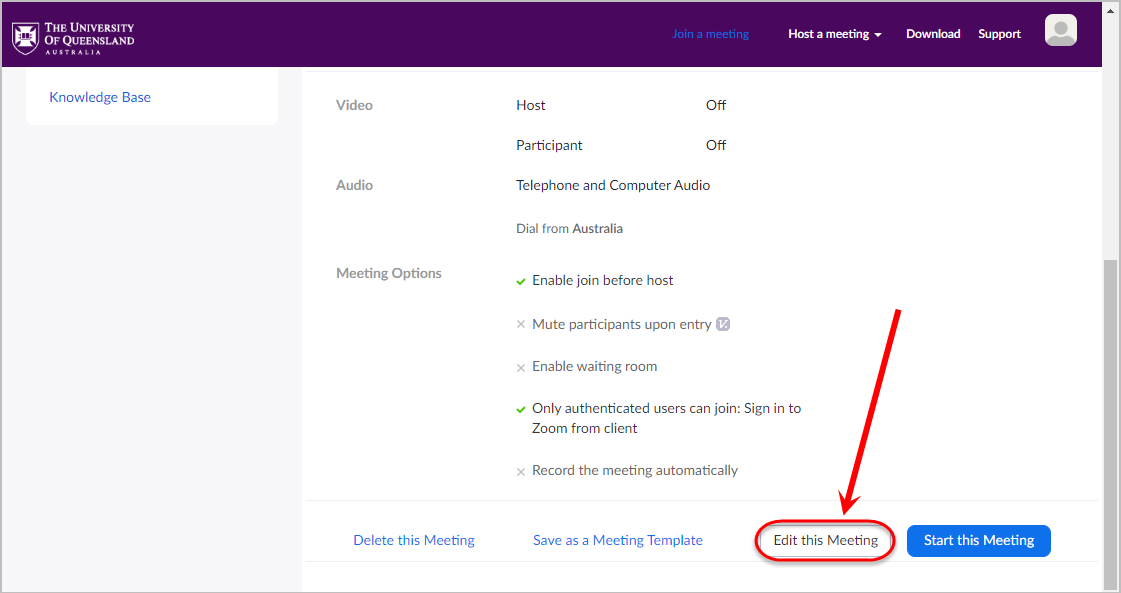
Warning: If you are editing a recurring meeting you must choose to edit All the meetings.
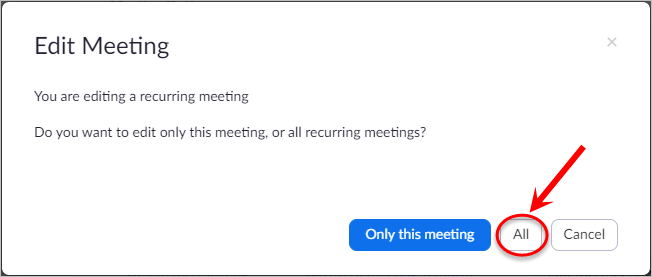
- Check the Breakout Room pre-assign checkbox.
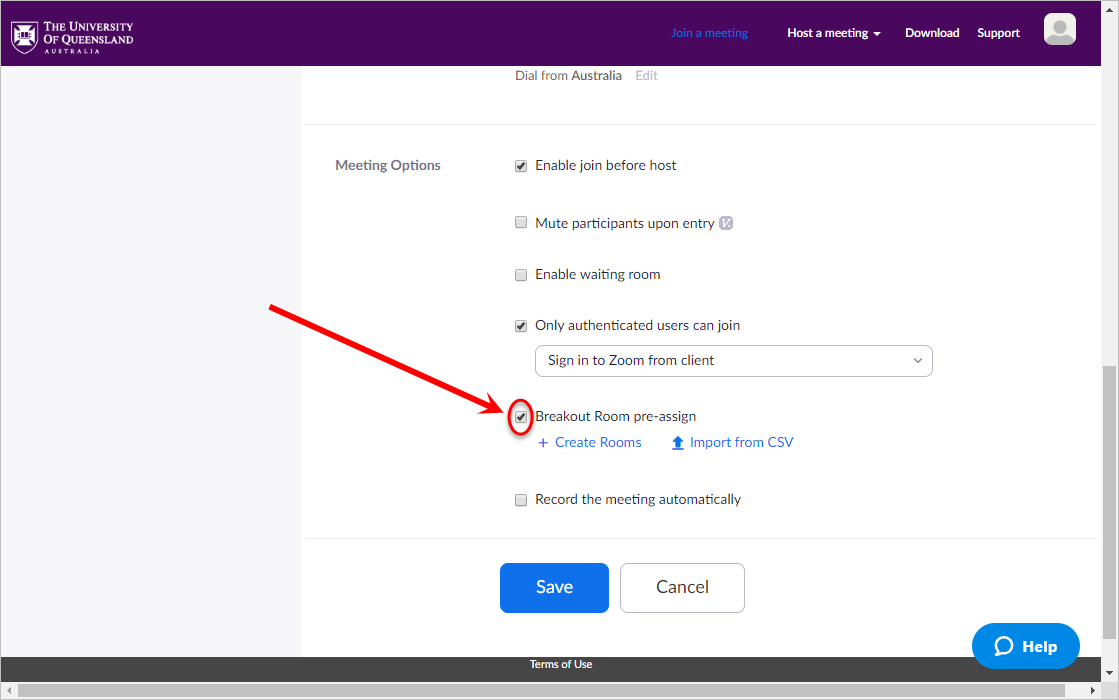
Option 1: Import from CSV
- Click on the Import from CSV link.
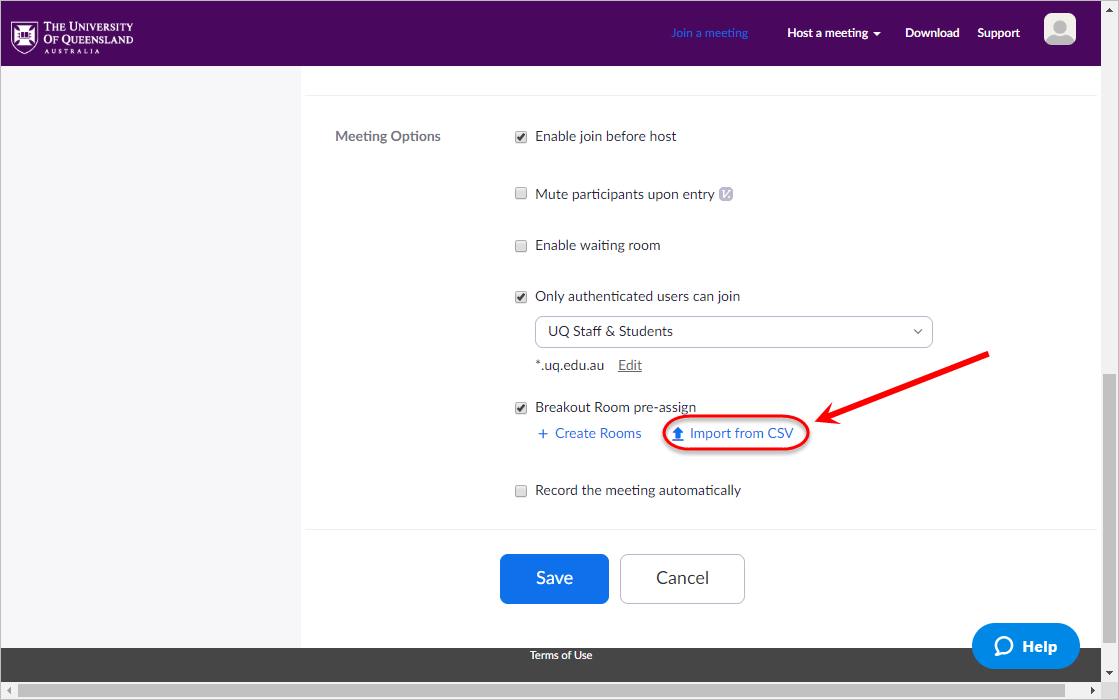
- Click on the download link to download a copy of the CSV template.
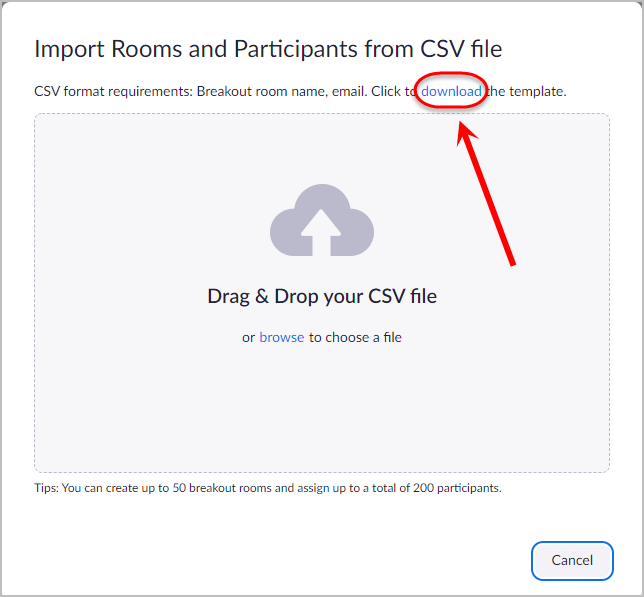
- Open the downloaded CSV file.
Tip: Do not edit the headings on the 2 columns, they must remain unedited.
- In column A, enter the name of the Pre-assigned Breakout Room. If you wish to have 5 students/staff in the same Breakout Room you will need the same Pre-assigned Breakout Room name on five (5) rows.
- In column B, enter the student's email address next to the desired Pre-assigned Breakout Room. The email address needs to be in the format s1234567@student.uq.edu.au for students and f.lastname@uq.edu.au for staff.
Note: Ensure there are no additional characters, i.e. spaces in the cells, or the Breakout Room participants might not be organised correctly.
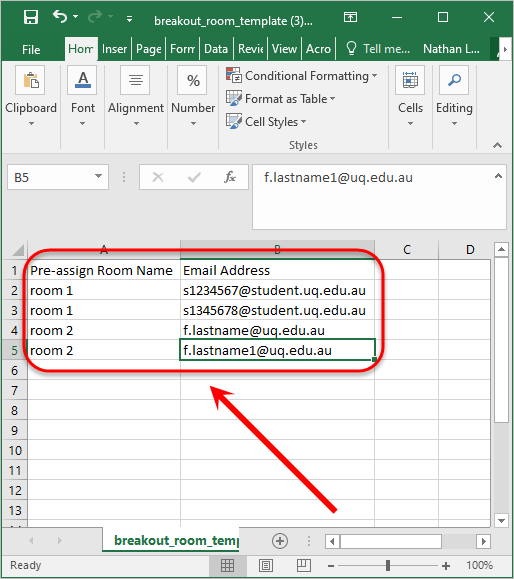
Tip: You can download your class lists from Allocate+ which contains the students' email address in the required format.
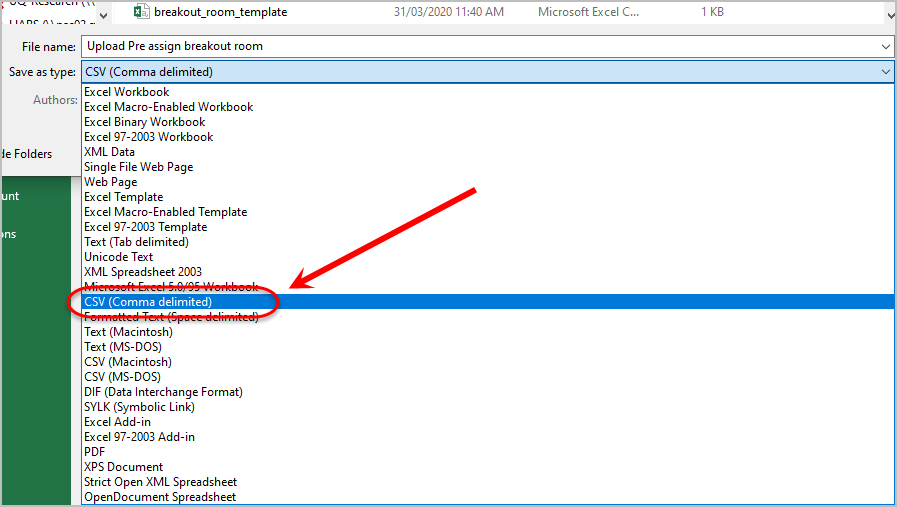
- Save the document as a CSV file.
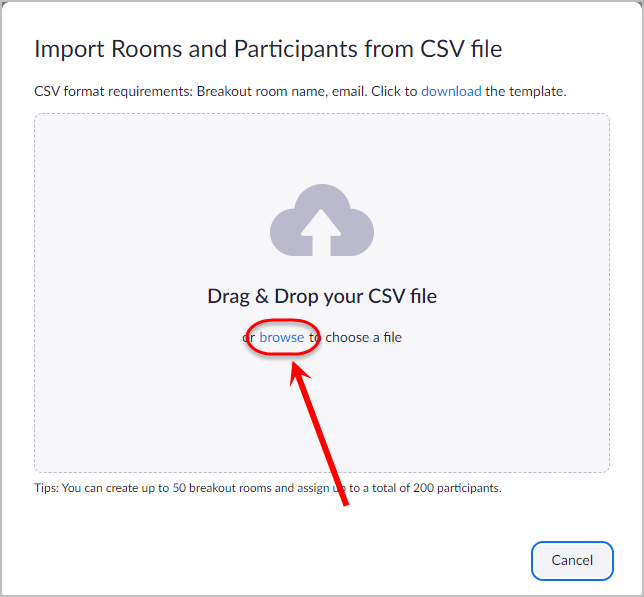
- Return to your web browser and use the Drag & Drop or click on the browse link to attach your Pre-assigned Breakout Room file.
- Once the file has uploaded your Pre-assigned Breakout Rooms will appear. Click on each room to see the list of student/staff emails that are associated with that room.
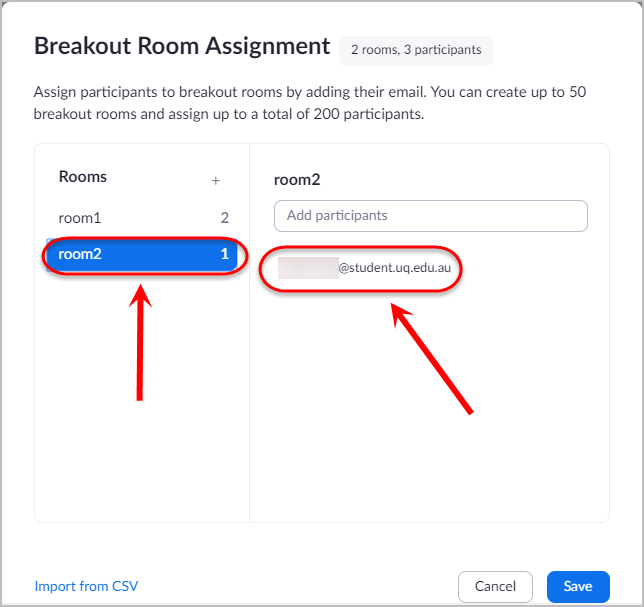
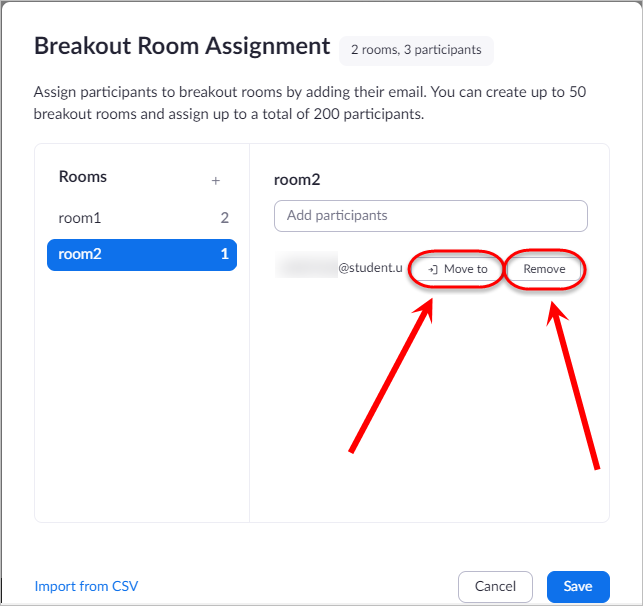
- Hover over a student/staff email address and click on the Move to button to change the allocated room or click on the Remove button to delete them from that room.
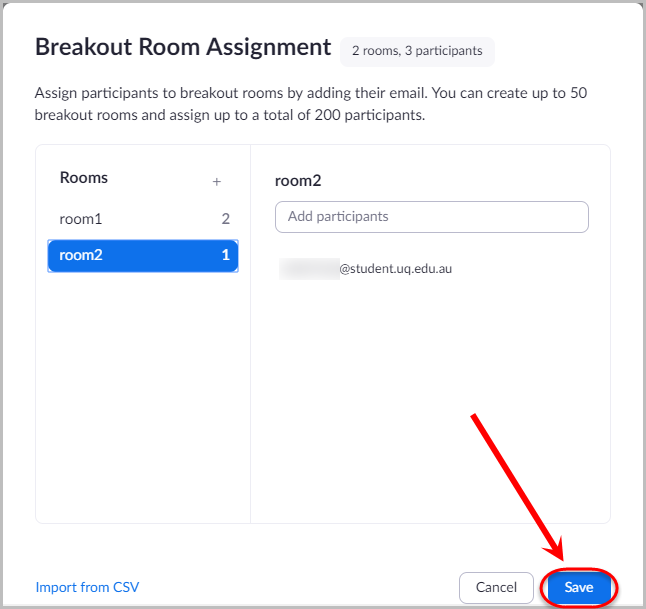
- Click on the Save button.
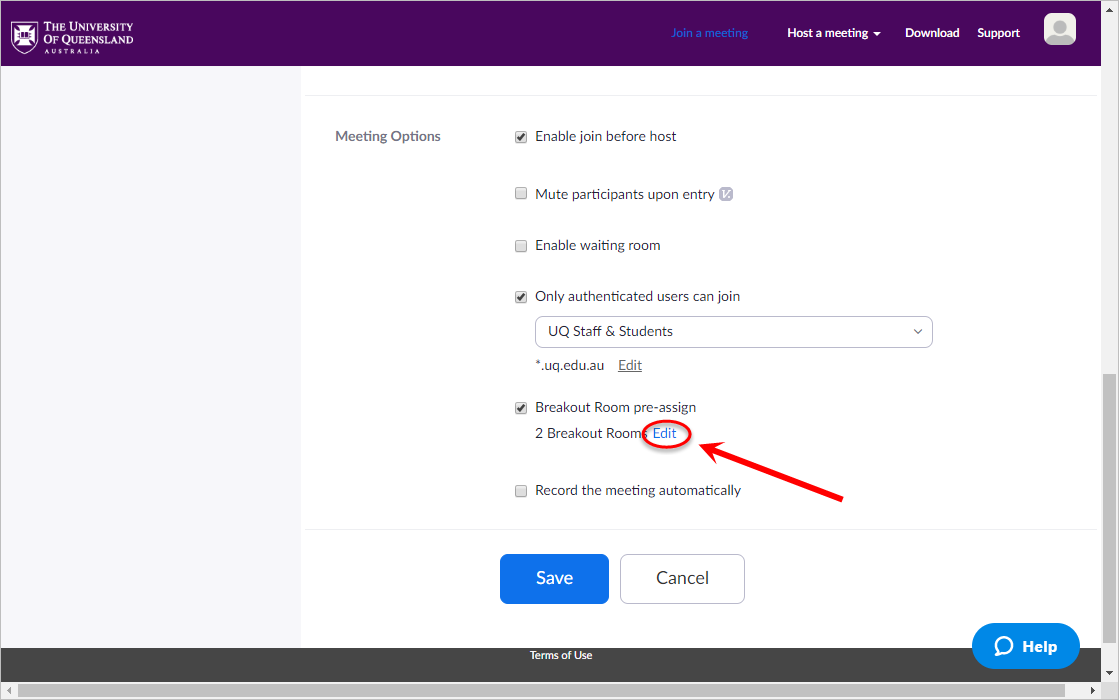
- If required, click on the Edit link to access the Breakout Rooms.
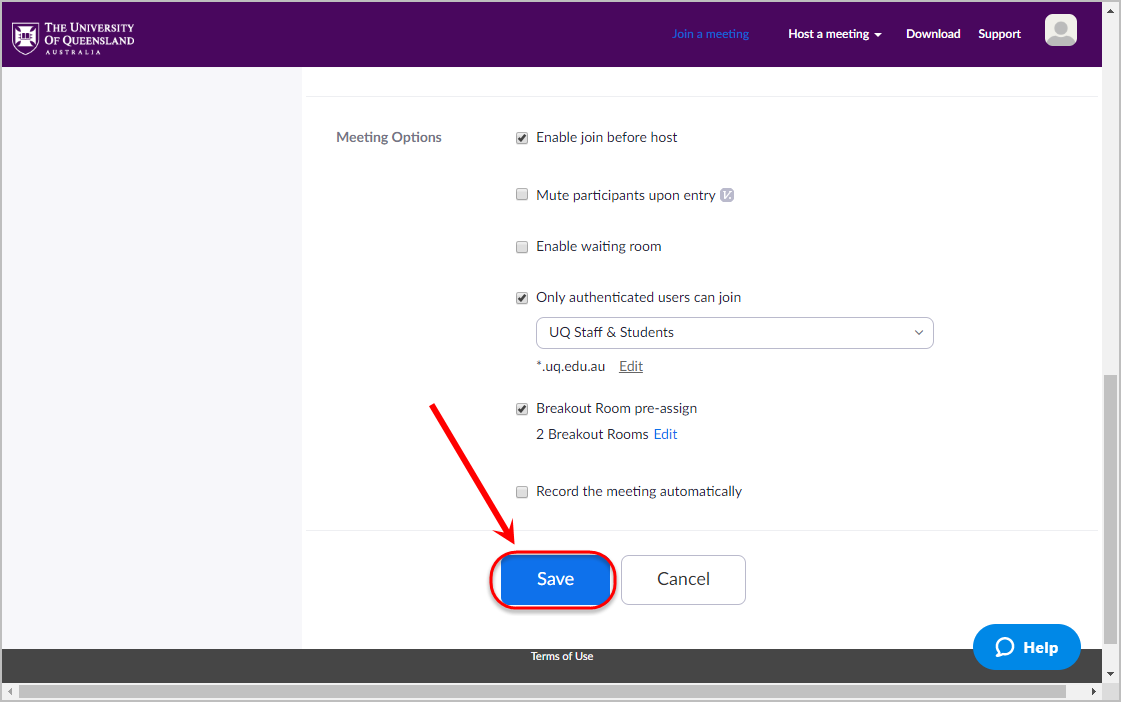
- Finish setting up any other meeting settings then click the Save button.
Option 2: Create Rooms
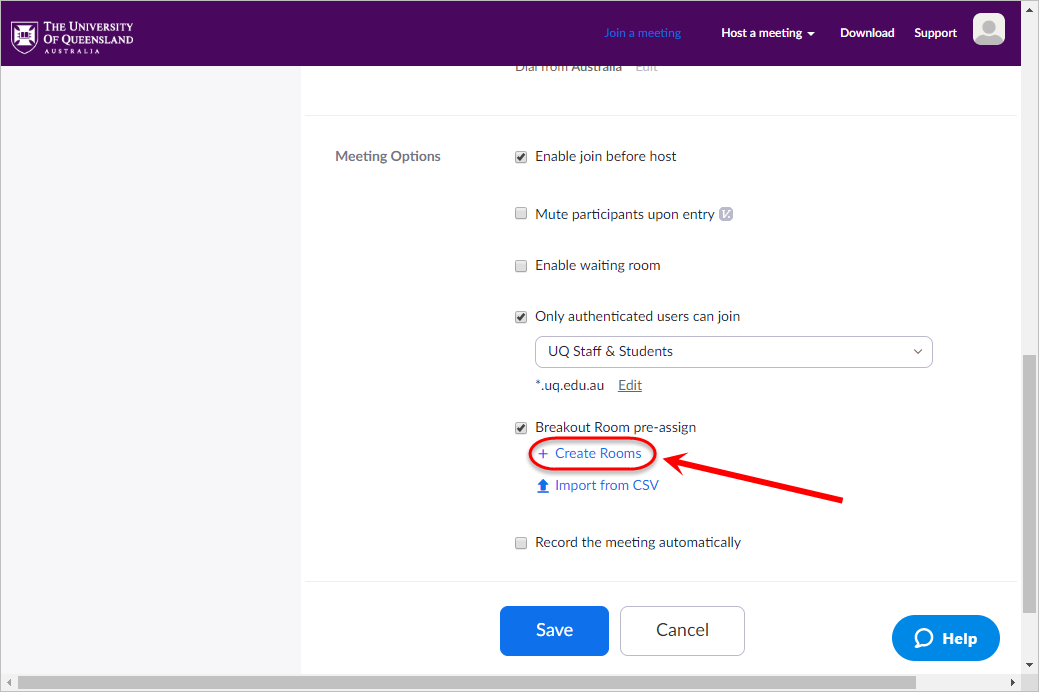
- Click on the + Create Rooms link.
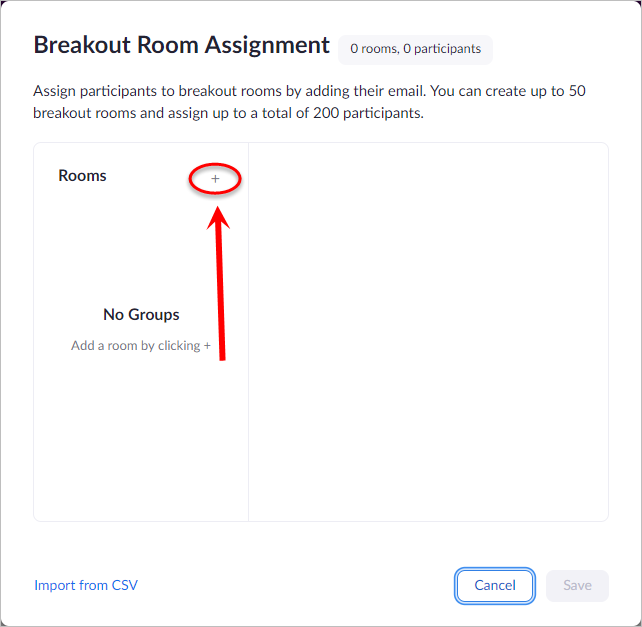
- Click on the + button in the left column to add a room.
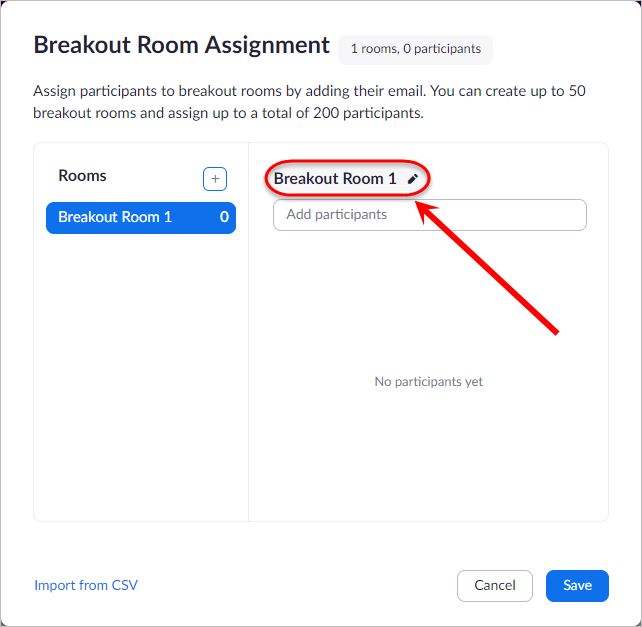
- Click on the name in the right column to change the name of the room.
Tip: The first room will be called Breakout Room 1 and each subsequent room will increase the number.
- Click on the Add participants box and type the name of a participant.
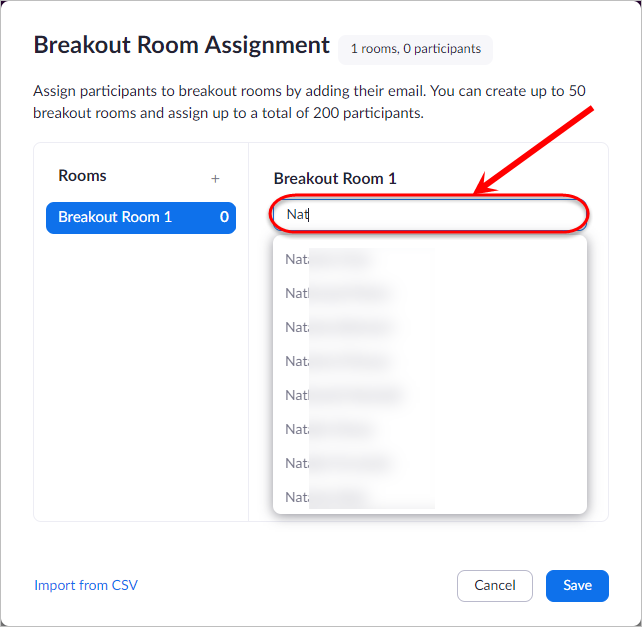
- Once the name is located click on the name to add it to the room (it will automatically convert to the participant's email address).
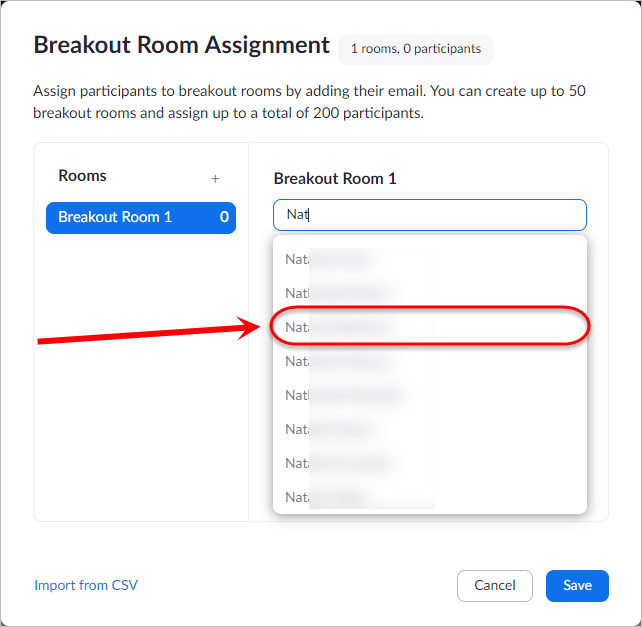
Warning: UQ's directory is extensive and it may not locate the participant's name or may present multiple options for a single name. If this is the case use their email address ie. s1234567@student.uq.edu.au for students and f.lastname@uq.edu.au for staff.
- Repeat steps 4 and 5 to add additional participants to the room.
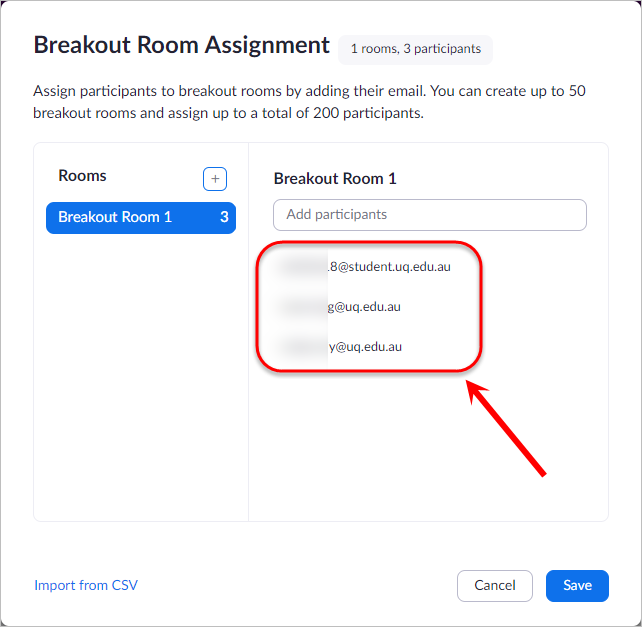
- Click on the + button in the left column to add an additional room.
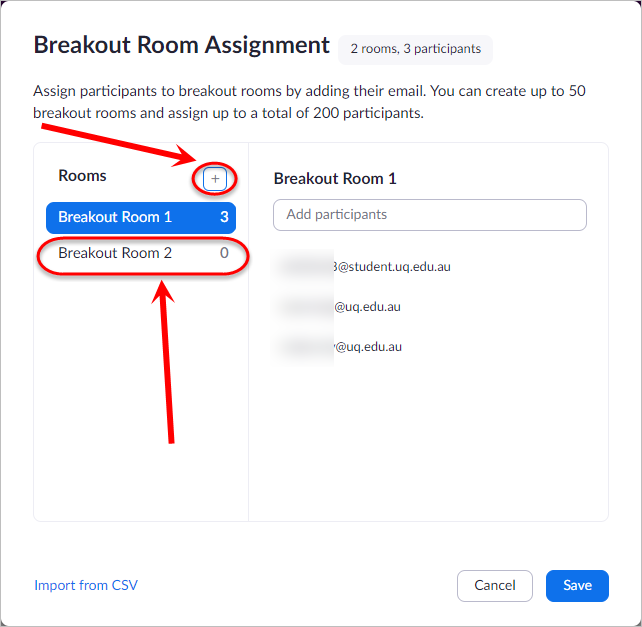
- Repeat steps 4 to 6 to add the participants.
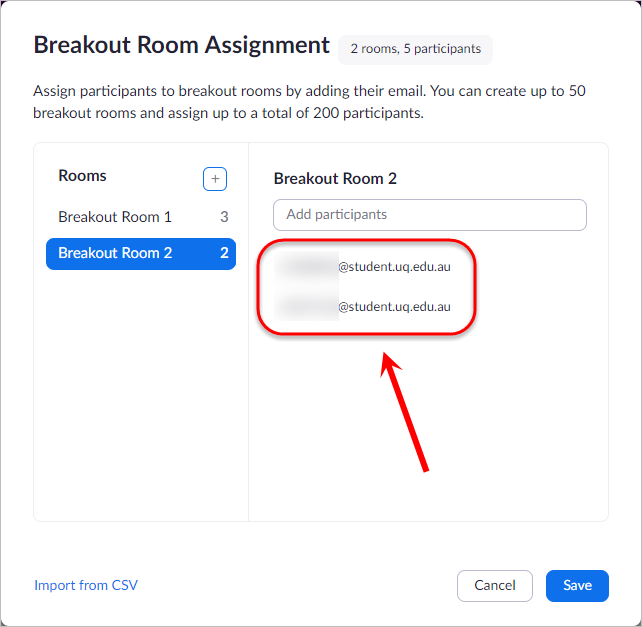
- Hover over a student/staff email address and click on the Move to button to change the allocated room or click on the Remove button to delete them from that room.

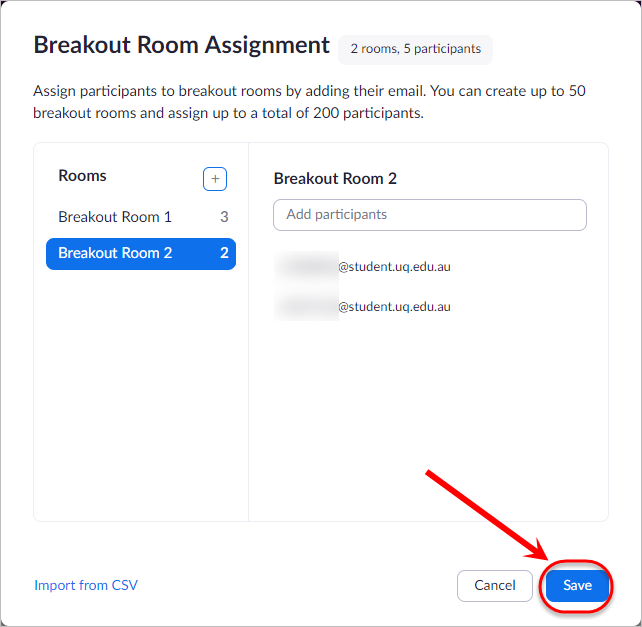
- Click on the Save button.
- Finish setting up any other meeting settings then click the Save button.


