Files in Teams (Original)
This guide provides instructions on how to:
- create and upload files
- create quick access to a file (e.g. create a tab or pin a file)
- share the file link in a post, chat/group chat or email.
Note: You can create your own group chat for collaboration in Teams.
2. Upload file in Teams
As a student, you are most likely to create or upload a file in your private channel for collaboration. Otherwise, you can use chat or group chat to collaborate with your group members.
Notes:
- Files uploaded to a standard channel are available for all team members.
- Files uploaded to a private channel are available only for the private channel's members.
- Uploading a file (from your personal drive) to a channel means creating a copy of the file for the channel's member to co-edit. All team members should be able to access the file in the channel to collaborate.
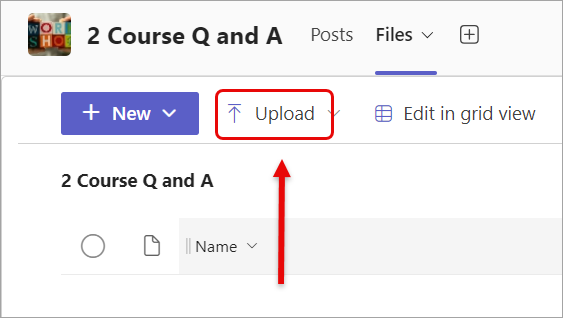
- Navigate to the relevant channel in a team.
- Click on the Upload button.
- Select the upload option (e.g. Files).
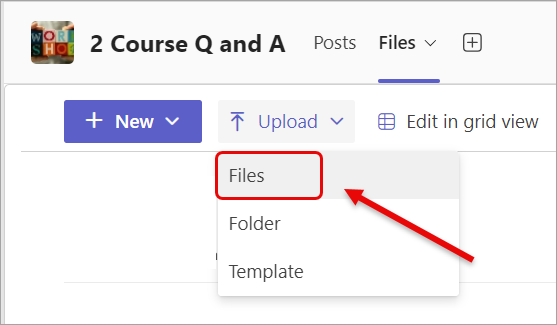
- Select a file from your device.
- Optionally, you can pin the file or add a file tab for quick access. Note: Your Course Coordinator needs to allow the 'add tab' permission for you to create a tab of the document if you are working in a private channel. Ask your Course Coordinator to refer to the Channel settings in Teams guide for more information (this guide is only available for teaching staff).