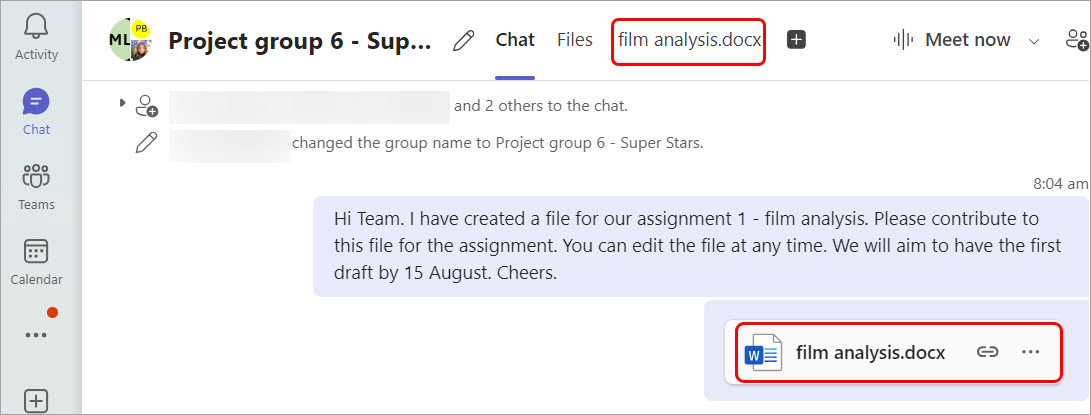
Group chat for collaboration in Teams (Original)
Group chat offers a private space for collaborators to chat and co-edit files.
This guide provides instructions on how to:
- create a group chat
- upload files for collaboration.
Note: You can always create a file and share it with your group members to collaborate without having a group chat in Teams.
Create group chat in Teams
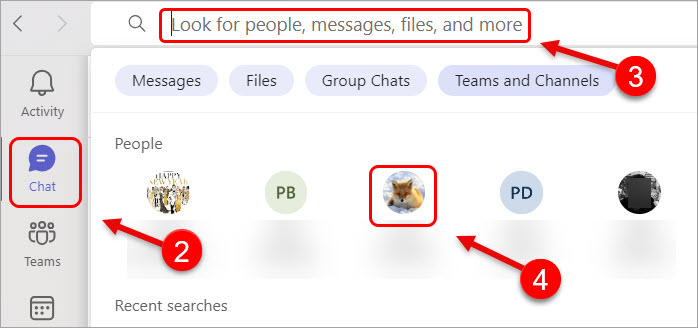
- Access MS Teams (app or web environment).
- Click on the Chat icon.
- Enter a name in the search box.
- Select the required contact (to start a chat conversation).
- Click on the Start a group chat button to add more members to the group.

- Enter a member's name. You can add multiple members at a time.
- Click on the Create button.

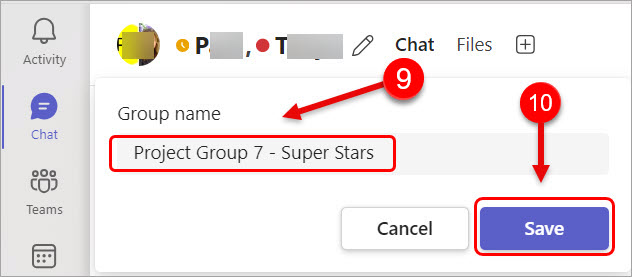
- Optionally, you can change the group name. Click on the pen icon.

- Enter the group name.
- Click on the Save button.
- You can start sending messages to group members in the group chat. Note: It is recommended to post a message to the group chat before uploading documents in Files for collaboration.

Upload files in group chat for collaboration
- Access your group chat.
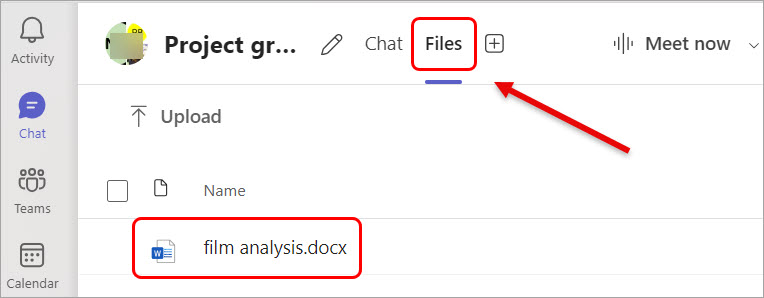
- Click on the Files tab.
- Click on the Upload button.
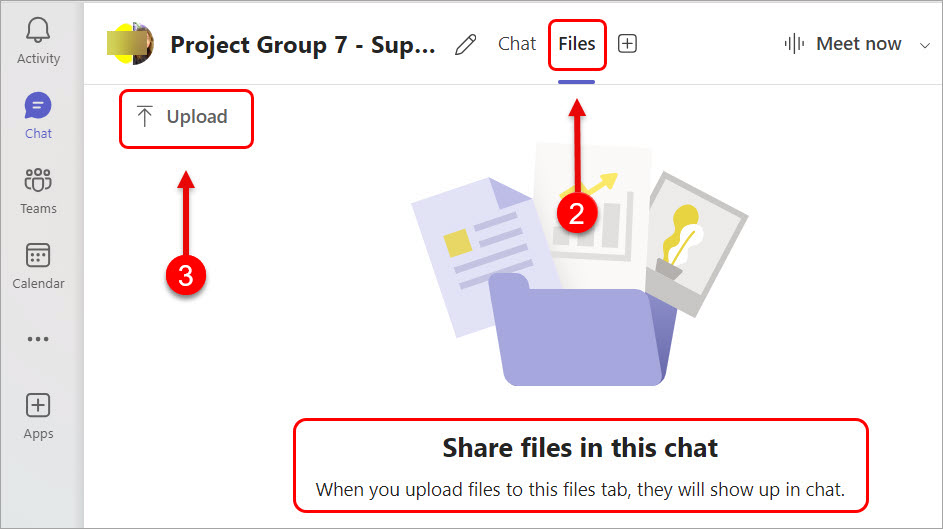
Note: When you upload a file, it will be shown in chat and saved in Files.
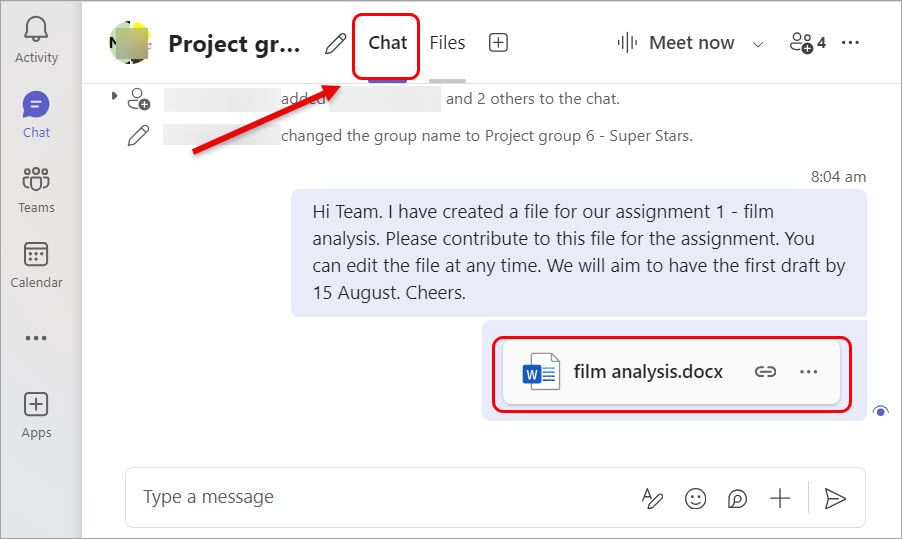
Optionally, you can make this file a tab for quick access.
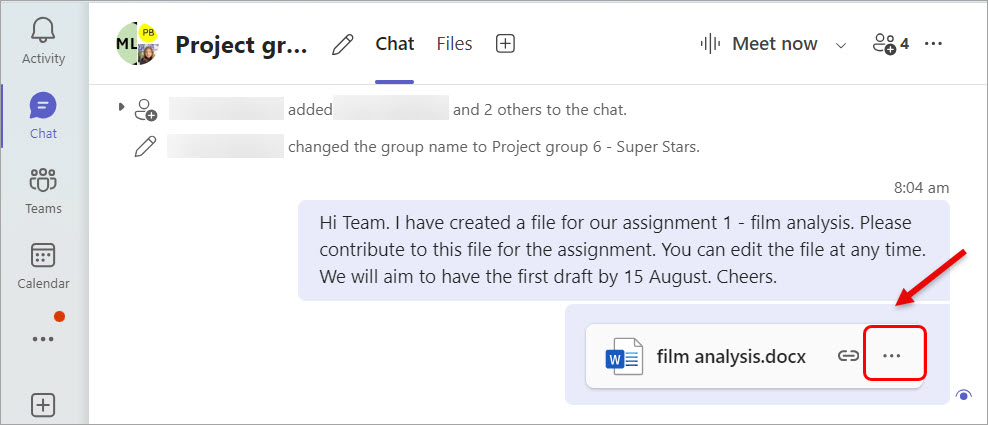
- Click on the three-dot (more options) icon.
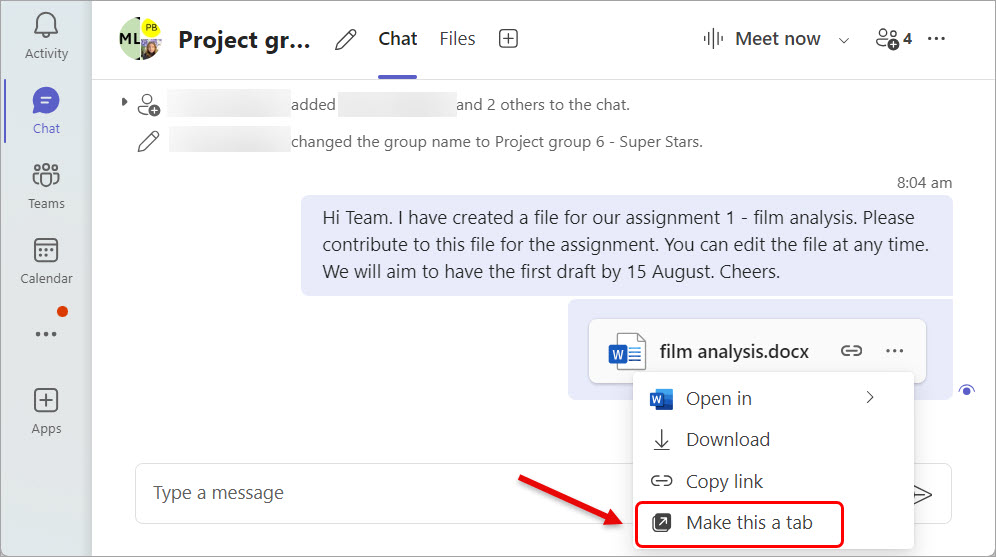
- Select the Make this a tab option.
The file is listed within the chat and as a tab for quick access within the group chat.
