Create and share files (Original)
This guide provides instructions on creating a file and sharing it with your group members to collaborate. You will need to create a file and save it in your drive/folder, then share the link with your group members via Teams chat or email.
Notes:
- Create and share file links in Teams chat: You need to change the file access settings before sharing the file link.
- Create and share files via email: Sharing a file via email provides direct access to the recipient.
For highly restricted content, please only share the files via emails, including only the recipients involved.
Create and share file link
Note: The access method included in this guide is for a file with general content. If you have highly restricted content such as a research paper, please email the file link directly to the recipients.
Instructions
Create a file and save it in the required folder
Note: You need to save the file before being able to share it with others.
Provide access to your group member
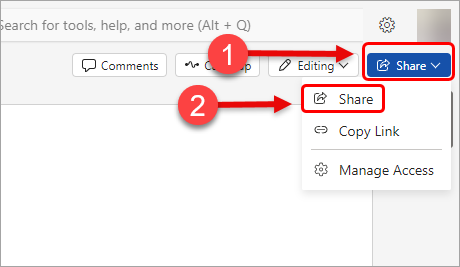
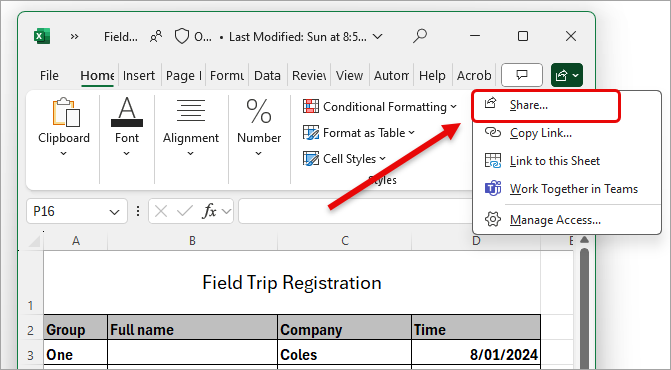
- Click on the Share button.
- Select the Share option.
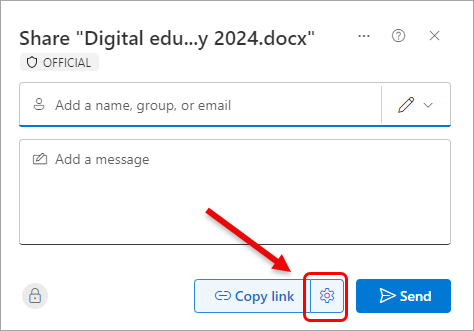
- Click on the cog button.
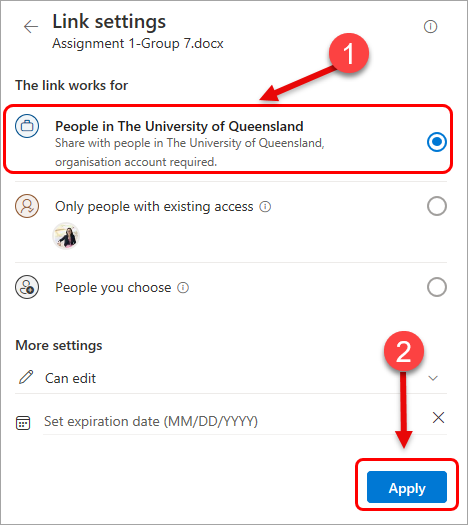
- Select the option People in the University of Queensland. Anyone with a Microsoft account with UQ who receives this link will have access to the file (after signing in).
- Click on the Apply button.
Share file link
- Click on the Share button.
- Select the Copy link option.
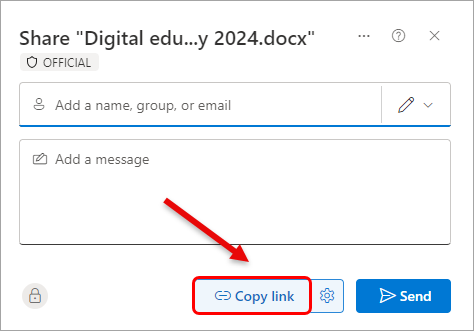
A message will be displayed.

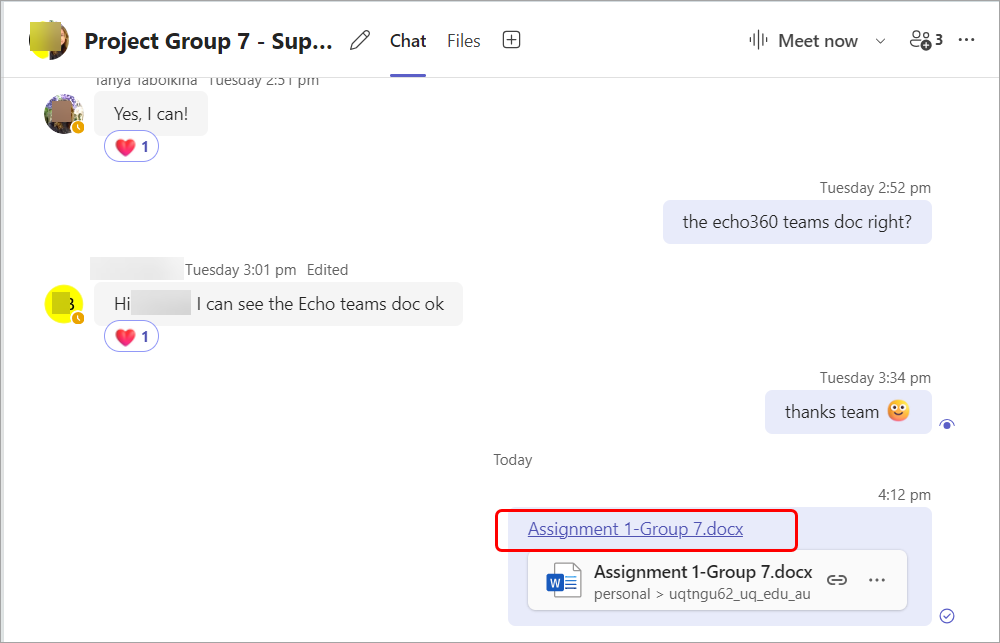
- Post the link in your group chat.
Share file via email
Create a file and save it in the required folder.
Note: You need to save the file before being able to share it with others.
Share file via email
- Open the file you would like to share with others.
- Click on the Share button.

- Select the Share option.
- Enter the recipient's name (their email address will be displayed to select). You can enter multiple recipients.
- Optional, enter a text message to let them know about the file.
- Click on the Send button.

The recipient will receive an email with the link to the file and they will have access to edit it.
