Create a Course Wiki (Original)
Note: It is not possible to create individual Wikis for students. For more information on how the create group wikis, refer to the Create a Group Wiki guide.
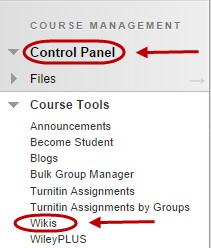
- From the Control Panel select Course Tools > Wiki.

Wiki information
- Click on the Create Wiki button.
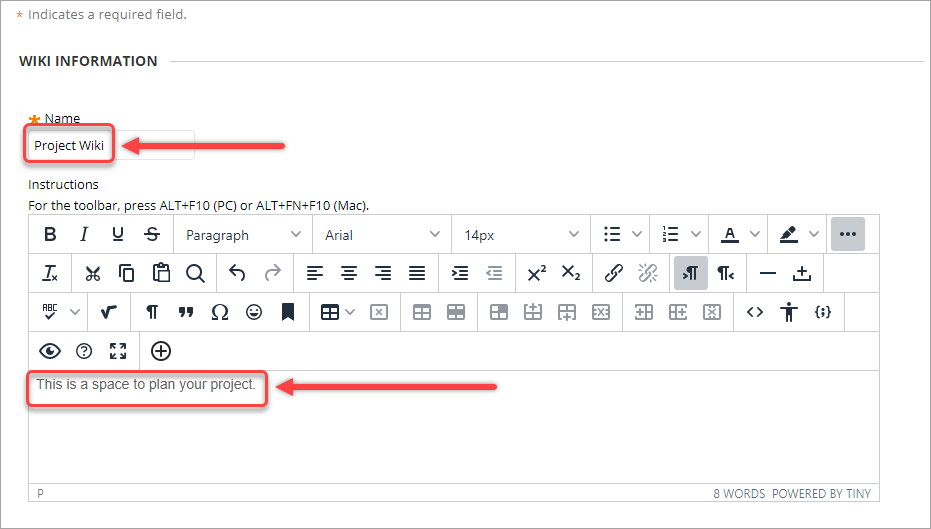
- Enter a name for the wiki in the Name textbox.
- Enter instructions for the students in the Description textbox.

Wiki Date and Time Restrictions
Set these if required. i.e. If the wiki is an assessment task you may need to restrict when it is available to students.
- Select the Yes radio button for the setting Wiki Availability.
- If required, select the Display After checkbox and enter the date using the Date Selection Calendar and enter the time using the Time Selection Menu.
- If required, select the Display Until checkbox and enter the date using the Date Selection Calendar and enter the time using the Time Selection Menu.

Wiki Participation
- Wiki participation can be limited to editing and/or commenting.
Note: Student access can be changed at any time.
- Closed to Editing: Select this option when you are the only one contributing pages or to disallow further page editing by users, such as when you want to grade the wiki pages. You can still view wikis when you select Closed to Editing.
- Open for Editing: Allows users to modify any wiki page. In a group wiki, a user must be a member of the group to edit a wiki page.
- Select the Open to Editing and Open to Commenting radio button.

Wiki Settings
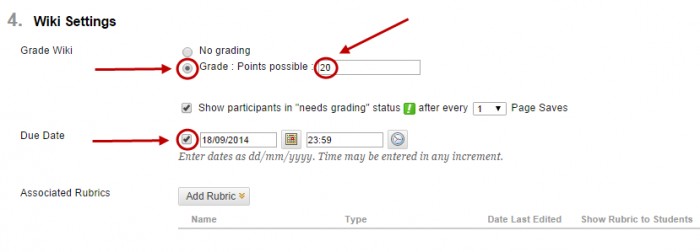
- Select Grade radio button if the item is an assessment task.
- Enter the total marks of the assessment in the Points possible textbox.
- Select the Due Date radio button to populate the due date of the assessment task.

OR
Note: Refer to the Rubric tool page for instructions on how to set up a rubric.
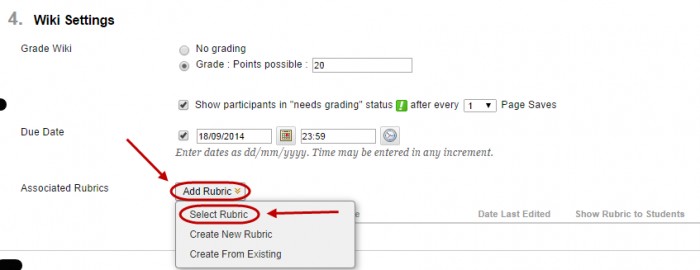
- Click on the Add Rubric button.
- Select Select Rubric from the drop-down list.

- Check the checkbox of the required rubric.
- Click on the Submit button.

- Click on the OK button if you want the points possible for the wiki to be the same as the total mark for the rubric. OR
- Click on the Cancel button and enter the total marks of the task in the Points possible textbox.
Note: The values of rubric cells will automatically change so the rubric totals the marks entered in the Points possible textbox.

- Click on the show rubric button and select Yes (With Rubric Scores) button.
- Click on the Submit button.
