Setup an ePAD / Program instance (Ultra)
Prior to setting up your ePAD / Program instance you will need to ensure you have created your cohort of students first. For further information on creating a cohort, refer to the Create a cohort guide.
2. Configure Allocation settings
Part settings
Within an ePAD there will be Parts. Parts are either setup for each year level of a program or as the entire program.
- set the Start Date and End Date of the Part
Note: The Start Date and End Date for a part will depend on whether your parts are year based or program based so set them accordingly. - if applicable set the Target Hours for the Part
- click the Save changes button
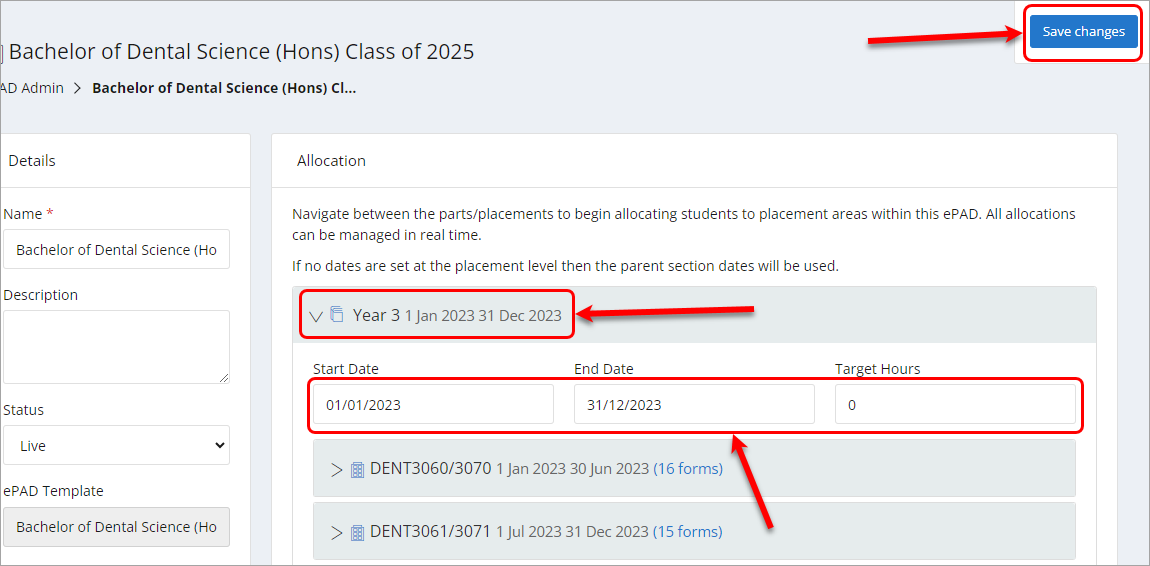
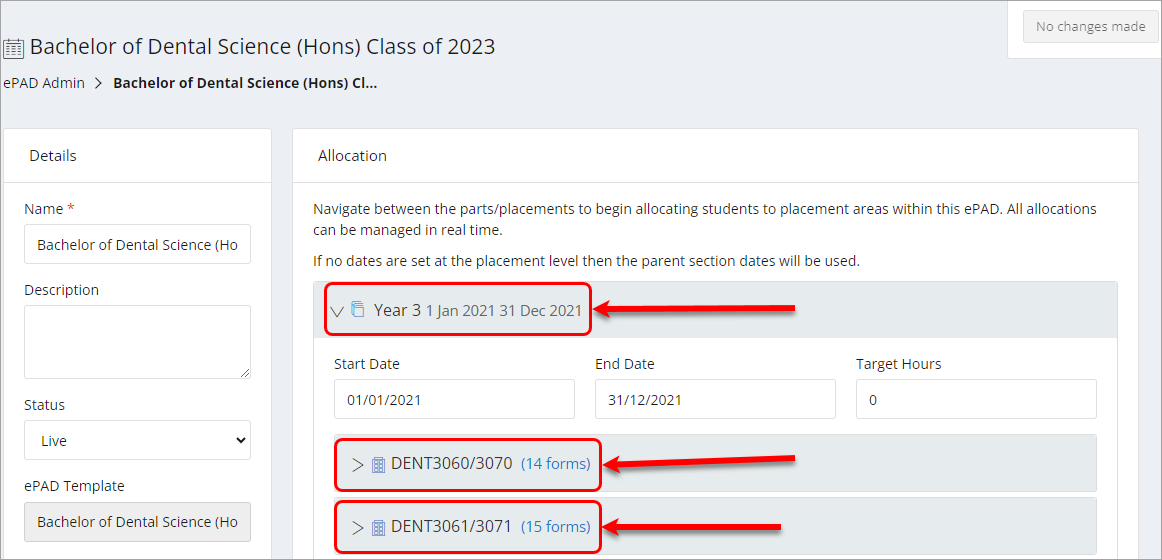
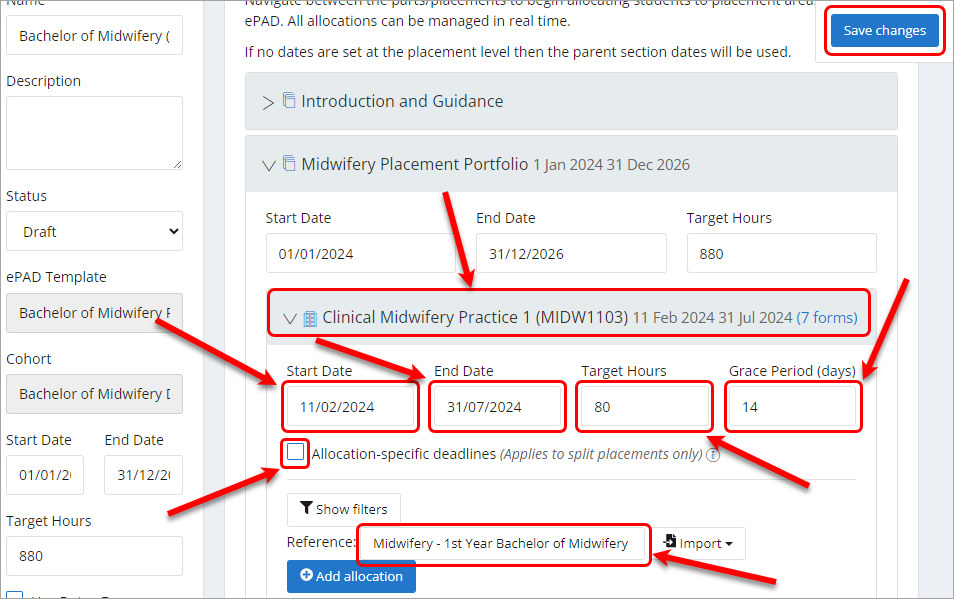
Placement block settings
Within an ePAD the placement blocks will be found under Parts headings for each Year level or under a program name these are called Parts. Placement blocks are named either after the placement course code for example DENT3060 (applies to Dentistry, Nursing, Midwifery and Vet Science) or under a placement rotation for example Surgery (applies to Medicine).
For each placement block you will need to set the following settings:
| Setting | |
|---|---|
| Start Date | This should be set at a date that is equal to 1 week prior to the first day of placement. |
| End Date | This should be set at a date that is equal to 2 weeks after the last day of placement. |
| Target Hours | This applies to courses using timsheets and should be set to the target hours for the placement block. |
| Grace Period (days) | The grace period refers to the number of days after the end of a student's placement that they can complete tasks. Recommend setting the Grace Period to 14 days. |
| Allocation-specific deadlines (Applies to split placements only) | Select this option when deadlines should be set for the individual placement allocations (if they have more than 1 placement) rather than across the placement period. |
| Reference | This textbox is where the InPlace allocation group name and experience codes should be placed. For examples of Placement block references, refer to the Placement block references guide. Warning: Ensure that there are no extra spaces at the beginning or end of the reference as this will stop placements from loading. |
Once the above placement block settings are set, click on the Save changes button.
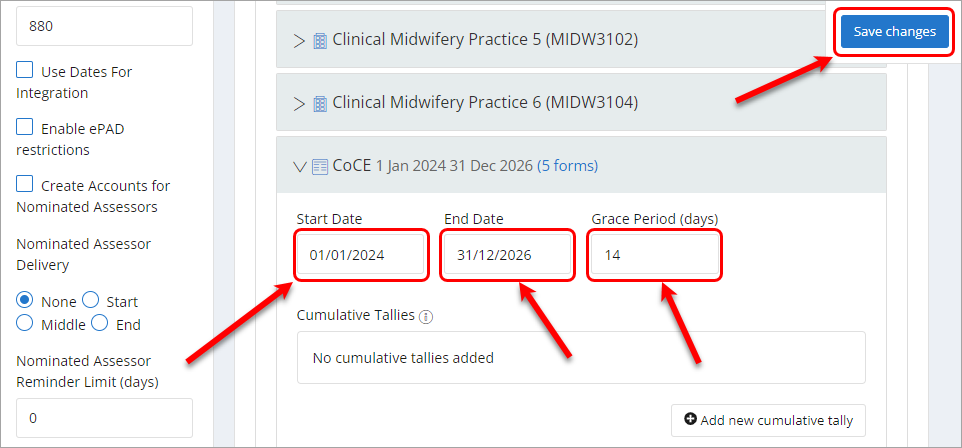
Ongoing assessment settings
Within an ePAD there may also be Ongoing assessment blocks under a Part. Ongoing assessment blocks are named after the type of assessment. Examples of ongoing assessments include DOPs (Direct observation of practical skills) in Medicine or CoCE's (Continuity of Care Experiences) in Midwifery. Ongoing assessments can be completed at any time by the student and generally will be completed across the whole program or year of a program
For each Ongoing assessment block you will need to set the following settings:
| Setting | |
|---|---|
| Start Date | This should be set at a date that is equal to the start of program or year that the ongoing assessment/s will be completed. |
| End Date | This should be set at a date that is equal to the end of program or year that the ongoing assessment/s will be completed. |
| Grace Period (days) | The grace period refers to the number of days after the end date of the ongoing assessment block. Recommend setting the Grace Period to 14 days. |
Once the above Ongoing assessment block settings are set, click on the Save changes button.