Create a Discussion (Original)
Warning: Prior to adding or editing content in your course you will need to access Studio view. Refer to the Change from Student View to Staff Editing (Studio) View guide for further instructions.
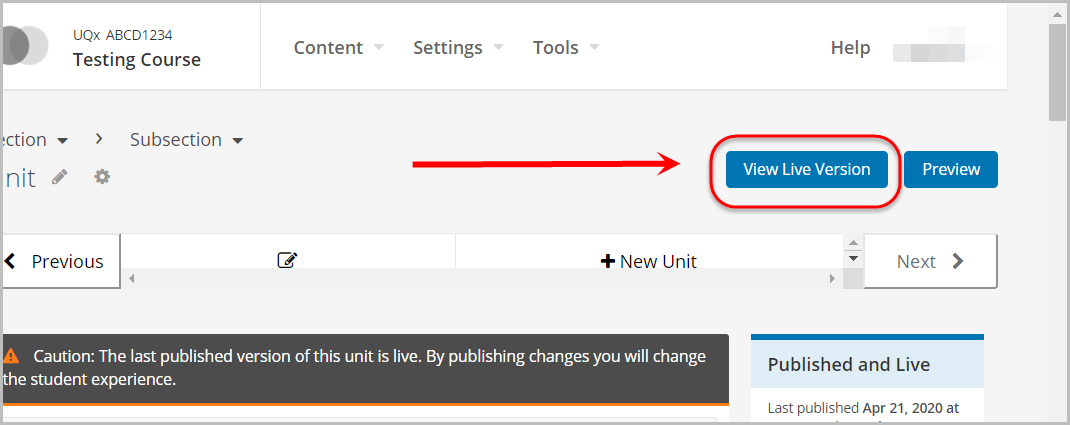
Note: Creating the discussion area only makes it visible in the unit; you have to access your UQ Extend course by clicking on the View Live Version button then add questions etc to the Discussion Board. For more information, refer to the Publish UQ Extend content guide.
1. Create a Discussion
- In your unit, click on the Discussion button.
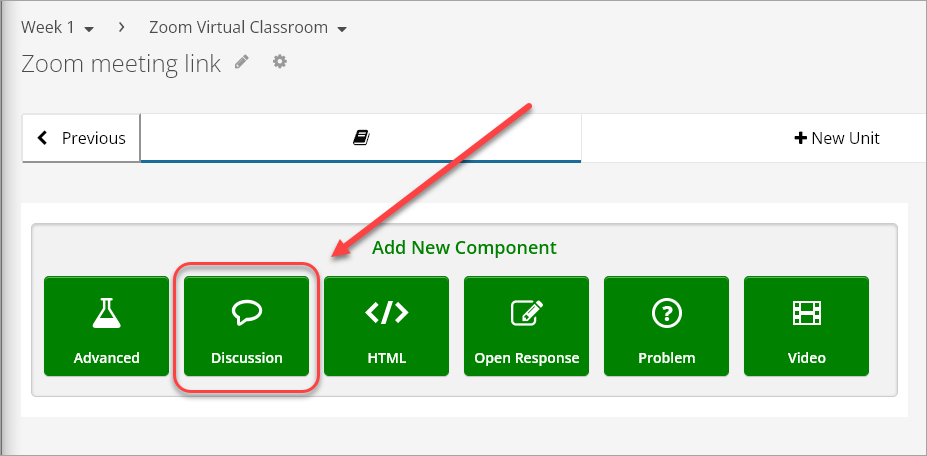
- Click on Edit.

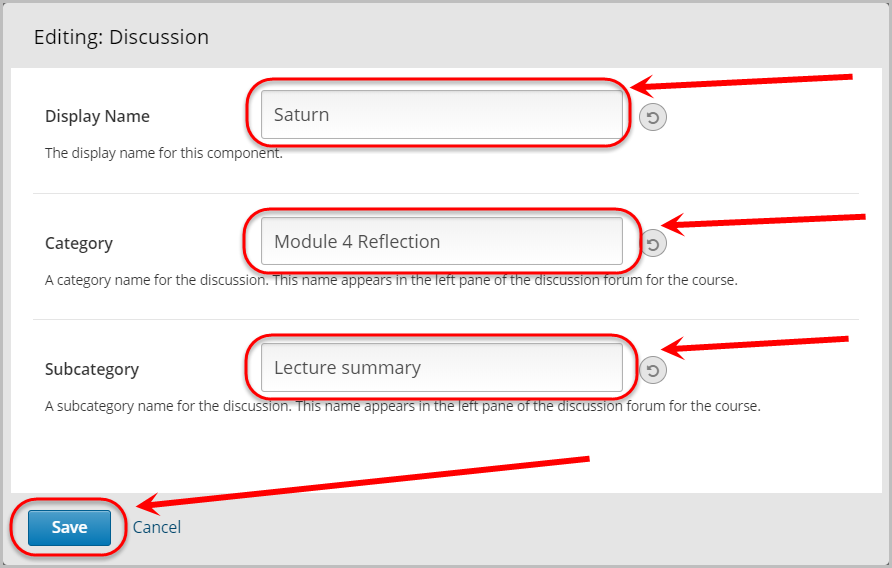
- Enter the discussion name in the Display Name textbox.
- Enter the category in the Category textbox.
- Optionally, enter the subcategory in the Subcategory textbox.
- Click on the Save button.
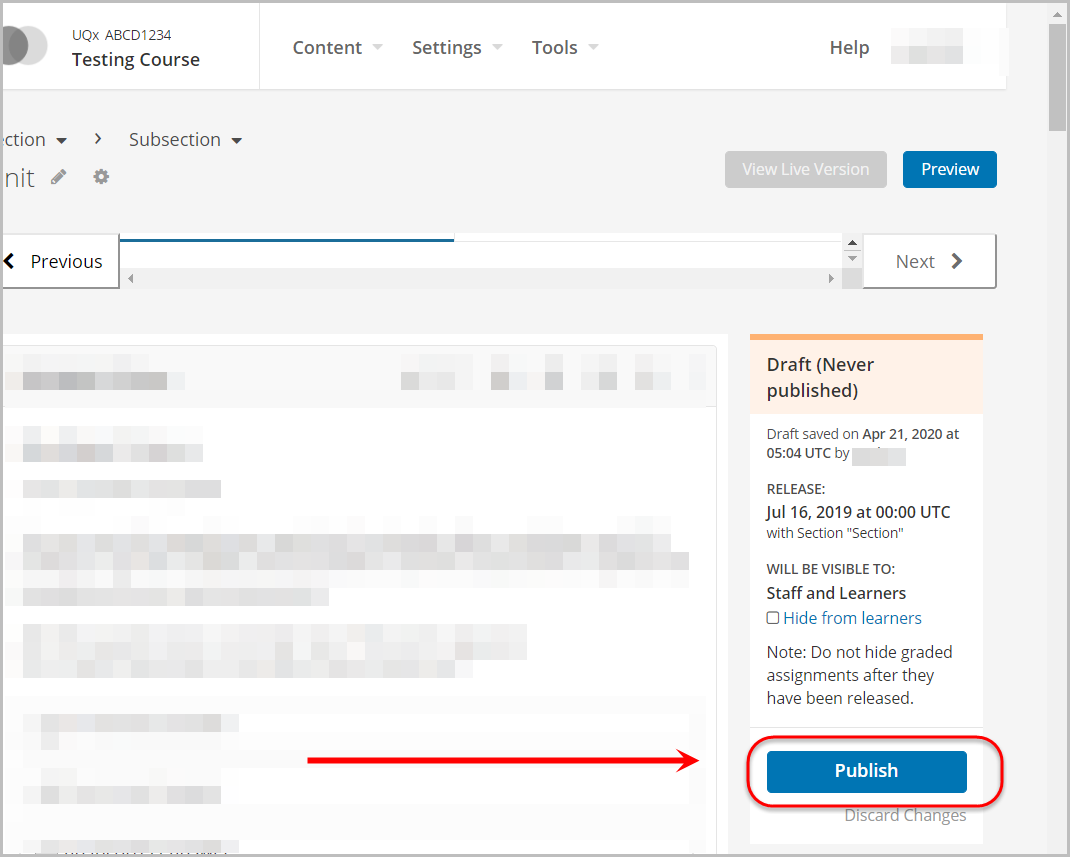
- In your unit, click on the Publish button.
Note: For more information, refer to the Publish UQ Extend content guide.
- Click on the View Live Version button.
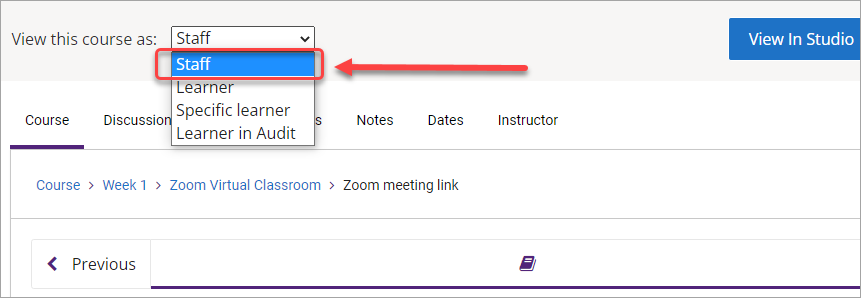
- Select Staff from the View this course as: drop-down menu.
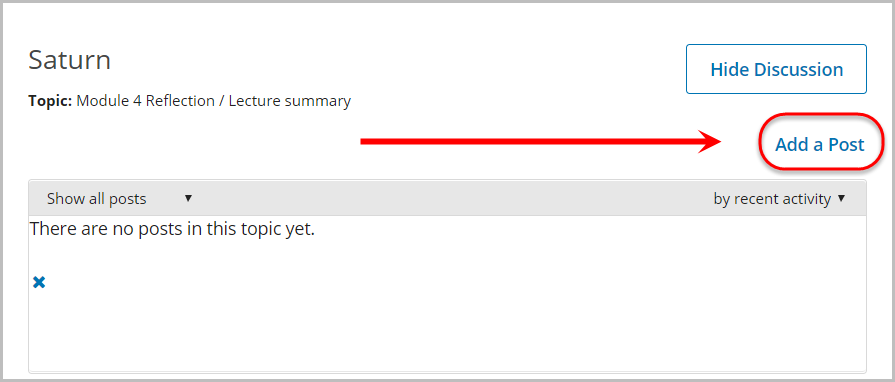
- Locate the Discussion you created in the unit and click on Add a Post.
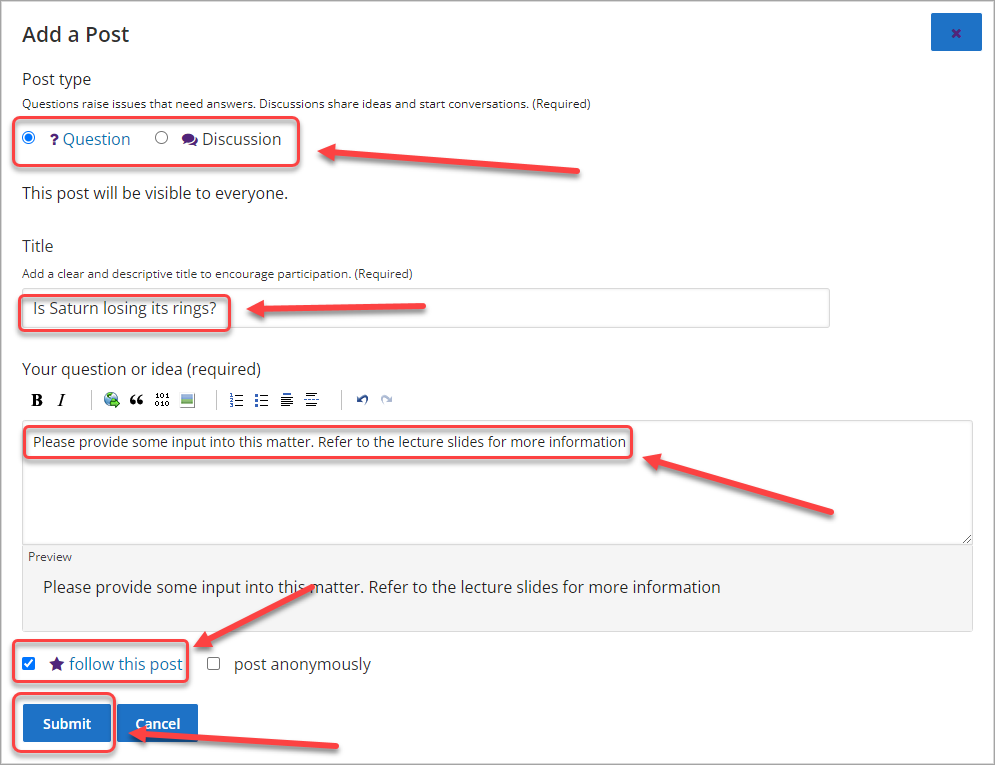
- Select either the Question or Discussion radio button.
- Enter a title in the Title textbox.
- Enter your information in the Your question or idea (required) textbox.
- Optionally, check the follow this post checkbox.
- Click on the Submit button.
