Set up Microsoft Bookings service
Before setting up your course's Microsoft Bookings service, you might consider Adding your teaching staff member to the booking page.
Five major settings are required in setting up a Microsoft Bookings service:
- Basic details
- Availability options
- Assign staff
- Custom fields
- Notifications
Access, Edit, Add, or Delete Microsoft Bookings Service
A Microsoft Bookings page can have multiple services. For example, in your course, you might have a service for general consultations and another for assignment interviews.
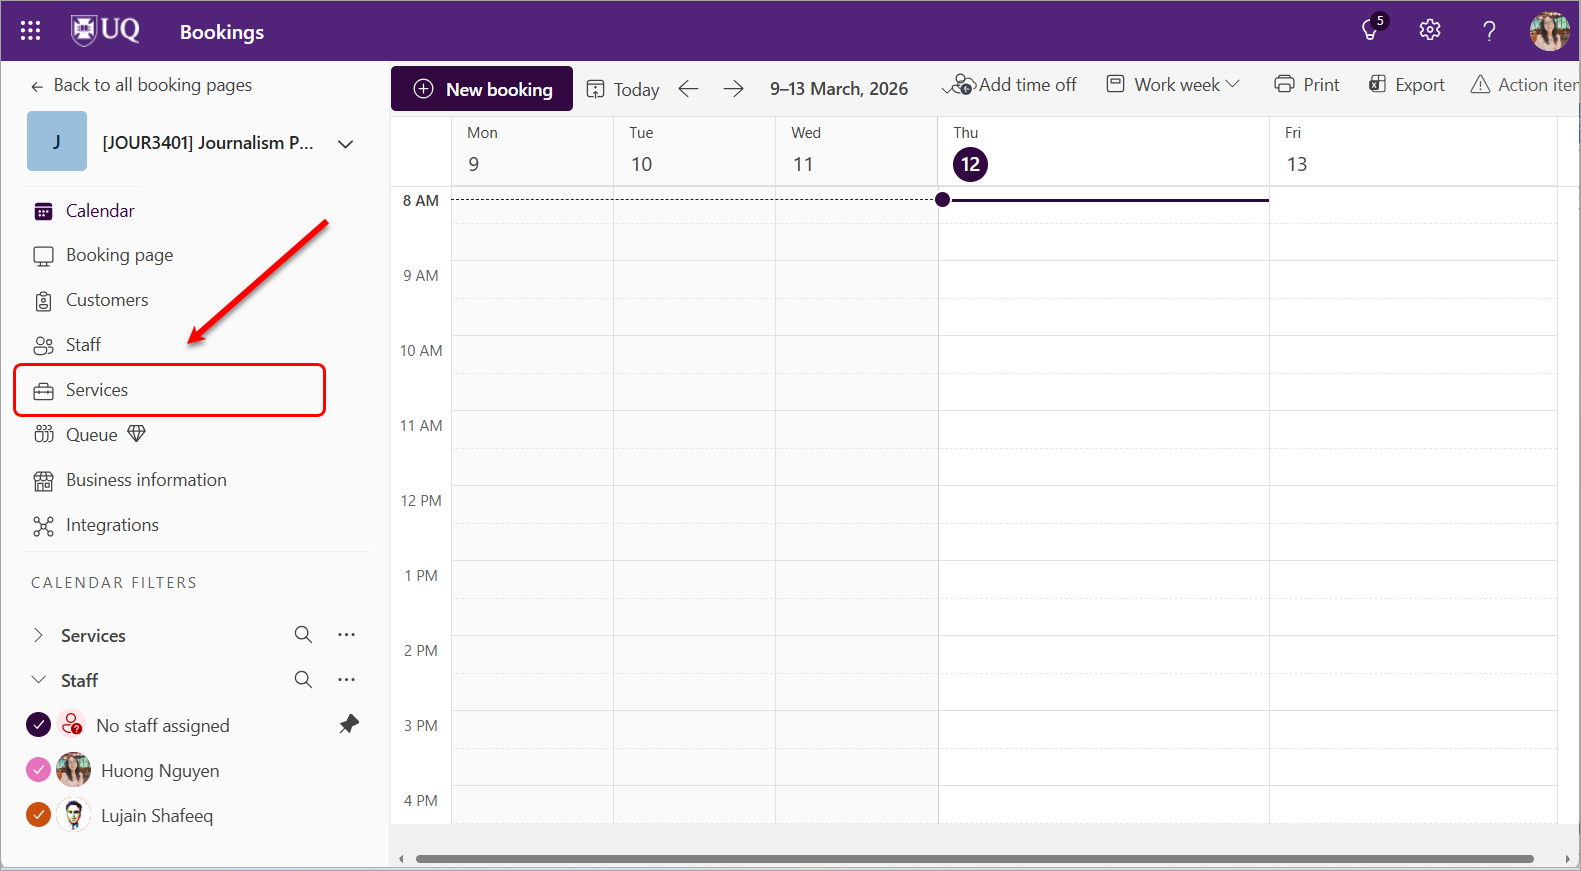
Access the Services in your Booking Page
- Access your course's Microsoft Bookings page from the UQ Bookings app.
- Click on the Services button.
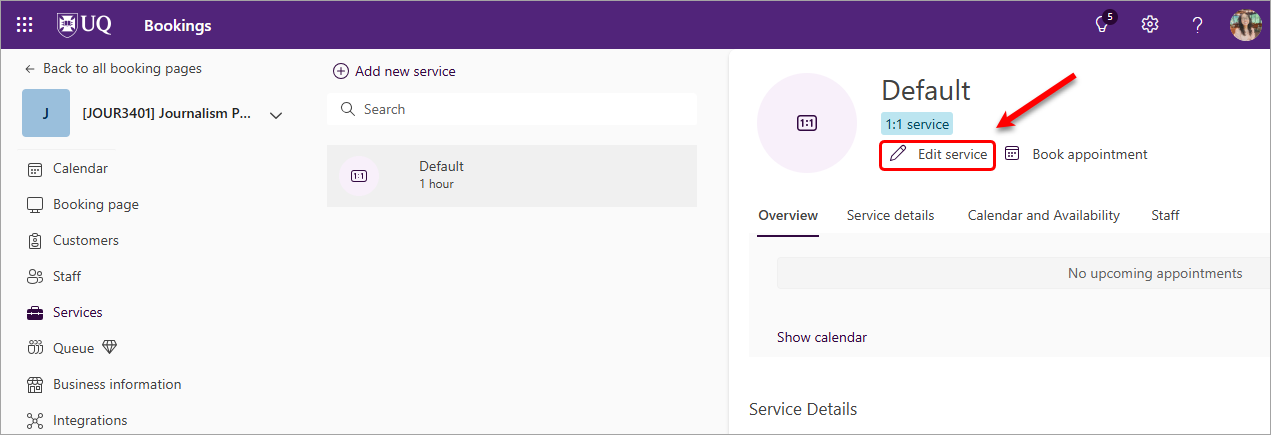
Edit a Service
A Default service has been added to your booking page for one-on-one booking. If this is your course's booking requirement, you can Edit service to start configuring the relevant service for your course.
If your course requires a different setting, e.g multiple availabilities at one time slot (because your course has different teaching staff and you want students to ONLY book with you and you will DELEGATE the bookings to relevant staff), you can Add new service.
- In the Services area of your booking page, click on the Edit service button.
Continue to set up your service with:
- Basic details
- Availability options
- Assign staff
- Custom fields
- Notifications
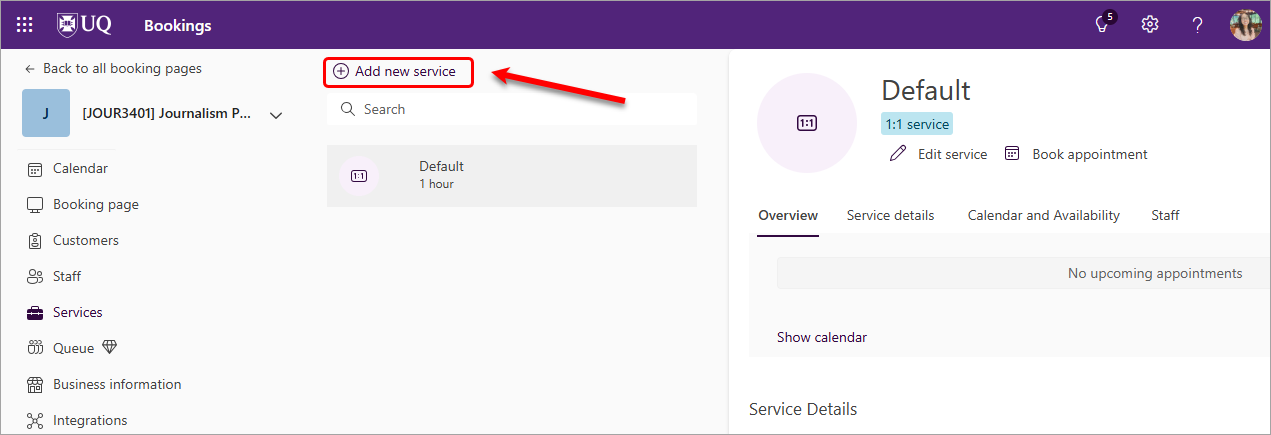
Add a Service
- In the Services area of your booking page, click on the Add new service button.
Continue to set up your service with:
- Basic details
- Availability options
- Assign staff
- Custom fields
- Notifications
Delete a Service
- In the Services area of your booking page, click on the bin icon of the service you want to delete.

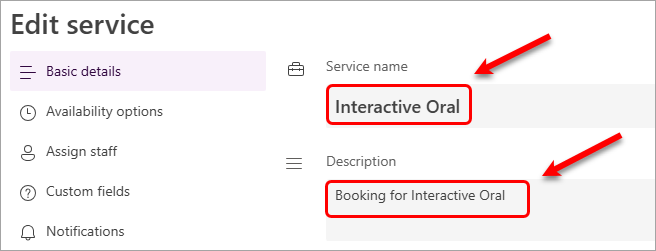
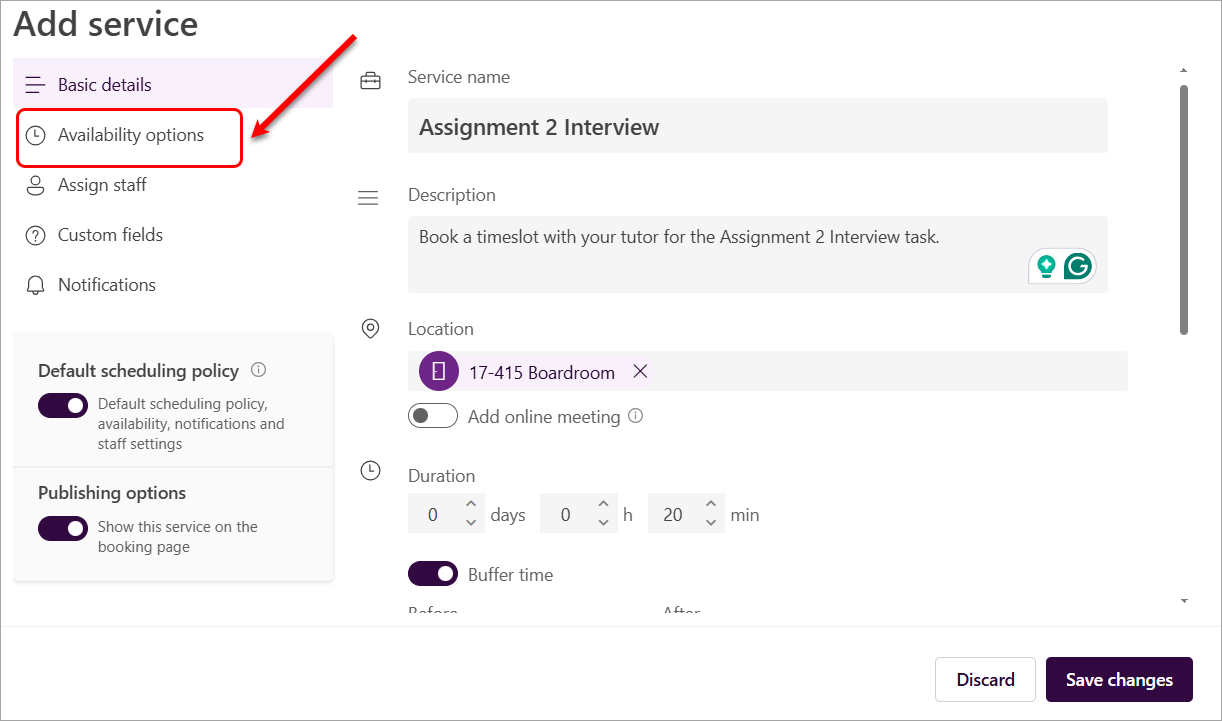
Microsoft Bookings - Basic Details
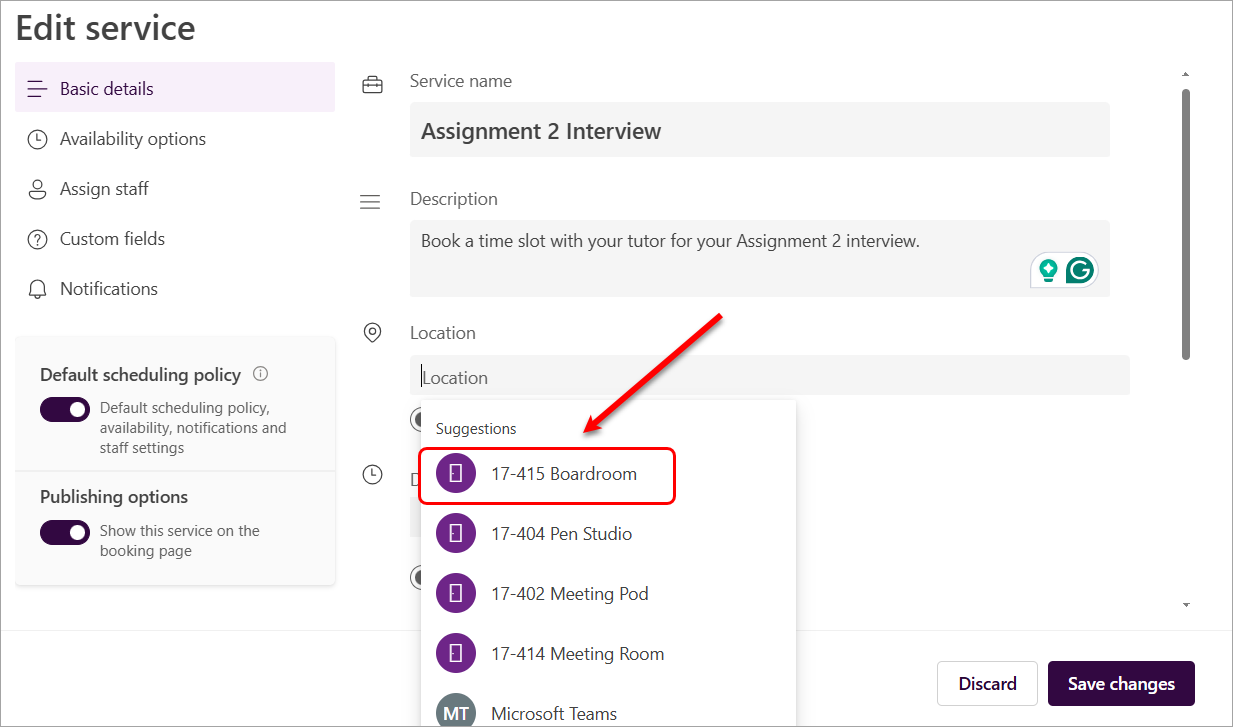
- Enter a Service name in the text box. Tip: Please use your assessment task name.
- Enter a Description in the text box, This description will be displayed for students when they book an appointment.
- For an in-person meeting, enter a relevant location.
- Select the relevant location link from the suggestion list.
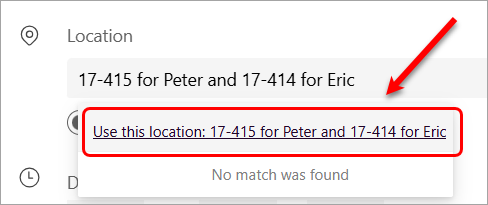
Tip: If this service includes multiple staff members, you can enter location details for each staff member and then select the generic booking link. This will not display the exact on‑campus location to students, but it can be used as a reminder of the appointment location.
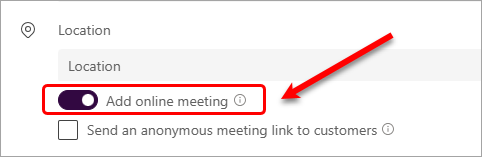
- For an online meeting, enable the option Add online meeting. A Teams meeting link will be included in the calendar invite.
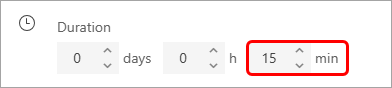
- Select the required Duration of the meeting. For example, if your interview is scheduled for 15 minutes, select 15 minutes. This information will be displayed for students when they book an appointment.
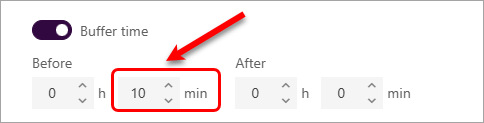
- Enable the Buffer time option. Buffer time is useful if you or your team need administration or travel time between bookings.
We recommend setting a buffer time before appointments, e.g 10 minutes. If you have an existing meeting that finishes before a student’s bookable time, the system will automatically display the next available time as 10 minutes after your meeting in your Outlook calendar.
If you also need time after each meeting, set the Time increments in the Availability options to add an additional 5–10 minutes between bookings.
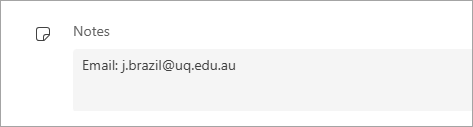
- Optionally, you can add Notes to students, such as the locations for all teaching staff or the course's email address. Students can view this information when they receive the booking confirmation email.
- With the default setting, the booking is 1:1 attendee is selected (One student per time slot).
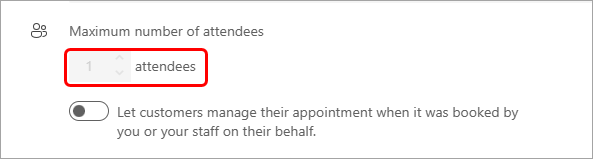
- If you need to have multiple availabilities per time slot, you will need to create a new service to enable this option.
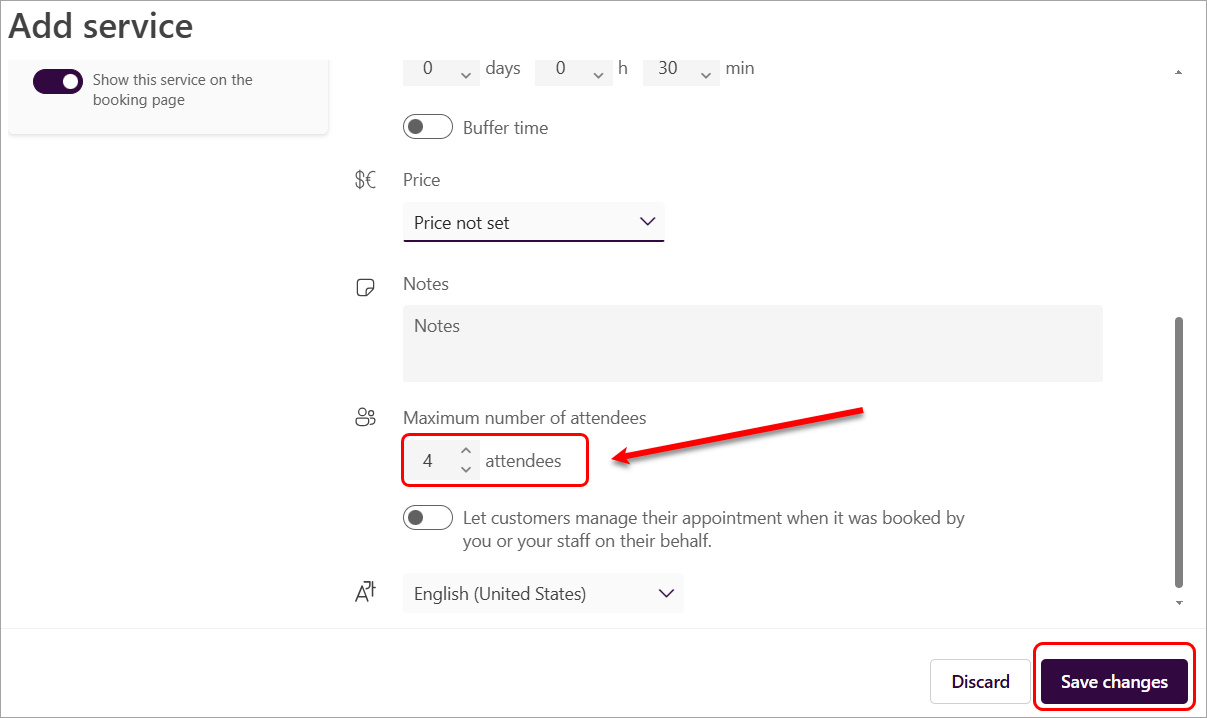
Note: Multiple availabilities can be created for the same time slot when a course has different teaching staff. This setup ensures that students book only with you, rather than selecting individual staff members directly. You can then delegate bookings to the appropriate staff member, helping to distribute bookings evenly or prevent students from booking with the incorrect staff member. - Select the required number of attendees.
- Click on the Save changes button before continuing to the next settings.
Microsoft Bookings - Availability options
The Availability options refer to the availability of the service, not the availability of individual staff members.
- Select the Availability option from the settings list.
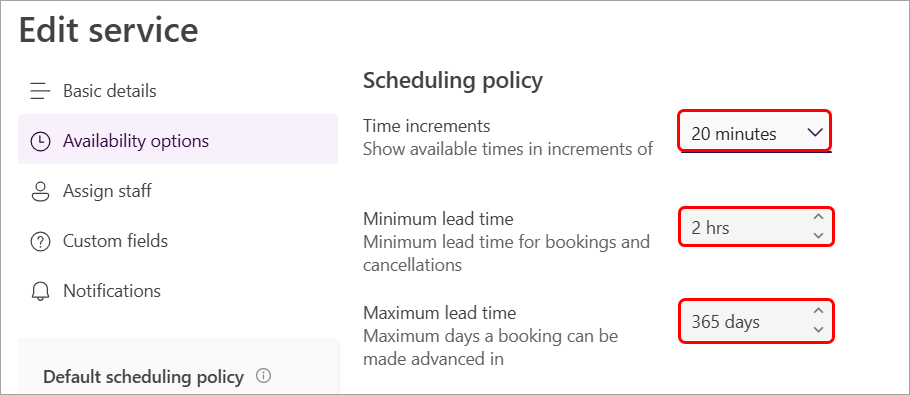
Scheduling policy
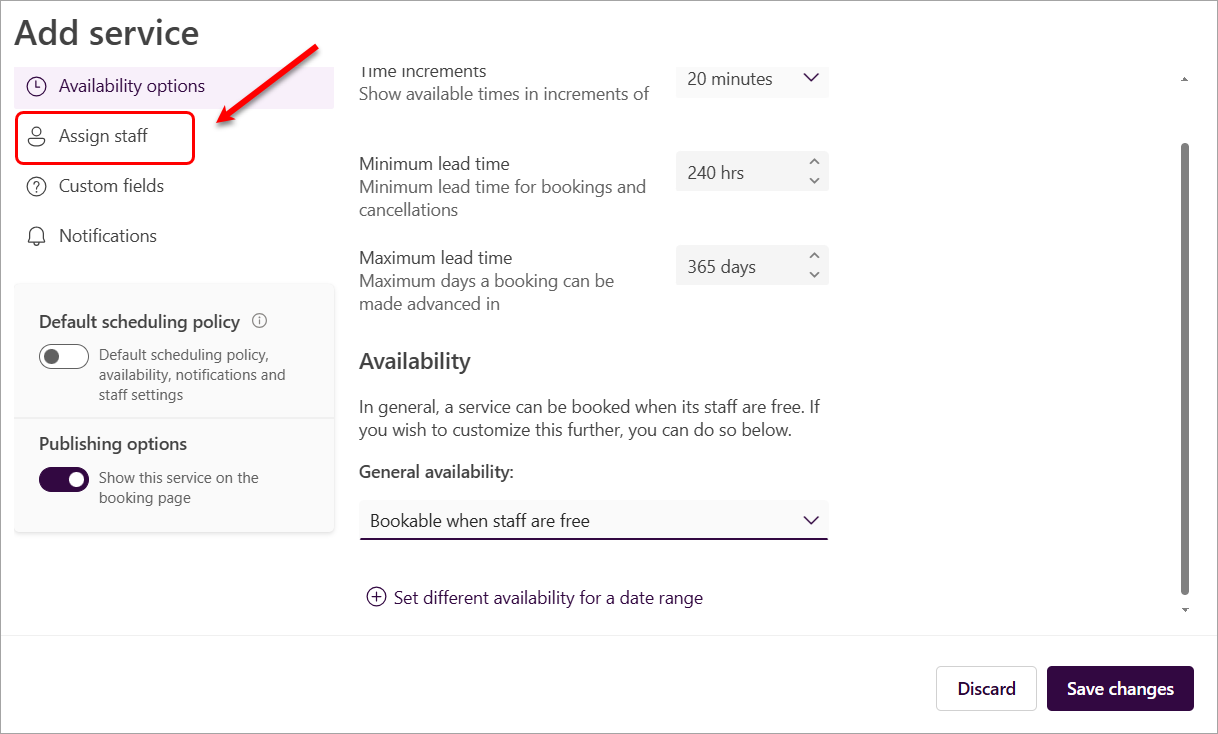
- Enter a relevant duration in the Time increments box.
Tip: Add 5–10 minutes to the meeting duration. For example, if an interview is scheduled for 15 minutes, set the time increments to 20 or 25 minutes. This allows a few minutes to complete administrative tasks after the meeting or interview. - Enter the required time in the Minimum lead time box. This setting controls how close to the appointment time students are allowed to make a booking.
Tip: The appropriate lead time will depend on student booking behaviour for your course—some courses allow bookings with as little as 1 hour’s notice. - Enter the required time in the Maximum lead time box. This setting controls how early students can make a booking.
Tip: You can leave the default 365 days option selected to allow students to schedule appointments well in advance.
General Availability
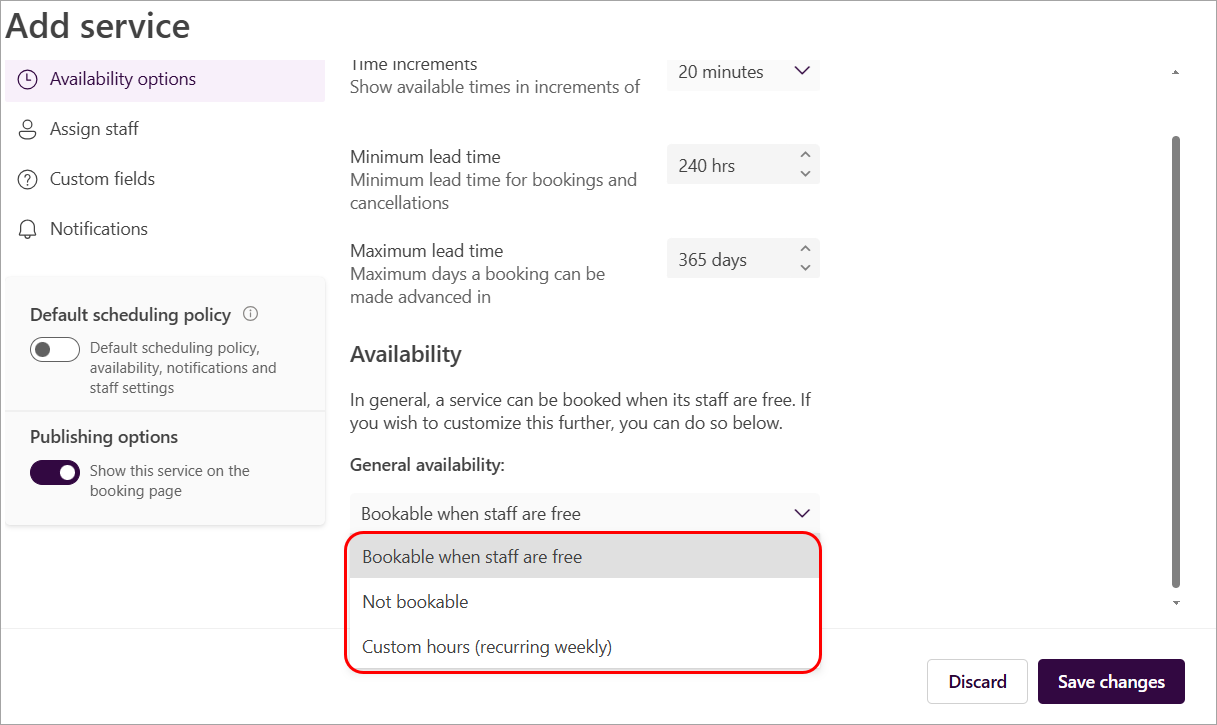
Three categories of service availability that apply to the general availability of your service:
- Bookable when staff are free: This means that your service will only be available when your staff members who offer this service are also available. This option helps you avoid double-booking or conflicts in your staff's schedule. This option is recommended for general consultation services, such as meeting with a teaching staff member to discuss an assignment.
- Not bookable: This means that the service cannot be booked by students. You can use this option to temporarily suspend a service or make it unavailable for online booking. Note: This setting is required when you want to define availability using a specific date range.
- Custom hours: This means that you can set a specific weekly schedule for your service availability. This option gives you more flexibility and control over your service schedule. This option is recommended when teaching staff have set their own availability for student consultation times.
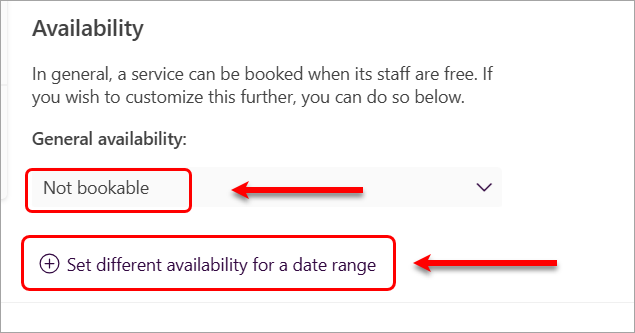
Specific Date Range Availability - Recommended
This setting allows you to define a specific period during which the service is available. For example, you may restrict availability to Week 7 of the semester if interviews are only scheduled during that time.
- Open the Services settings of the service you want to change your availability for.
- Click on the Availability Options from the settings list.
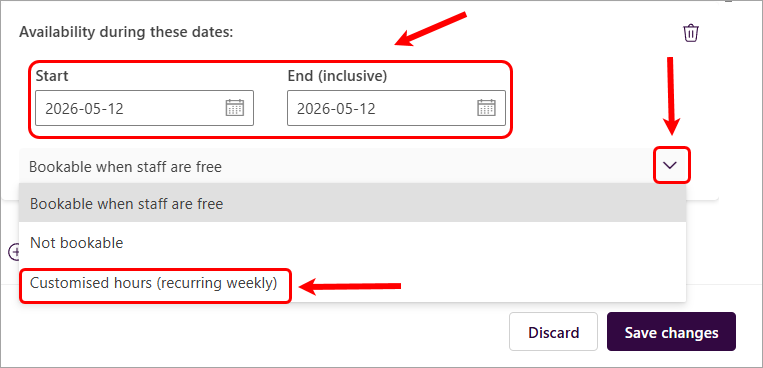
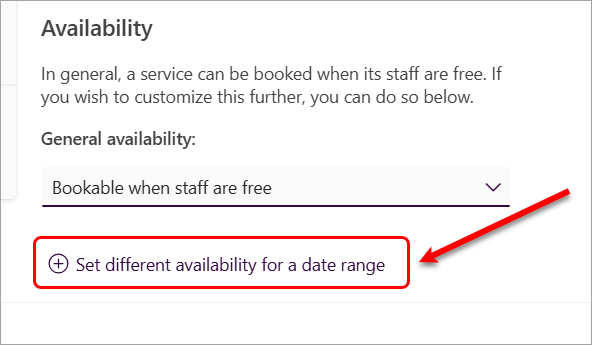
- Select the Not bookable option from the General availability drop-down list.
- Click on the Set different availability for a date range link.
- Enter the Start and End (inclusive) dates for that period.
- Click on the down arrow (next to the Bookable when staff are free option).
- Select the Customised hours (recurring weekly) option.
a { text-decoration: none; color: #464feb; } tr th, tr td { border: 1px solid #e6e6e6; } tr th { background-color: #f5f5f5; }
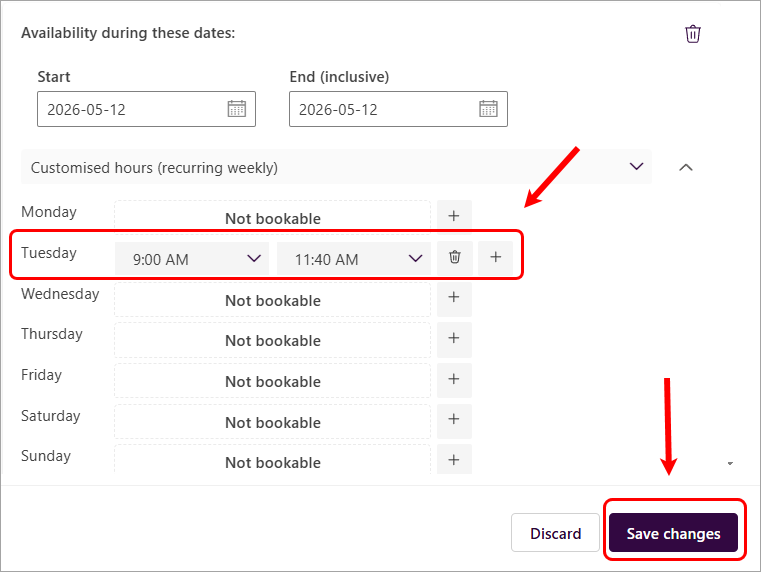
- Enter the specific time period of the day allocated for the assessment task.
a { text-decoration: none; color: #464feb; } tr th, tr td { border: 1px solid #e6e6e6; } tr th { background-color: #f5f5f5; }In this example, the assessment takes place on Tuesday, 12 May 2026, from 9:00 AM to 11:40 AM. To set this up, click the bin icon next to the other days to disable booking availability, then specify the assessment time for Tuesday.
Click on the Save changes button.
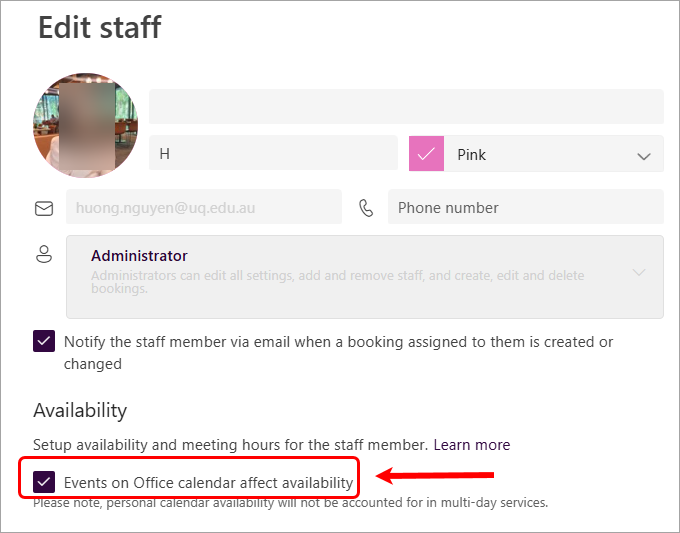
Note: Teaching staff must have enabled the setting Events on Office calendar affect availability on their staff setting to avoid double bookings.
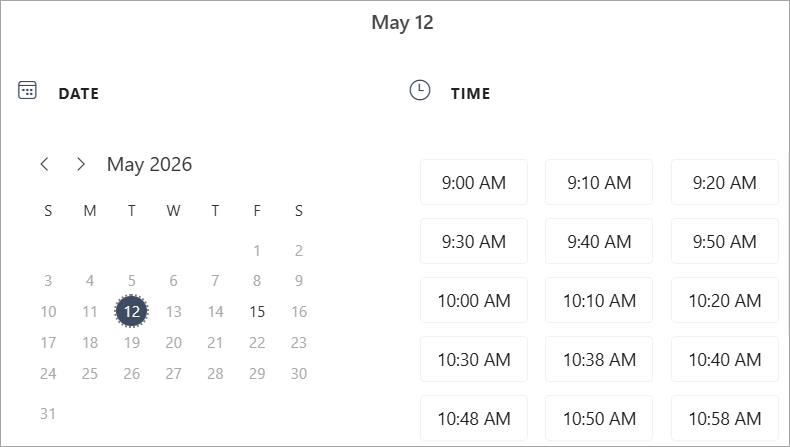
The booking availabilities will be applied when students book an appointment. Only the specified weekdays are available for bookings. Other days are grey.
Block Availability During Certain Dates
There may be times when you don't want to accept bookings, such as holidays, vacations, or personal days. To configure your services as "Not bookable" for the specified dates, follow these steps:
- Open the Services settings of the service you want to change your availability for.
- Click on the Availability Options from the settings list.
- The Bookable when staff are free setting from the General availability is enabled by default. Keep this setting unchanged.
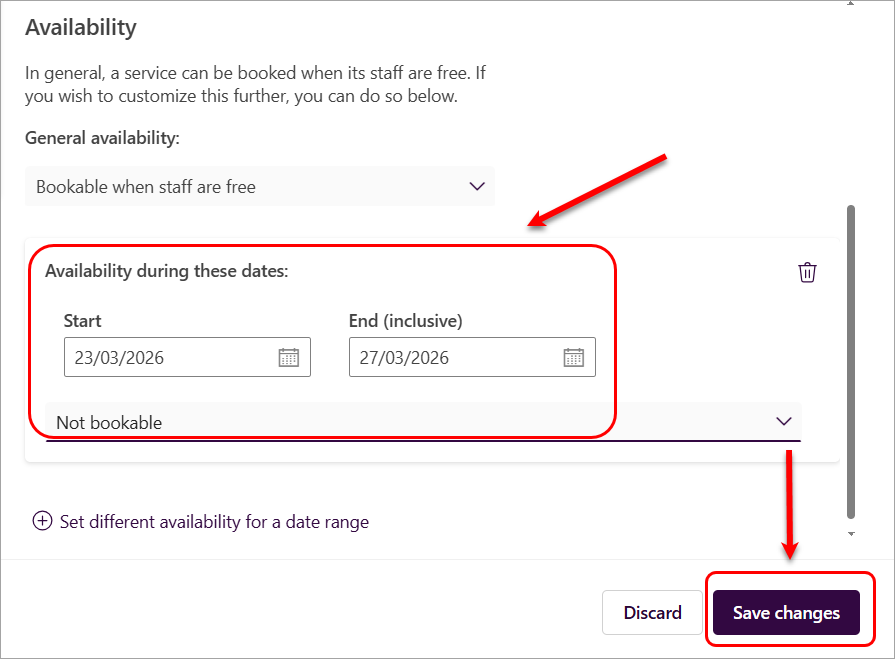
- Click on the Set different availability for a date range option.
- Enter the period for which you will not accept any bookings for this service.
- Select Not Bookable from the drop-down list.
- Click on the Save changes button.
Microsoft Bookings - Assign staff
You need to Add staff to your course's Microsoft Bookings page before you can assign them to the service
- Click on the Assign staff button.
- Select the relevant staff name to add to the service.
- Optionally, click on the Save changes button.
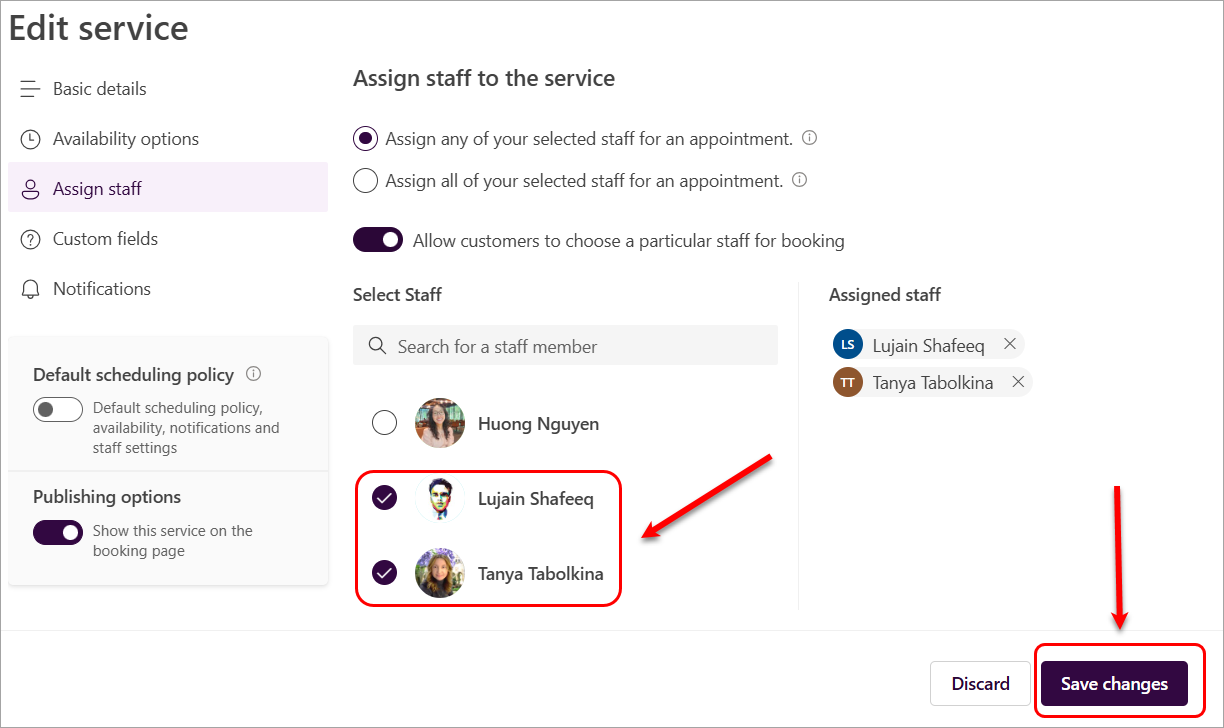
If you need to unassign staff, click on the cross button next to the staff name to remove them from the service.
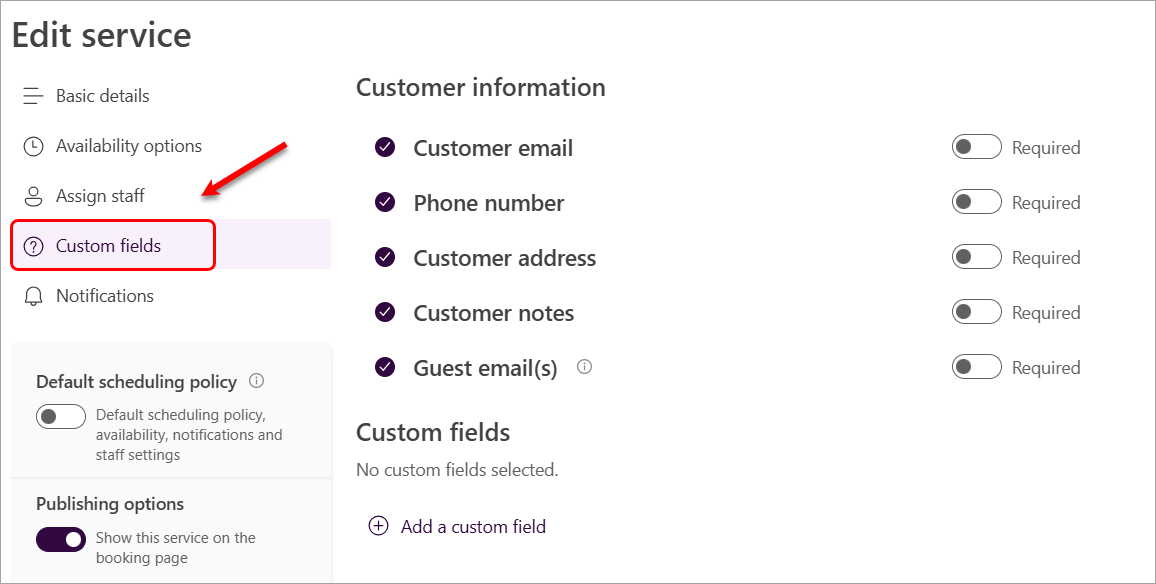
Microsoft Bookings - Custom Fields
In the Custom fields settings, you can enable some optional or required questions for students to answer when booking an appointment. You can also add custom questions, such as student ID or group name, that are relevant to the meeting.
- Click on the Custom fields button. Some questions are available by default.
- Unselect the questions that are not relevant to your meeting.
- For the selected questions, select the Required checkbox if relevant. Your students won't be able to complete the booking until they've answered the required questions.
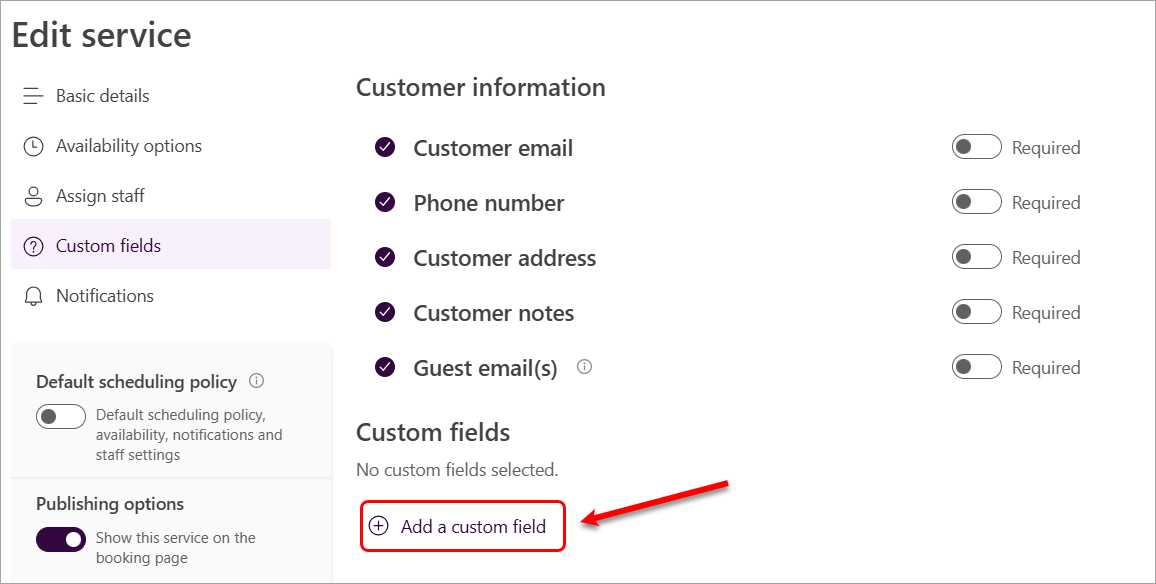
- If you need to add another question, click on the Add a custom field option.
Two custom question types are available:
- Text question
- Drop-down question
Sample questions:
- What is your 8-digit student number? (recommended)
- What is your group's name? (if it is a group presentation)
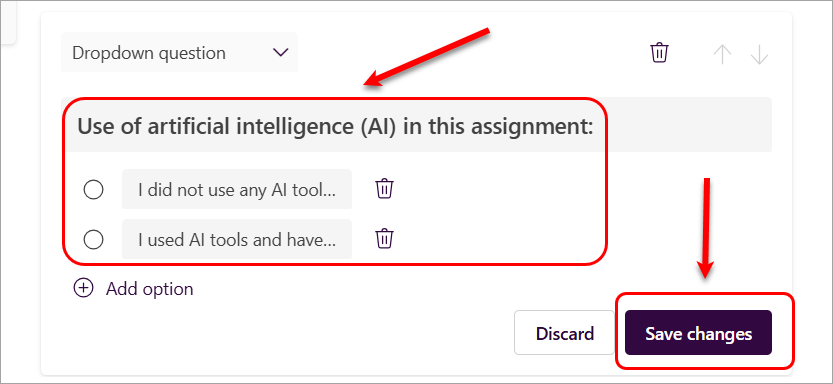
- Use of artificial intelligence (AI) in this assignment:
- I did not use any AI tools in completing this assignment
- I used AI tools and have acknowledged their use
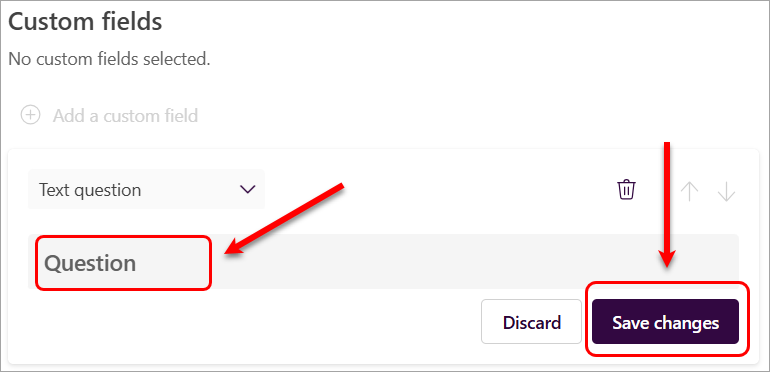
Create a text question
- Enter the question in the Question field.
- Click on the Save changes button.
- Click on the Select button. It will be changed to Selected.
- Click on the Required button if this question is mandatory.

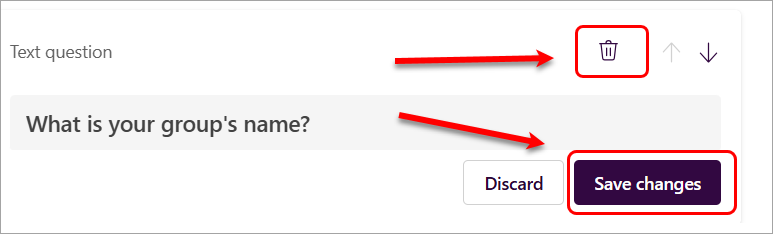
You can edit a custom question by clicking the pencil (edit) icon and making the required changes.

You can delete a custom question by clicking the bin (delete) icon and click on the Save changes button.
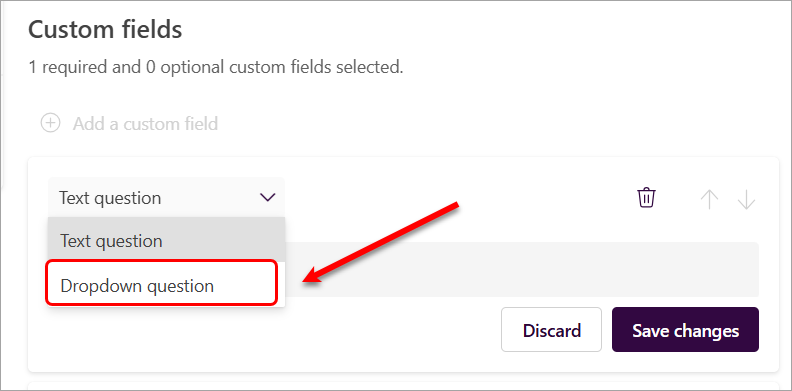
Create a drop-down question
- Click on the Text question drop-down.
- Select the Dropdown question option.
- Enter the question in the Question field.
- Click on the Add option to add options to the question.
- Click on the Save changes button.
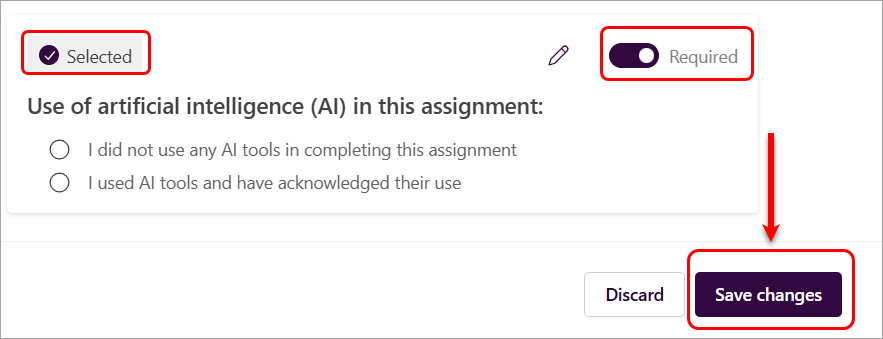
- Click on the Select button. It will be changed to Selected.
- Click on the Required button if this question is mandatory.
- Click on the Save changes button.
Note: The order in which questions appear to students matches the order listed in the Custom fields settings. If you want questions to display in a specific order, you may need to add the last question first and adjust the sequence accordingly.
Bookings saves all of your custom questions in a master list so that you can easily add questions to each service. For example, if you open a different service, the question you created for the first service shows up in the Custom fields section, but will be disabled. When you select the question, a highlighted rectangle displays and the question is enabled.
a { text-decoration: none; color: #464feb; } tr th, tr td { border: 1px solid #e6e6e6; } tr th { background-color: #f5f5f5; }
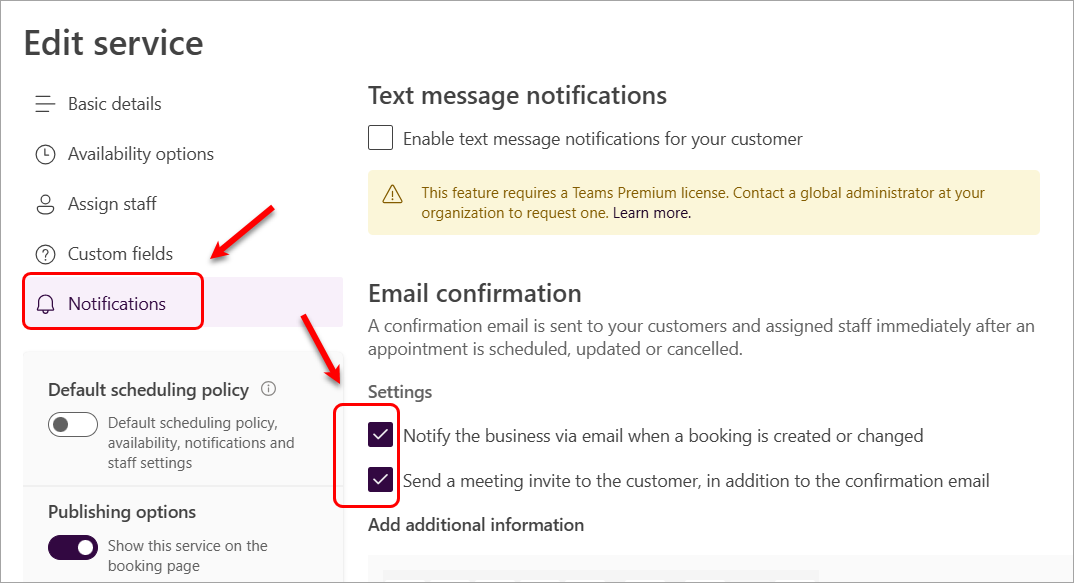
Microsoft Bookings - Notifications
The Notifications setting allows communication via emails and Outlook calendar of a booking for both teaching staff and students when an appointment is made. Please note that the text message notifications are not available at UQ.
- Click on the Notifications button.
- The setting Notify the business via email when a booking is created or changed is enabled by default and is recommended to remain enabled. This setting will send an email confirmation to both staff and students when a booking is made.
- Select the setting Send a meeting invite to the customer, in addition to the confirmation email. This setting will create an invite in the Outlook calendar for both staff and students.
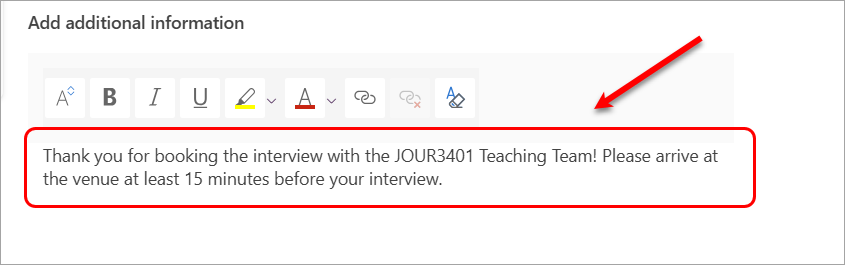
- Add a brief message to the Add additional information text box that will be displayed for students in their confirmation email.
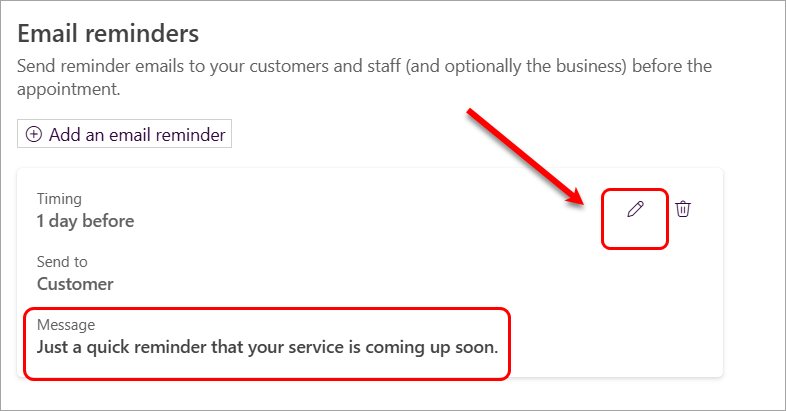
- An Email reminder with a generic message is available by default.
- Click on the pen (edit) icon to edit the message.
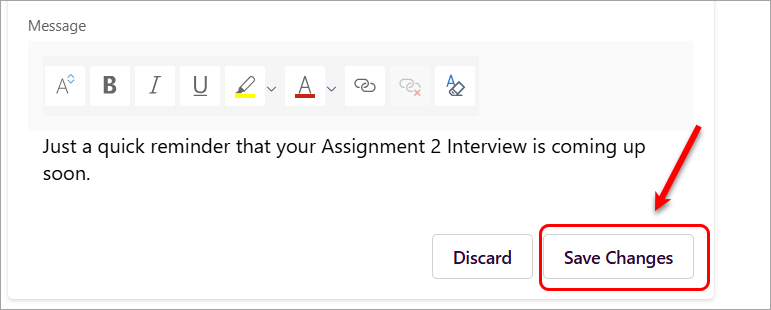
- Sample message 1:
Just a quick reminder that your Assignment 2 Interview is coming up soon.
- Sample message 2:
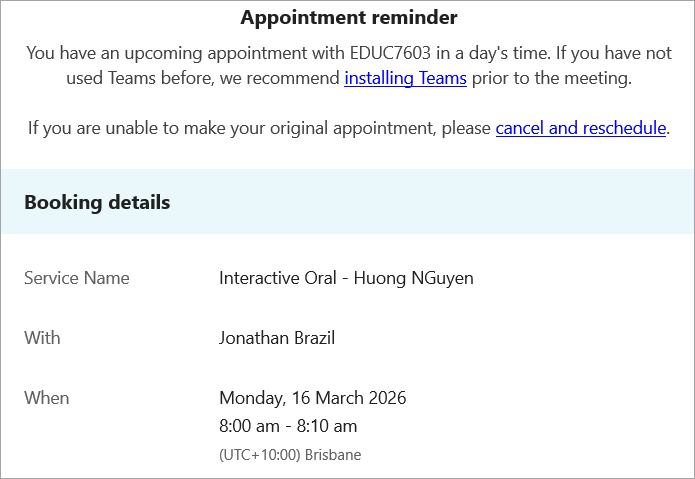
You have an upcoming appointment with EDUC7603 in a day's time. If you have not used Teams before, we recommend installing Teams prior to the meeting. If you are unable to make your original appointment, please cancel and reschedule.
Note: The text editor options are available to format the message
- Click on the Save Changes button.
This is the reminder from a student's perspective:
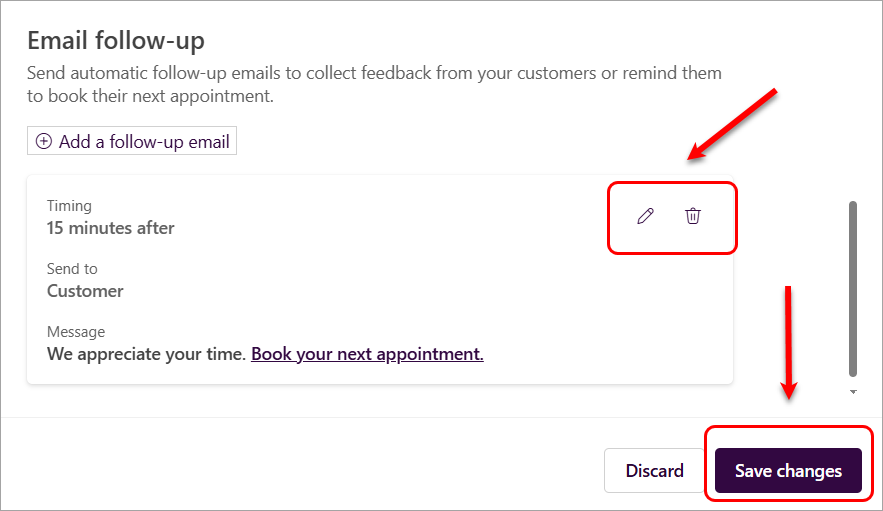
- An Email follow-up with a generic message is available by default.
- Click on the pen (edit) icon to edit the message or the bin (delete) icon to delete this option.
- Click on the Save changes button.
- Access Microsoft Bookings (Ultra)
- Add staff availability in Microsoft Bookings (Ultra)
- Add staff to Microsoft Bookings page
- Set up Microsoft Bookings service
- Share Microsoft Bookings link with students
- Test your Microsoft Bookings service
- View, Edit, and Cancel student bookings in Microsoft Bookings