Create a jump link in UQ Extend (Original)
Warning: Prior to adding or editing content in your course you will need to access Studio view. Refer to the Change from Student View to Staff Editing (Studio) View guide for further instructions.
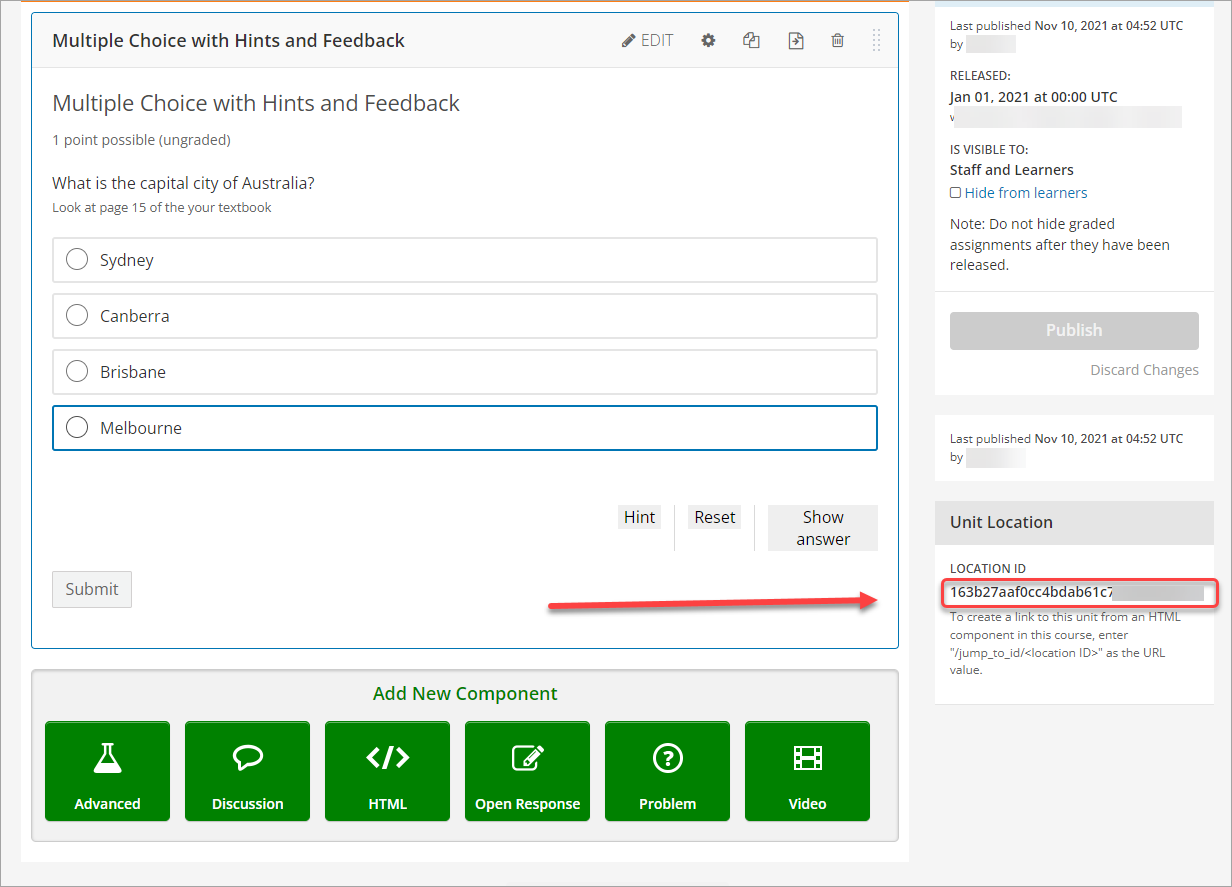
- In the current tab of your internet browser, navigate to the jump link destination unit in UQ Extend.
- In a new tab of your internet browser, navigate to the unit where you want to add the jump link.
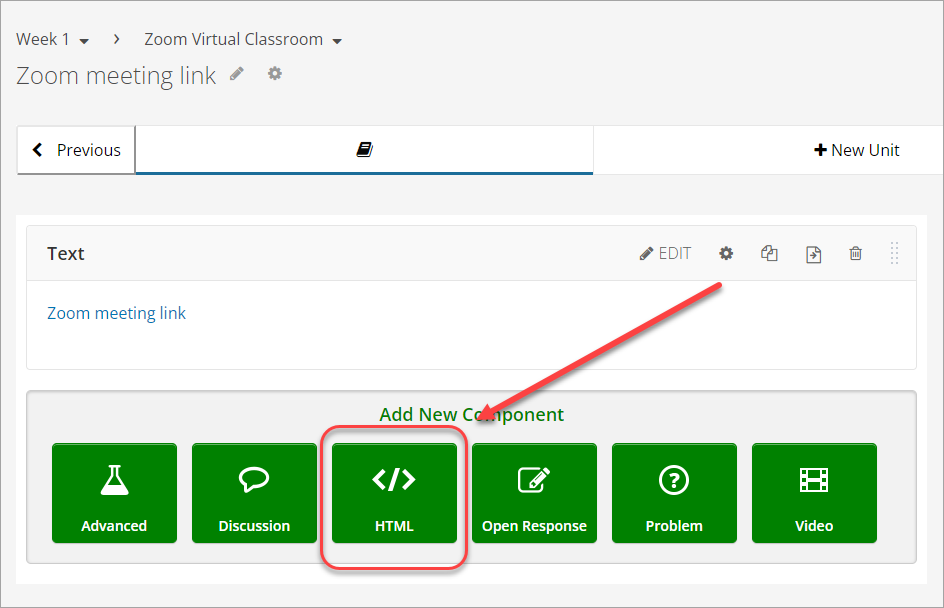
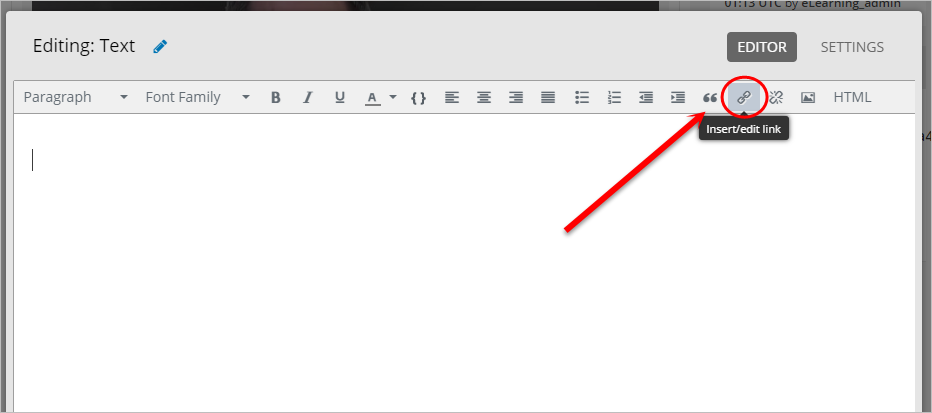
- Click on the HTML button.
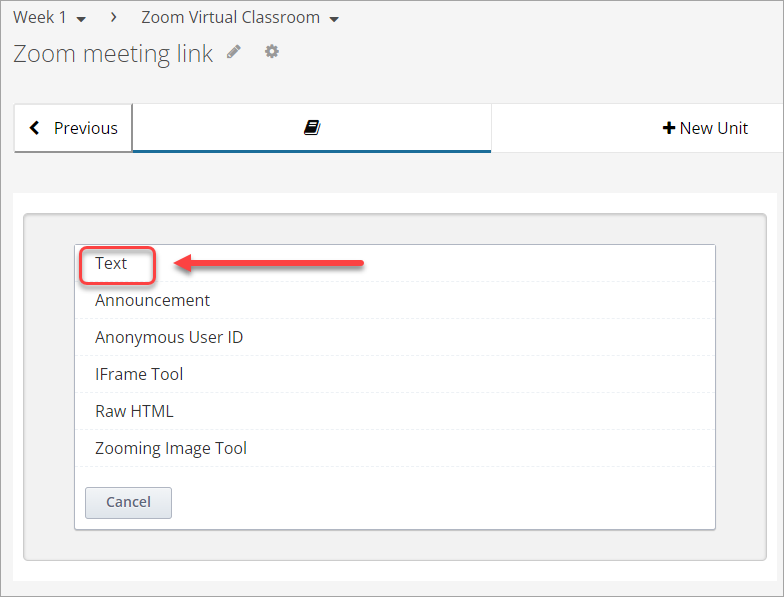
- Click on Text.
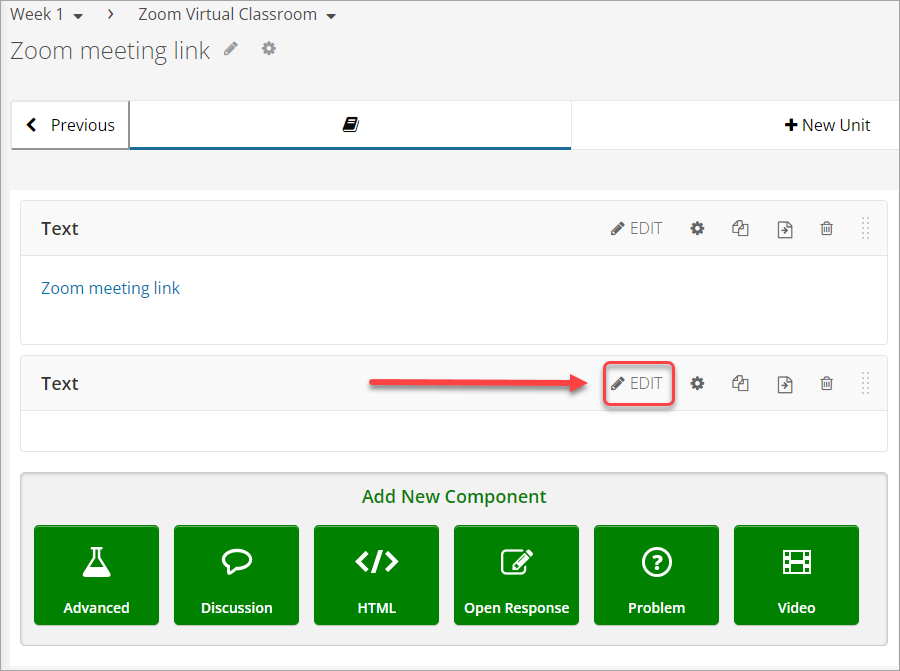
- Click on Edit.
- Click on the Insert/edit link icon.
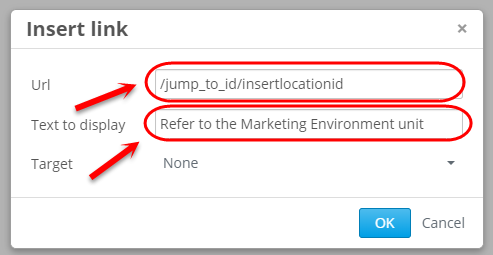
- Paste /jump_to_id/insertlocationid in the URL textbox.
- Enter text in the Text to display textbox.
- Navigate back to the tab with the jump link destination unit.
- Copy the LOCATION ID from the Unit Location panel.
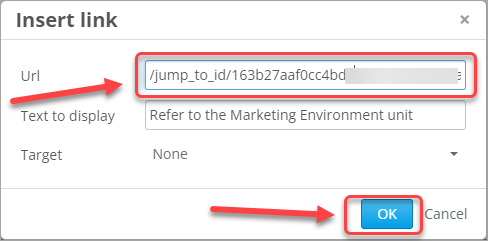
- Navigate back to the tab with the Text component.
- Paste the LOCATION ID in place of insertlocationid in the URL textbox.
- Click on the OK button.
- Click on the Save button.

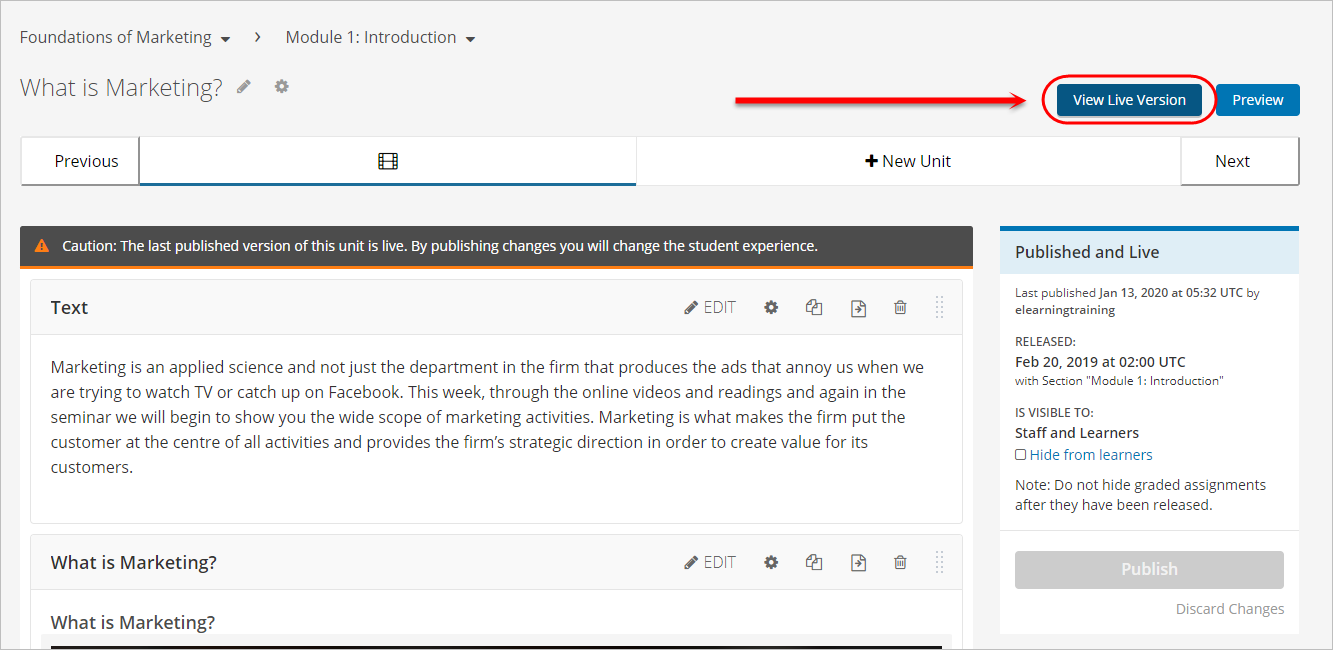
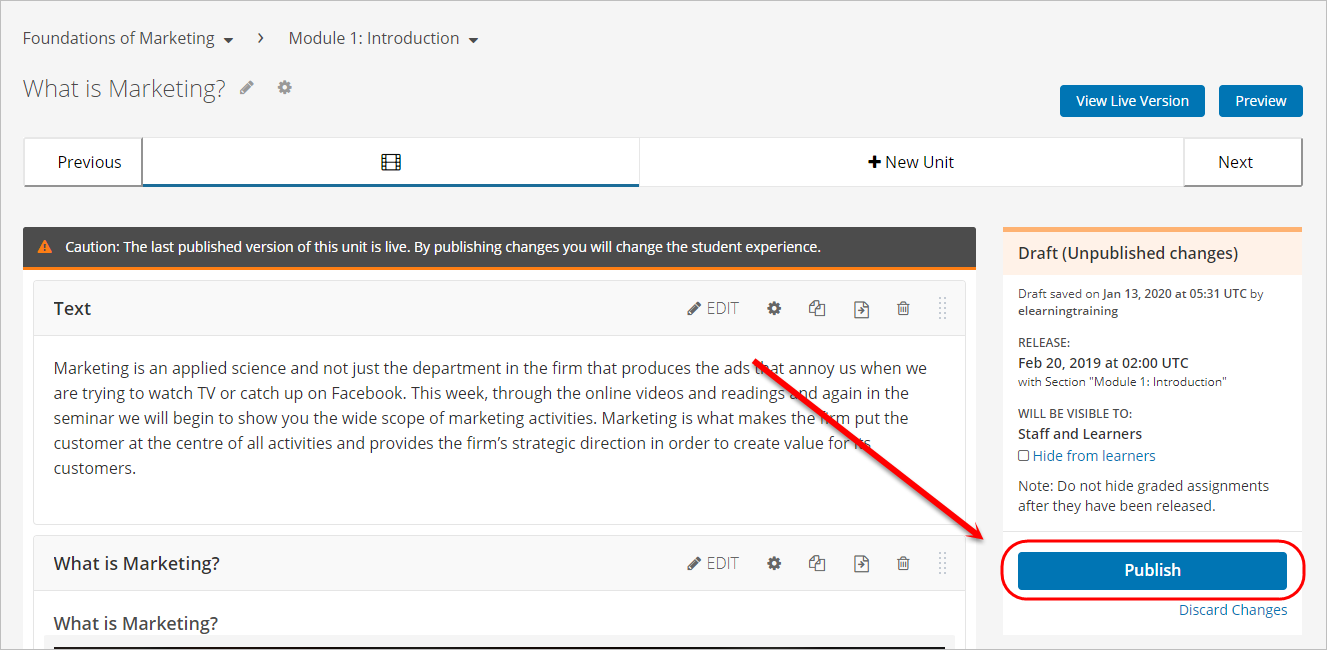
- Click on the Publish button to publish the unit.
Note: The jump link will only work if both this unit and the destination unit are published.
- Click on the View Live Version button to test if the jump link is functioning properly. For more information, refer to the View UQ Extend course from student's view guide.
Note: Jump links cannot be tested in Studio and only work in the live version of UQ Extend. Jump links will also open in a new tab by default.