Create a Single Group - Manual Enrol (Original)
Overview
This method allows you to create an individual group.
You could also use this method for multiple groups, if:
- you want students to be able to belong to more than one group, or
- you want different properties for each group (such as different maximum student numbers or different group tools).
This method takes more time to administrate as groups need to be created separately and if you need to change group properties, they need to be changed for each group individually.
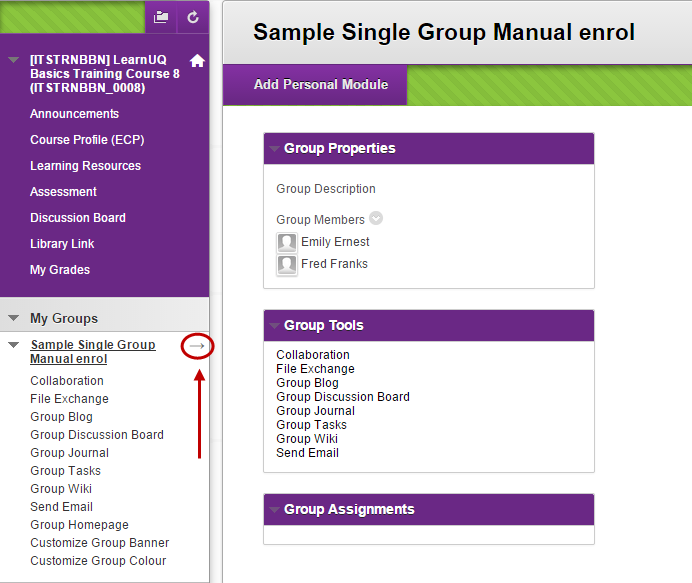
Using this enrolment method, instructors assign students to the group. Student can access the group tools or assignments via the My Groups menu.
Warning: A group set up should be used when you need all students to be placed in a group. For more information, refer to the Group Set guides on the Group's tool page.
View Groups listing page
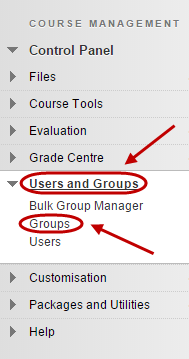
- From the Control Panel, select Users and Groups > Groups.
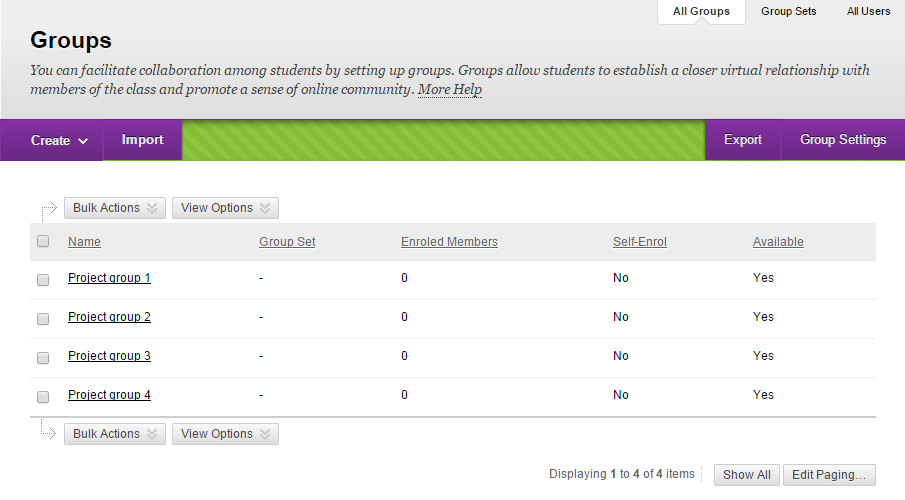
- The Groups page will be displayed.
Manual Enrol
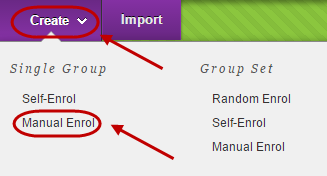
- Click on the Create button.
- Select Manual Enrol from the drop-down list.
Group Information
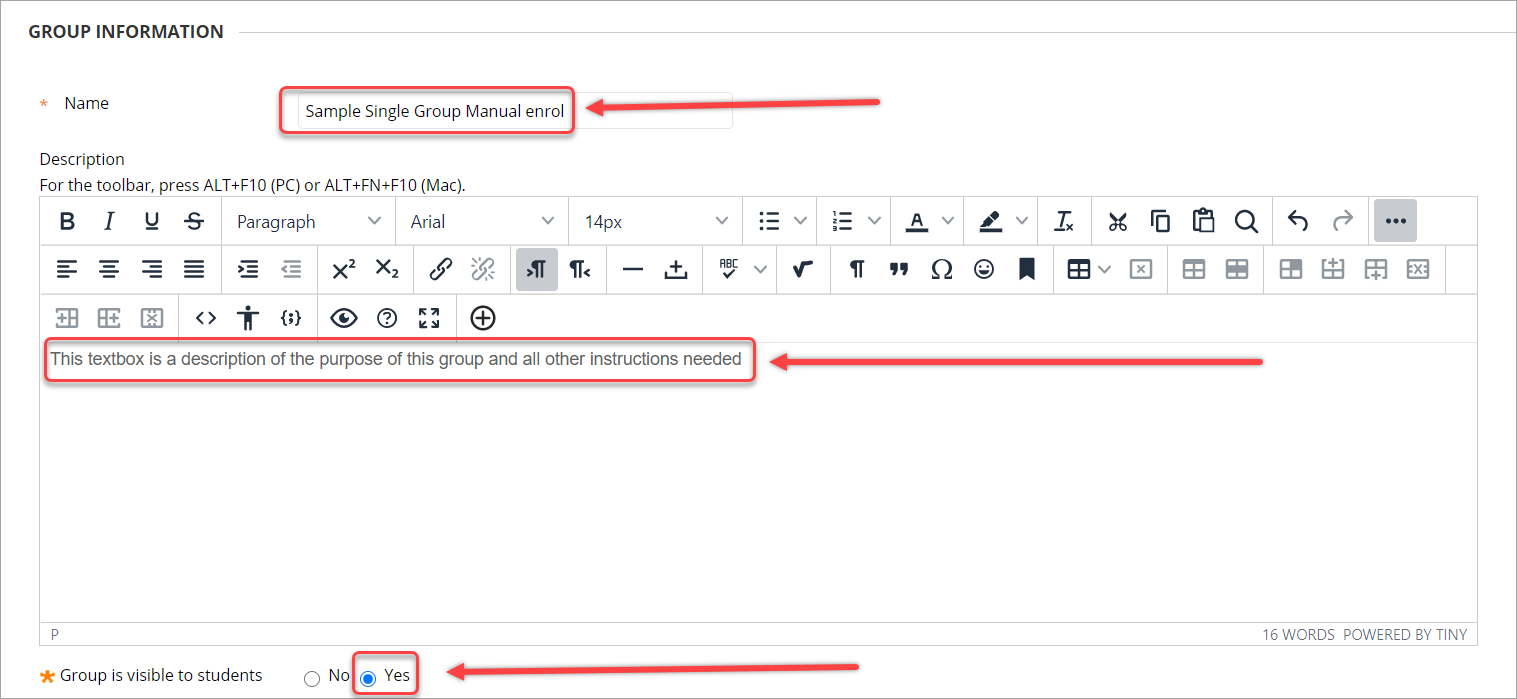
- Enter a name for the groups in the Name textbox.
Note: Do not use special characters, e.g. "_, > <'; as they will not be recognized by the system and will not be displayed in Group Assessments.
- Enter a description of the purpose of the group and instructions for students in the Description textbox.
- Select a radio button from Group is visible to students.
- No: the groups are not available for students to enrol into.
- Yes: students may enrol and immediately use group tools.
Tool Availability
- Check the checkboxes of the tool you want available to the groups.
- Select the Grade: Points possible radio buttons for the items you wish to mark.
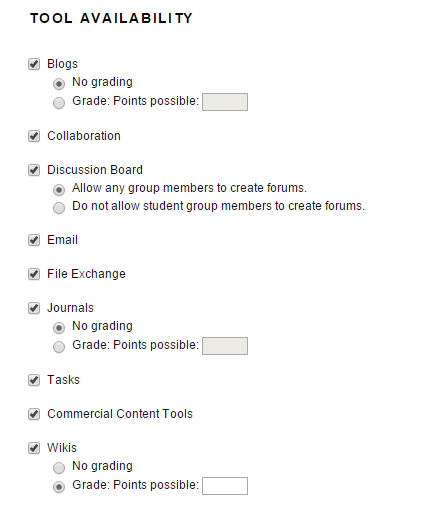
- Either enter the mark the item is out of in the textbox OR
- Click on the Add Rubric button.

Tools: Refer to the Group Tools guide for information on the purpose and use of each tool.
Note: For more information, refer to the Rubric guide on how to set up a rubric.
Note: For more information, refer to the relevant tool page (Blogs, Journals or Wikis) on marking tool items online.
Module Personalisation Setting
The module personalisation setting allows each student to add personalised modules to their own version of the group home page (e.g. What’s New, My Calendar, Needs Attention).
Warning: Students may use this option to add inappropriate content. Either set clear rules on appropriate content or uncheck this option.
- Uncheck the Allow Personalisation checkbox.

Group Options
- Option to check the Create smart view for this group checkbox to provide a link in the grade centre for the group.
Warning: If you do not check the Create smart view for each group in set checkbox, you will have to manually set this up in Grade Centre. For more information, refer to the Group Smart View guide.

Membership
- Click the Add Users button to select the students required for the group.

- Click the required students from the list.
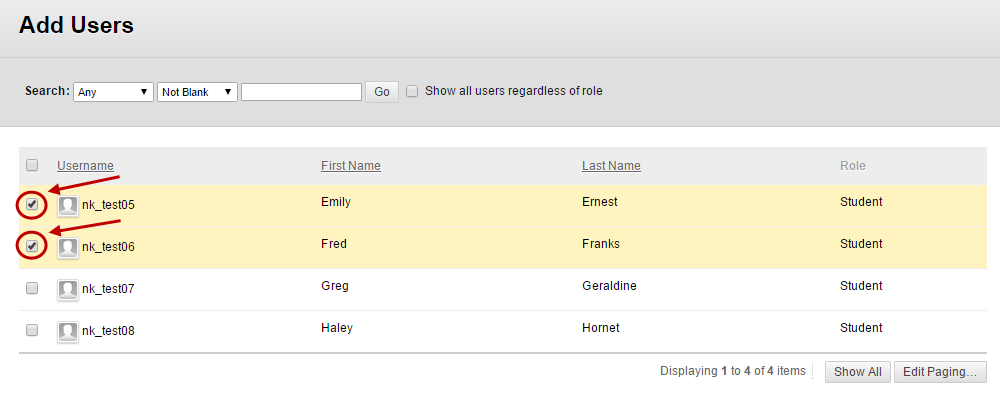
- Click on the Submit button.
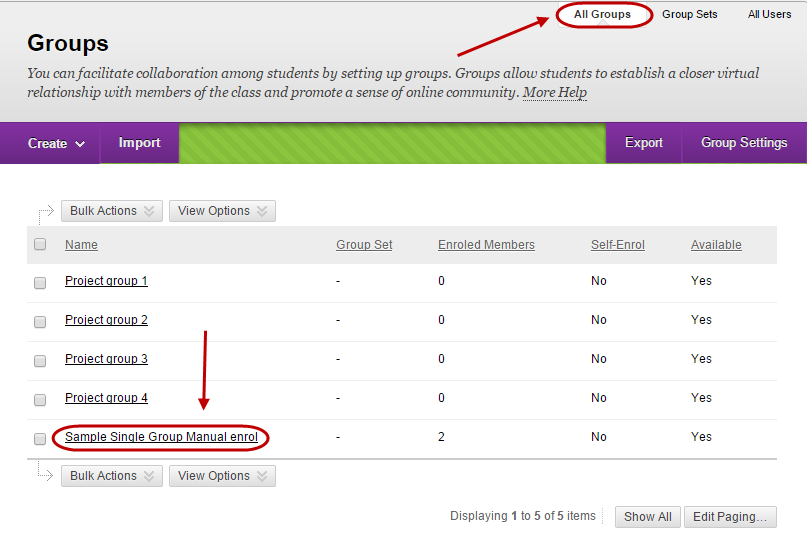
All groups
The new group will now be listed on the All Groups page.
My Groups Menu
Students can access their group tools and assignments using the My Groups menu. This menu is not displayed to instructors/teaching assistants.
