Create an Update (Original)
Video Guide
Create an Update (YouTube 1m 18s)
Overview
Warning: Prior to adding or editing content in your course, you will need to access Studio view. Refer to the Change from Student View to Staff Editing (Studio) View guide for further instructions.
Updates can be created to provide students an announcement, including but not limited to, what they should do in preparation for the week's content.
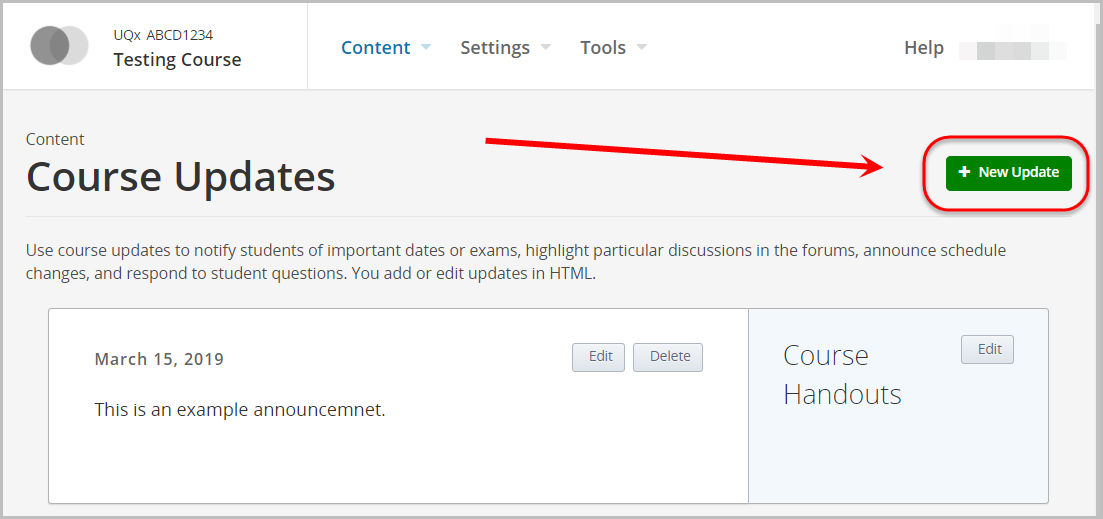
Create an Update
- Select Updates from the Content drop-down menu.

- Click on the + New Update button.
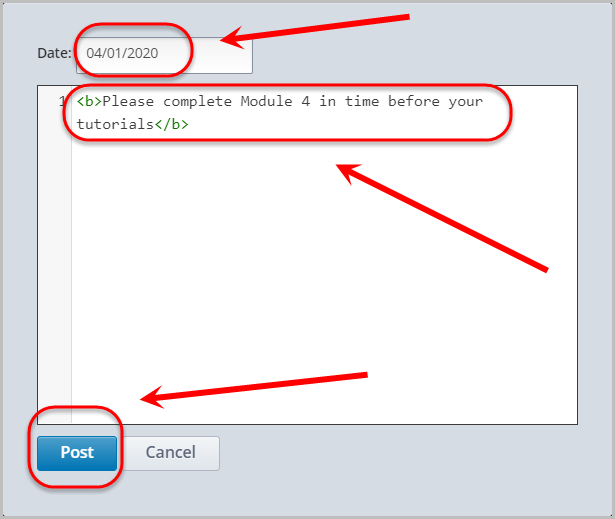
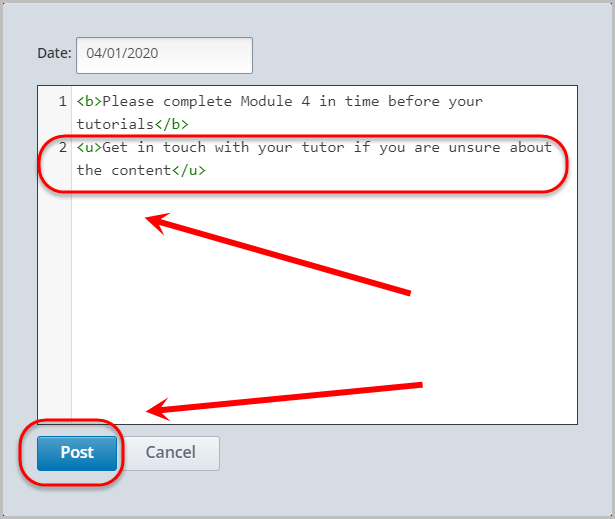
- Enter the date in the Date: textbox.
- Enter your update in the textbox.
Note: There is no HTML editor, but HTML code can be incorporated to include font colour changes, images etc.
- Click on the Post button.
Edit Update
- Select Updates from the Content drop-down menu.
- Click on the Edit button.
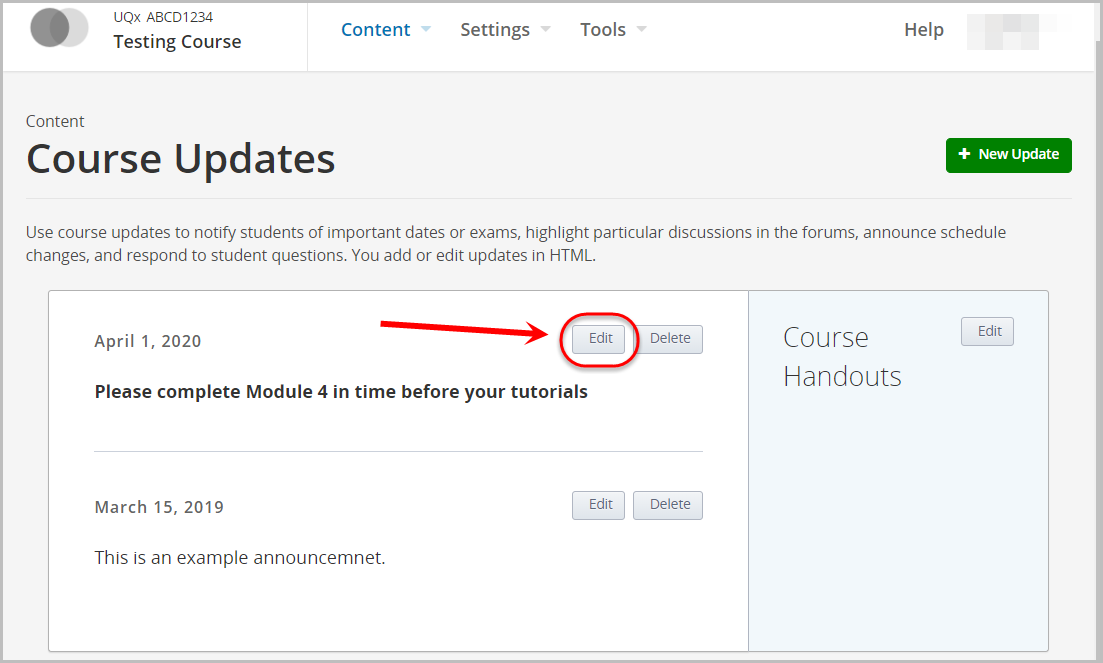
- Make the required changes in the textbox.
- Click on the Post button.
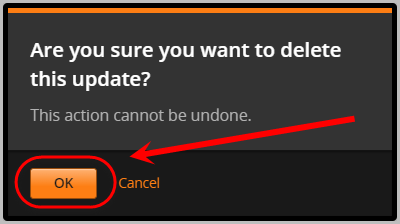
Delete Update
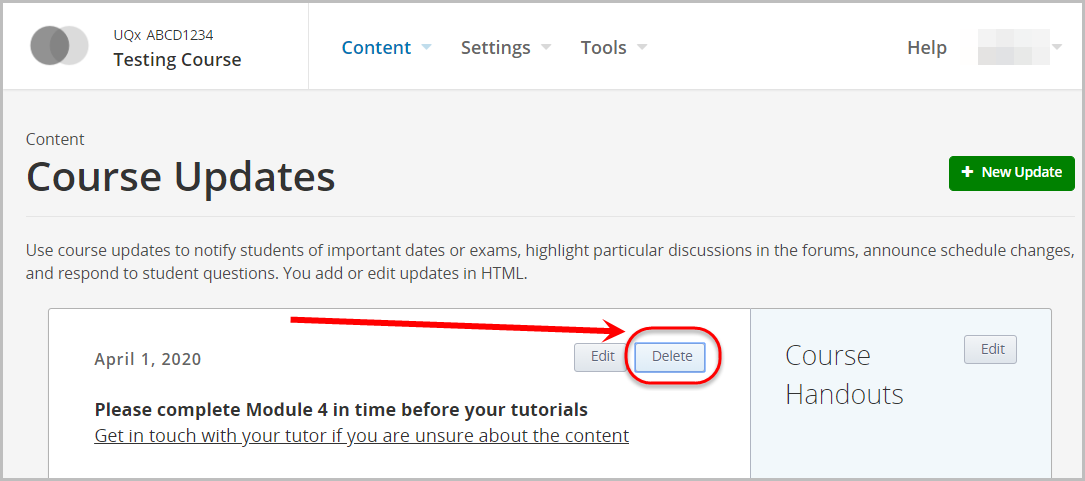
- Select Updates from the Content drop-down menu.
- Click on the Delete button.
- Click on the OK button.