Create a Forum (basic) (Original)
Video Guide
Create a Forum (Basic) (Youtube, 2m 32s)
Overview
Use forums to organise your discussion board into main topic areas i.e. A forum for assignment questions and a forum for tutorial reading responses. For a more detailed description of options refer to Create a Forum (marked).
Create a Forum
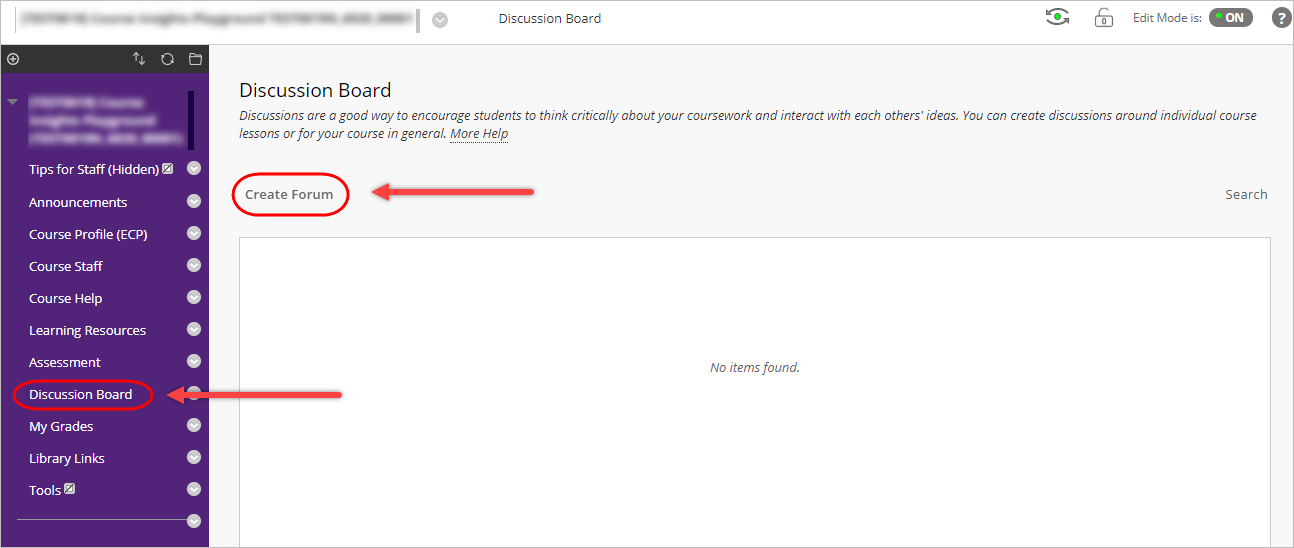
- Select Discussion Board from the Course Menu.
- Click on the Create Forum button.
Forum Information
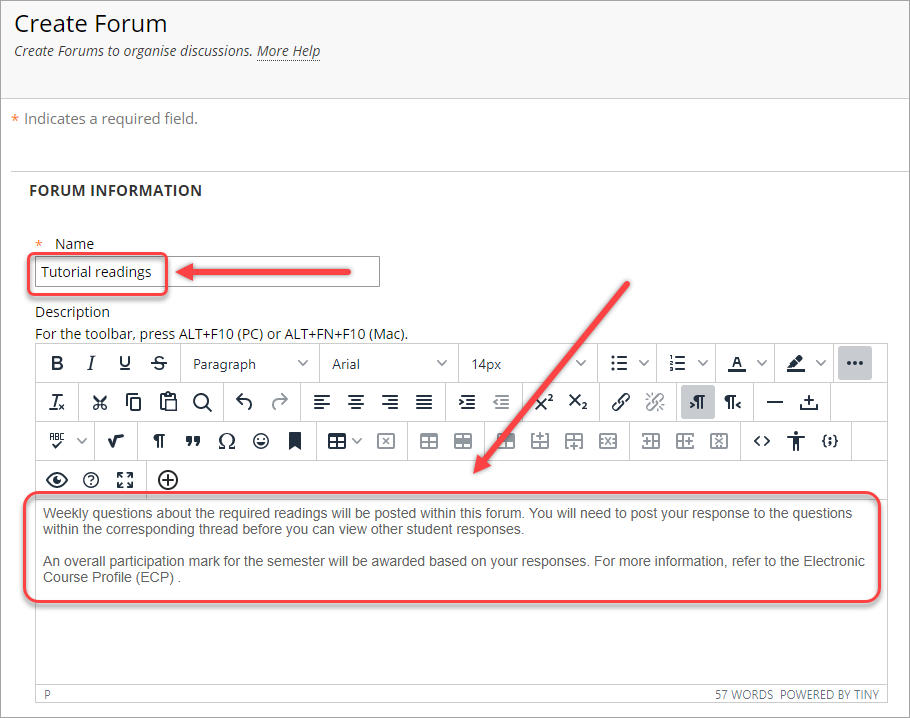
- Enter an informative title for the forum in the Name textbox.
- Enter instructions for the forum in Description textbox.
Example description:
Weekly questions about the required readings will be posted within this forum. You will need to post your response to the questions within the corresponding thread before you can view other student responses. An overall participation mark for the semester will be awarded based on your responses. For more information, refer to the Course Profile . |
Tip: If the forum is set up as Post first (Students need to create a thread in order to view other threads in the forum) include this information in the description.
Tip: Include a link to the Discussion Boards student guide in the description.
Forum Availability
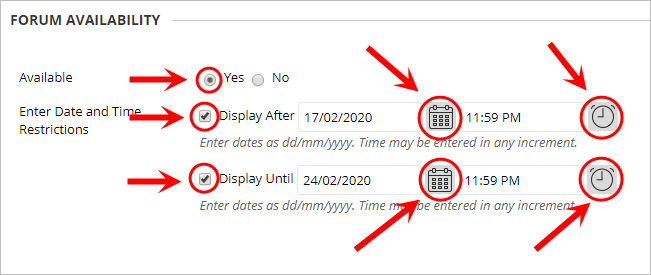
You may wish to limit the time a forum is visible to students (i.e. for an assignment specific forum).
- Select the Yes radio button.
Note: If you select No for Available, this will override any date and time restrictions.
- If required, select the Display After checkbox and enter the date using the Date Selection Calendar and enter the time using the Time Selection Menu.
- If required, select the Display Until checkbox and enter the date using the Date Selection Calendar and enter the time using the Time Selection Menu.
Viewing Threads/Replies
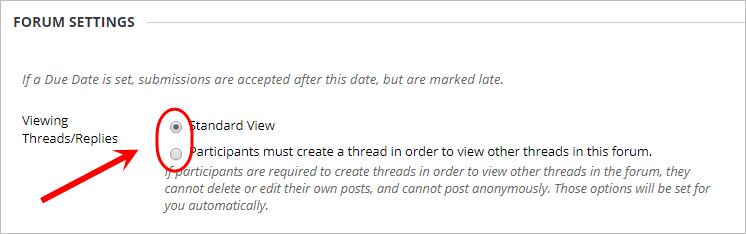
Select the required radio button:
- Standard View: Students can enter and view all threads and replies.
- Participants must create a thread in order to view other threads in this forum: Student will not be able to enter the discussion board until they post their own thread.
Note: Selecting 'Participants must create a thread...' will automatically select the other forum settings needed.
Grade
- Select the No Grading in Forum radio button.

Subscribe
Allowing members to optionally subscribe will mean students can opt to receive an email every time something is added to the forum / thread. If you select to also include the body of the post in the email, students will also receive the content posted.
- Select the Allow members to subscribe to forum radio button.
- Select the Include body of post in the email radio button.

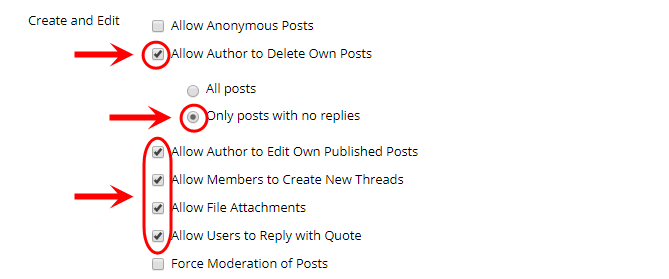
Create and Edit
- Optionally, check the Allow Anonymous Posts checkbox.
Tip: In most cases, this option would not be selected to ensure appropriate use of the forum, however anonymous posts may be useful in some cases if students are reluctant to post questions.
- Check the Allow Author to Delete Own Posts checkbox.
- Select the Only posts with no replies radio button.
- Check the Allow Author to Edit Own Published Posts checkbox.
- Optionally, check the Allow Authors to Create New Threads checkbox if you want students to be able to post new questions.
Note: You may select to not allow students to create threads if you are setting up the forum so they only respond or ask questions by replying to a thread you have created.
- Check the Allow File Attachments checkbox.
- Check the Allow Users to Reply with Quotes checkbox to allow students to quote the content of another student posts.
- Optionally, check the Force Moderation of Posts checkbox to have all posts approved by a moderator (Instructor) before being posted.
Note: Choosing this option can be very work intensive and it is recommended that you set guidelines for post contents instead.
Additional Options
- Optionally, check the Allow Post Tagging checkbox.
- Optionally, check the Allow Members to Rate Posts checkbox for peer assessment or voting purposes.
- Click on the Submit button.

- The forum will then appear within the Discussion Boards section.
Course Link
Discussion boards that are relevant to a specific week/module can have a link added to the relevant section of the course (i.e. Lecture Recordings section).
For step-by-step instructions on how to create a link to an existing discussion board within the Learning Resources folder, refer to the Add a Course Link guide.