Ed Discussion Chat and Channels (Original)
Course coordinators can now create channels for small group work and enable direct student-student and staff-student messaging in their course discussion.
Ed Chat provides an easy way to add instant messaging to your course.
Chat might be used for:
- Staff-only private conversations
- Private conversations between staff and a student or groups of students
- Student group-assignment conversations
- Tutorial group conversations.
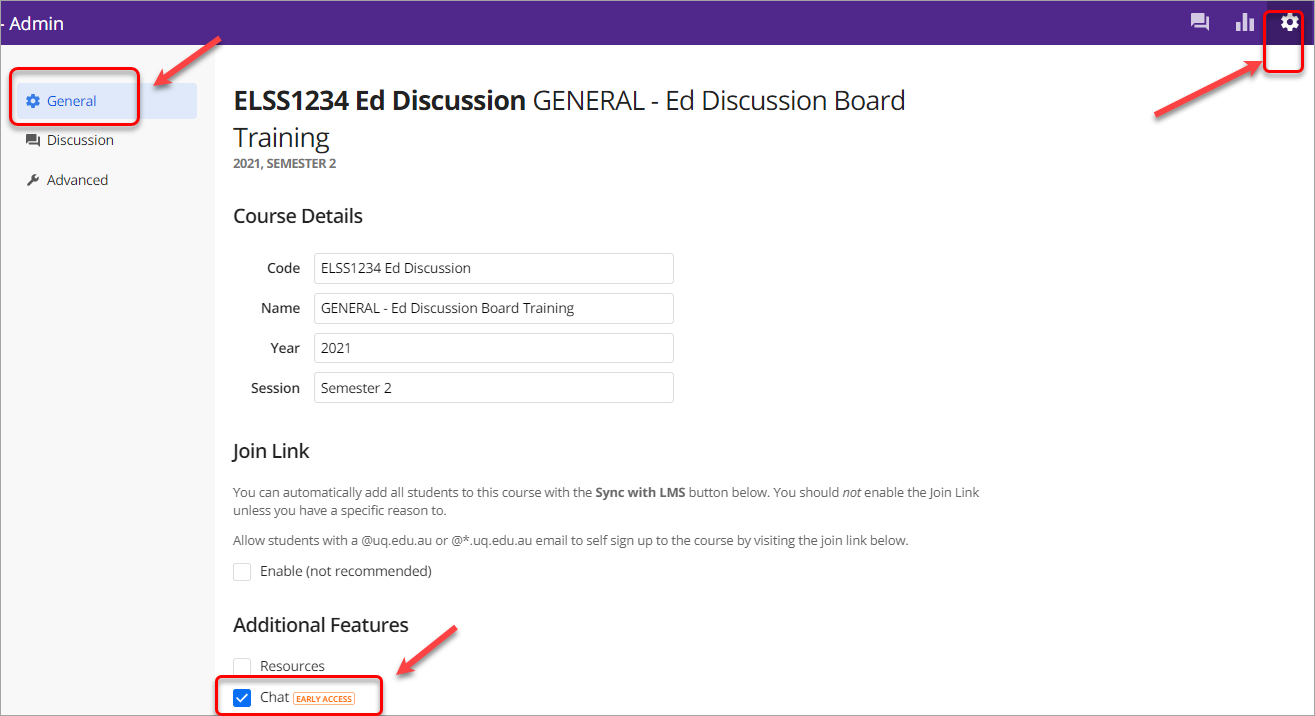
- To enable chat, in Admin Panel>General>Additional Features> check Chat Early access* checkbox.
* Early access is a recently released feature, which is available to selected customers and courses, prior to general release to all courses.
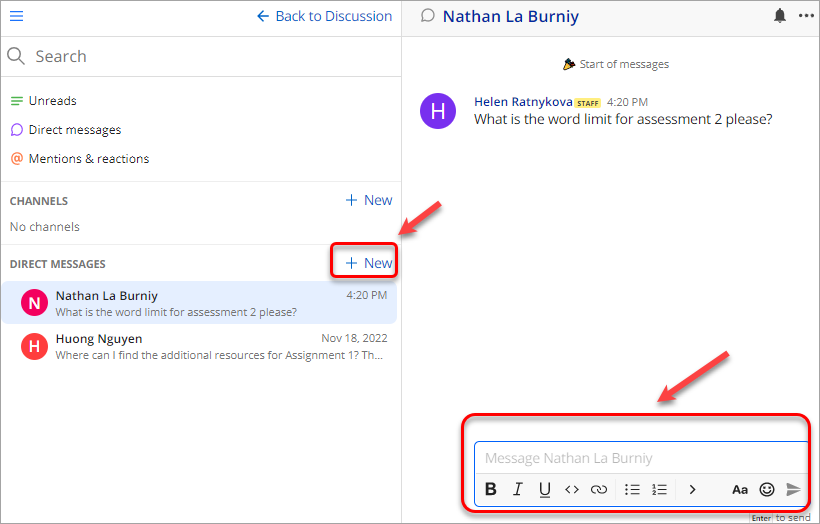
- To access chat, click on the Chat icon in the course discussion:

- To create a message, click on the +New button, type the recipient's name in the To textbox and compose a message. The functionality will be the same as in the regular threads in the discussion (attach image/video, Latex, callout styles etc).
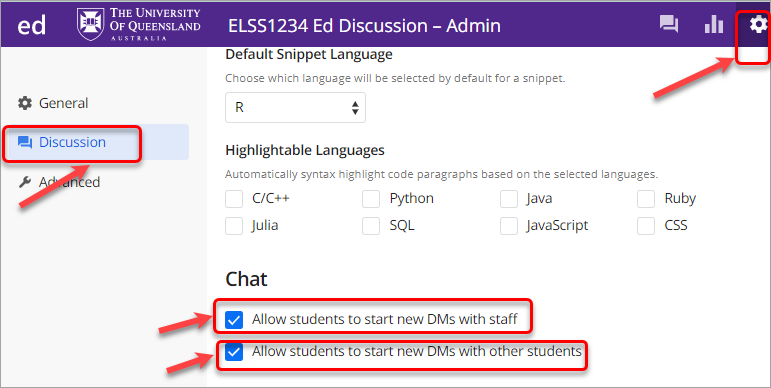
- By default, only staff may start new direct messages. You can configure this in Course Admin > Discussion > Chat to allow students to initiate direct messages with students and/or staff members.
- Drafts: Messages that you have started typing but not yet sent will be saved as drafts, which can be viewed from the Drafts filter or by returning to the relevant conversation. If you have no active drafts, the Drafts option will disappear from the list. To edit/delete a draft, click on the pencil/bin icons.

- To add a reaction to a message hover over a message and select an emoji from the list of reactions You can see reactions to your messages in the Mentions & reactions tab.

- To return back to the discussion, click on the Back to Discussion button.

Channels are used for conversations based on a group project, tutorial work, any specific topic etc. A channel should be used if you need to add/remove members from the conversation over time. For example, you could have a channel for each group of students, e.g. #group1, #group2, or a channel for 'staff tutorial discussion' and another for 'staff exam discussion'.
Only Staff can create or edit channels.
Channels can be private or public. Private channels are only visible to specific members, while public channels are visible to everyone in the course.
Tip: When using public channels in your course, remind students to use the discussion forum for Q&A, rather than asking course-based questions in the public channel.
Create/delete a channel
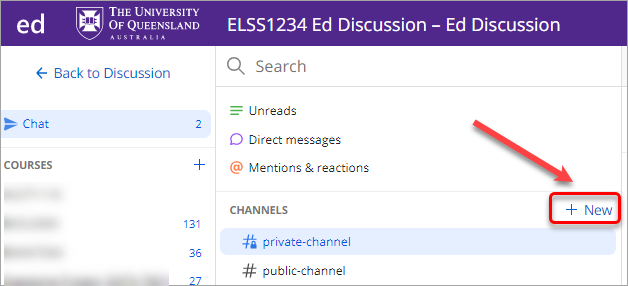
- To create a new channel, in the Chat tab click on the + New button.
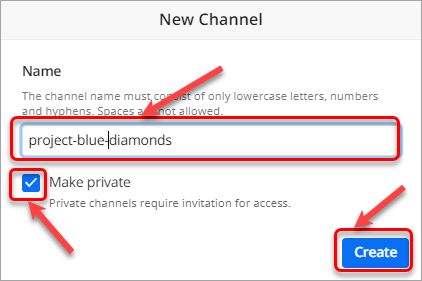
- Type the channel name and click on the Create button.
- Check Make private checkbox to make the channel private.
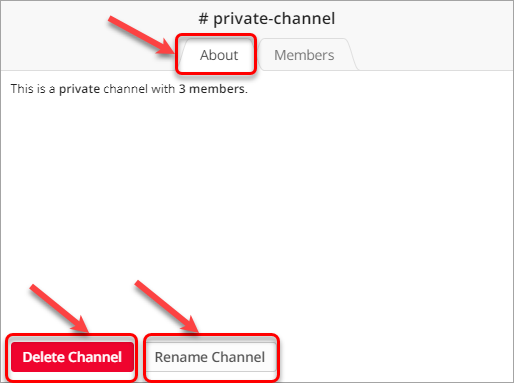
- To delete a channel, click on the channel icon in the top right-hand corner.

- In the About tab, click on the Delete Channel button.
- To rename a channel, in the About tab click on the Rename Channel button.
Add/remove members
- In a channel, click on the channel icon in the top right-hand corner.
- In the Members tab click on the Add people button.
- Type a member's name in the Search by name or email textbox.
Note: you can add all staff by typing @staff.
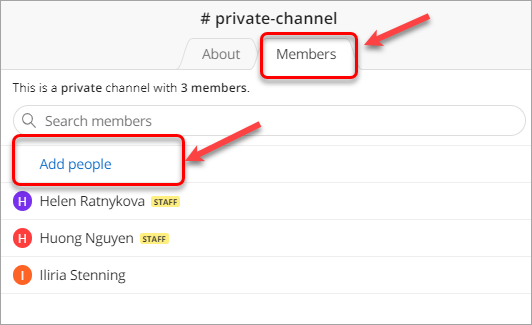
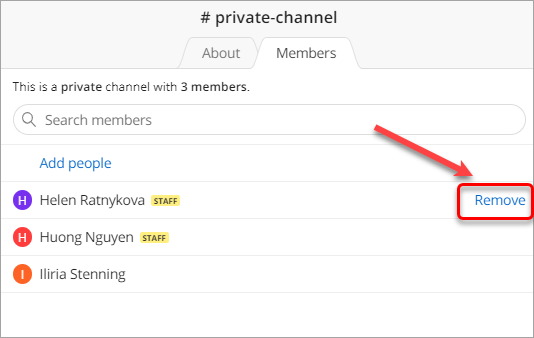
- To remove a member, hover over their name and click on the Remove button.
