Desktop Recording (Echo360) Online Workshop
6. Video editing
Tasks to complete
Trim the start of the recording
- In the playback panel, put the playhead/cut marker at the desired new start position
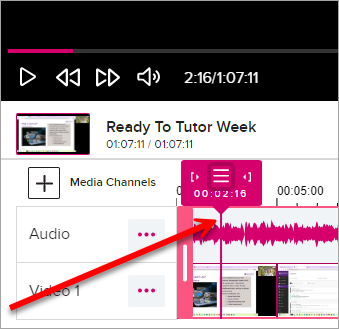
- Click the trim-in icon on the cut marker, located left of the cut marker menu button.
![]()
- The playback panel will move to the set location.
- Check if the new start point of your media is correct.
- Click on the Save button.
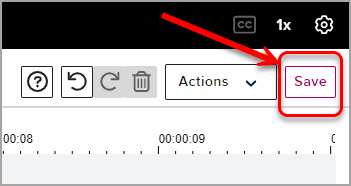
Note: If you have more changes to make, be sure to make all changes before saving. You cannot make further edits to video until processing of saved edits is completed. Processing time will depend on the length of your video and number of edits.
Trim the end of the recording
- Move the playhead/cut marker to the location where you want the video to end.
- Click on the trim-out (right square bracket) icon on the cut marker.
![]()
- The playback panel will move to the new location.
- Check of the end point of your media is correct. If you cut too little or too much, you can use undo button and re-adjust end position.
- Click on the Save button.

Note: If you have more changes to make, be sure to make all changes before saving. You cannot make further edits to video until processing of saved edits is completed. Processing time will depend on the length of your video and number of edits.
Split into multiple
- Move the playhead/cut marker to the required position/s where you need to have video splited.
- Click on the hamburger button (the triple bar ≡ icon) on the timeline cut marker.
- Select Split Clip from the drop-down list.
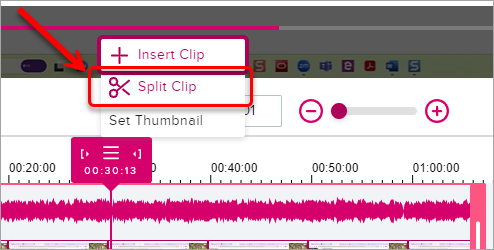
- Click on the Save button.
Delete segment
The Trash Can icon is used for deleting any segment of the video that you have placed cut marks around.

To cut a part of your video:
1. Mark the beginning of the segment you want to remove.
2. Mark the end of the segment you want to remove.
3. Click on the segment between the marks.
Note the pink trim handles will appear on either end of the selected segment. Unless you need to change either end location of the segment, you can ignore them.
4. Click on Trash can button.
You can also place a cut mark near the beginning or end of the video, then select and delete the segment between the mark and the beginning or end of the video.
Make a copy
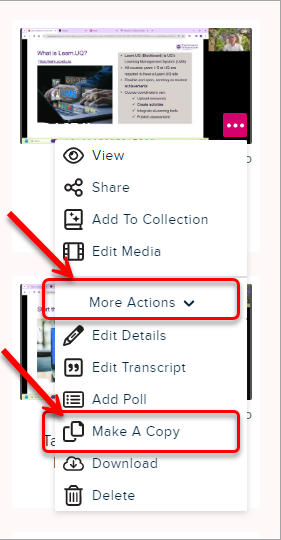
Staff is encouraged to review the information below and to experiment safely with the EchoVideo Editor by using the Make A Copy command. This creates a copy of the original video, which can be used to make changes, review results, and sharpen editing skills, without changing the original.
In your EchoVideo account Library
- Click on the More (3 dots) icon at the bottom right-hand corner of your video.
- Click on More Actions to extend a drop-down list
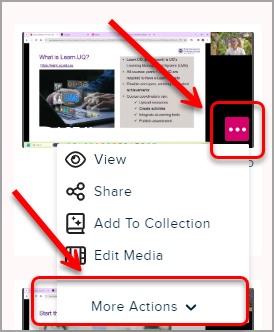
- Select Make A Copy from the drop-down list.
- Click OK to confirm if you want to create a copy.

- A copy of video will appear in your Library with the same title and the word (Copy) appended. If required, change the file title (repeat steps 1 and 2). Select Edit Details and edit the title if needed.
