Using the Recording Equipment (Original)
When will the system start recording?
Recording of lectures in all teaching spaces equipped with Echo360 recording facilities starts automatically at the beginning of the hour of each lecture room booking. It will record for the duration of your booking and conclude five minutes before the next room booking commences.
The Touch Panel
Starting the recording
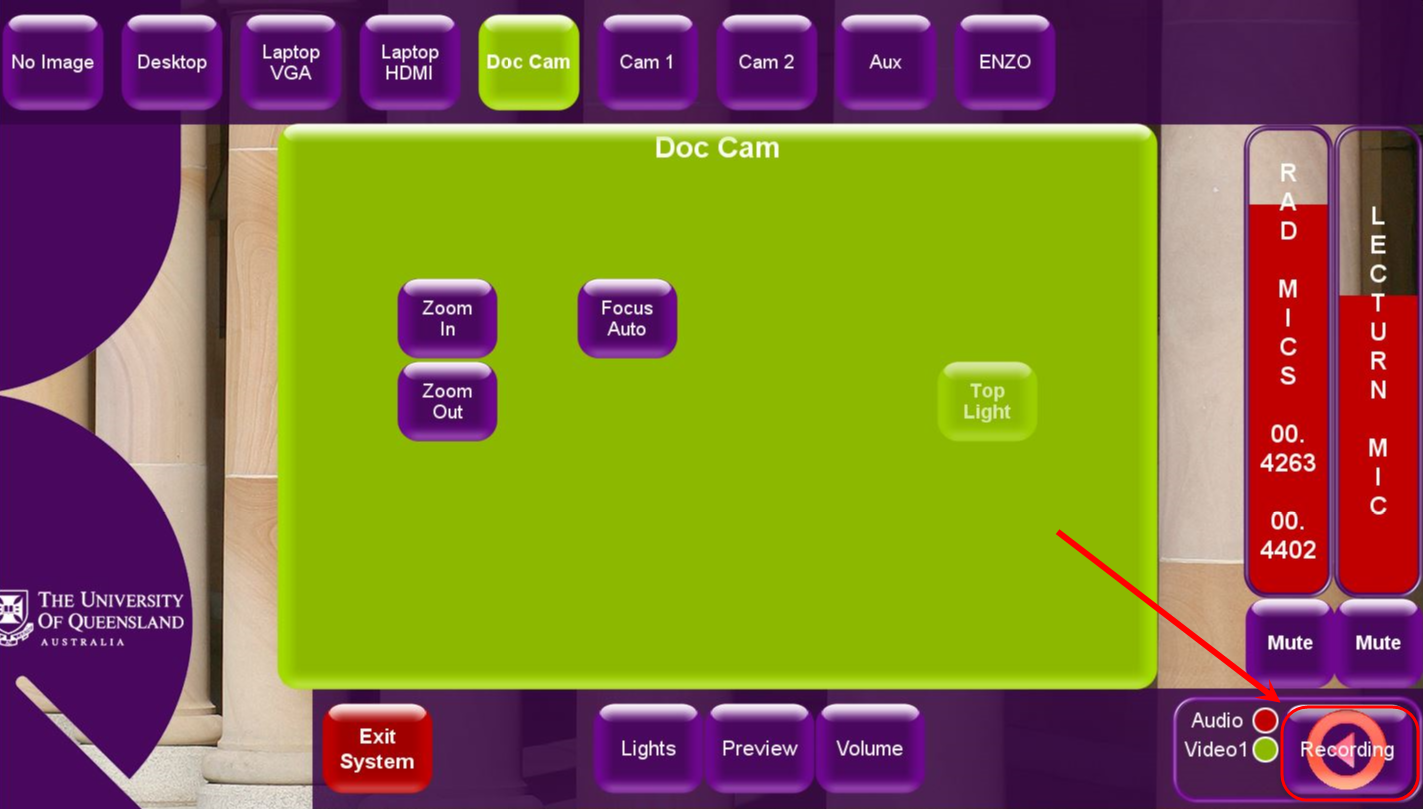
Tap the Echo 360 Idle button in the bottom right hand corner of the touch panel.
- The Echo360 button will change its status to Recording to indicate the recording has commenced.
Pausing the recording
Tap the Recording button in the bottom right hand corner of the touch panel.

- Tap the Pause button to pause the recording at any time.
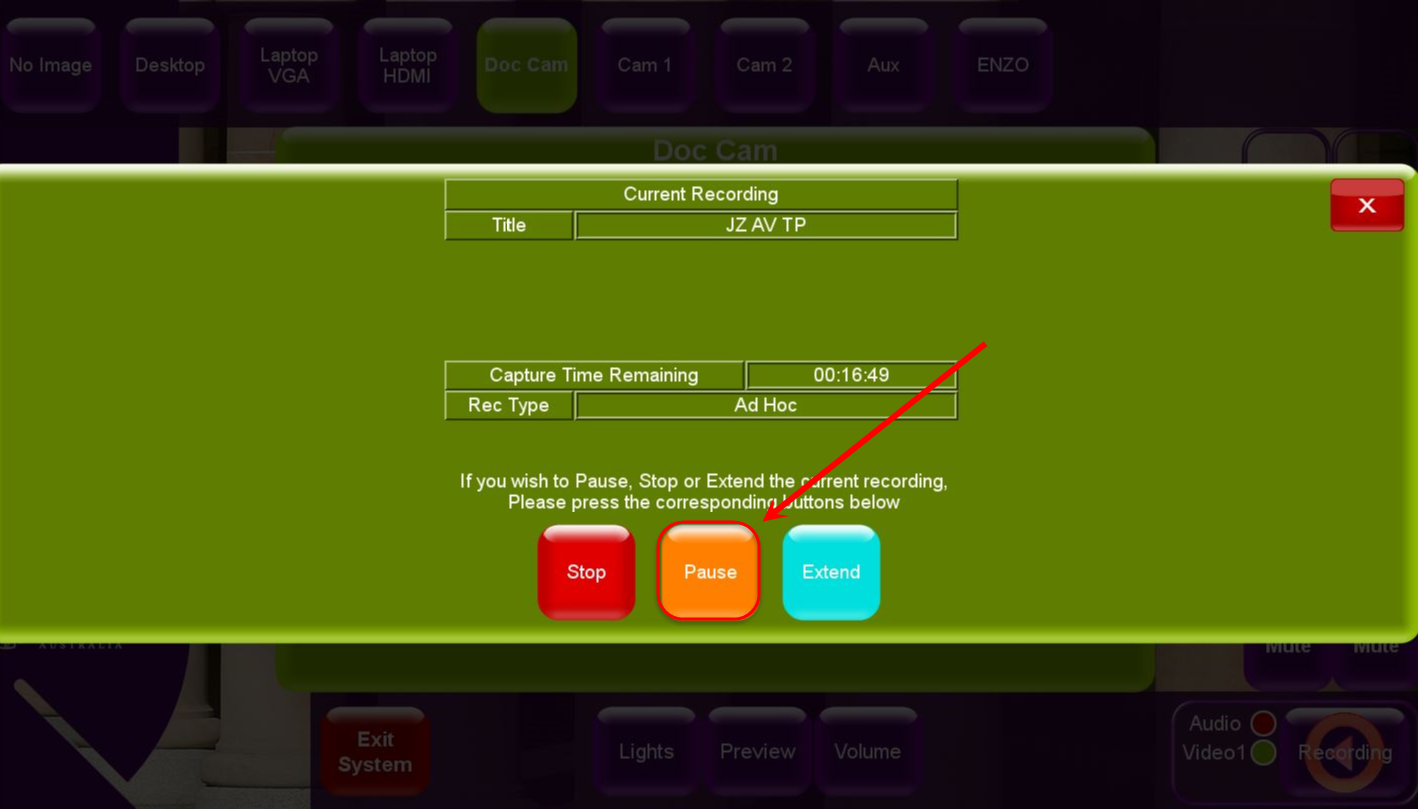
Note: The recording will pause immediately, but the icon will take a few seconds to change to Paused accompanied by a flashing Echo360 icon.
Extend the recording duration
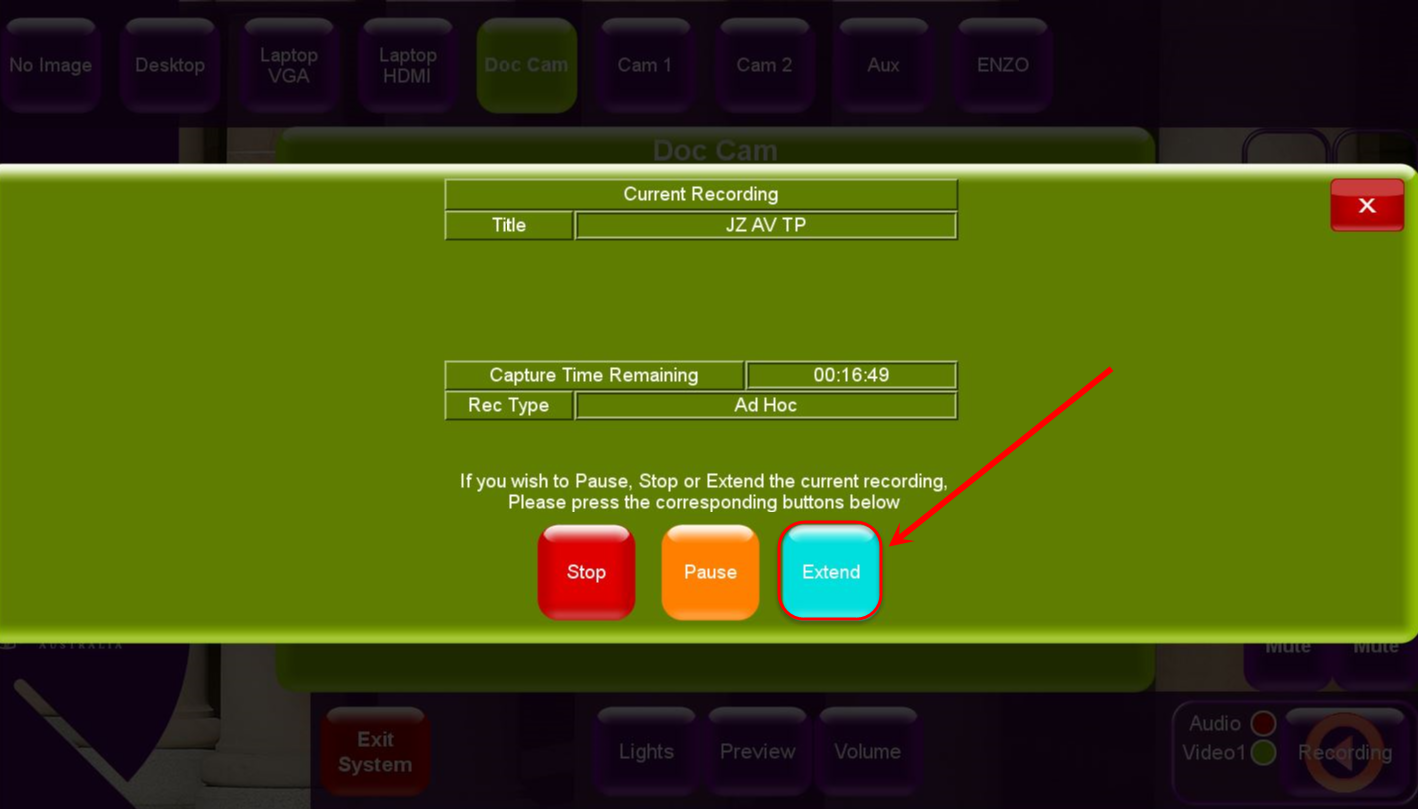
Tap the Recording button in the bottom right hand corner of the touch panel.
Tap the Extend button to extend the duration.
Stop the recording
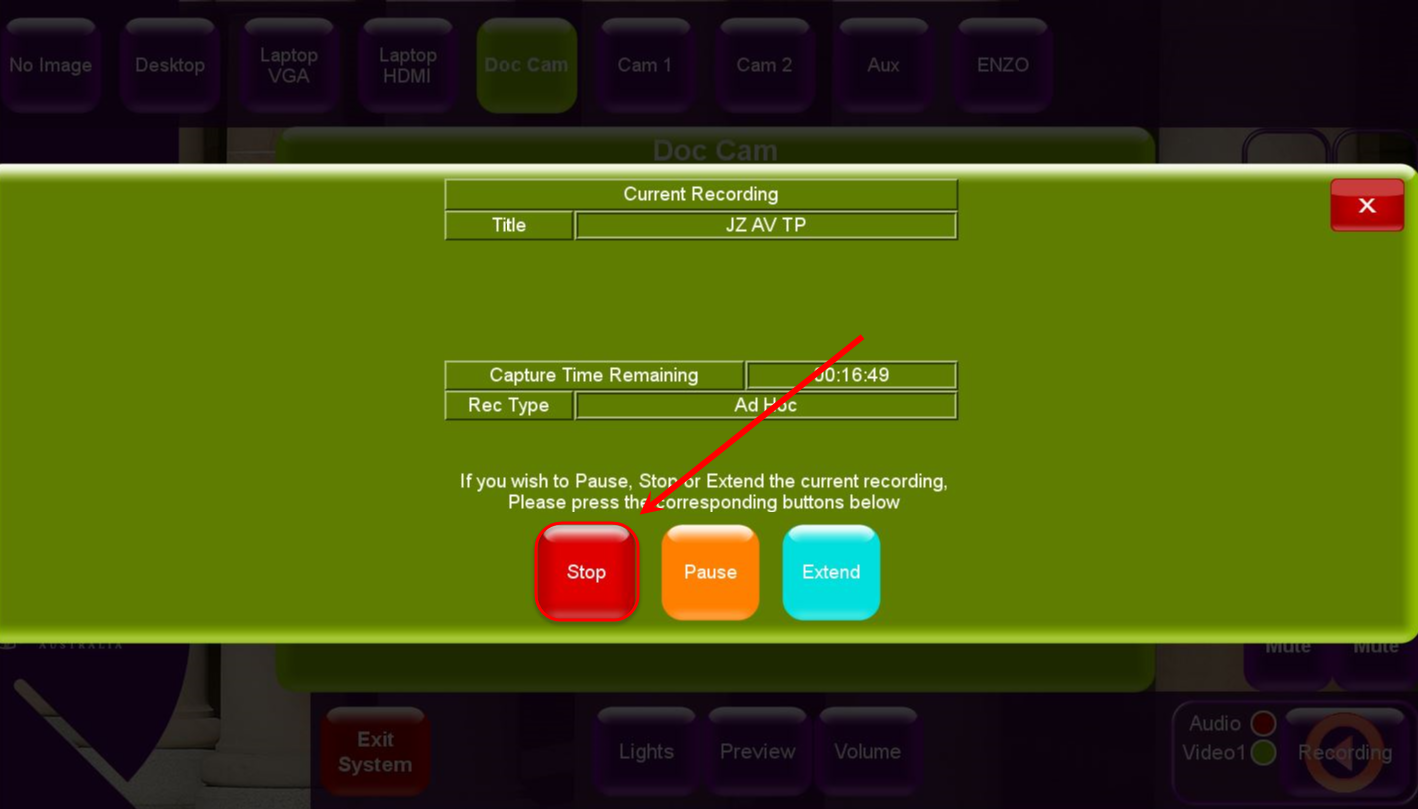
Tap the Recording button in the bottom right hand corner of the touch panel.
Tap the Stop button to extend the duration.
Note: Use with caution, as once the recording is stopped, it cannot be restarted.
Start an Ad Hoc recording
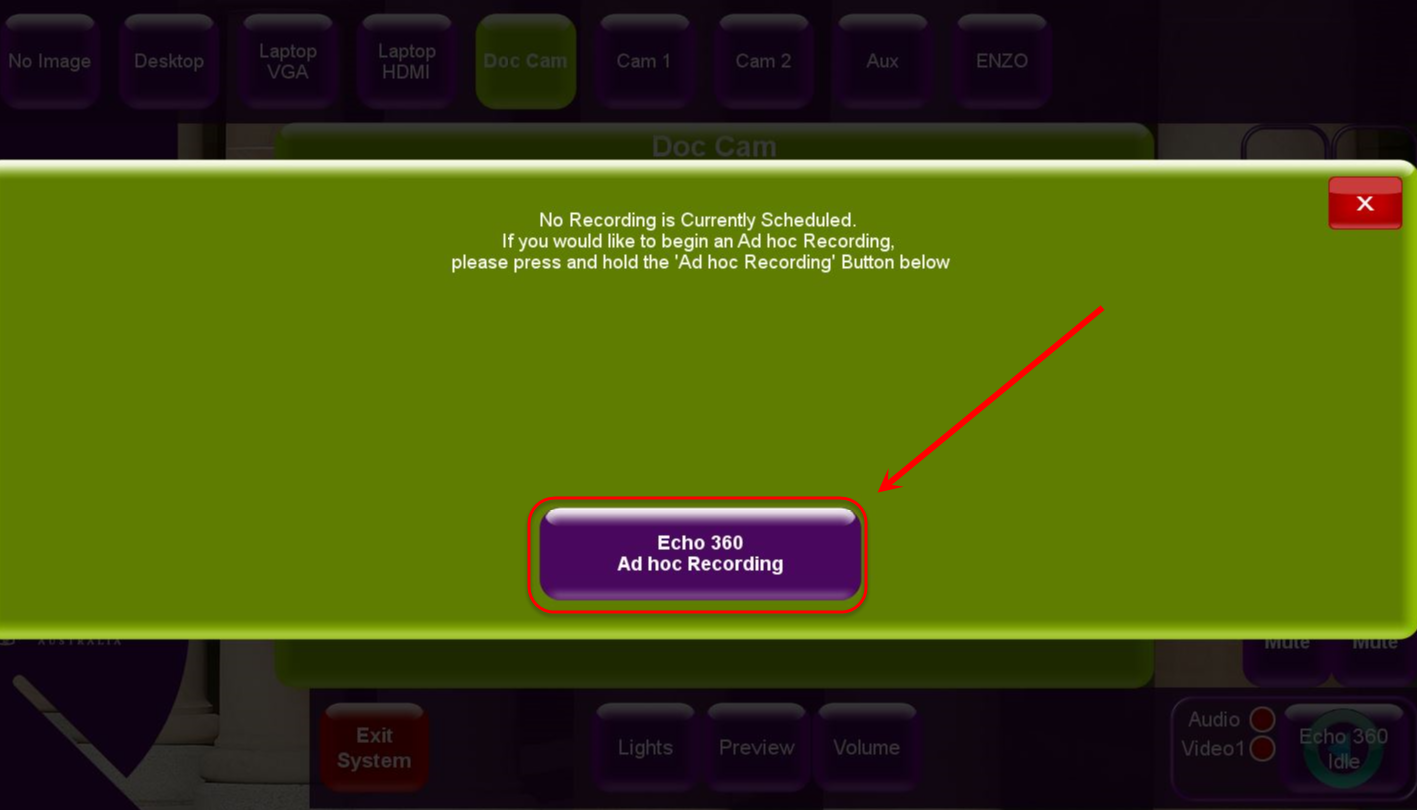
Tap the Echo 360 Idle button in the bottom right hand corner of the touch panel.
Tap the Echo360 Ad hoc Recording button to begin the Ad Hoc capture process.
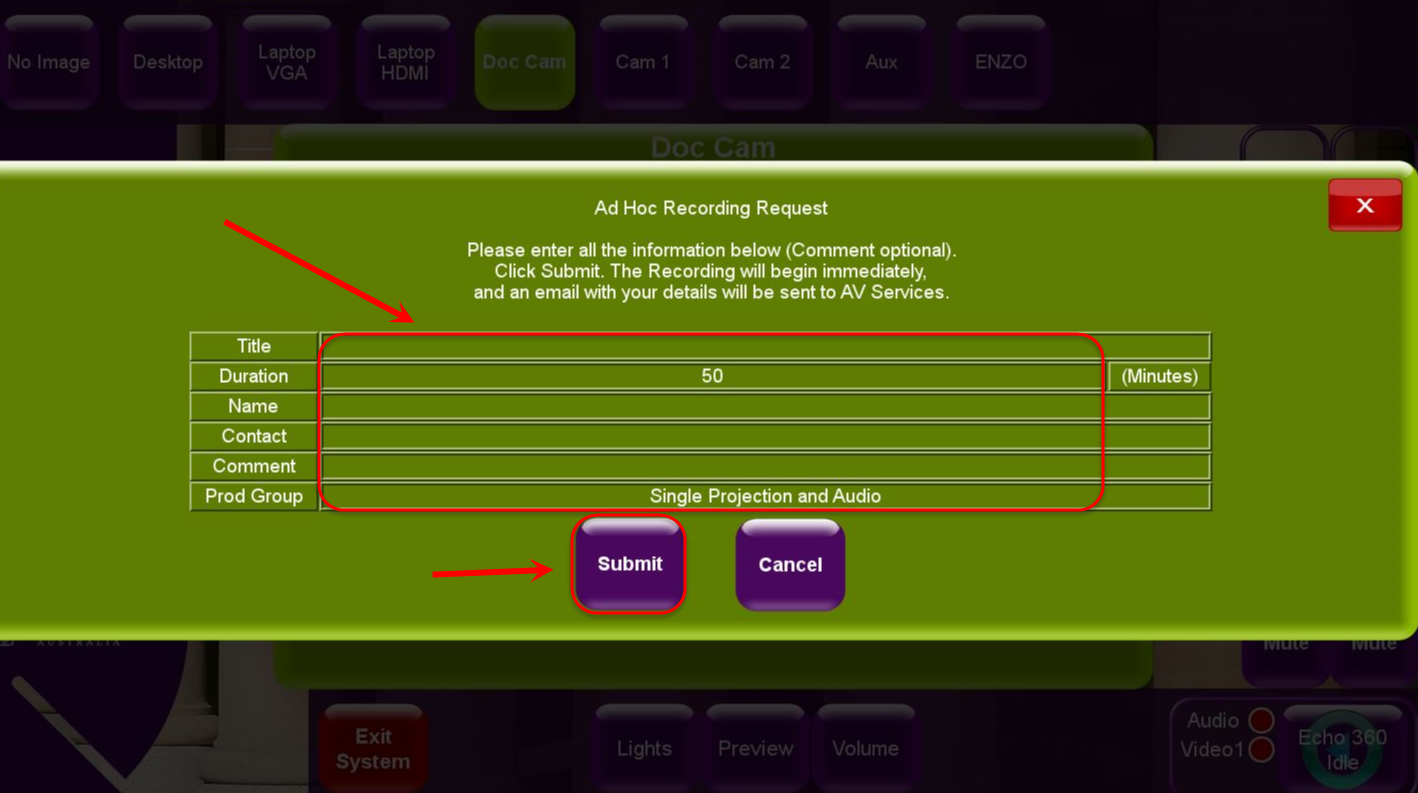
- Tap in the Title field and enter a title for the recording.
- Tap in the Duration field and enter the duration of the recording in minutes.
Tip: Allow five minutes before the start of the next room booking
- Tap in the Name and Contact fields and enter the name of the person initiating the recording and their contact details.
- Tap in the Comment field and include the email address and UQ username of the person initiating the recording.
- Tap in the Product Group field and select the appropriate type of capture.
Tip: Select Audio Only for Audio only recordings, Single Projection and Audio if the venue is a single projection venue, or Dual Projection and Audio if using a dual projection equipped venue.
- Tap on the Submit button to commence the recording.
- Begin your lecture or presentation as normal. AV Services will receive an email notifying them of the capture and will process the recording once the capture has finished and uploaded to the Echo360 server.
Microphone
To record the audio of a lecture the microphone must be turned on. This is usually “on” by default unless a previous user has turned down the volume using the touch screen control bar.
There are two kinds of microphones in the lecture theatres where lecture recording is used:
Lectern microphone (limits lecturer's movement to the lectern area only)
- Radio microphone (movement unlimited, allowing the lecturer to move freely throughout the venue). Radio microphones are supplied by your faculty office and must be set for the correct frequency before operation. The correct frequency is displayed on a label on the touch screen in each theatre where radio microphones can be used.
Tips for using microphones:
Speak directly to the lecture microphone. if you turn away from it you will sound lost and off-mic.
Repeat questions asked from the audience; this will allow the questions to be properly picked up by the microphone you are using
Limit background noise by trying not to rustle papers, tap the lectern or jingle items in pockets
Avoid the use of neck jewellery if wearing neck microphone as the noise of pendants or chains knocking against the microphone will be picked up in the recording and sound very loud
Desktop PC
All venues equipped with Lecture Recording facilities also have a Desktop PC. This PC can be used to display your PowerPoint or other computer driven content and can be recorded. The desktop can be display by selecting the Desktop PC button on the touch-screen interface.
Laptop PC Connections
The lectern has a cable that can be connected to a laptop. Once connected with the laptop PC button selected on the touch-screen, your laptop screen will be projected and recorded in the venue.
Note that the output resolution of the laptop should be set for 1024 x 768. Setting a resolution higher than this will result in the recording failing to pick up the Screen Capture.
Visualiser (Document Camera)
The visualiser functions in a similar manner to an overhead projector but is more versatile. If the visualiser is selected to the main projector, it will be recorded in "Screen Capture" mode.
Further help
This equipment is managed by the AV Integration & Support unit of ITS. They’re there to help you if you have any queries about the equipment, require training in using the equipment, or would like assistance at the time of the lecture. For emergency phone support, there is a wall phone in most lecture theatres that will allow you to call the AV help line x54033. For non-urgent assistance, submit an ITS support request.

