Import Groups function (Original)
Import Groups function alows you to create groups and memberships in an excel file and import them in your Learn.UQ course.
1. Import groups
- In you course in Learn.UQ, in the Course Management menu, go to Users and Groups>Groups.
- Click on the Import button.

- Download the template (optionally, click on the More Help button and download the Groups template).
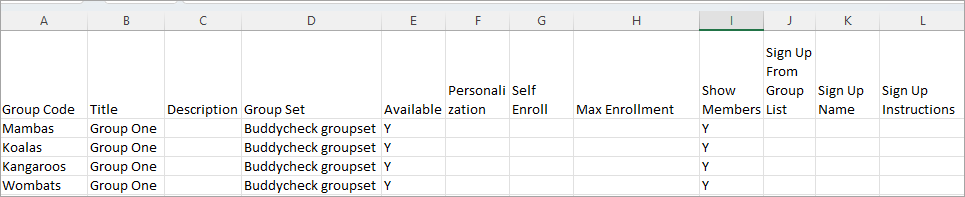
- In the template DO NOT DELETE ANY OF THE COLUMNS (if you do not need the data in some columns please remove the wording from the template, but keep all the columns and their titles):
- Group Code (this is a technical column and will not be displayed anywhere): add the names of your groups
- Title (1- will be displayed as group title for the students and staff): copy the names of your groups from the Group Code column
- Description (3 - optional - will be displayed as a description for the students): if you do not require a description remove the wording
- Group Set (optional - this will include the group within a larger group set, e.g. group project for assessment 1): add the names of your group set(s)
- Available: type Y if you would like to have the groups available for the students and N if not
- Personalization (optional - students will be able to personalise their group page, e.g. add a banner, change the colour etc.): type Y if you would like to allow personalization and N if not
- Self Enroll (optional - it's recommended that you use a regular process to create self-enrol groups): type Y if you would like to allow self enrolments and N if not
- Max Enrollment (optional): type the maximum number of group members in a group. If left blank the number will be unlimited.
- Show Members (2 - optional): type Y if you would like to show members and N if not
- Sign Up From Group List (optional): type Y if you would like to allow sign up from the group list and N if not
- Sign Up Instructions (optional): add sign-up instructions.
- Save the file on your device.
- Under IMPORT GROUPS click on the Browse Local Files button and attach the created file.
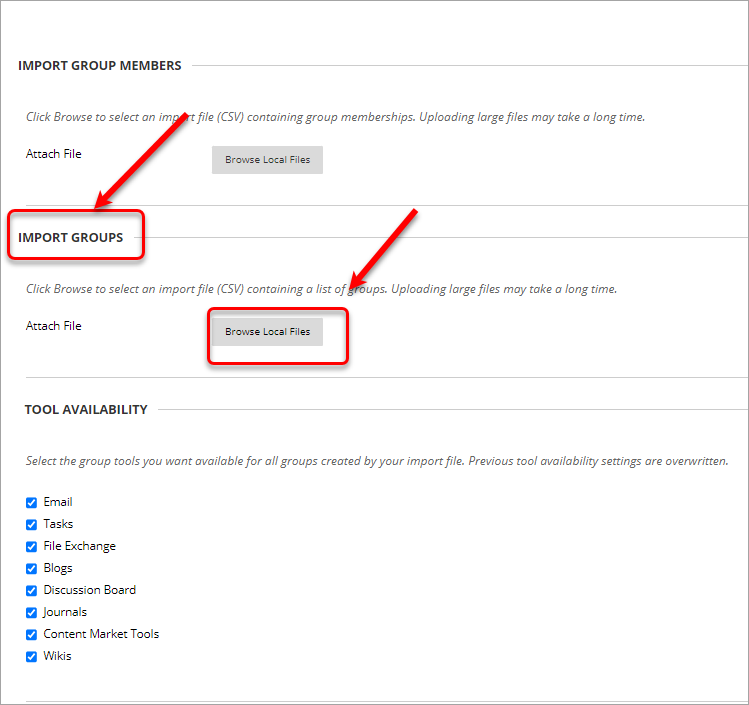
- Click on the Submit button.