Create a Group Set - Self-Enrol (Signup Sheets) (Original)
Video Guide
Users and groups - Self-Enrol Group sets (YouTube, 6m 9s)
Self-Enrol group sets
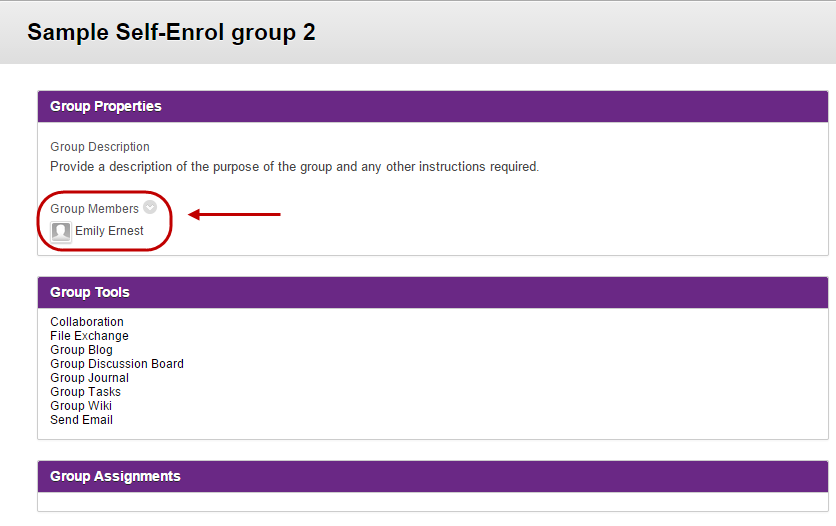
Self-enrolment allows students to add themselves to a group using an online sign-up sheet. Students can access sign-up sheets on the Groups listings page or by a menu link if you have created one.
View Groups listing page
- From the Control Panel, select Users and Groups > Groups.
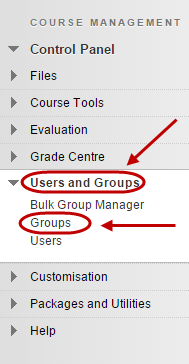
- The Groups page will be displayed.

Self-Enrol
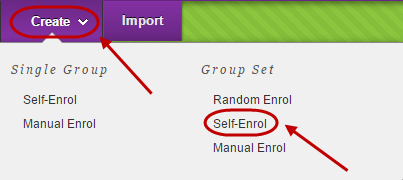
- Click on the Create button.
- Select Self-Enrol from the drop-down list under Group Set.
Group Information
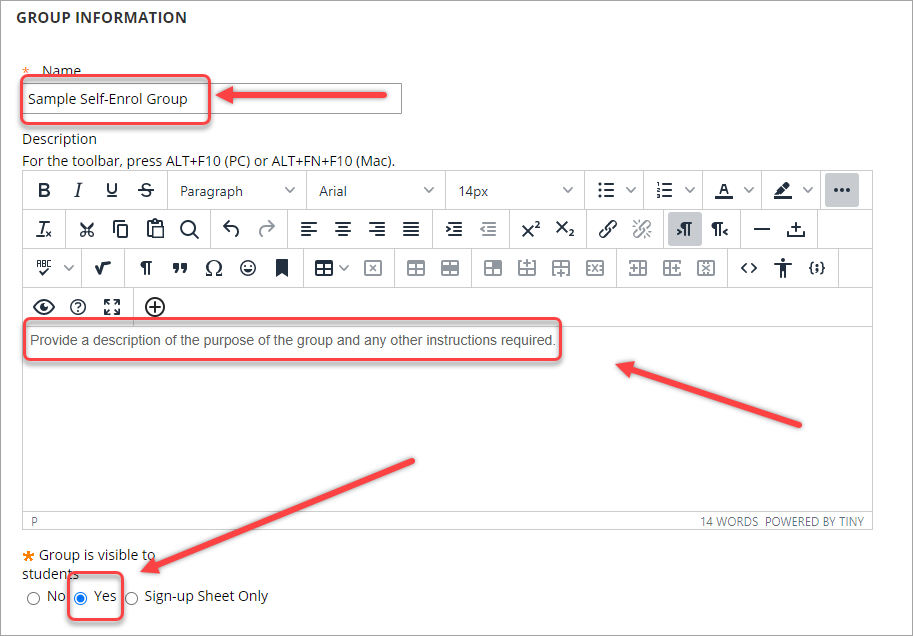
- Enter a name for the groups in the Name textbox.
Note: Do not use special characters, e.g. "_, > <'; as they will not be recognized by the system and will not be displayed in Group Assessments.
- Enter a description of the purpose of the group and instructions for students in the Description textbox.
- Select a radio button from Group is visible to students.
- No: the groups are not available for students to enrol into.
- Yes: students may enrol and immediately use group tools.
- Sign-up Sheet Only: the students may enrol in a group but will not have access to group tools until you change the availability to Yes.
Tip: Initially set up the Group is visible to students by selecting the Sign-up Sheet Only radio button and give the students a deadline to select a group. After the deadline, check the groups and manually place any students who have not signed up into a group (refer to the Edit Group Enrolments guide). Then edit the group properties and select the Yes radio button.
Tip: It is possible have a different description for each individual group i.e. If students should be signing up for groups based on their tutorial group. This information can be added to each individual group description. For more information, refer to the Edit Group Properties guide.
Tool Availability
- Select the checkboxes of the tool you want available to the groups. Refer to the Groups tool page for information on the purpose and use of each tool.
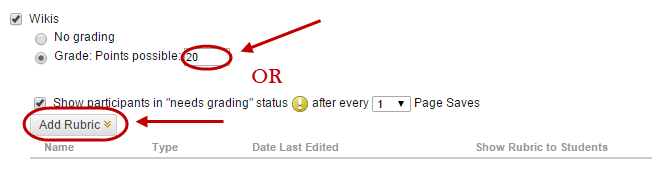
- Select the Grade: Points possible radio buttons for the items you wish to mark.
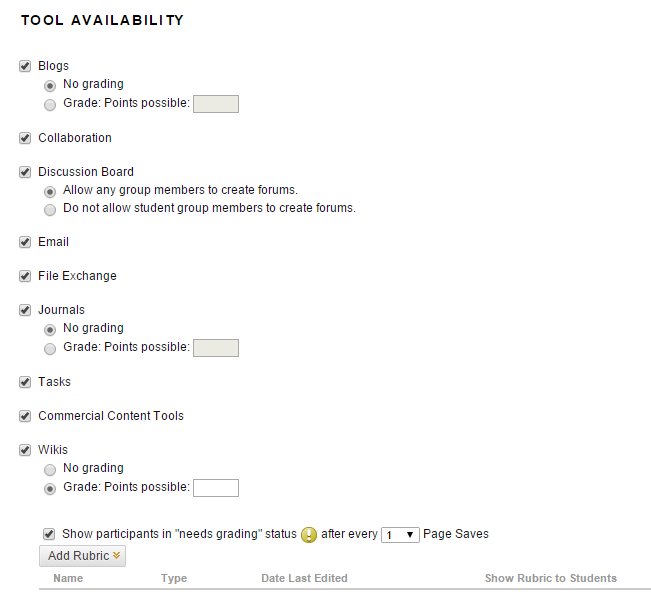
- Either enter the total marks of the item OR
- Alternatively, click on the Add Rubric button. For more information, refer to the Rubric tool page.
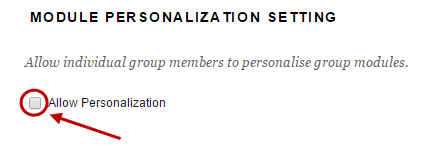
Module Personalisation Setting
The module personalisation setting allows each student to add personalised modules to their own version of the group home page (e.g. What’s New, My Calendar, Needs Attention).
Tip: Students may use this option to add inappropriate content. Either set clear rules on appropriate content or uncheck this option.
- Uncheck the Allow Personalisation checkbox.
Sign up options
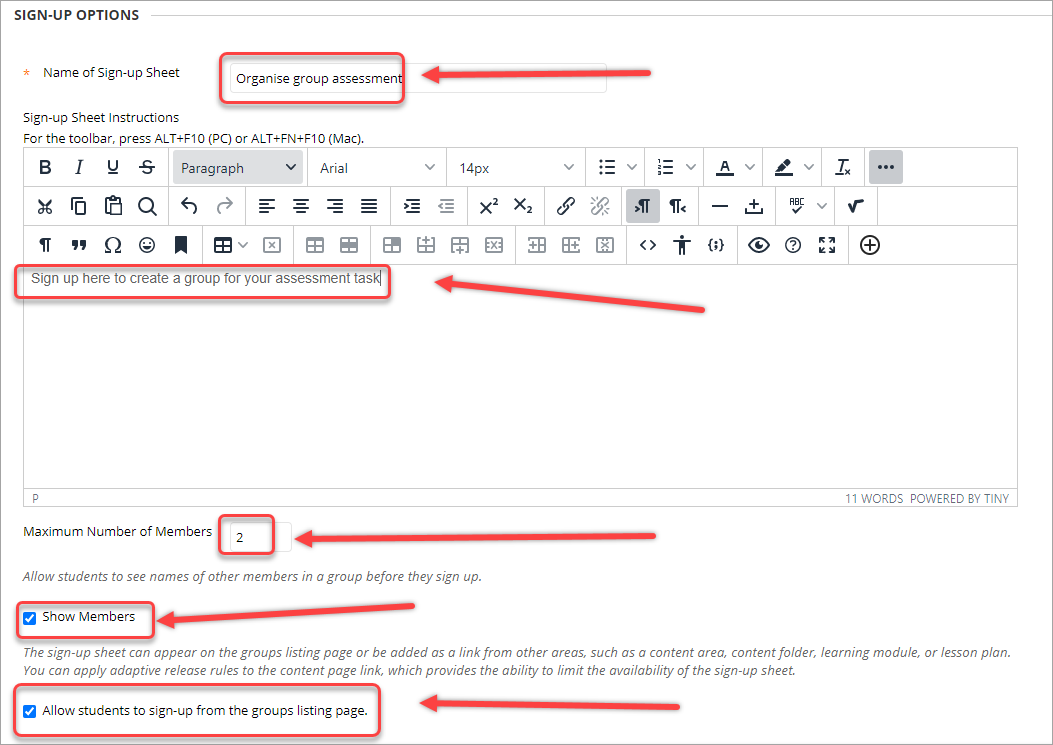
- Enter a name in the Name of sign-up Sheet textbox. i.e. If you provide a direct link to the sign-up sheet instead of the students accessing the Group listings page, this is the name that will be displayed.
- Enter a description of the purpose of the group and instructions for students in the Sign-up Sheet Instructions textbox.
- Enter the number of students that can sign up for each group in the Maximum Number of Members textbox.
- Select the Show Member checkbox so students can view who has already signed up for a particular group.
- Select the Allow Students to sign up from the Groups listing page checkbox. The other option is to create a link to the sign-up sheet from the menu.
Tip: Initially set up the Group Available as Sign-up Sheet Only and give the students a deadline by which to select a group. After the deadline, check the groups and manually place any students who have not signed up into a group (refer to the Edit Group Enrolments guide). Then edit the group properties and select the Yes radio button from Group Available.
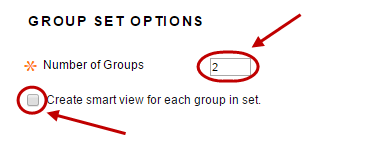
Group Set Options
- Enter the total number of sign-up groups to display in the Number of Groups checkbox.
- Optionally, check the Create smart view for each group in set checkbox to provide a link in Grade Centre for the group.
Warning: If you do not check the Create smart view for each group in set checkbox, you will have to manually set this up in Grade Centre. For more information, refer to the Group Smart View guide.
- Click the Submit button.
Group set
The new group set will now be listed in the Group Sets page.

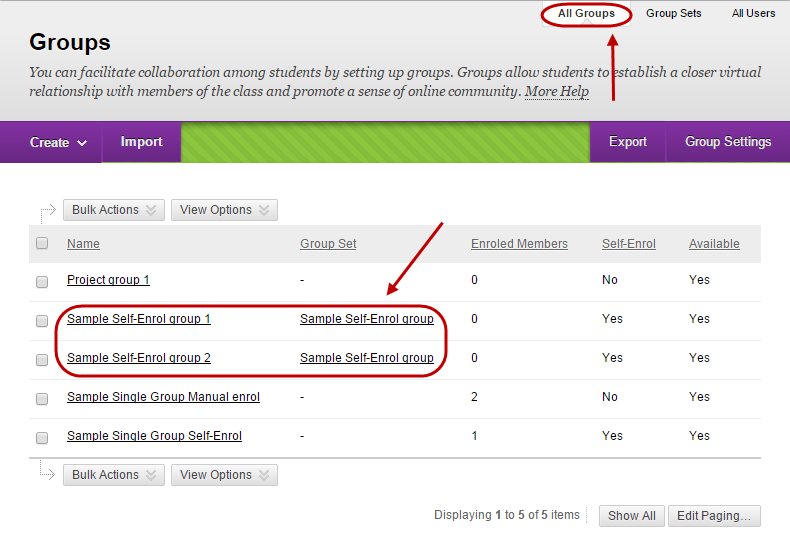
All groups
The individual groups will now be listed in the All Groups page.
Changing individual group descriptions (optional)
- Click on the All Groups button.
- Click on the arrow next to the required group.
- Select Edit Group from the drop-down menu.
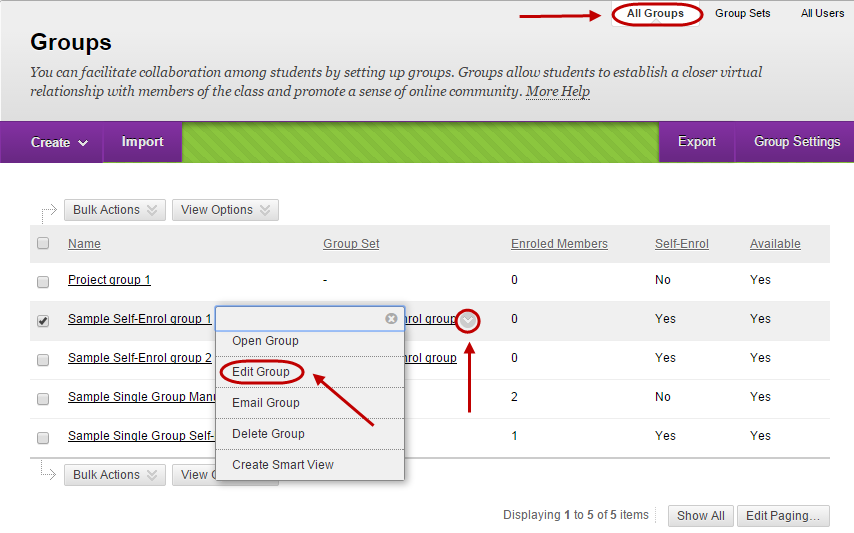
- Edit the Description text box as required.
- Click on the Submit button.

- If required, repeat the above steps for each group.
Link the Groups page to the Course Menu
- Click on the plus button in the menu.
- Select Tool Link from the drop-down list.
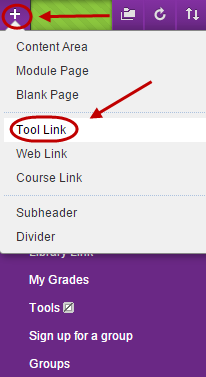
- Enter a title in the Name textbox.
- Select Groups from the Type drop-down list.
- Check the Available to Users checkbox.

- Click on the Submit button.
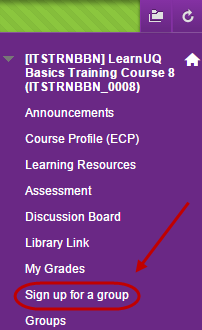
Student access to the Sign-up Sheet
Students can access the Sign-up Sheet from the Course Menu.
- If a link has been added, from the Course Menu, select Sign up for a group.
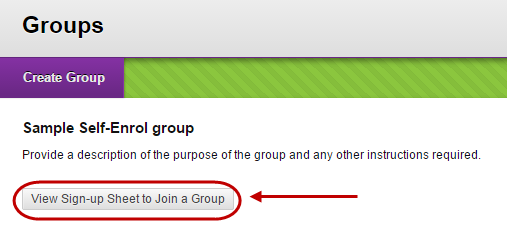
- The students then click the View Sign-up Sheet to Join a Group button for the group they want to join.
- Students must click on the Sign up button to confirm their membership. In this example, they have the option to sign up with either Group 1 or Group 2.
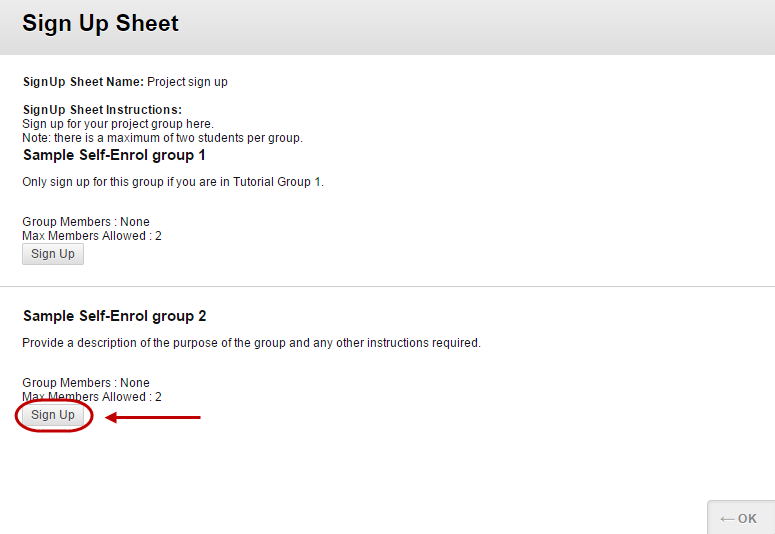
- The Group will appear in the Groups page where the student can check their membership.