EchoPoll - Start and end your polling session (Original)
There are 2 ways to start your polling session:
- At the start of the lecture (recommended): You start your PPT and at the same time the polling session. The transition from the lecture content to polling questions is seamless.
- At the polling slide: You start teaching the lecture content without activating the poll, then when it comes to the polling slide, you will escape the presentation mode and start the poll. This method involves a few clicks in the middle of the lecture.
At the start of lecture
- Open the PPT slide.
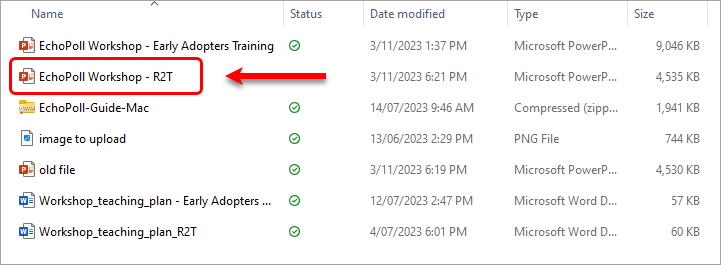
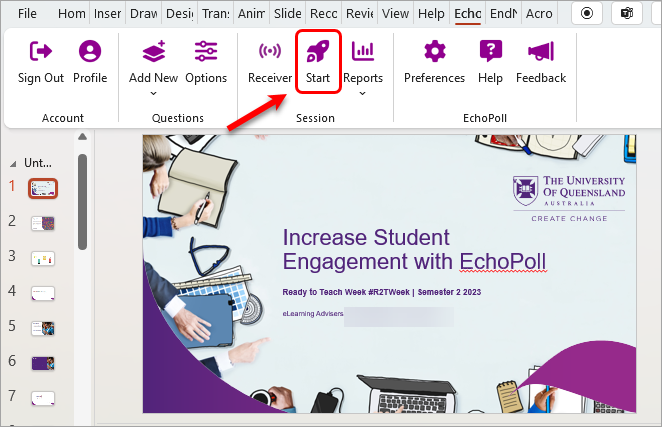
- Click on the Start button.
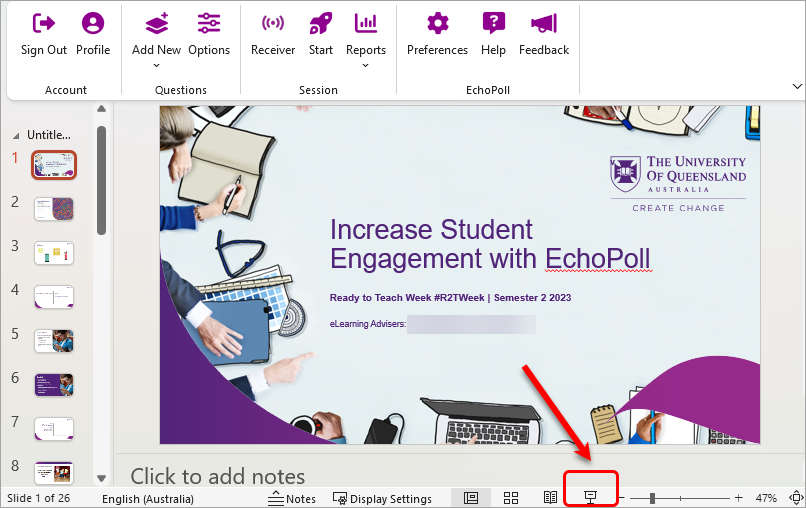
Note: You can also start the session by entering the presentation mode.
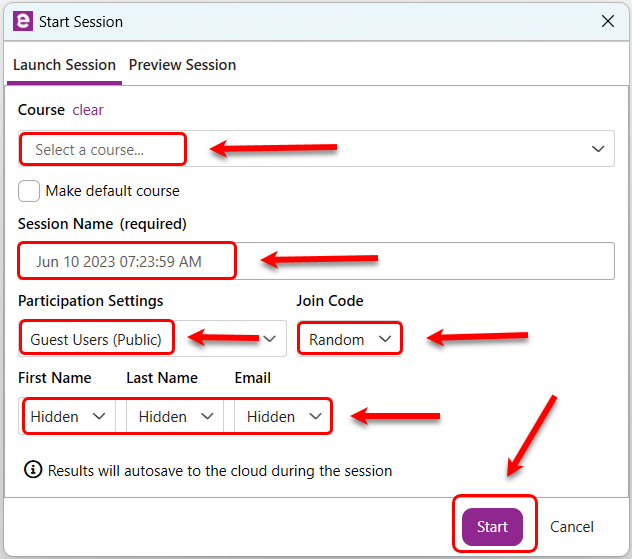
- Select the preferred settings for your polling session:
- Select a course (Optional)
- Enter a session name (Optional)
- Select the preferred participation setting
- Join code: Select a pre-defined join code (Optional), or use the random option
- Select the preferred participant's name and email
Note: the Participation setting and the participant's name and email setting might have seen pre-selected in the global settings.
- Click on the Start button to start your poll
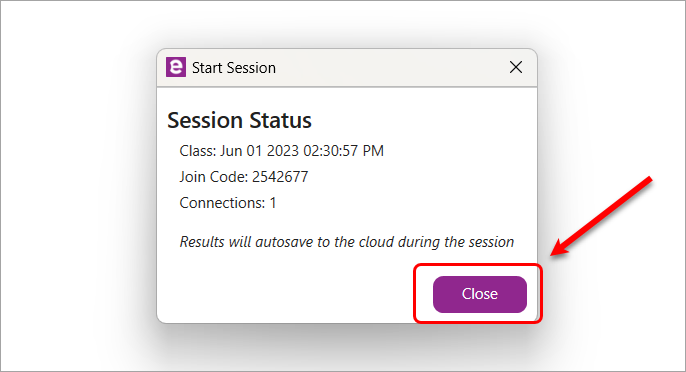
- Click on the Close button to close the notification.
- The first slide will be displayed. Note:
- The show bar will be displayed (on all slides) to control your polling session.
- You can move this show bar to the conner of the slide or to another screen, using the six-dot icon.
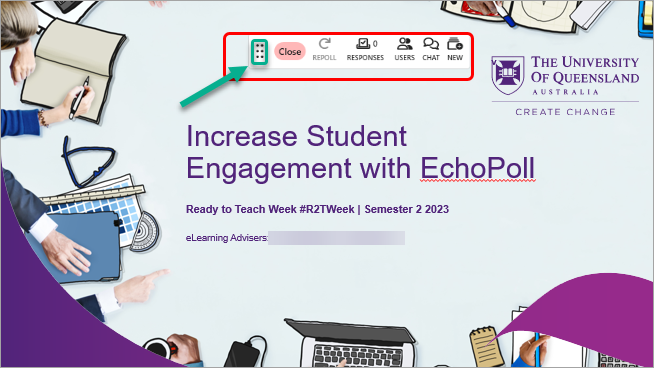
The show bar includes the functionalities to:
- Show the poll status (Open/Close)
- Repoll
- Show the number of participants who answered each polling question
- Show the number of participants who joined the poll
- Show chat among participants
- Add new polling questions
- Click on the slide to move to the next slide (as you often do in teaching or presenting).

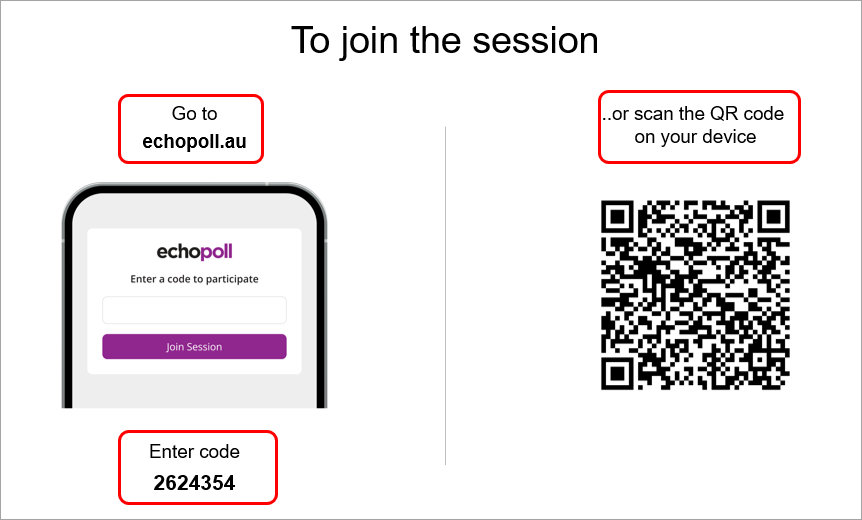
- When it comes to the polling slides, students will join the poll using the details on the join slide.
Note: It is recommended you join the poll, using your mobile device to see if there is any access issue.
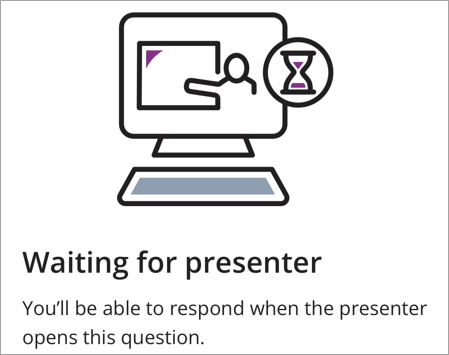
- When you see the message Waiting for presenter on your mobile device, it means you have joined the poll. You should let students know about this message so that they know the next step.
Tip: If you click on the USERS button on the show-bar, you will see the number of students who have joined your poll.

- Click on the slide to move to the first polling question.

- Continue with the next polling slides and the content slide until the end of the lecture.
- Escape the presentation mode.
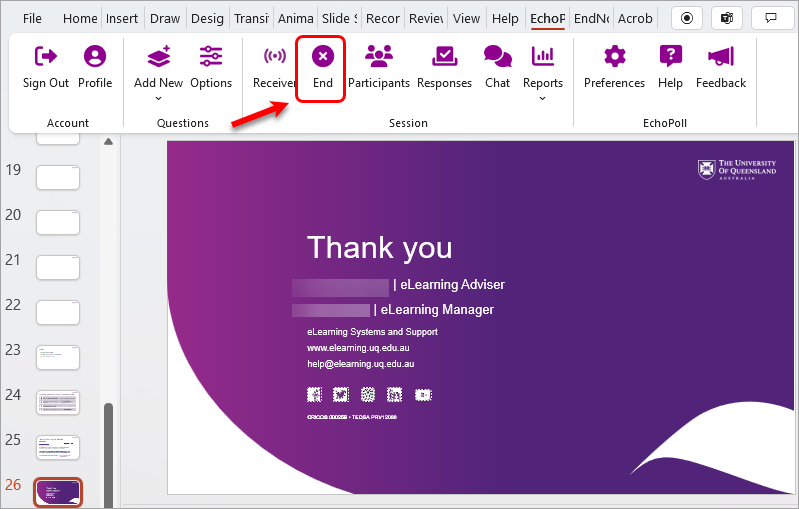
- Click on the End button.
At the polling slide
- Open the PPT slide.

- Enter the presentation mode.

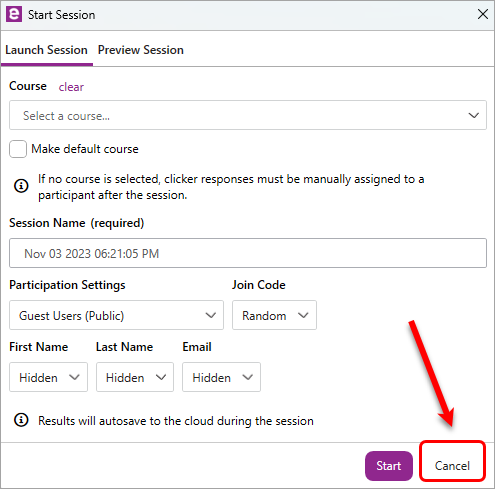
- Click on the Cancel button (because you do not want to start the polling at this point).
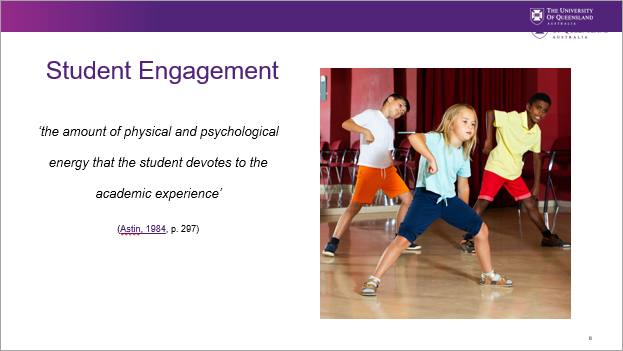
- Start teaching from the first slide; e.g.
- At the join slide, click on the ESC (escape) button on your keyboard. The presentation mode will be stopped.
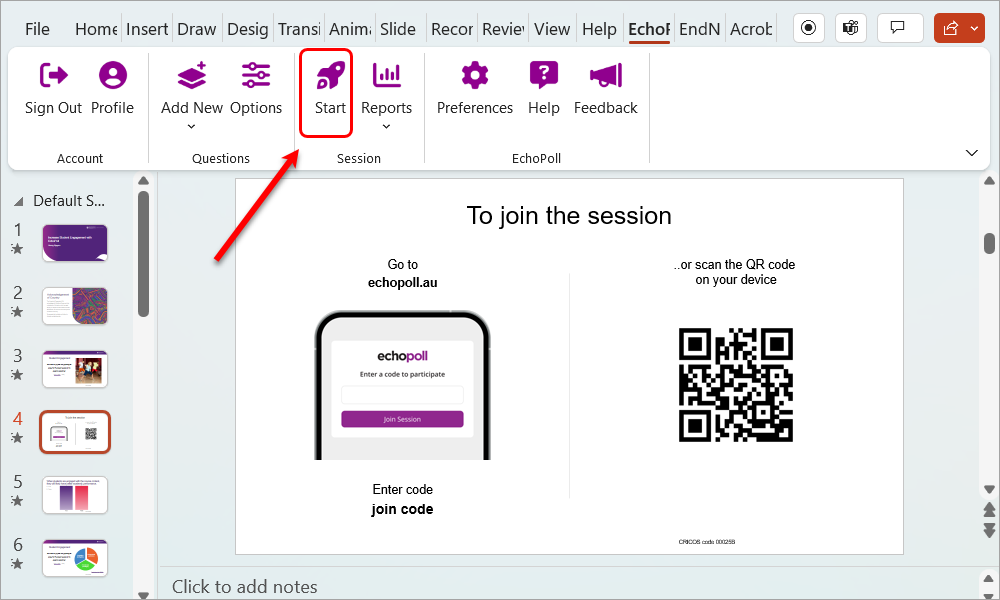
- Click on the Start button.
- Select the preferred settings for your polling session:
- Select a course (Optional)
- Enter a session name (Optional)
- Select the preferred participation setting
- Join code: Select a pre-defined join code (Optional), or use the random option
- Select the preferred participant's name and email
Note: the Participation setting and the participant's name and email setting might have seen pre-selected in the global settings.
- Click on the Start button to start your poll

- Click on the Close button to close the notification.

- Click on the presentation mode button.
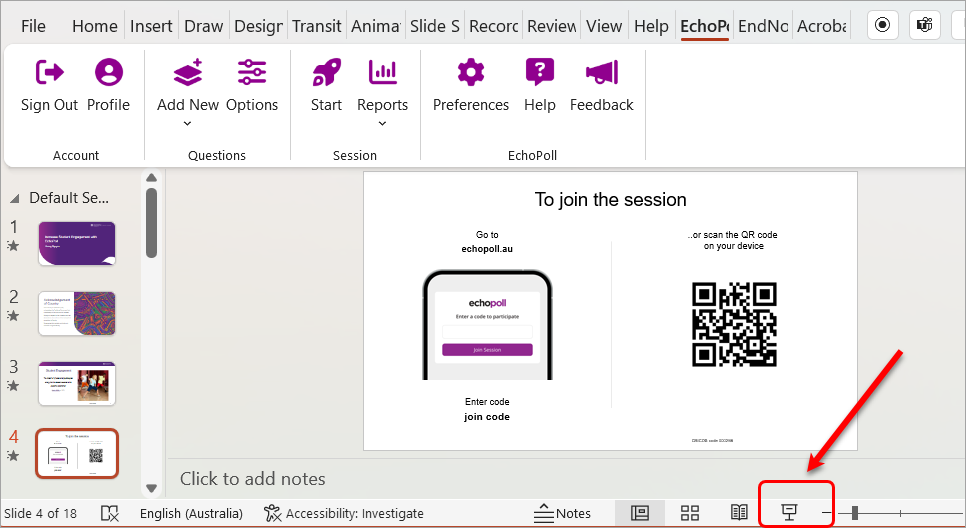
- Students will join the poll using the details on the join slide.
Note: It is recommended you join the poll, using your mobile device to see if there is any access issue.

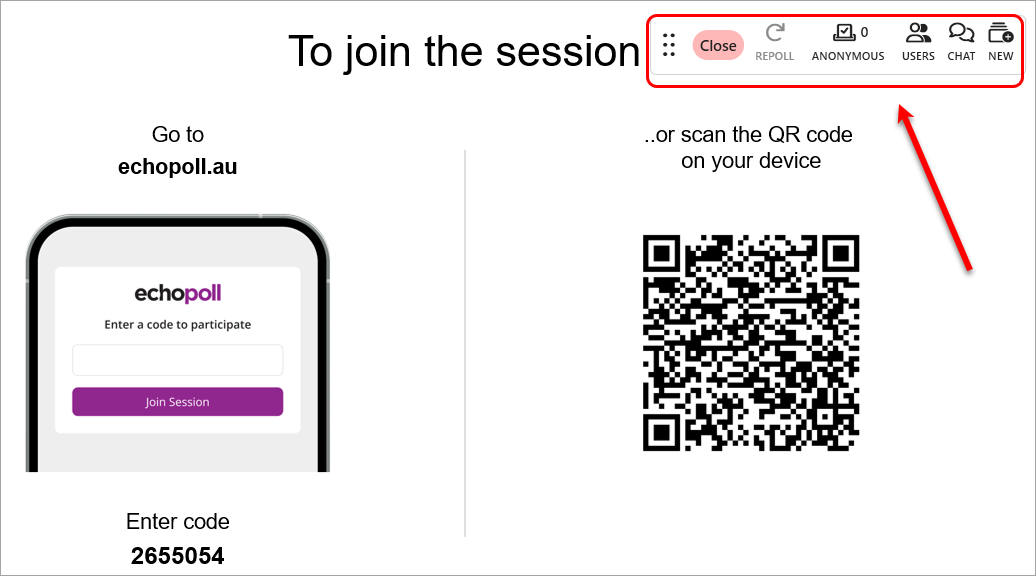
Note: The show bar will be displayed (on all slides) to control your polling session.
- You can move this show bar to the other screen, using the six-dot icon.
- The show bar includes the functionalities to:
- Show the poll status (Open/Close)
- Repoll
- Show the number of participants who answered each polling question
- Show the number of participants who joined the poll
- Show chat among participants
- Add new polling questions
- When you see the message Waiting for presenter on your mobile device, it means you have joined the poll. You should let students know about this message so that they know the next step.

Tip: If you click on the USERS button on the show-bar, you will see the number of students who have joined your poll.

- Click on the slide to move to the first polling question.

- Continue with the next polling slides and the content slide until the end of the lecture.
- Escape the presentation mode.
- Click on the End button.

- EchoPoll - Access
- EchoPoll - Add a join slide
- EchoPoll - Add new polling slides in a live session
- EchoPoll - Assignment
- EchoPoll - Create a hotspot question
- EchoPoll - Create a multiple choice question
- EchoPoll - Create a multiple select question
- EchoPoll - Create a numeric question
- EchoPoll - Create a short-answer question
- EchoPoll - Create a true/false question
- EchoPoll - Create a word cloud question
- EchoPoll - Create courses and link to polling sessions
- EchoPoll - Enable the Anywhere floating toolbar
- EchoPoll - Global setups in your account
- EchoPoll - Individual question setups
- EchoPoll - Local setups in your PowerPoint
- EchoPoll - Navigating the EchoPoll platform
- EchoPoll - Preview a polling question
- EchoPoll - Reports and Results
- EchoPoll - Resources and feature requests
- EchoPoll - Save the app to taskbar
- EchoPoll - Sign-in and download the desktop app
- EchoPoll - Start and end your polling session
- EchoPoll - Teams functionality (Original)
- EchoPoll - Using the EchoPoll app in centrally controlled teaching spaces
- EchoPoll - Web environment
- EchoPoll - Workflow for creating a poll in PowerPoint
