Set up Ed Discussion Board (Original)
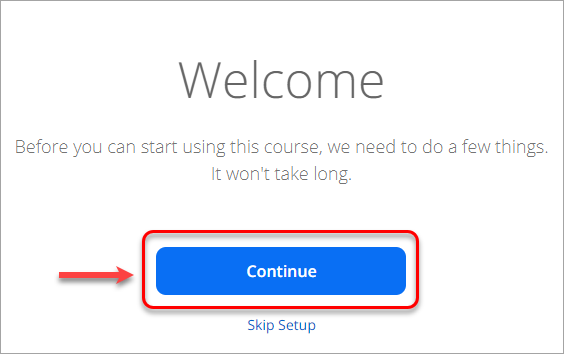
Post announcement
- After activating your Ed Discussion board course, click on the Continue button.
- Welcome announcement will be automatically generated for you. After editing it (if necessary) click on the Continue button.

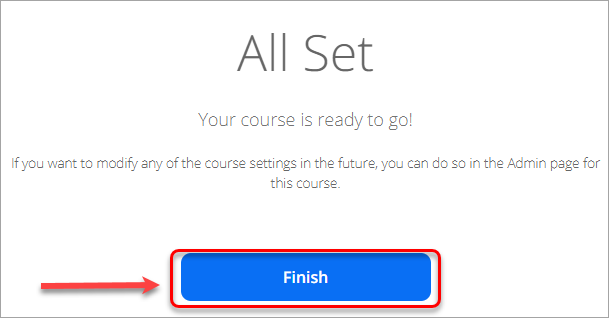
- After confirming the post, click on the Finish button. Email notifications will be sent to all enrolled in this course.
Rename your course
As students are enrolled in multiple courses and they will have multiple discussion boards. To make it easier for the students to navigate and to ensure consistency rename your course in Ed platform.
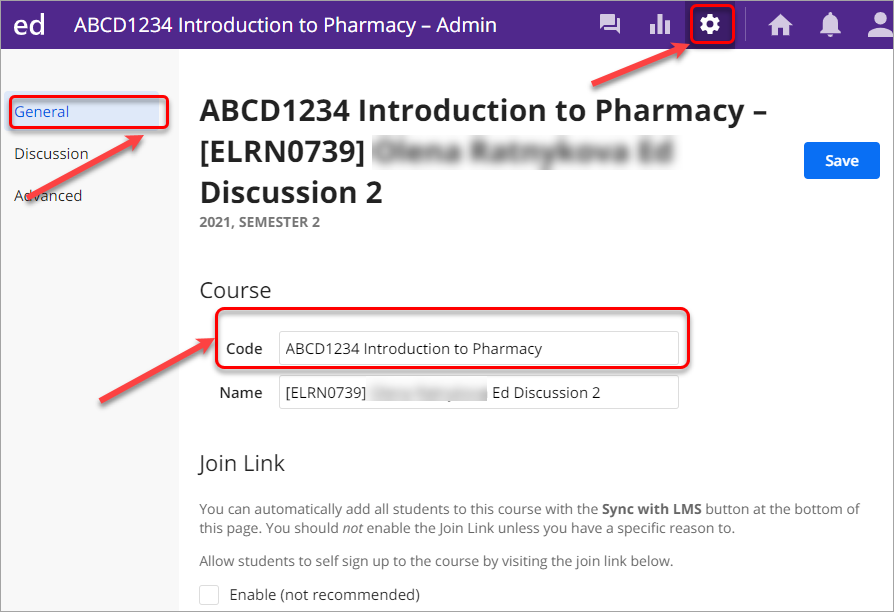
- Click on the cog button in the admin panel.
- Under the General tab type the new name in the Code bar. Rename the course using the following name convention: course code - course name , f.ex. 1234 Introduction to Pharmacy.
Note: you do not have to change the title displayed in the Name bar, as it will not be displayed.
Enroll students
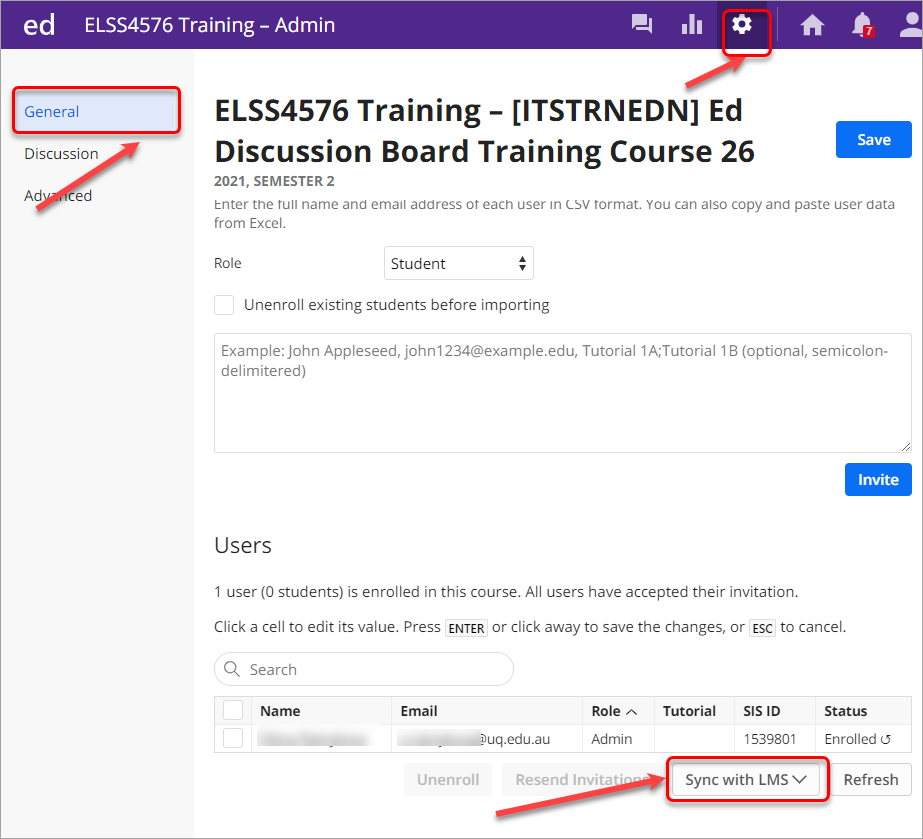
- Go to admin panel and click on the cog button.
- In the General tab go to Users section.
- Click on the Sync with LMS button. All students and staff enrolled in your Learn.UQ course will appear in the Users section.
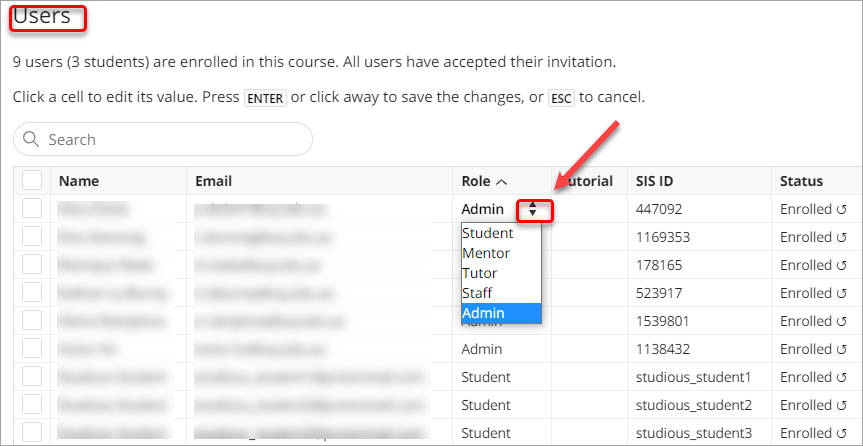
Change staff roles
Below is the mapping of how roles will be transfered from Learn.UQ to Ed Discussion Board
Role in Learn.UQ | Role in Ed Discussion Board |
Instructor | Admin |
Course Builder | Staff |
Teaching Assistant | Admin |
Student | Student |
If you want to change the staff roles, click on the double arrow button next to a staff name and select from the drop-down menu.
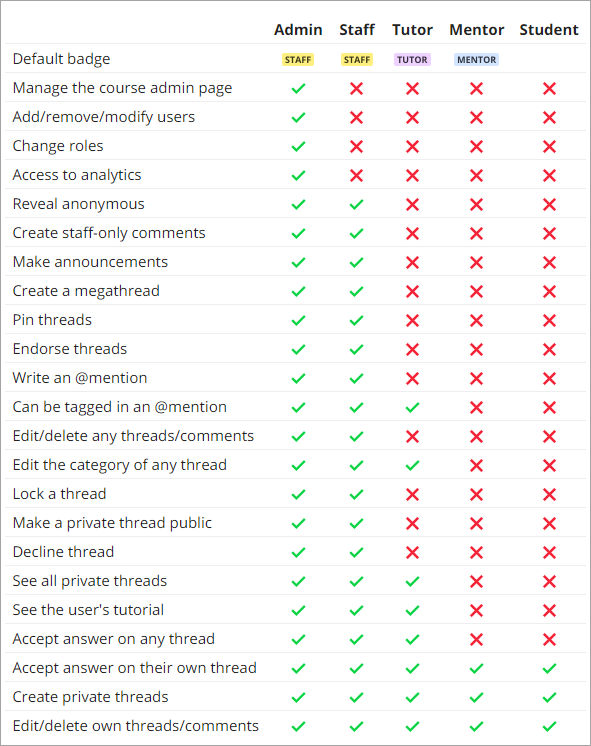
Role descriptions in Ed Discussion Board
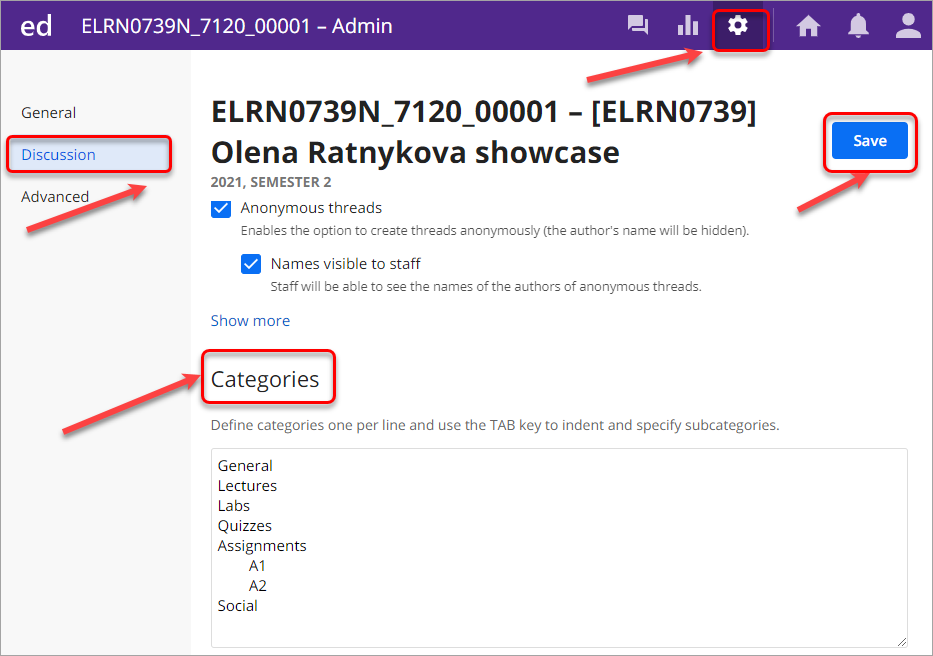
Set up categories
The following categories are generated by default for every course.
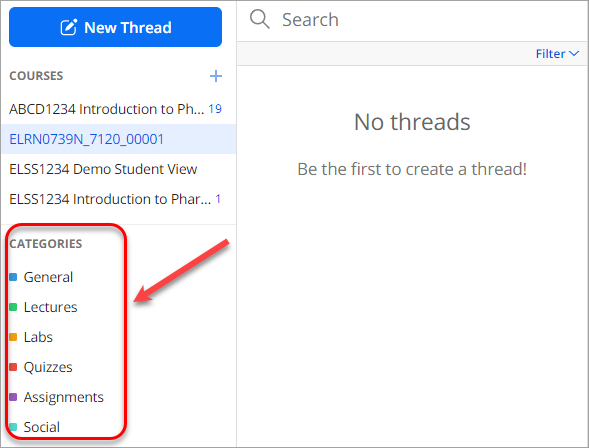
Depending on your course specifics and to streamline discussions effectively, they can be modified/deleted/copied and sub-categories can be created.
- Click on the cog button in the admin panel.
- In the Discussion tab scroll down to the Categories section.
- To create a category type the required name.
- To create a sub-category press Tab key on your keyboard and type the name of the subcategory.
- Click on the Save button.