Kaltura Capture - Screen Recording (Original)
Video Guide
Kaltura Capture - Screen Recording and Drawing (YouTube, 4m 56s)
Note: This video covers Drawing and it is not a compulsory aspect when conducting Screen Recording. For additional information, refer to the Drawing guide.
Overview
Screen Recording is useful in that instructional videos can be created to demonstrate how to use a specific software (like how to create a formula in Microsoft Excel) or to navigate a particular website. It is not restrictive to PowerPoint Presentations.
Screen Recording
- Plug in the microphone you will be using (if you are not using a microphone built into your computer) before you open Kaltura Capture.
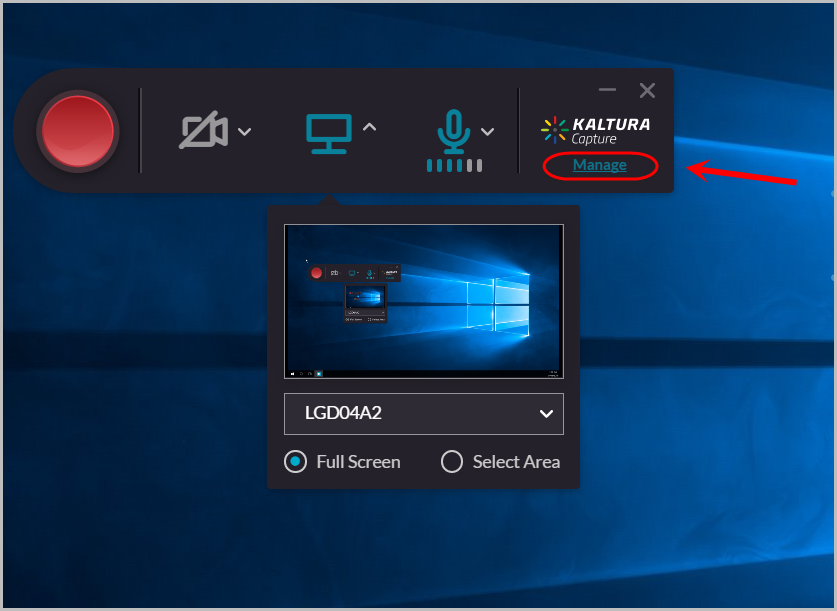
- Click on Manage then the cog icon to check your settings.
Note: Refer to the Recording Options and Settings guide for more details.
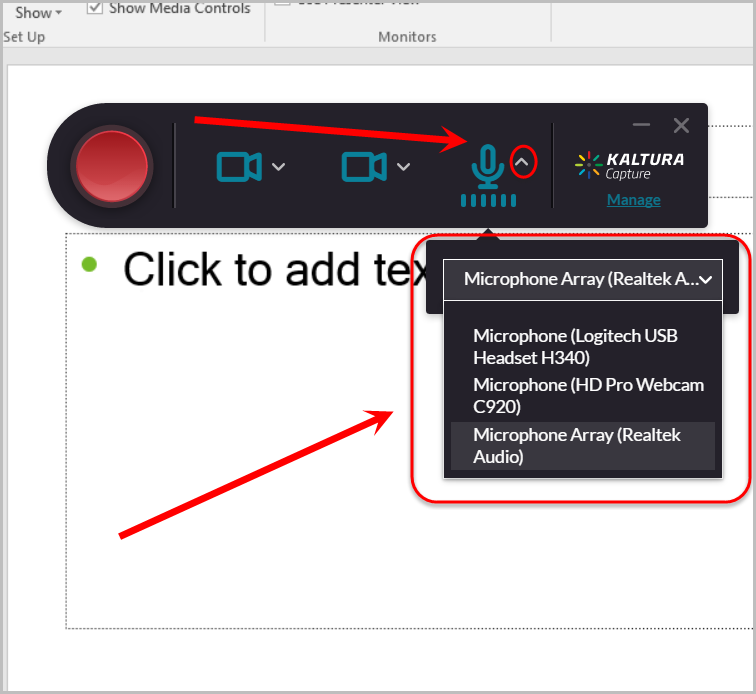
- In the main interface, click the microphone icon to make it blue and enabled. Click on the down-arrow near the icon then select the appropriate microphone.
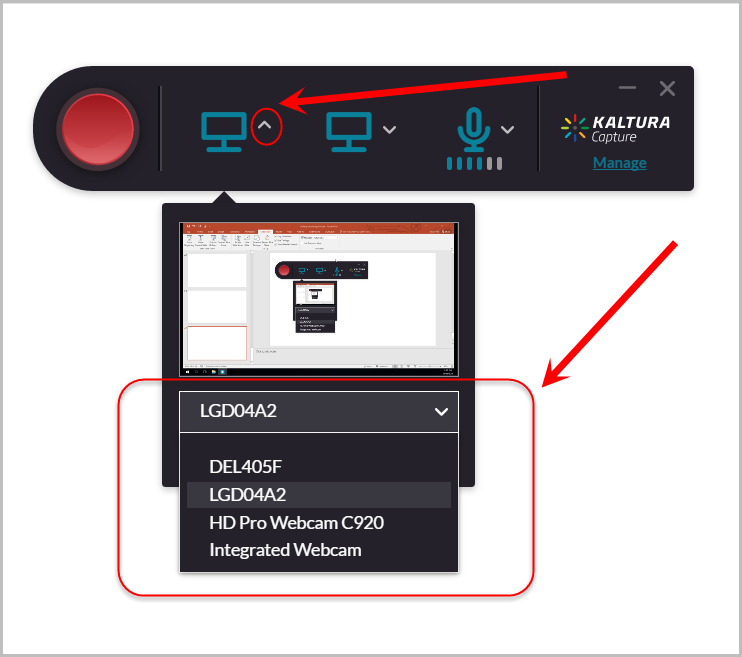
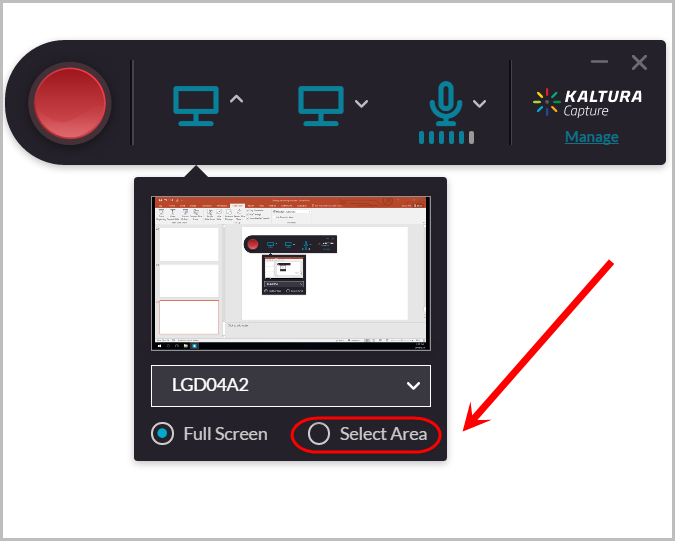
Click on the down-arrow then select the appropriate screen based on the preview screen.
Note: You are able to record both screens at once.
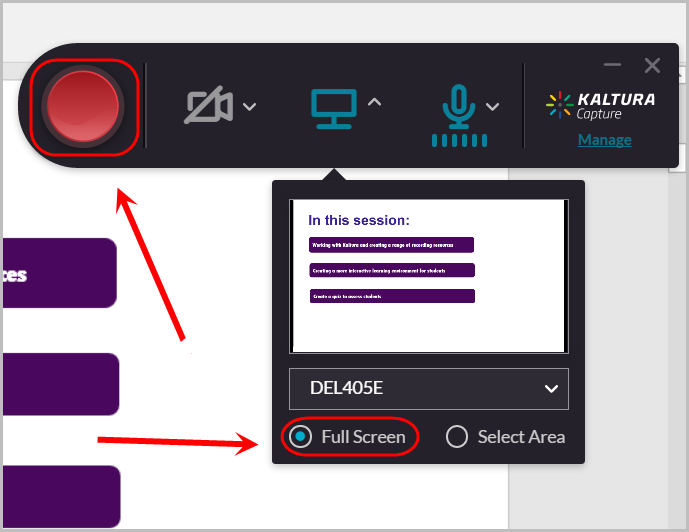
- By default, the screen recording setting is set to Full Screen. If recording using Full Screen, proceed from Step 10.
- If recording a specific area, select the Select Area radio button.
Follow the prompt to click and drag over the area of your screen for recording by either:
Clicking and dragging over the dotted line to the desired size.
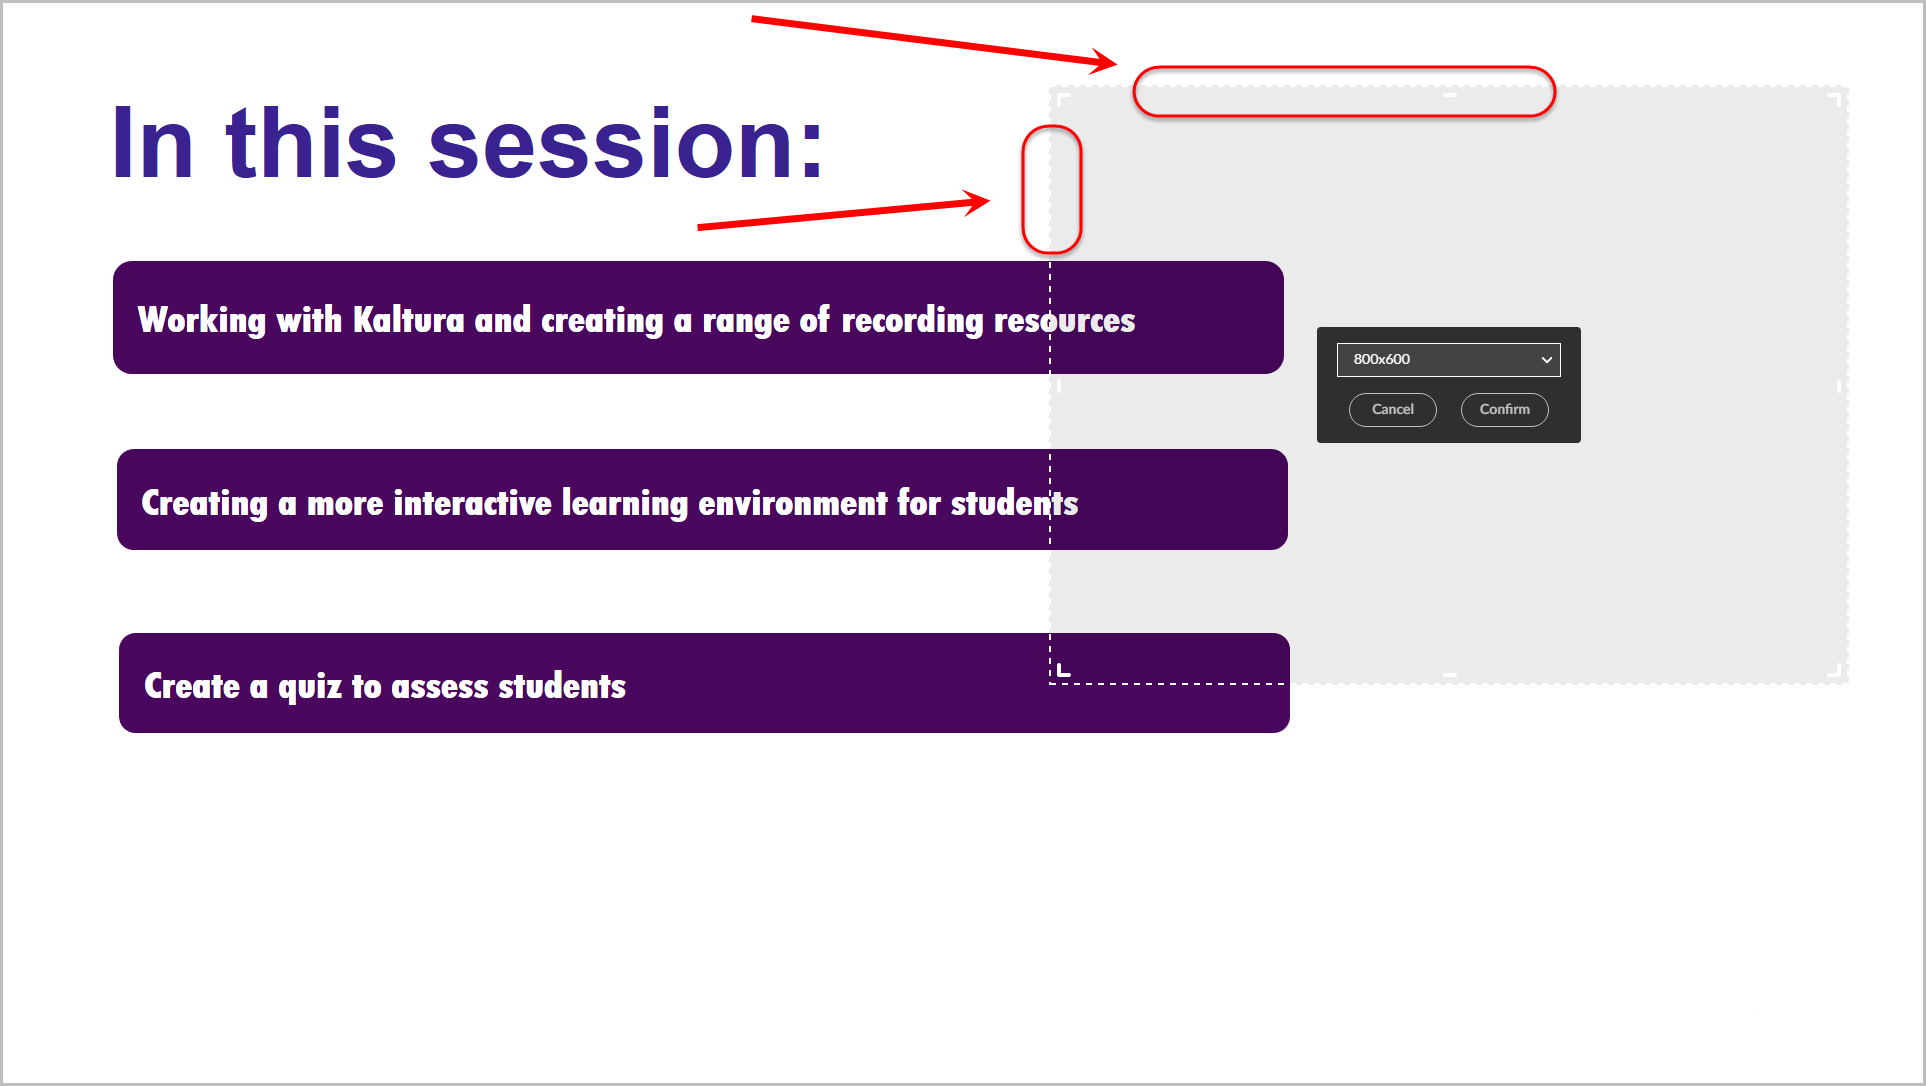
- Or select the size options from the drop-down menu.
Note: You may manually resize after selecting the size from the drop-down menu.
- Click on the Confirm button.

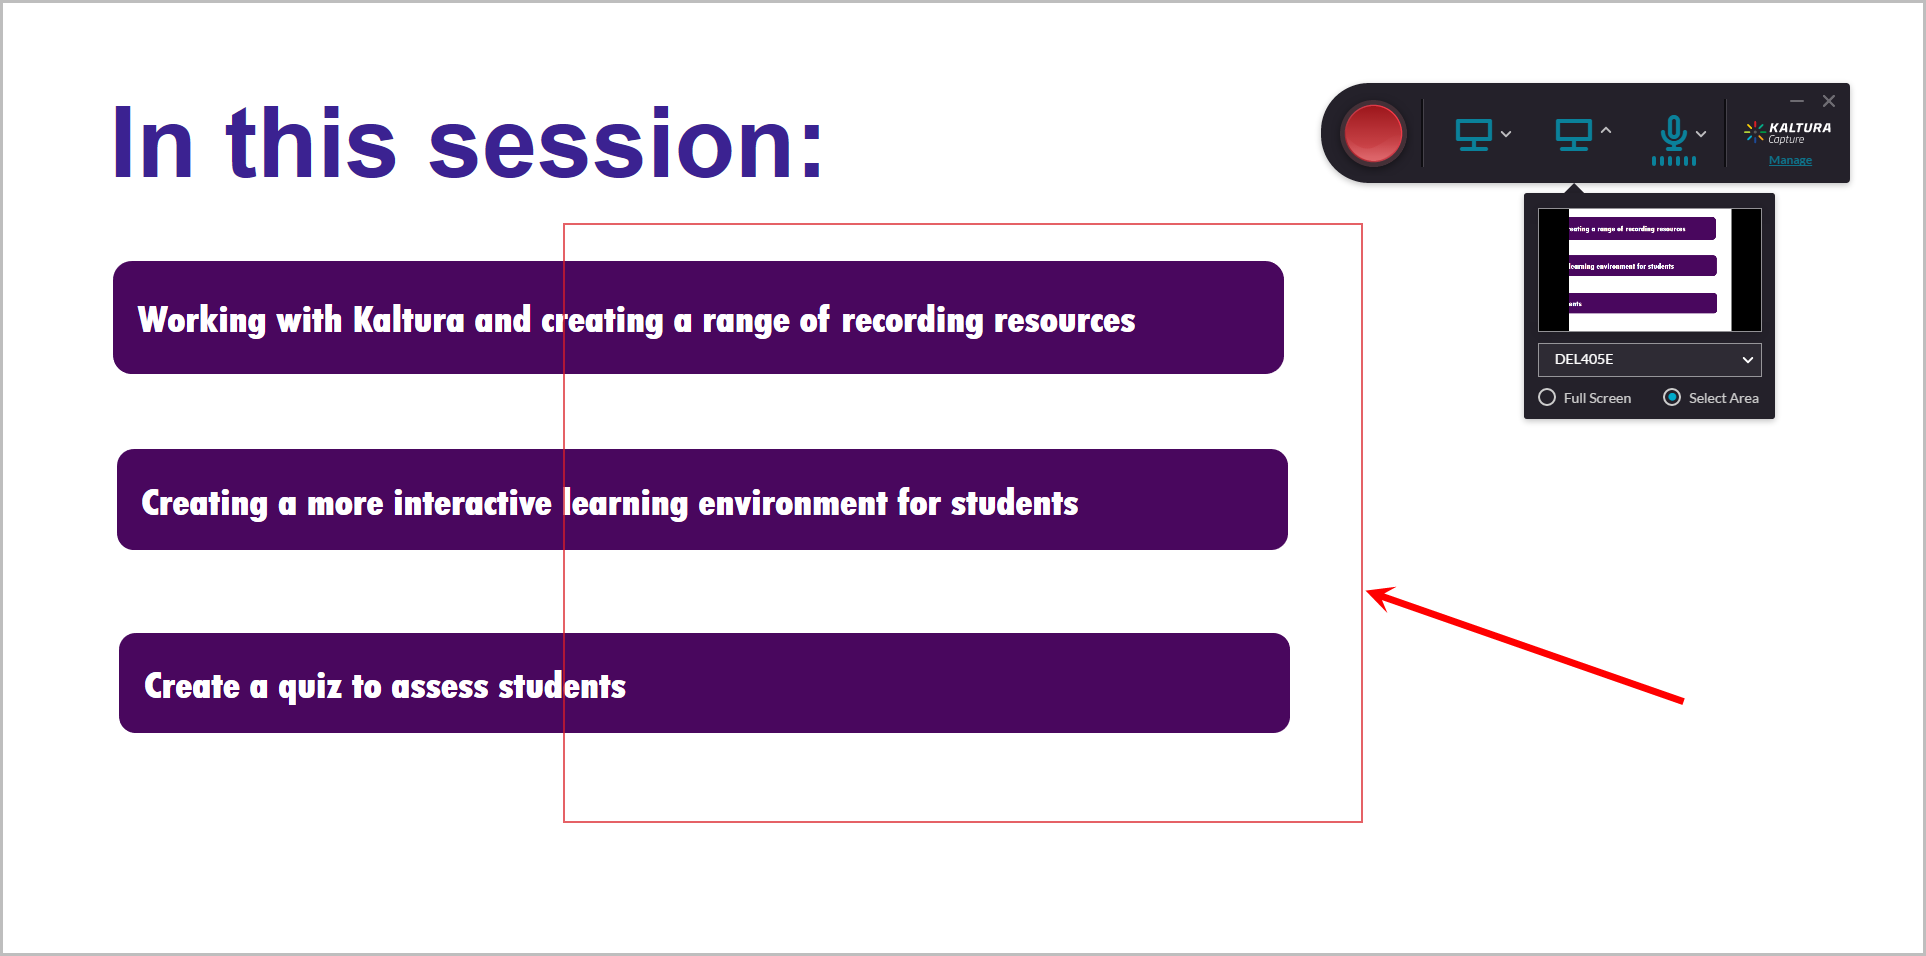
- A red border will appear around your selection for recording.
Note: Resizing your selection can be modified at this stage. Refer to Step 6 for more details.
- Click on the Red recording button to begin recording.
Note: It will start recording after 3 seconds and can be cancelled by pressing cancel.
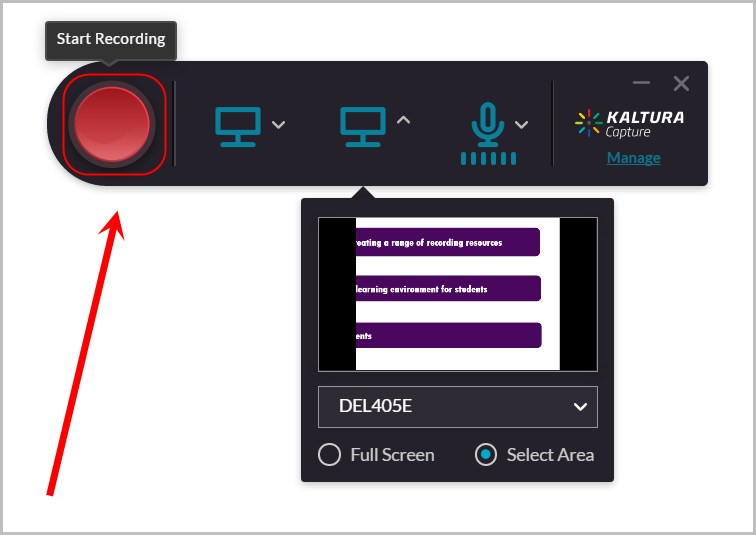
Tip: Clicking on the Red pause button ensures that recordings do not need to be completed in one take. Resume recording by clicking the Red pause button again.

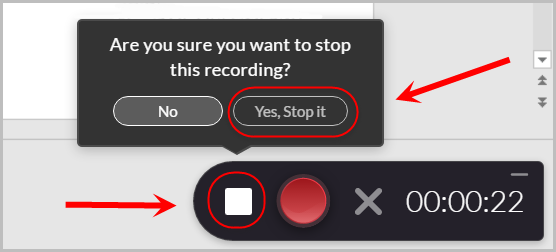
- Stop recording by clicking on the White stop button then Yes, Stop it.
- The recording entry will appear. Editing must be done via My Media after uploading.
Note: Refer to the Editing guide for more information.
- Enter a meaningful title, and/or description and tags for your recording then click Save & Upload to upload it My Media.
Note: Click Save to have the recording in your library in the event you want to make another recording and decide which is preferrable. Click Delete to delete the recording.
