Convert your course to Blackboard Ultra
What is Blackboard Ultra?
Blackboard Ultra is the new version of our learning management system. UQ is transitioning from the previous version of Blackboard Original from Semester 2, 2025 to Semester 1, 2027.
View the Ultra Courses Activation Project page for more information.
How long will it take me to convert my course to Blackboard Ultra?
Note: This guide assumes you have already requested your course on Learn.UQ. See the Order SI-net Courses and UQ Extend Courses (Ultra) guide.
The course conversion tidy-up could take between 10 to 20 hours, depending on its complexity. Note that when you access your course, you will need to copy in content from the Original course yourself. Factors are:
- how many videos you have that are not stored in Echo360
- how much content you have nested deeply in folders
- whether your main learning resources are in UQ Extend.
Is it possible for professional staff to convert my course?
Yes. But in this case, you will need to submit a course request again, asking for a copy of a previous course so they have the content to work with. Use the Learn.UQ Site Request form (or contact your school admin if they usually order your course for you).
Note: There will be a delay between ordering the course and having professional staff complete the Ultra conversion work.
Where can I get help?
- Refer to the Blackboard Learn Help for Instructors - Ultra Course View by Anthology.
- See advice from your faculty or school Learning Designer. Go to the Learning Designers list.
What do I need to convert my own course?
To build your course from scratch in Ultra you will need:
- Blackboard Ultra Example Course The purpose of this course is for staff to experience Blackboard's new look and functionality for course sites from a student perspective. You can self-enrol in the Ultra Example course.
- Ultra Resources - icons and banners
- your course profile
- Instructor access to both the Original and the Ultra courses
- learning materials on your device.
13. Condense content onto a document
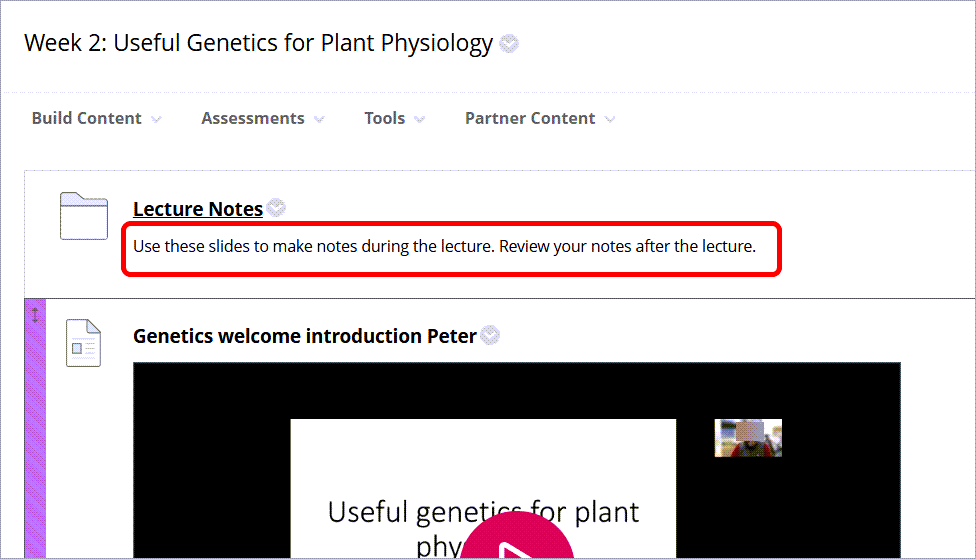
Example: Original course
There is a folder in the Learning resources folder called Lecture Notes. This folder has text in its description, then students have to click through again to reach the actual files (Lecture notes). The lecture video is in a separate item.
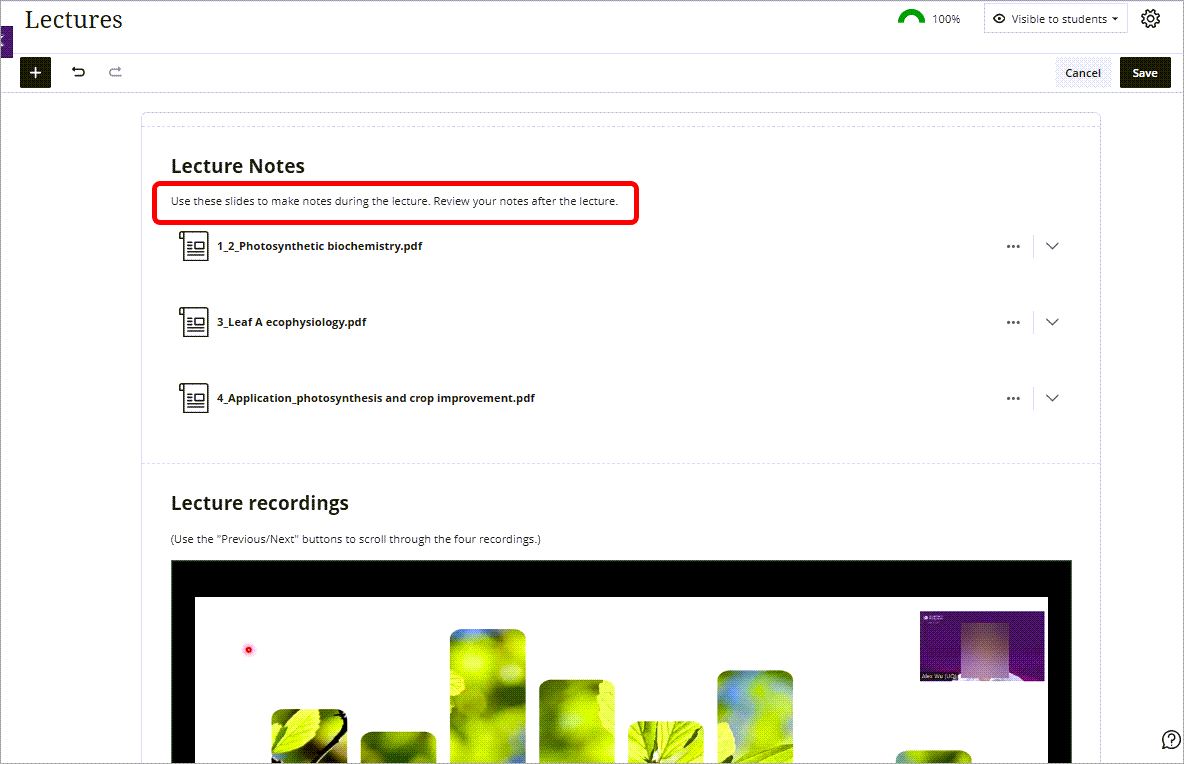
Example: Ultra course
The person tidying the course has created a document page in the relevant Learning Module. The title Lecture notes and the description have been copied to the top of the document page. The videos have also been added to the same document page directly under the Lecture notes files.
Benefits:
- The student can click once to find all the files and videos on one document page.
- By uploading the files onto the document, the student has reduced scrolling.
If you need to get files from one document onto another, follow these steps.
- Know the exact filename of the file you want to copy into the desired position.
- On a document, click on the Edit Content button.
- Add a Content Collection block.
- A files area will appear.
- Use the search function to locate the file.
- Check the box under the file icon to select it.
- Click the Submit button.
- In the Edit File Options, change the Display Name to make it meaningful for the students.
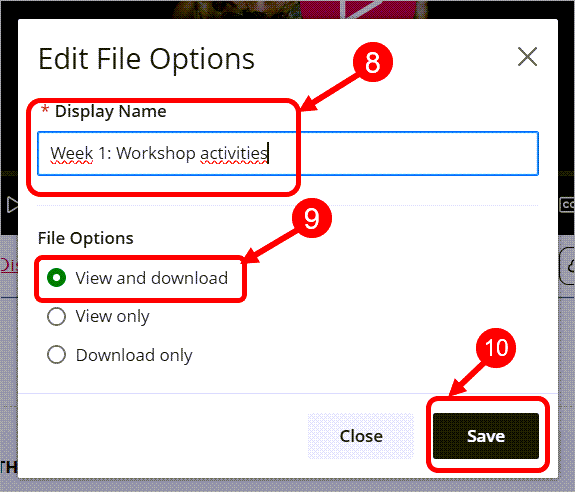
- Select View and download from the drop-down options.
- Click the Save button.
Your file will be in position ready for you to drag where you need it on the document page, or make it narrower in one of the four columns.