Gradescope tips (Original)
This guide provides some tips that will allow you to save time on administering and marking Gradescope assignments.
Scanning
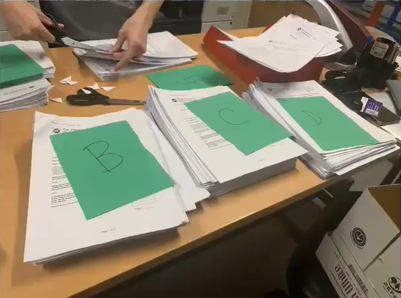
Tip 1: Split the papers in an equal number of submissions. In this case, scanned PDF sizes will be equal, so if a page goes missing, the file size will differ.

Tip 2: Check the maximum file size that scanner can send to your email.
Tip 3: Check that you entered the correct email address for the pdf's to be sent to.
Tip 4: Do not exceed what can be loaded in the scanner to avoid paper jams.
Tip 5: Remove the staples from the top left corner of the paper (either with sharp scissors or with a guillotine) and place the papers with the cut corner AWAY from the feeding slot. Rotate the scanned file in Adobe before you upload it to your assigment for marking.

Tip 6: Recommended scanning settings:
- (if your scanner allows it) 2-sided for a faster scanning. Otherwise, print 1-sided papers and scan 1-sided
- Resolution: 300dpi
- Colour: Gray Scale
- File Type: Compact PDF
- Scan Size: Auto
- Name/Subj/Name other: ON.
Auto matching submissions to names
The name and ID region are used to specify where students write their name and ID on the assignment (the same as recorded in the course roster). For instructor-uploaded assignments, creating either a name region or an ID region is necessary for the Manage Submissions step and assigning names to submissions. While having both regions is optional, providing both a name and ID region can help increase the number of students that are automatically matched to submissions. For fixed-length assignments, you need to specify the name and ID regions for students to write in their names and student IDs.
Before creating an assignment
Upload student IDs. For detailed instructions, please refer to Upload student IDs guide.
When creating the assignment template PDF
Tip 1: Whenever possible, include both a student name region and student ID region on the exam as two separate fields, and make sure these individual regions are horizontally aligned. Don’t place the name region on top of the ID region or vice versa.
Tip 2: Make sure your course roster has Student IDs associated with each student.
Tip 3: Don’t create an individual region box for each character or number of the student's name or ID, just create one area for the name and one area for the ID.
Tip 4: For the name region, don’t create separate lines for a student’s first name and last name.
Correct

Incorrect

When creating the assignment outline in Gradescope (on the Edit Outline page)
Tip 1: Make sure the blank copy of the template PDF that you upload is the exact same PDF that is printed and distributed to students.
Tip 2: Draw the Name region box and ID region box on the Edit Outline page so that they do not overlap.
Tip 3: Make the name and ID region boxes big enough so that there’s enough space to include student information (for students to write in and for Gradescope’s auto detection).
This ensures that the AI can accurately detect all of the students' handwriting. For example, a letter “g” that partially falls below the box region will be read by our AI as the letter “a”. See the screenshots below for an example of adequate region sizing.
When handing out the assignment to students
Tip: Have students write their name and ID on the exam the same way it is recorded in the Student ID column on the Gradescope roster. For example, if the roster includes a first, middle, and last name for the student, they will need to write out their full name on the assignment.
Rubrics and marking
Tip 1: Create detailed rubrics to allow consistent marking for different tutors/markers.
Tip 2: Use marking short keys:
- The numbers ‘1’-‘0’ map to the rubric items that you create for each question
- ‘z’ goes to Next Ungraded (the same question or sub-question on the next student’s submission that hasn’t been graded or isn’t currently being graded by anyone on the staff)
- Right arrow goes to Next (the same question or subquestion on the next student’s submission), and left arrow goes to Previous
- ‘g’ and ‘f’ zoom in and out of the student’s submission
- ‘shift+r’ rotates the student’s submission
- ‘,’ and ‘.’ go up and down the question outline for an individual student’s submission
- ‘j’ and ‘k’ go to the previous and next page of an individual student’s submission
- ‘a’ displays the list of all student submissions for a given question.
The resource below was kindly provided by Dr.Paul Vrbik, UQ School of Electrical Engineering and Computer Science
Exam papers formatting
To save time on scanning and marking if your exam questions are long, you can print (for central exams - order printing) the question booklet and the answer booklet separately. Both booklets will be printed on A4 paper, and stapled in the top left corner.
You can combine the written answers with the Gradescope bubble sheets - Multiple Choice Questions.
For more information and instructions, please refer to Gradescope exam papers formatting guide.
