Bulk create individual student Padlets (Original)
Individual student Padlets
Using the PadletUQ tool, staff can bulk-create individual Padlets based on an existing Padlet template for all students in their course. The tool allows staff to create a web link in their Learn.UQ course which automatically generates an individual Padlet for each student when they click on the link. Staff will also need to create a Blackboard assignment submission link for students to submit their Padlet URL for feedback and/or marking.
Group functionality
While students are able to manually share their Padlet with their other students (i.e. group members), it is difficult for staff to locate group Padlets, as only the student who originally clicked on the link in Learn.UQ to generate the Padlet will appear in the initial search results. Therefore, the PadletUQ tool is recommended for individual use only due to the limited group functionality.
Marking
The tool unfortunately doesn't integrate with Grade Centre. Therefore, staff should create a Blackboard submission link for students to copy and paste their Padlet URL and submit. Instruction should be provided to students to add their names to the URL, so staff will be able to identify students' works for assessment purposes.
Four major steps need to be done in bulk-creating individual Padlets and assessing students' Padlets:
- Create a Padlet for the activity
- Change the notification setting
- Link the Padlet in the Learn.UQ course
- Create the submission link for the activity in the Learn.UQ course
- Mark students' Padlet through Grade Centre
1. Create a Padlet
Create a Padlet
- Access PadletUQ.
- Click on the Make a padlet button to create the Padlet for the assessment activity.
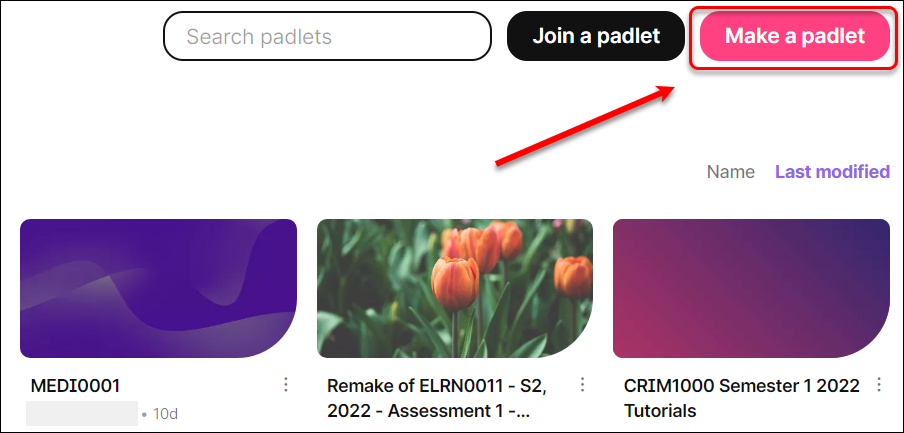
Note: Staff can select a suitable format for the Padlet activity. In this sample, the timeline format is used for the weekly reflection task.
- Enter the Title (Course Code - Semester, year - Activity Name)
- Enter a short instruction in Description
- Select an icon (optional)
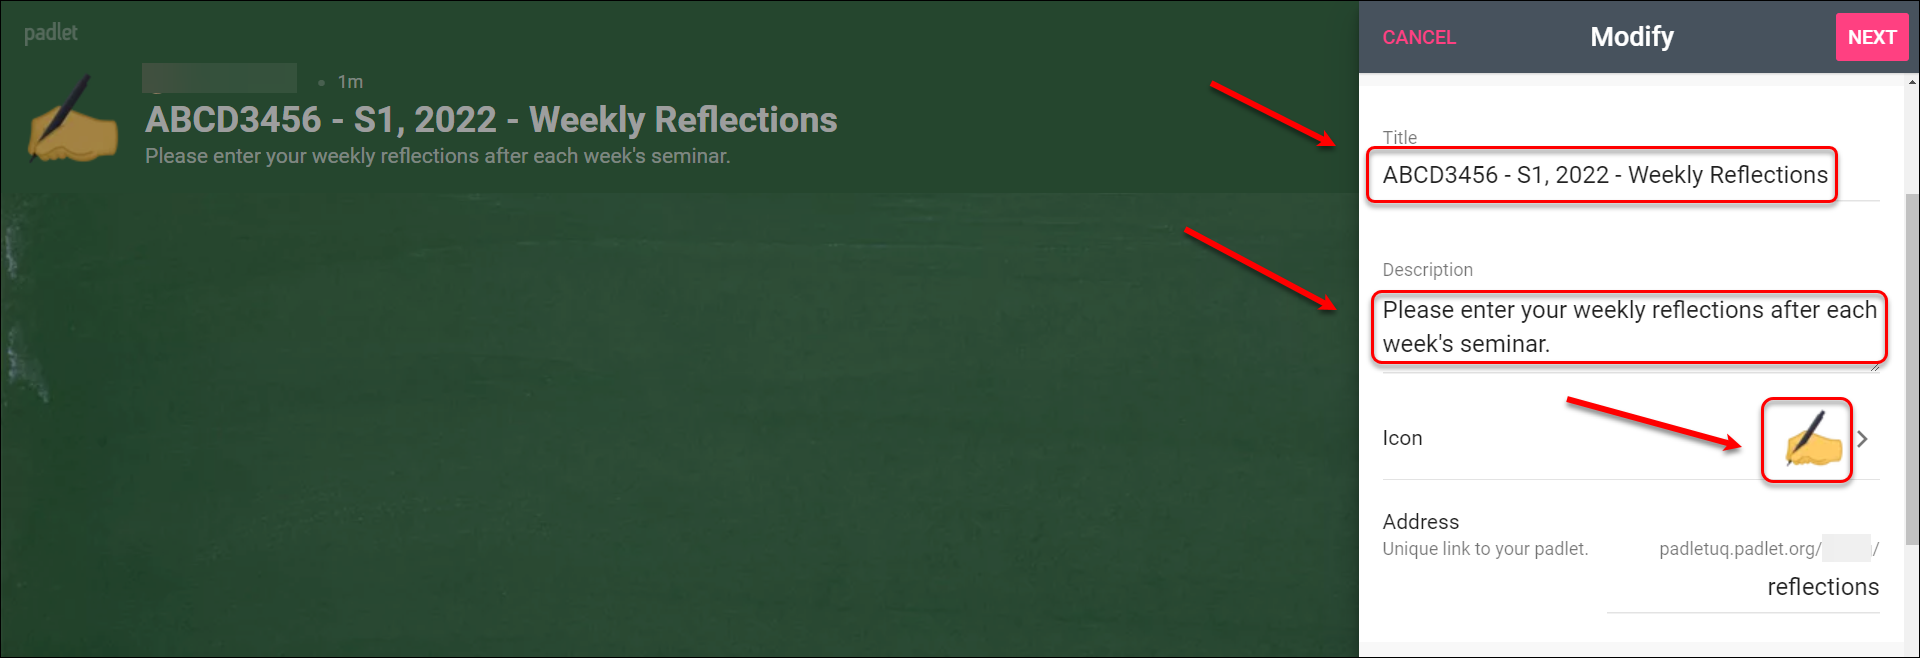
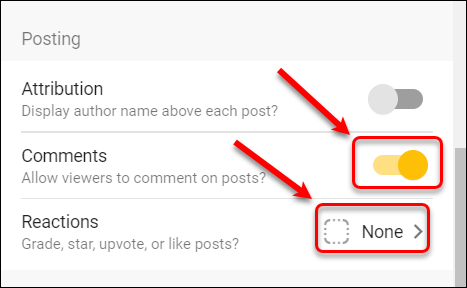
- Activate the Comments function (so staff can provide feedback on students' work).
- Activate Reactions function to assign a grade for the task.
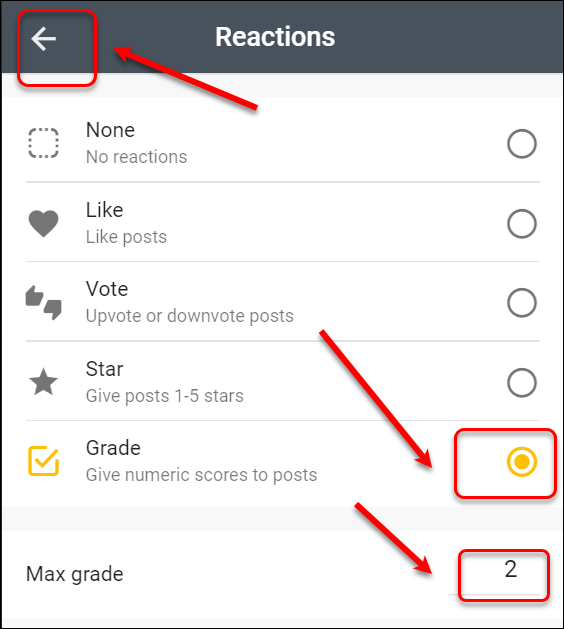
- Select Grade.
- Change the default Max Grade 100 to the points you assign for each post (e.g., 2).
- Click on the left arrow when finished to go out of this setting.
Add instructions in a post
It is recommended that staff make an instruction post to this Padlet page so students will be able to refer to the task requirements each time they work on the task.
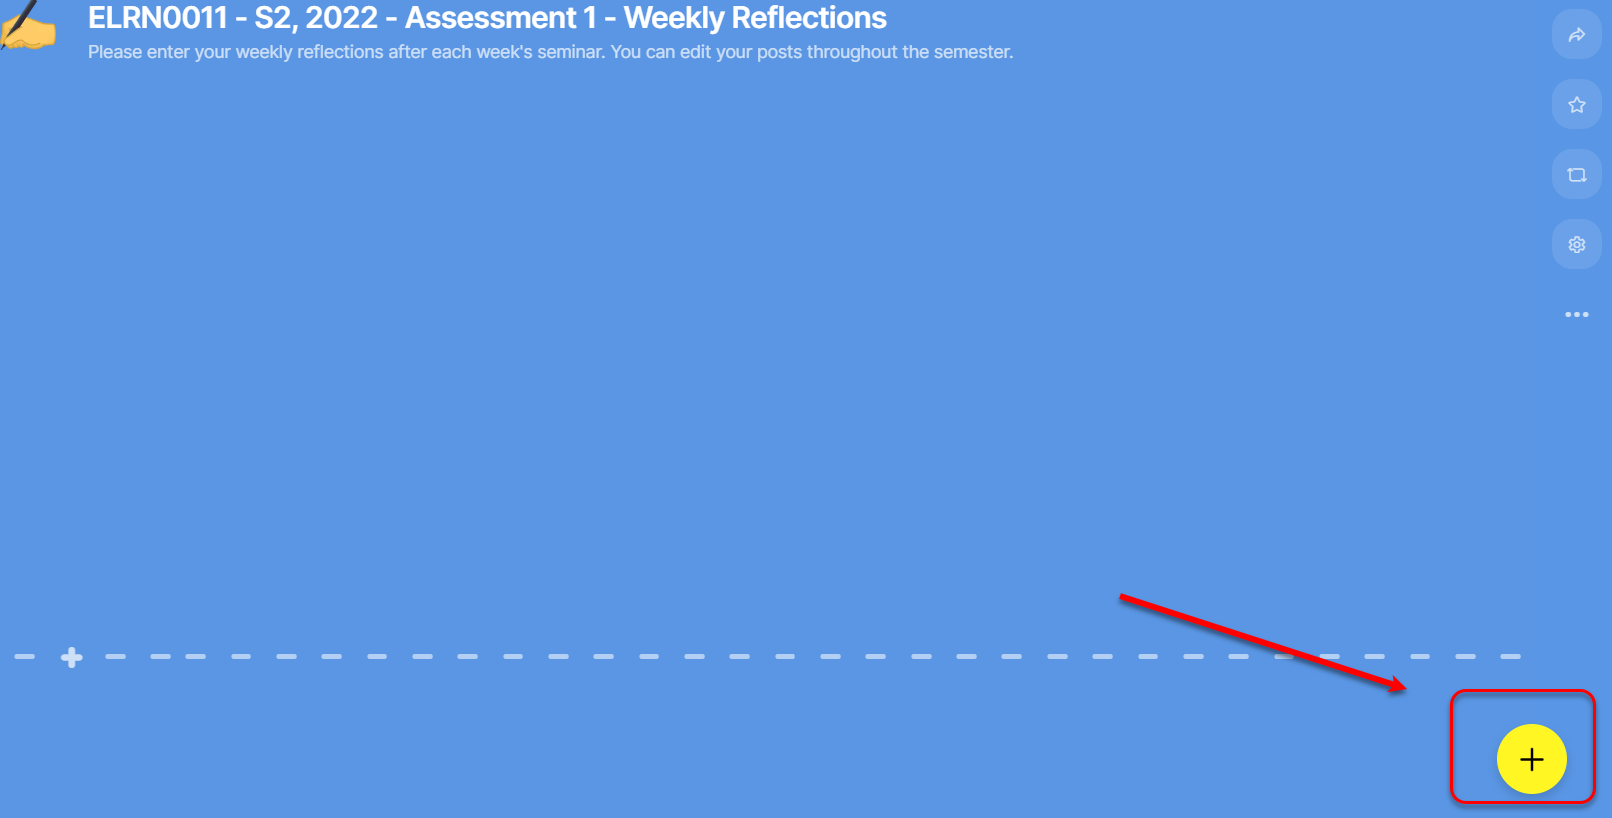
- Click on the plus button to start a new post.
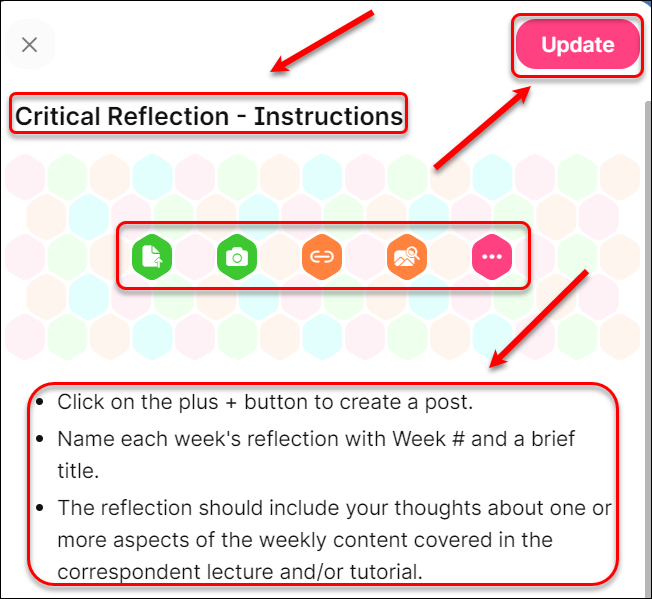
- Enter the post title.
- Enter the post content. Note: Text editor is available to format your text.
Optionally, you can add a media content (e.g., a photo, a link, etc.) to the post.
- Click on the Publish button.
Add course team to the Padlet (optional)
Optionally, you can add your course team to this Padlet as admin, so they will be able to do any edition if required.
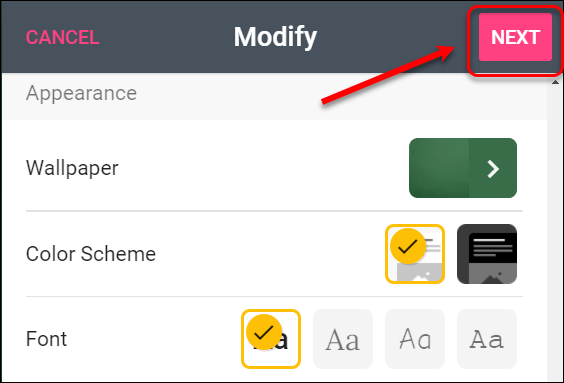
- Select NEXT to continue with the next setting (optional steps).
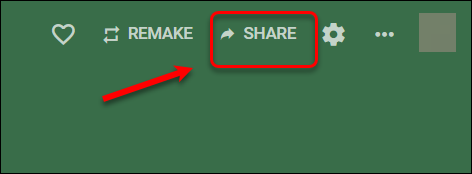
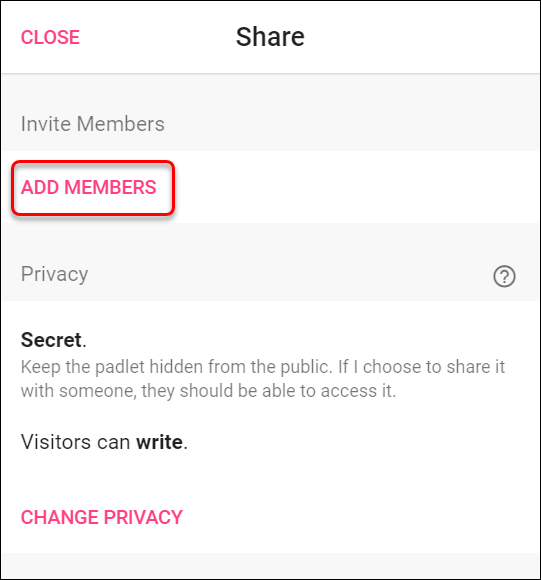
- Click on the SHARE button.
- Click on the ADD MEMBERS button.
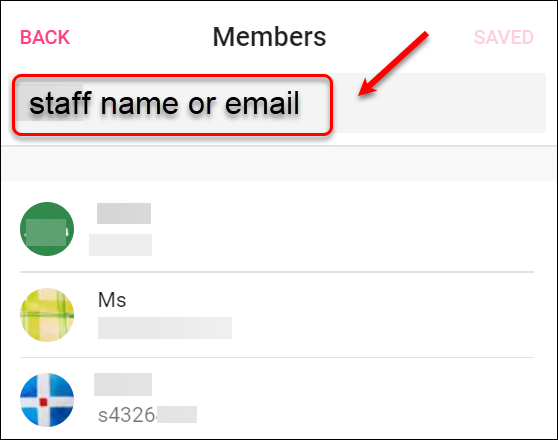
- Enter the staff member's name or email address, then select the correct one from the list.
Note: Staff members need to have their Padlet accounts so their names/accounts will be displayed in the list.
Note: Course Coordinators need to decide whether to add all tutors in the Padlet or to create each Padlet for each tutorial group and only add the tutor of the group to the relevant Padlet.
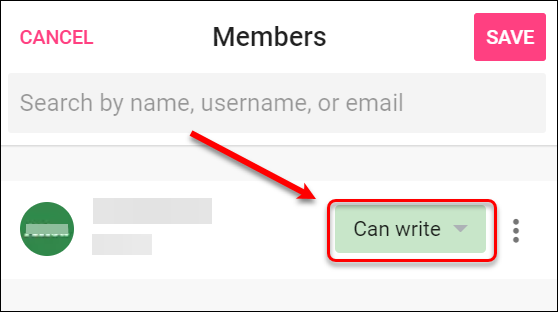
- Click on the Can write button to change the access level for the course staff member.
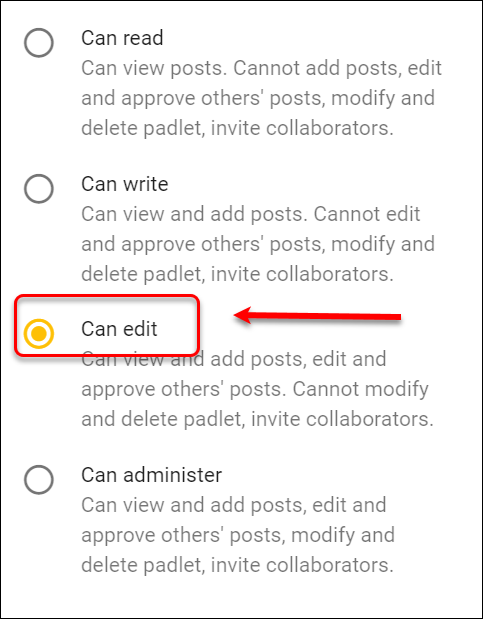
- Select the 'Can edit' option. Note: This access level allows course staff members to edit the original Padlet if required.
- Click on the dark area to get out of the options.
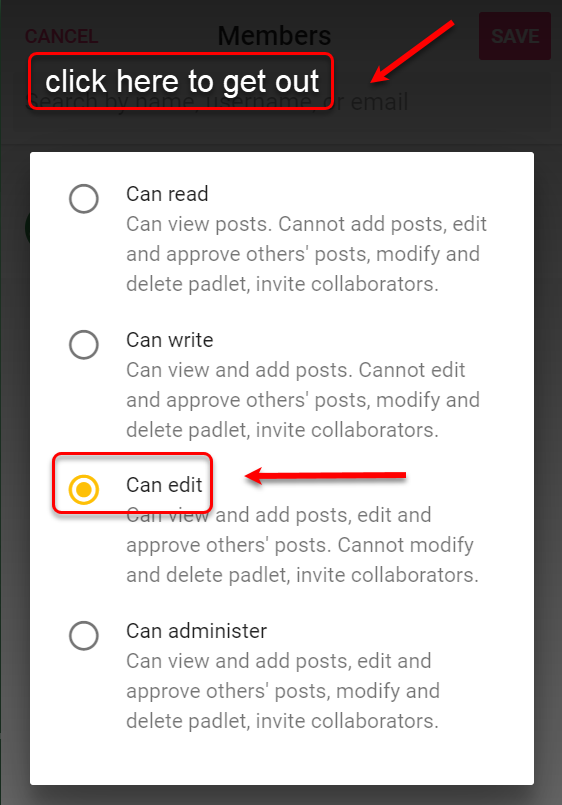
- Click on the SAVE button.
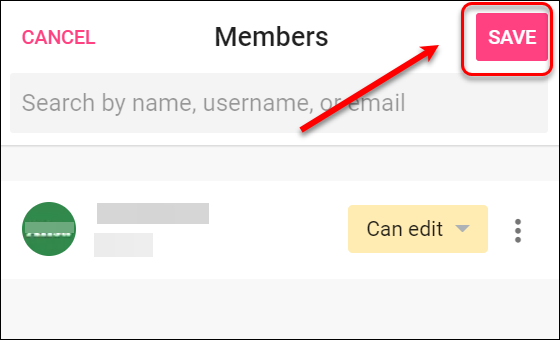
- Click BACK to continue with the next setting.
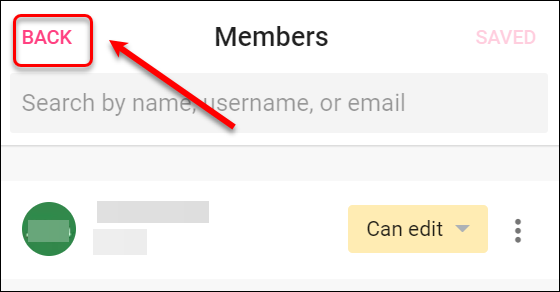
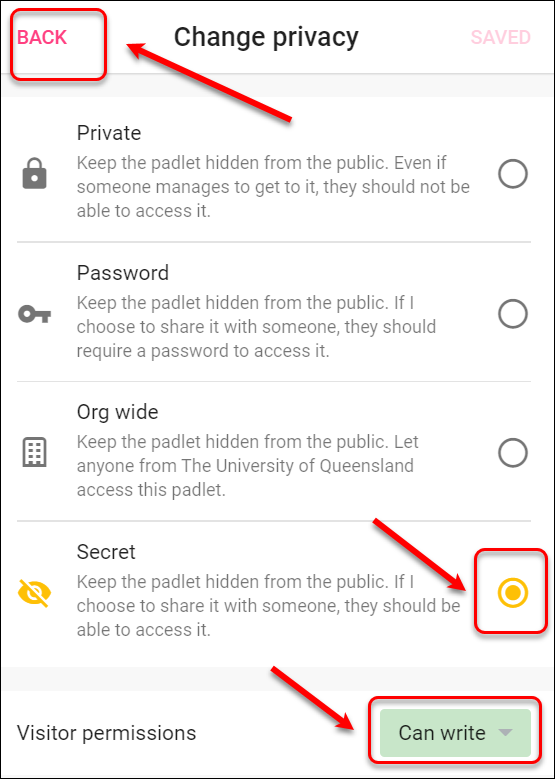
- Click on the CHANGE PRIVACY button.
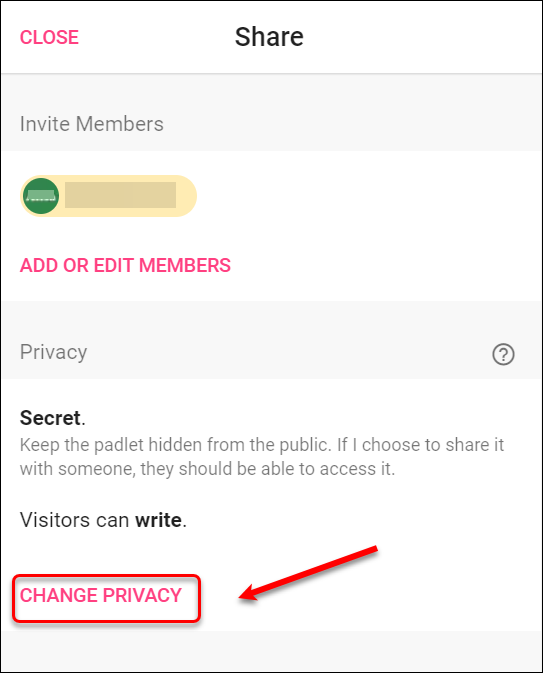
- Make sure the privacy setting is Secret (default).
- Visitor permissions: Can write (default).
Note: Course coordinators can decide if they want to select the setting Can edit to allow students to edit their own posts on their individual Padlet.
- Click on BACK to get out of this setting.
- Click on the CLOSE button.
Staff will need to change the notification settings to avoid overloading their mailbox.
