Using Zoom for Personal Capture (Ultra)
Zoom, the university's video conferencing system, can be used to produce online lectures that include screen recordings, narration and webcam video.
Launch Zoom
- Launch the Zoom application on your computer. For more information on installing Zoom, refer to the Installing Zoom ITS guide.
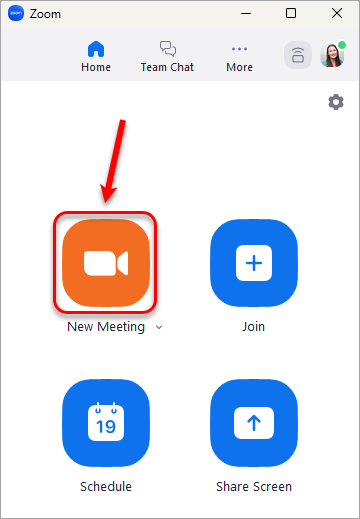
- Click on the New Meeting button to launch your personal meeting room.
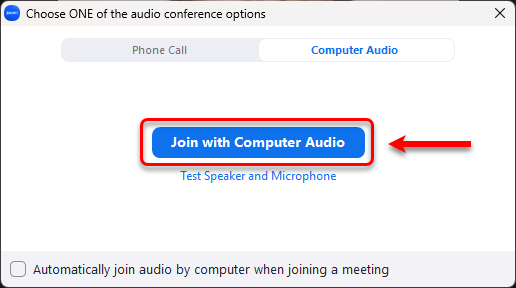
- If prompted, click on the Join with Computer Audio button.
Prepare for recording
Enable and test audio
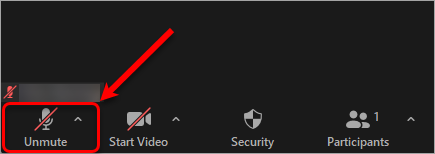
- If required, click on the Unmute button to enable audio.
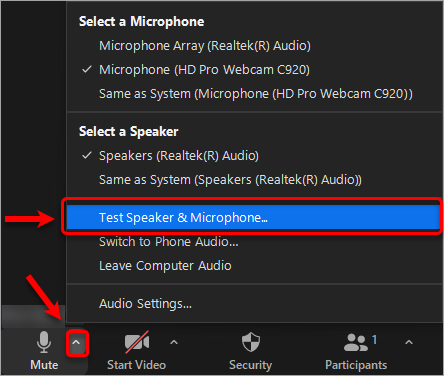
- Click on the arrow next to "Mute" and select Test Speaker & Microphone from the dropdown menu.
- Follow the prompts to test your speaker and microphone prior to recording. For more information, refer to the Testing audio Zoom guide.
Enable video and background
- If required, click on the Start Video button to enable video.

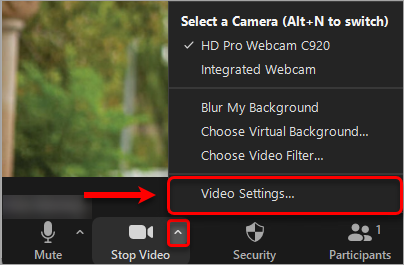
- Click on the arrow next to "Stop Video" and select Video Settings from the dropdown menu to adjust your settings. For more information, refer to the Testing your video Zoom guide.
Tip: Check the HD checkbox in video settings for higher quality video.
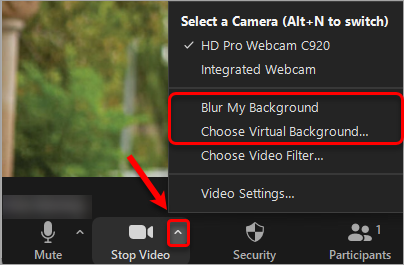
- Optionally, click on the arrow next to "Stop Video" and select either Blur My Background OR Choose Virtual Background if you would prefer a different background. For more information, refer to the Add a virtual background guide.
Share your screen
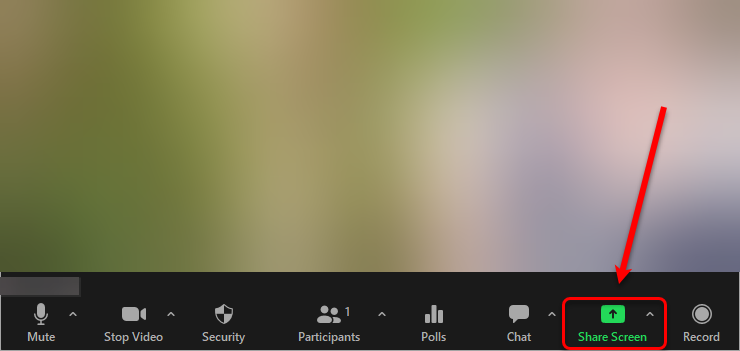
- Click on the Share Screen button in the bottom menu.
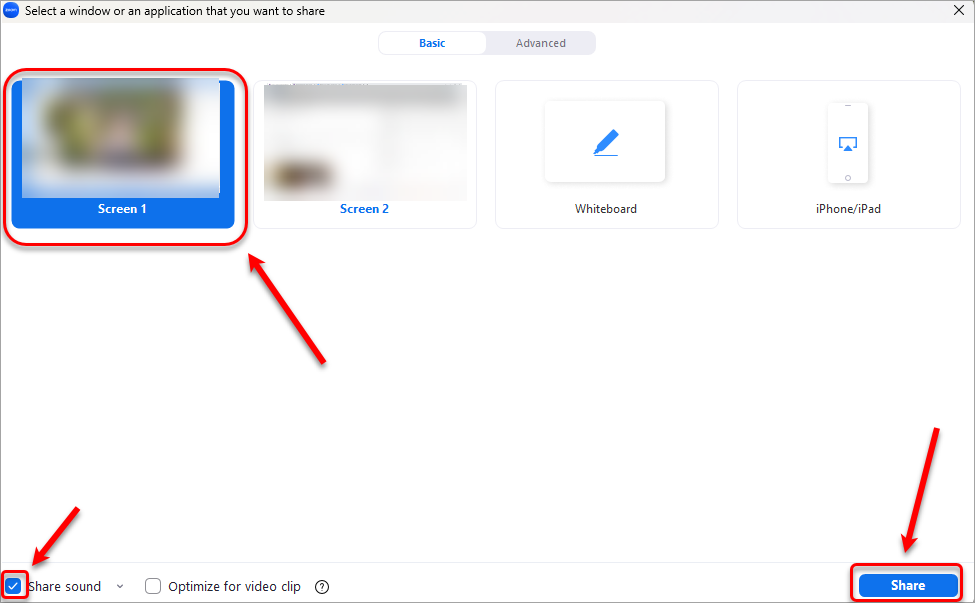
- Select Screen to share your entire computer screen and any apps (i.e. PointPoint) you access during the recording.
Note: You may need to choose between Screen 1 or Screen 2.
If you require computer sound (i.e. a YouTube video) to be captured in the recording, check the Share sound checkbox.
Click on the Share button to share your screen.
- Your screen will then be shared within the Zoom session and your webcam view will be minimised.
Preparation tips
- Use a structured PowerPoint to guide your recording. If using a PowerPoint, ensure it is in presentation mode (i.e. not editing mode).
- If screen sharing, open all required windows and applications prior to recording. (i.e. YouTube, website, documents etc.)
- Be ready to flip between shared screens if necessary (i.e. Playing a video) using Alt + Tab on PC or Cmd + Tab on Mac.
Recording
Start the recording
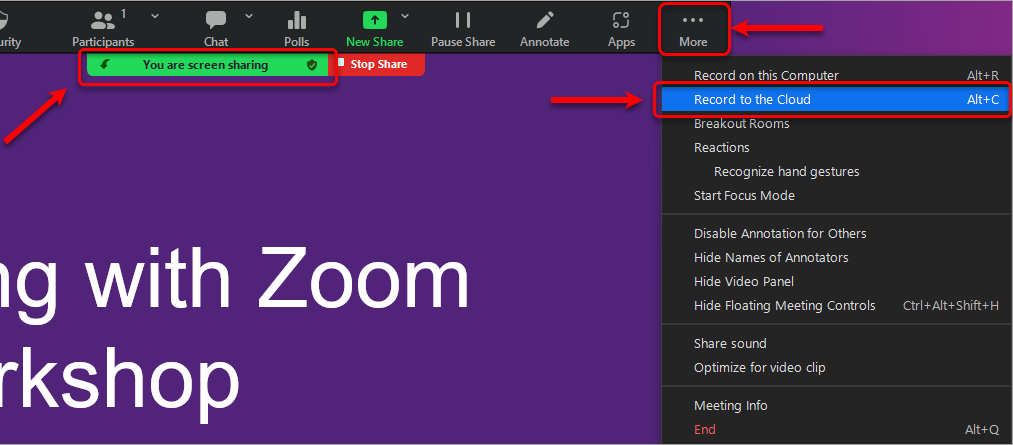
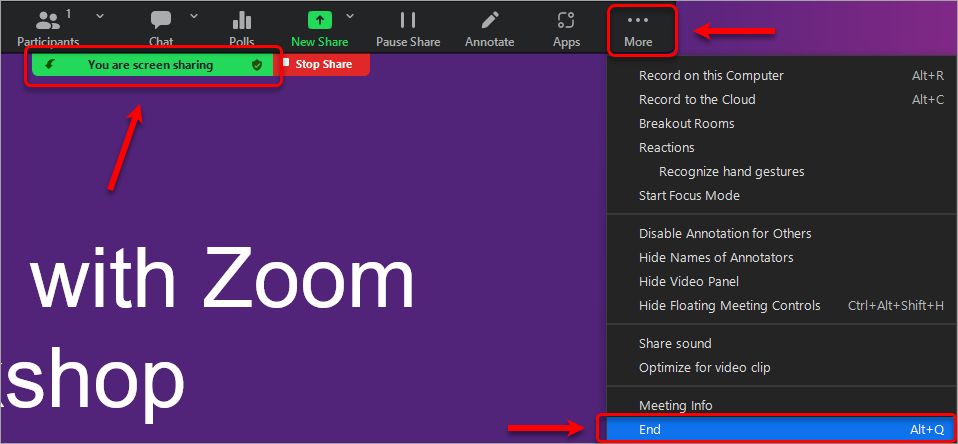
Hover your mouse over the green bar and select More > Record to the Cloud from the dropdown menu (Alt + C on PC OR Cmd + Shift + C on Mac).
Note: It is important that you record to the cloud, as opposed to your computer, as all cloud recordings are automatically available in Echo360 for editing and sharing purposes.
Pause/resume the recording
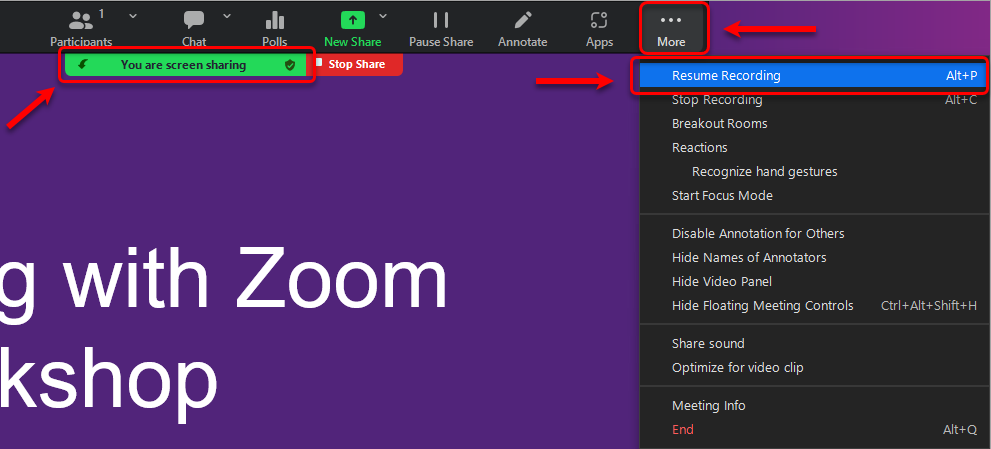
- Hover your mouse over the green bar and select More > Pause Recording from the dropdown menu (Alt + P on PC OR Cmd + Shift + P on Mac) to pause the recording.

- Hover your mouse over the green bar and select More > Resume Recording from the dropdown menu (Alt + P on PC OR Cmd + Shift + P on Mac) to resume the recording.
Stop the recording
- Hover your mouse over the green bar and select More > Stop Recording from the dropdown menu (Alt + C on PC OR Cmd + Shift + C on Mac).
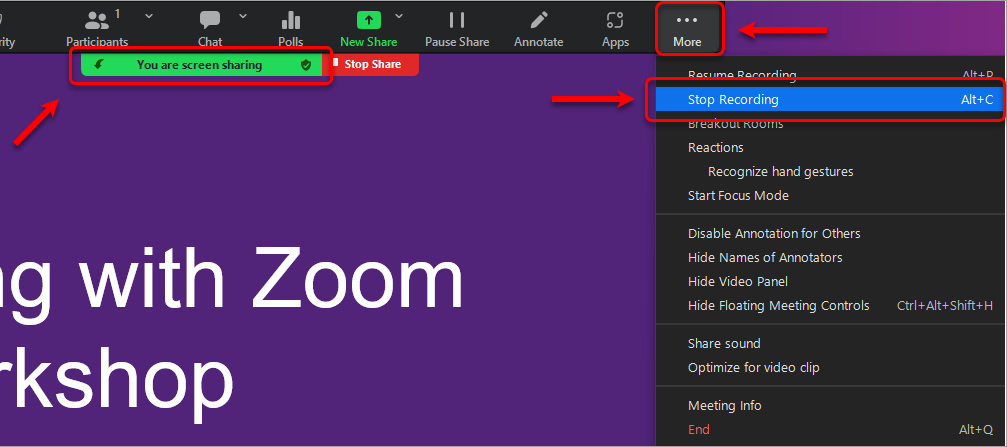
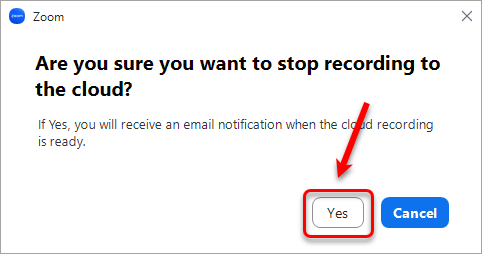
- In the pop-up window, click on the Yes button to stop the recording.
Warning: Once you stop the recording, you will be unable to resume it again.
End the Zoom meeting
- Hover your mouse over the green bar and select More > End Meeting from the dropdown menu (Alt + Q on PC OR Cmd + Shift + Q on Mac).
- Click on the End Meeting for All button to end the meeting.

Edit and share the recording
All Zoom cloud recording are available in Echo360 for editing and sharing purposes. For more information, refer to the Publishing a Zoom recording to Echo360 and Access, Edit, Download or Delete a Recording guides.