Universal Capture - Access, Edit, Download or Delete a Recording (Ultra)
Access your recordings
- Go to echo360.net.au
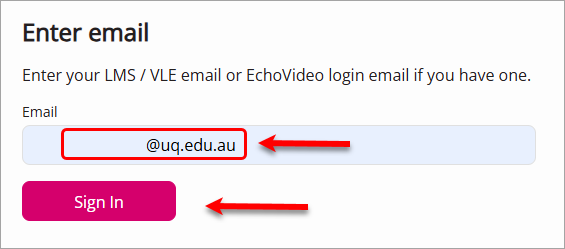
- Enter your staff email address in the text-field.
- Click on the SUBMIT button.
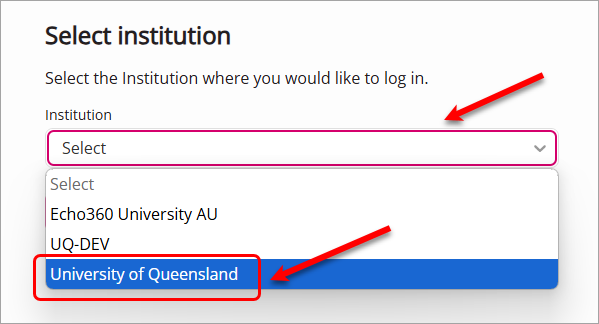
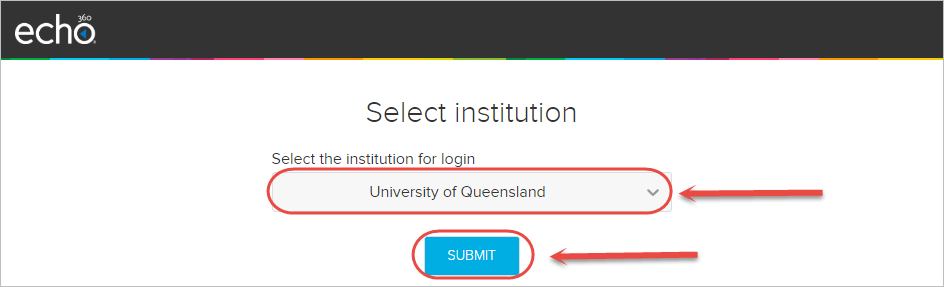
- Select University of Queensland from the dropdown menu.
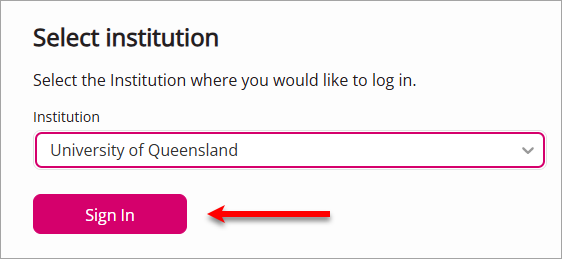
- Click on the Sign In button.
- You might need to go through the authentication steps.
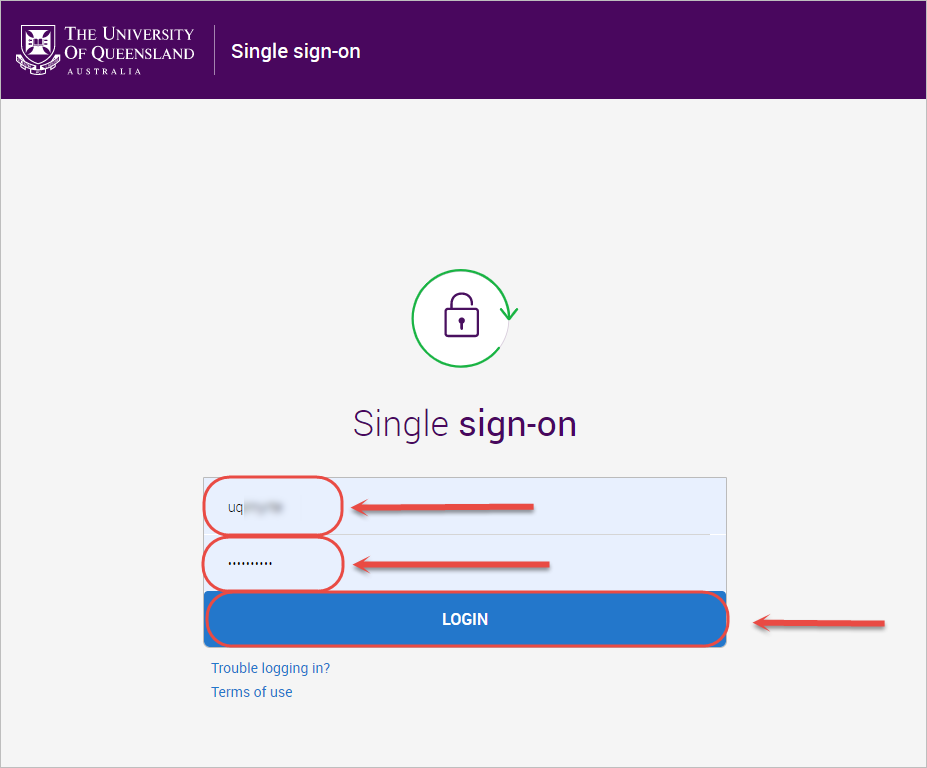
- Enter your UQ username and password in the text-fields.
- Go to https://echo360.net.au.
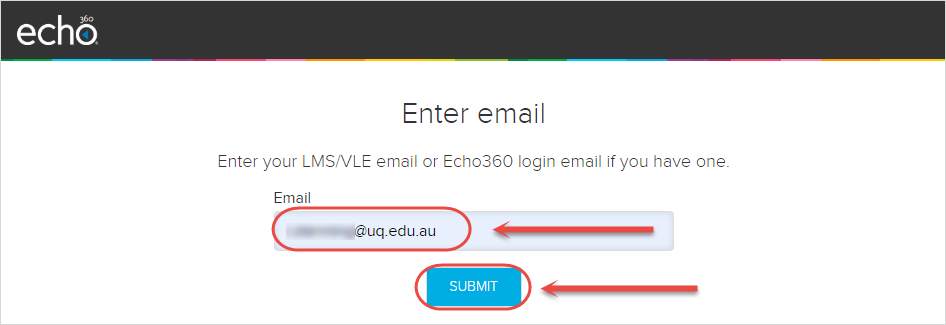
- Enter your UQ email address in the Email textbox.
- Click on the SUBMIT button.
- Select University of Queensland from the dropdown list.
- Click on the SUBMIT button.
- Enter your UQ username and password.
- Click on the LOGIN button.
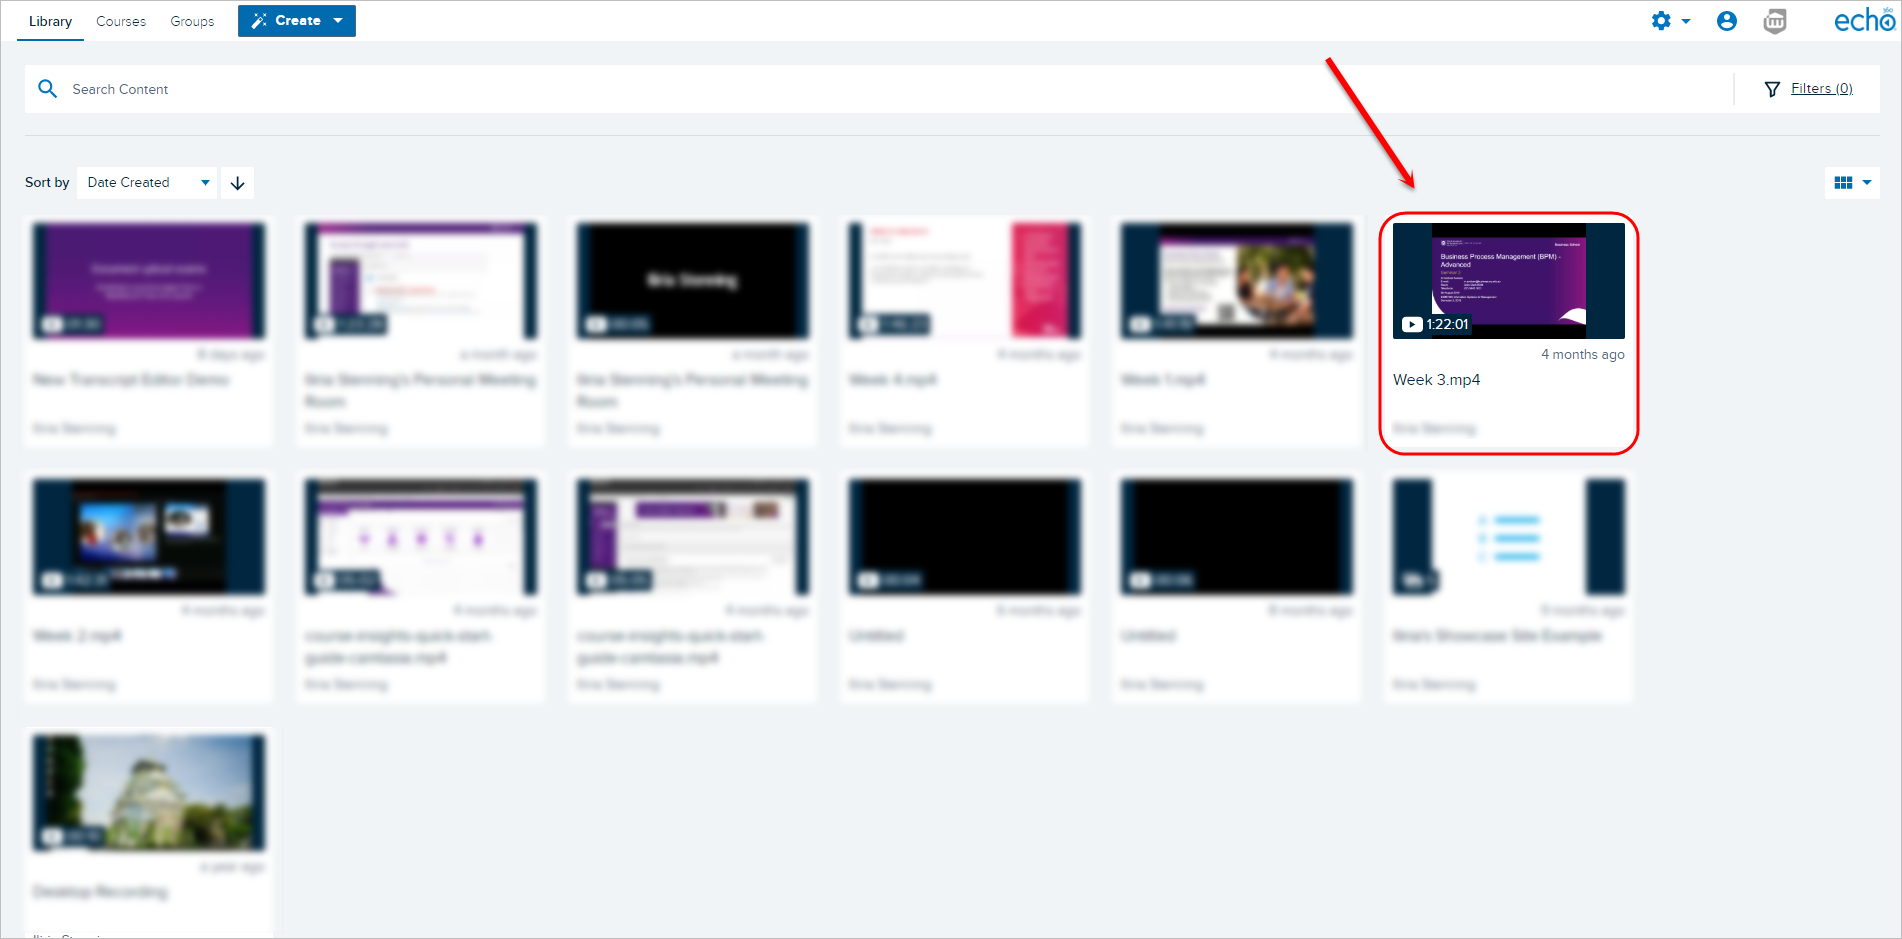
- You will be brought to the Echo360 Library.
- Select the required recording.
Edit a recording
Edit the recording details
- Access your recording. For step-by-step instructions, refer to the Access your recordings section.
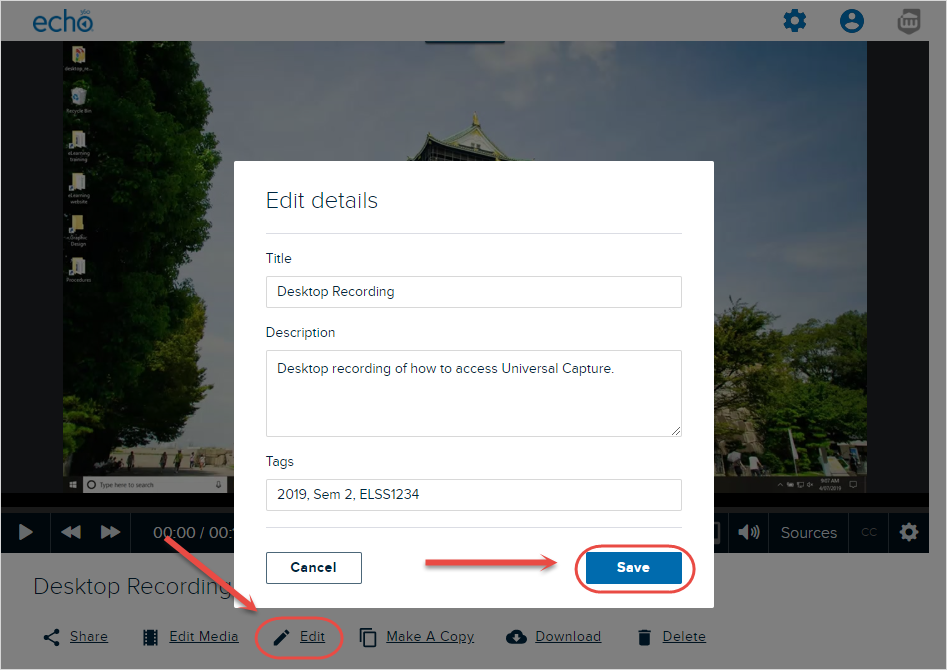
- Click on the Edit button.
- Edit any details required.
- Click on the Save button to save any changes made.
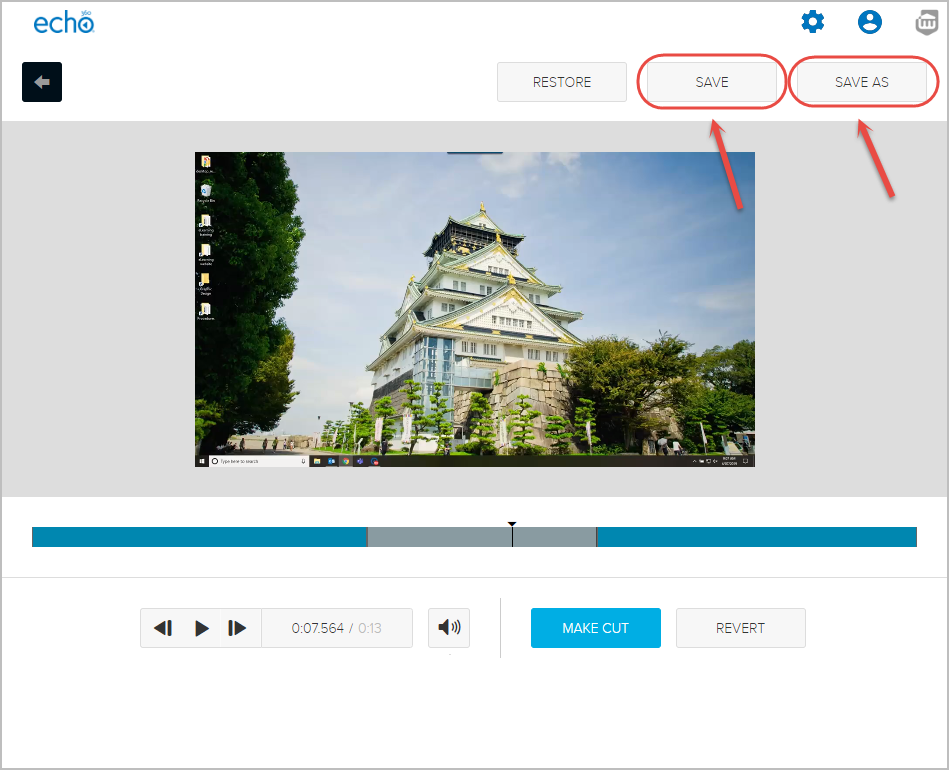
Edit the recording media
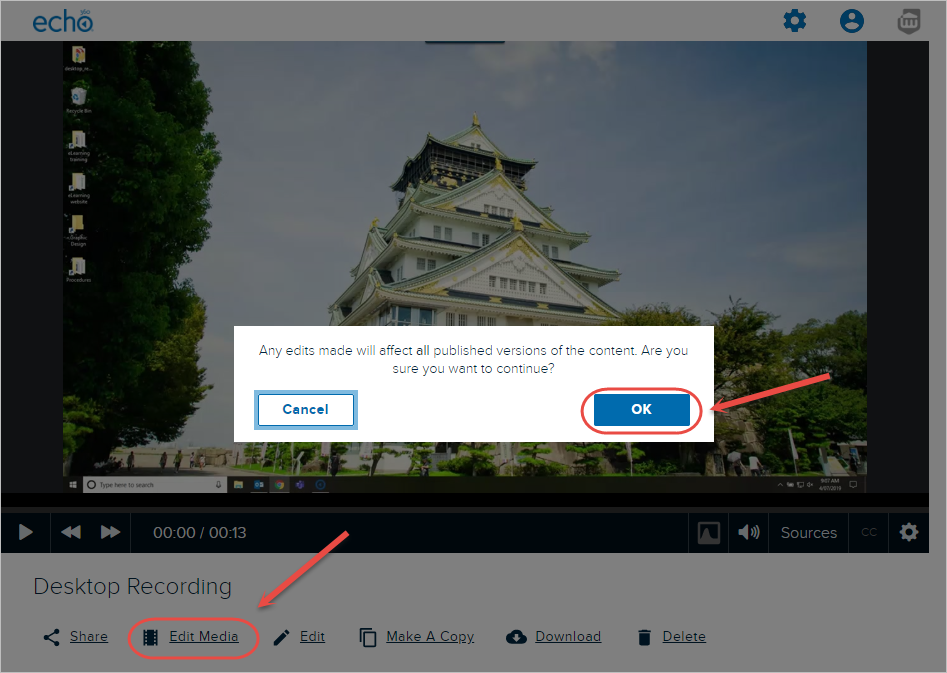
- Click on the Edit Media button.
- Click on the OK button to confirm you want to edit the published video.
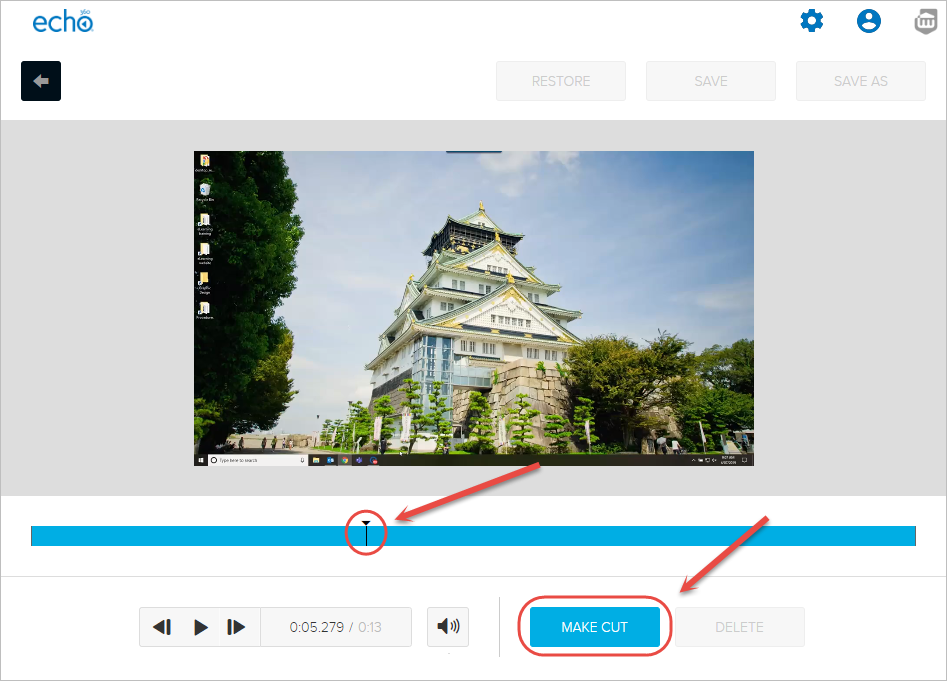
- Select the desired starting point along the timeline for the section you wish to remove.
- Click on the MAKE CUT button.
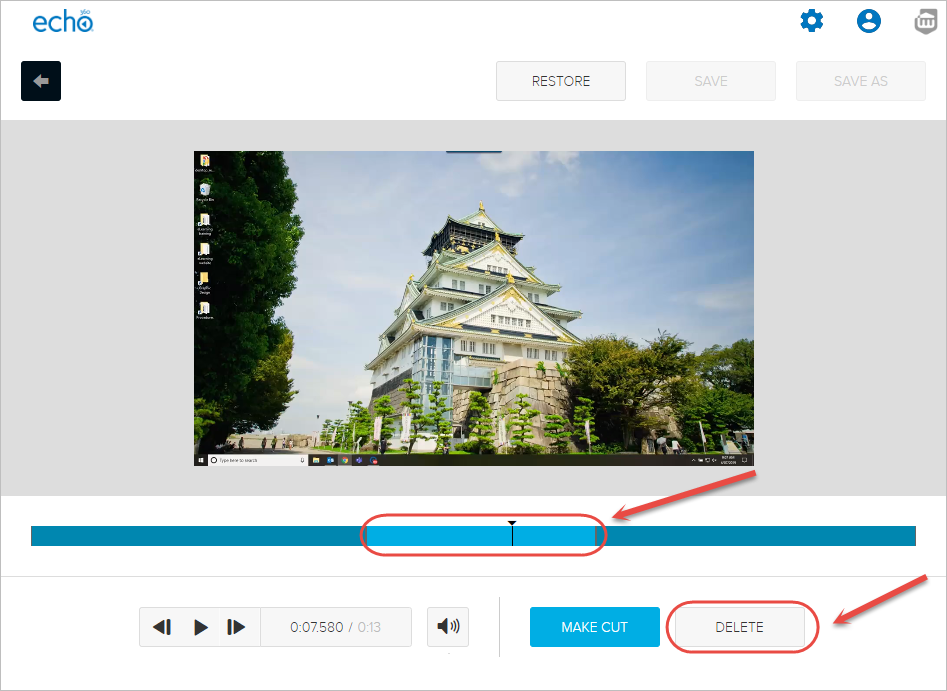
- Select the desired end point along the timeline for the section you wish to remove.
- Click on the MAKE CUT button again.
- Select the middle section between the two cuts you just made.
- Click on the DELETE button to remove that section from the recording.
- Optionally, click on the REVERT button to undo the deletion.
- Optionally, click on the RESTORE button to undo all changes.
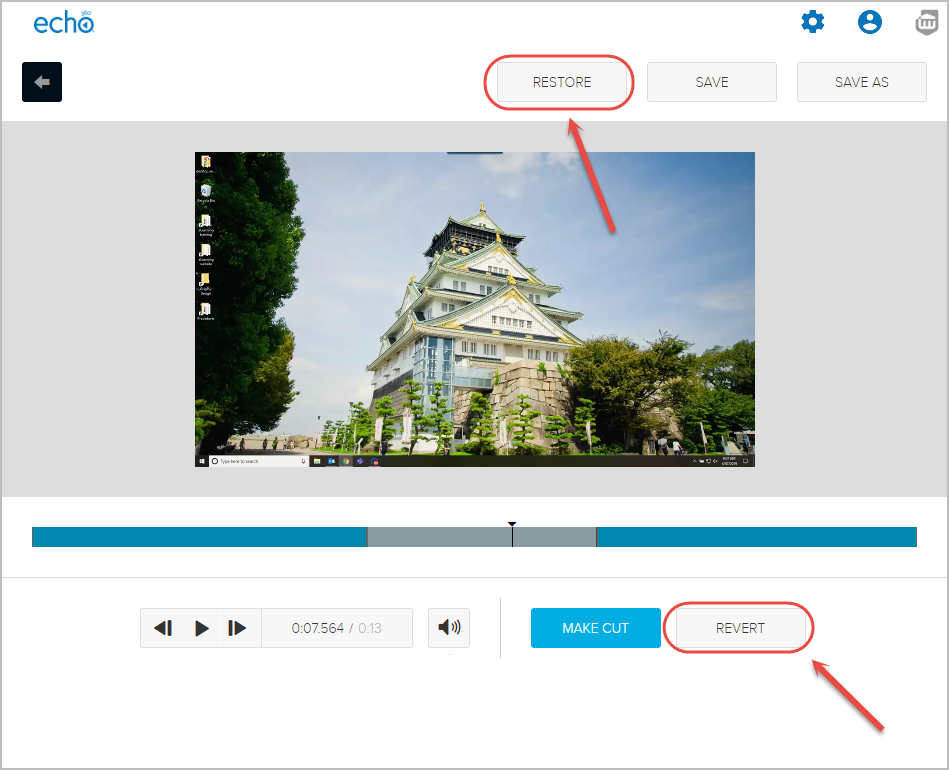
- Click on the SAVE button to override the original published video with the changes you have made.
- Alternatively, click on the SAVE AS button to save the recording as a new file.
Download a recording
- Access your recording. For step-by-step instructions, refer to the Access your recordings section.
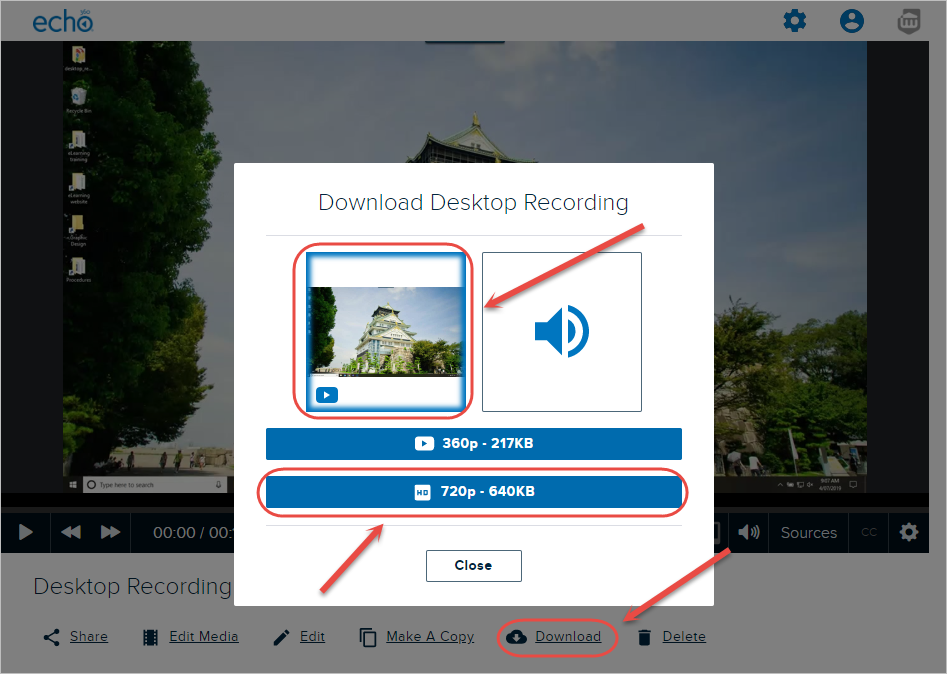
- Click on the Download button.
- Click on the video icon to download the entire video (i.e. video and audio).
- Click on the required video dimensions/size button (i.e. 720p - 640KB) to download the MP4 file.
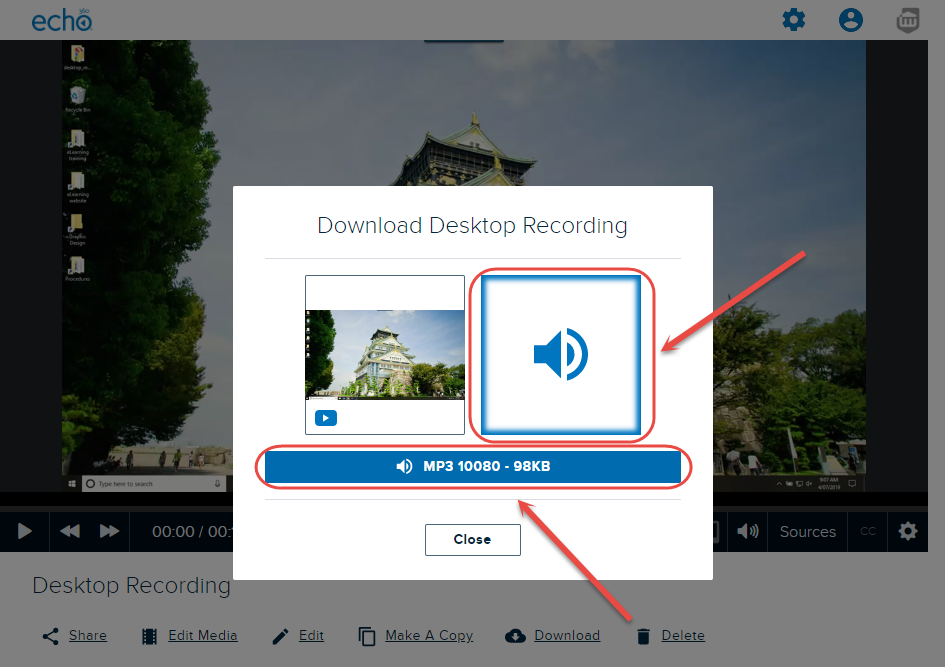
- Optionally, click on the audio icon to download just the audio.
- Optionally, click on the MP3 button to download the MP3 file.
Delete a recording
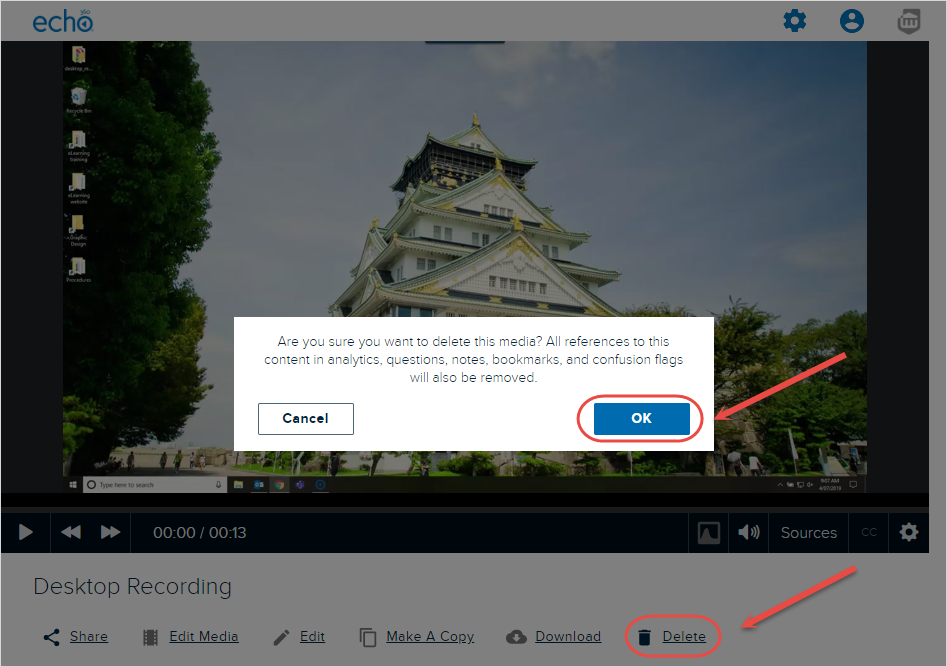
- Access your recording. For step-by-step instructions, refer to the Access your recordings section.
- Click on the Delete button.
- Click on the OK button to confirm video deletion.
Note: Deleted recordings cannot be recovered.
- Access your Echo360 account (Ultra)
- Create an Echo360 browser capture video (Ultra)
- Desktop Recording Options Comparison (Ultra)
- Download Universal Capture (Ultra)
- Edit an Echo360 Video (Ultra)
- Embed EchoVideo to your course (Ultra)
- Share your Echo360 video (Ultra)
- Universal Capture - Access, Edit, Download or Delete a Recording (Ultra)
- Universal Capture - Create a Recording (Ultra)
- Using Zoom for Personal Capture (Ultra)