Insert and embed content (Original)
Use the following features in the Learn.UQ text editor to include content as part of collaboration or assessment tasks for your course.
Insert a hyperlink
While using the text editor
- Type and then highlight the link text.
- Click the Insert/Edit Link button (a chain link icon).
Note: If the button is not visible, click the 3 dots button on the right of the editor to expand the text editor.

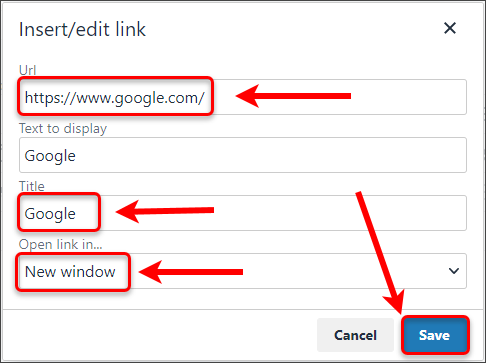
- Paste a web link into the URL box.
- Select New Window in the 'Open link in' field.
- Optionally, enter a title which will appear when someone hovers their mouse over the link.
- Click on the Save button.
Preview your link
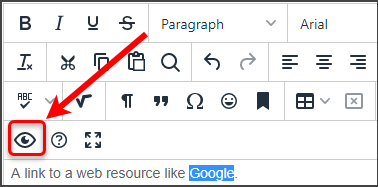
- Click the Preview button (an eye icon) in the text editor to test your link to ensure that your instructor can locate and mark your work (links are not active while editing).
Insert a file
Option A
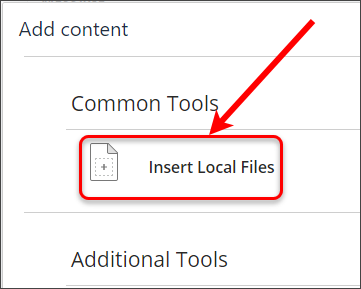
- Click on the Add content button on the text editor.
Note: If the button is not visible, click the 3 dots button on the right of the editor to expand the text editor.

Click on Insert Local Files button.
Locate the file.
Click on the Open button.
Test your file link
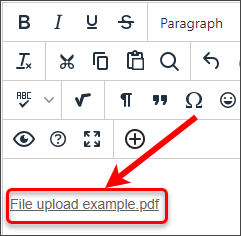
- Click the Preview button (an eye icon) in the text editor to test your file link to ensure that your instructor can locate and mark your work (file links are not active while editing).

Option B
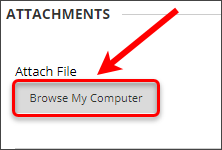
- Click on the Browse My Computer button under the Attachments heading.
- Locate the file.
- Click on the Open button.
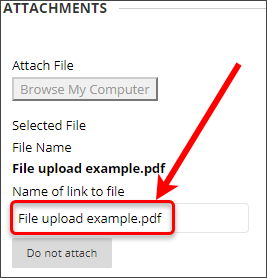
- Optionally, update the 'Name of link to file' textbox.
Insert and edit an image
Add an image from a website
- In your internet browser, locate the image.
- Right-click on it and click on Copy image.
- Paste it into the text editor.
- For more information on editing the image, refer to the Edit image section.
Add image/s from your computer
- In the text editor, click on the Add content button.
Note: If the button is not visible click the 3 dots button on the right of the editor to expand the text editor.

- Click on Insert Local Files.

- Locate the appropriate image or images (hold down Shift or Control on your keyboard and then left-click on your mouse to select multiple images).
- Click on the Open button.
- For more information on editing the image, refer to the Edit image section.
Edit an image
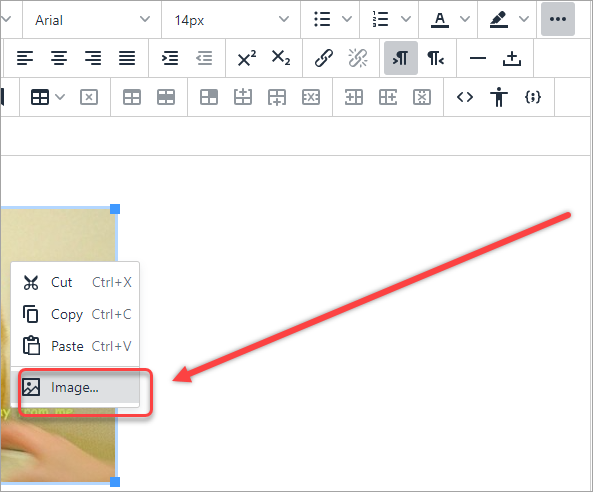
- Right-click on the image in the text editor and click on Image....
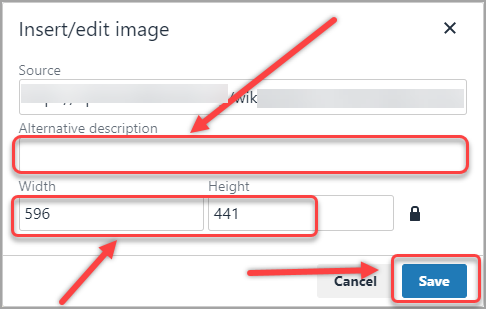
- Enter a description in the Alternative description textbox.
Note: It is recommended that you enter both a description and title for all images for accessibility reasons.
- Enter the width and height (in pixels) in the Width and Height text boxes respectively.
Note: The height will change automatically if the width is changed and vice versa.
Tip: If you are embedding an image, it is recommended that you limit the width to a maximum of 600 pixels where possible.
- Click on the Save button.
Insert and edit an equation
Insert an equation
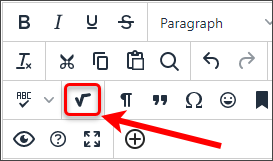
- In the text editor, click the Insert a math equation button (square root symbol).
Note: If the button is not visible, click the 3 dots button on the right of the editor to expand the text editor.
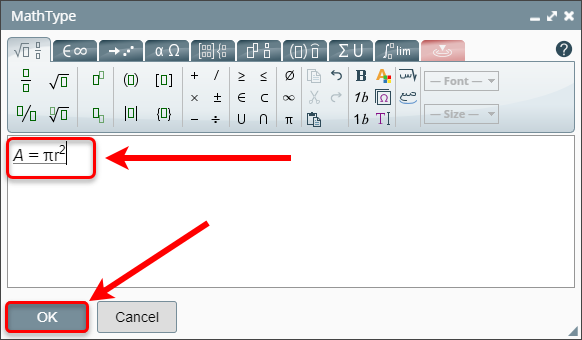
- Type text and symbols and use the tabs to locate and select tools to build your equation.
- Click the OK button.
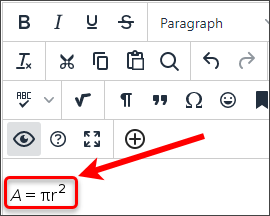
- The equation will be inserted into the text editor as an image.
Edit an equation
- Select an equation object in the text editor.
- Click the Insert a math equation button (square root symbol).
- Type and symbols and use the tabs to locate and select tools to adjust your equation.
- Click OK button to replace your old equation in the editor.
Equation editor help
Click the Manual (? icon) button at the top right corner of the MathType editor window to open the online manual.
