Create a Custom Rubric (Original)
Video guide
Create a custom Turnitin rubric (YouTube 2m, 12s)
Overview
For information on the different types of rubrics available in Turnitin, refer to the Marks / Rubrics / Grading Forms Overview guide.
Note: Turnitin rubrics are different to Blackboard rubrics. It is not possible to use a Blackboard rubric in Turnitin.
Note: The availability of rubrics is based on who is logged on, not what Blackboard course the Turnitin is accessed from. Your tutors will be able to use the rubric you select for marking.
To pass a rubric on to another staff member, you need to export the rubric/form and they will need to import it into Turnitin (refer to the Export / Import a Rubric/Form guide).
Another option would be to share the spreadsheet the rubric is based on.
Example
Note: The below rubric is an example of how a Custom rubric may be structured.
| Criteria | High Distinction | Credit | Pass | Fail |
|---|---|---|---|---|
Argument Argument and analysis (Clarity) | 2 | 1.5 | 1 | 0.5 |
Evidence | 4 | 3 | 2 | 1 |
Conclusion | 8 | 6 | 4 | 2 |
Scholarship Scholarship and sources | 0 | 0 | 2
| 1 |
Add a rubric
It is recommended that rubrics be created in a spreadsheet and uploaded to Turnitin. The advantage of this is that rubrics can then be easily copied into your Course Profile and assignment instructions.
Download the spreadsheet template
- Right click the below link and save the spreadsheet template.
Complete the rubric
Note: The criteria percentage weightings and standard marks are not included in the spreadsheet.
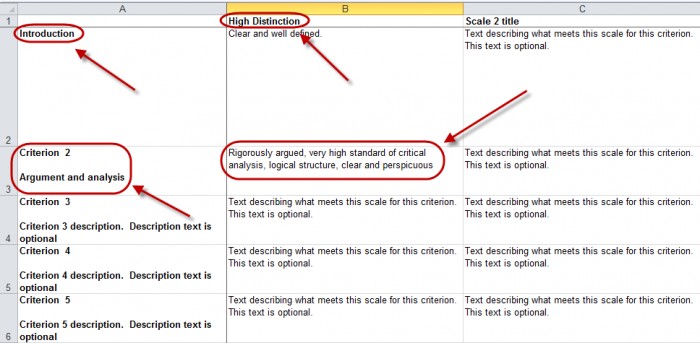
Note: The criterion titles are limited to 13 characters (including spaces). If the criterion title is too long, leave it as Criterion X and enter the title underneath as the criterion description.
Tip: If you are unsure of character limits we suggest you do not change the criterion titles or the scale titles and do this after you have uploaded the rubric.
Import the spreadsheet into TurnItIn
A rubric can be added when you first set up your Turnitin assignment under Optional settings or by editing an existing assignment.
Refer to the guides Create a Turnitin Assignment (text-based), Create a Turnitin Assignment (non-text based), Create a Turnitin Assignment (no file submission) or Create a Turnitin Revision Assignment.
- Navigate to the required assignment link.
- Click on the assignment title.
- Click on the cog button.
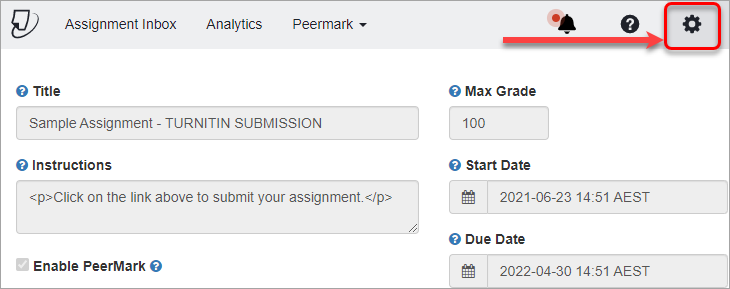
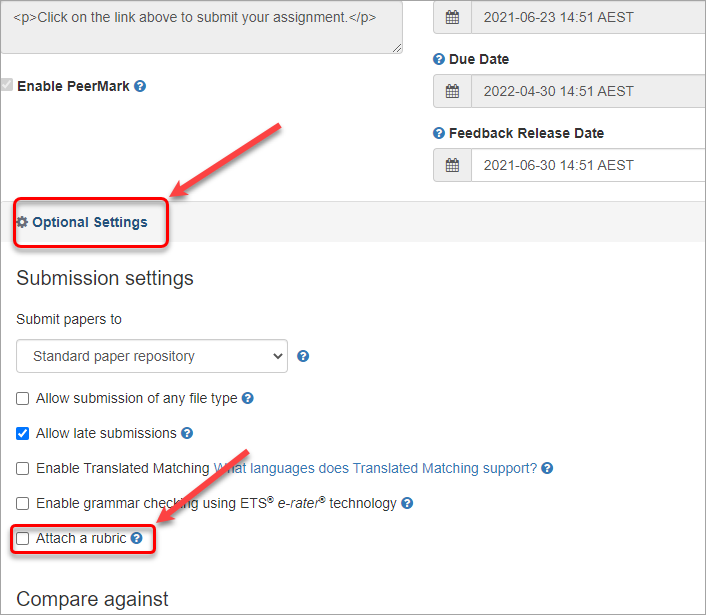
- Expand Optional settings and check the Attach a rubric checkbox.
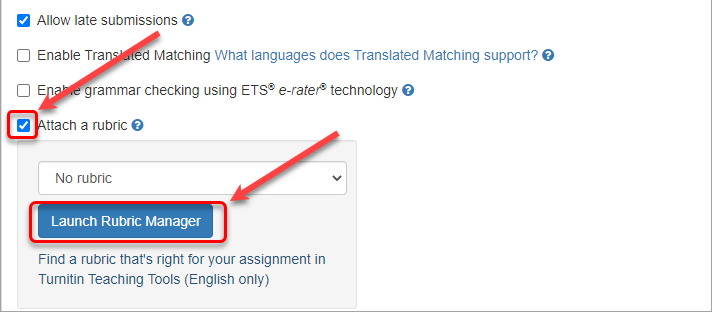
- Launch Rubric Manager panel will be displayed. Click on the Launch Rubric Manager button.
- Click on the Export/Import button.
- Select Import from the drop down list.

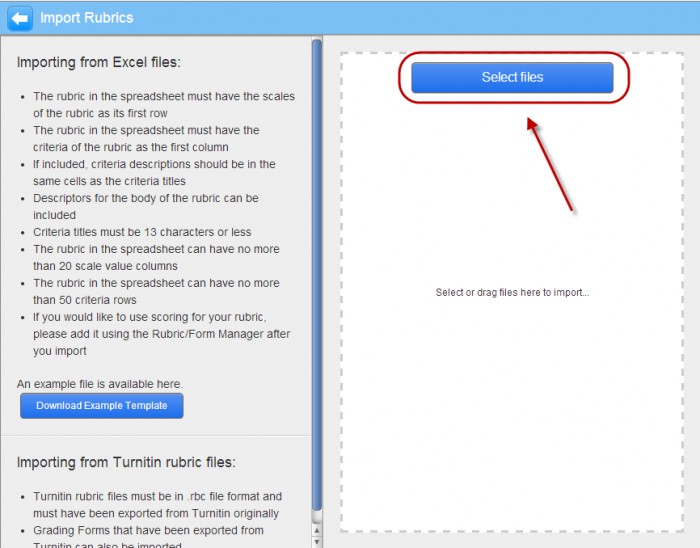
- Click on the Select files button.
- Browse to and select the complete rubric template.
- Click on the View button.
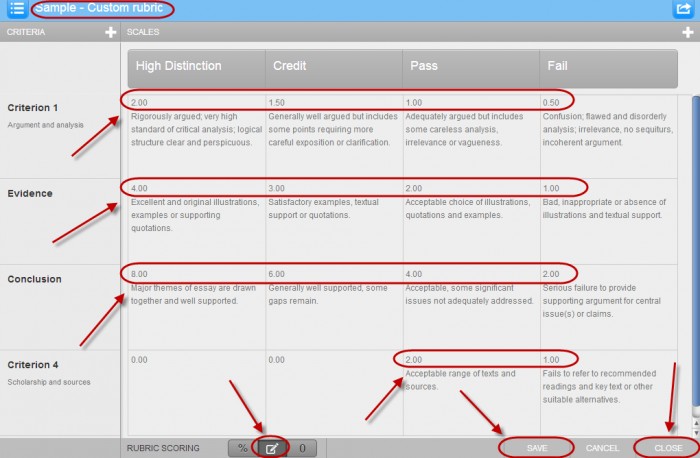
- Enter a name for the rubric.
- Click on the Custom rubric icon.
- Enter a mark for each criterion/standard “cell”.
Note: Marks can be entered to two decimal places, though the final total mark returned to the Grade Centre will be rounded to a whole number.
Note: Not all criterion/standard “cells” need to be used.
- Click on the SAVE button.
- Click on the CLOSE button.
- Select the required rubric from the Rubric drop-down list.

