Create a Folder (Original)
Create a Folder
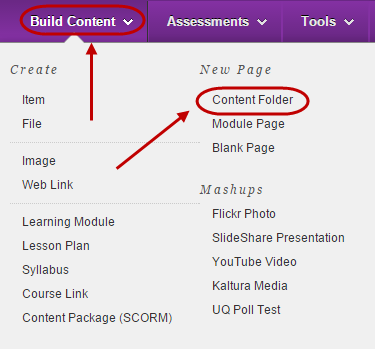
- From the Course Menu select a Content Area (e.g Learning Resources).
- Click on the Build Content button.
- Select Content Folder from the drop down list.
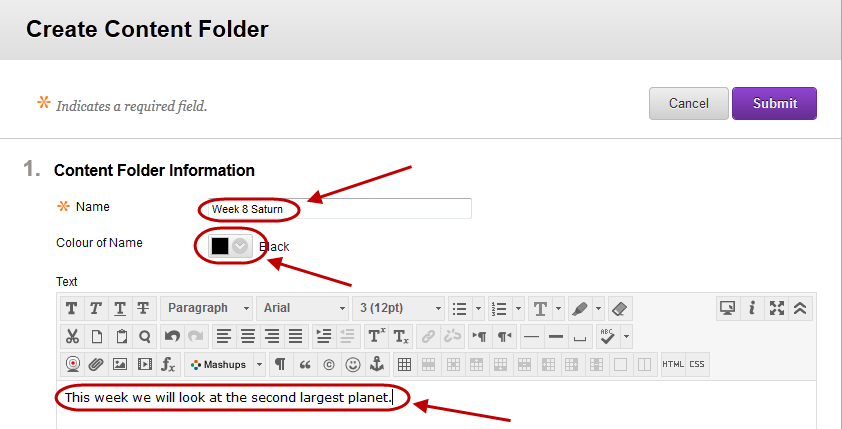
- Enter a descriptive title for the folder in the Name textbox.
- Optionally, select the font colour for the title from the Colour of Name drop-down colour picker.
- Optionally, enter a description of the folder contents in the Text textbox.
Insert an image (optional)
Optionally, insert an image to improve navigation (refer Textbox Editor: Insert an Image guide).
Tip: Place your cursor where you want to position the image, it is difficult to move images once they are inserted.
Standard Options and Submit
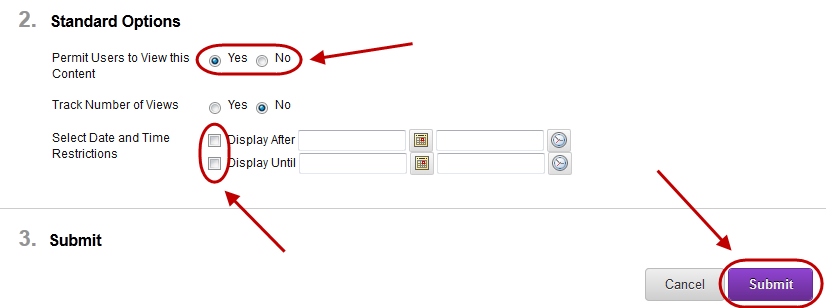
- Optionally, if you have not completed organising the content, select the No Permit Users to View this Content radio button.
- Optionally, if you need statistics on which students have viewed the content select the Yes Track Number of Views radio button.
- Optionally, set Date and Time Restrictions: i.e. The course content could be organised into weekly folders that are display progressive over the semester at the relevant time.
- If required, select the Display After checkbox and enter the date using the Date Selection Calendar and enter the time using the Time Selection Menu.
- If required, select the Display Until checkbox and enter the date using the Date Selection Calendar and enter the time using the Time Selection Menu.
- Click on the Submit button.
- The Folder will be displayed at the bottom of the page.
Moving the Folder
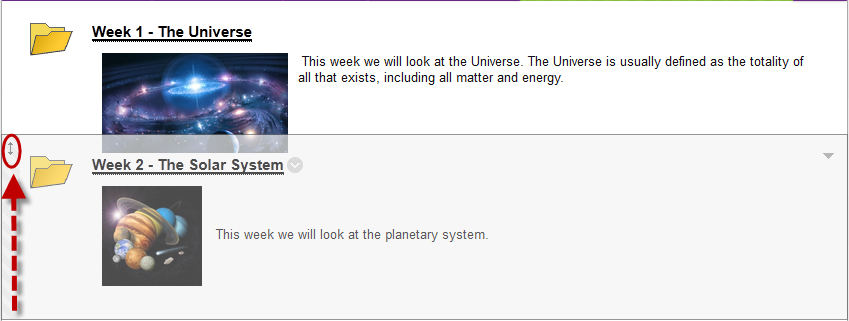
- Hover over the folder.
- Click and drag the double arrow to the left of the folder to move it to the correct position on the page.
Edit or Delete a Folder
- Hover over the Folder.
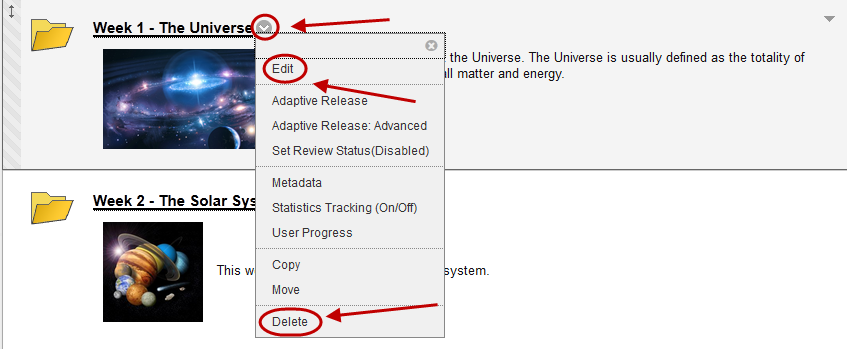
- Click on the arrow to the right of the title.
- Select Edit OR Delete from the drop down list.
Add content to a Folder
- Click on the Folder title.

Note: Use the Breadcrumbs at the top of the page to navigate.

