Blank Page (Original)
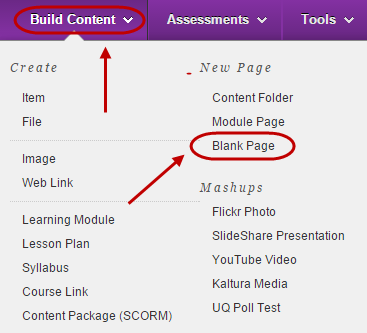
- From the Course Menu select a Content Area (Learning Resources).
- Click on the Build Content button.
- Select Blank Page from the drop down menu.
Content
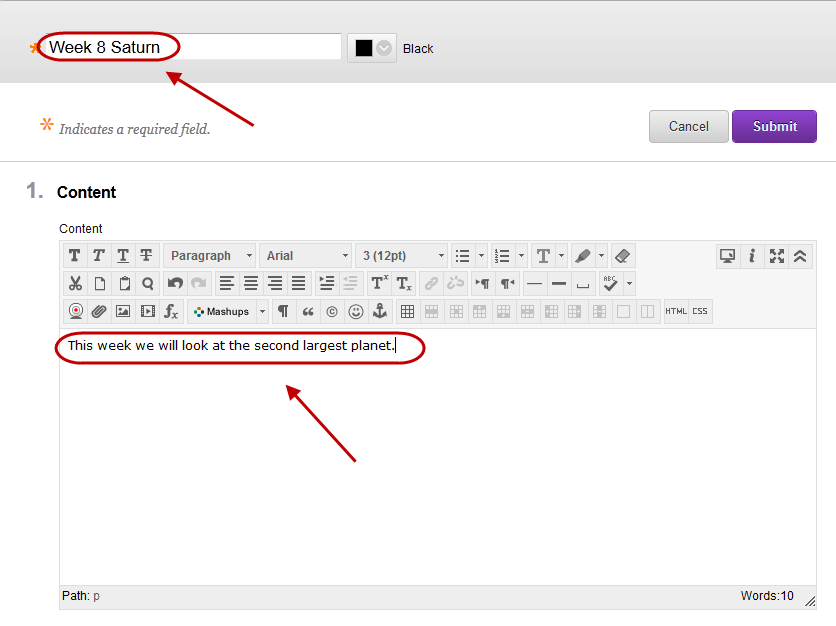
- Enter a description title for the page in the textbox.
- Optionally, select the font colour for the title from the Colour of Name drop down colour picker.
- Enter the required content into the textbox editor. (Refer to the Textbox Editor guides: Tool overview, Insert an image, Add a file link, Add a web link and Equation editor)
Attachments and Submit
- Click on the Browse My Computer button to upload a file from your computer. OR
- Click on the Browse Course button to link to a file you have previously uploaded to the course.

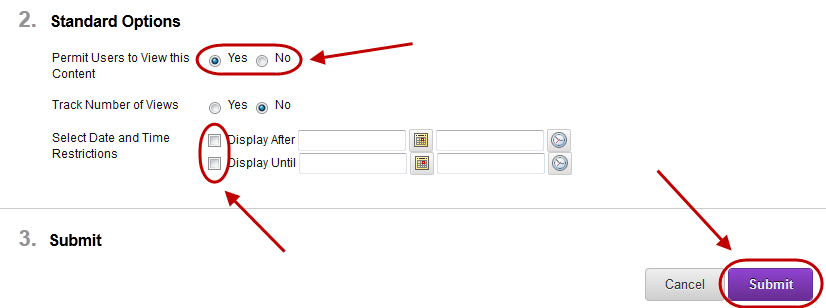
- Optionally, if you do not want students to view the page content, select the No Permit Users to View this Content radio button.
- Optionally, if you want to track the number of students opening the page, select the Yes Track Number of Views radio button.
- You can set the page so it is not immediately visible to students.
- Select Not Date Restricted radio button if you want the announcement to be displayed immediately. OR
- Select the Date Restricted radio button if you do not want the announcement to be displayed immediately.
- If required, select the Display After checkbox and enter the date using the Date Selection Calendar and enter the time using the Time Selection Menu.
- If required, select the Display Until checkbox and enter the date using the Date Selection Calendar and enter the time using the Time Selection Menu.
- Click on the Submit button.
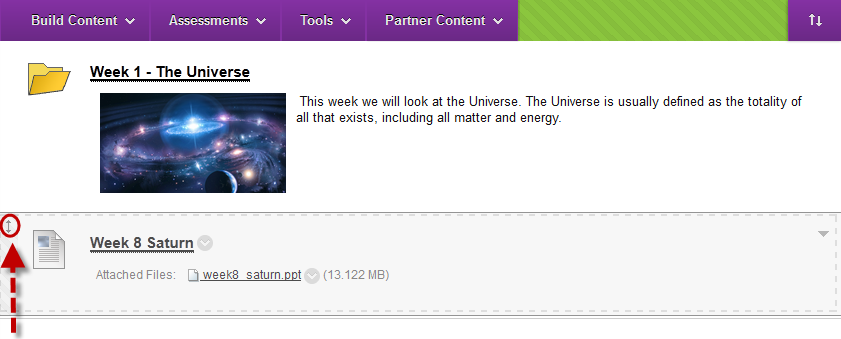
- The new page link will be displayed at the bottom of the Content Area.
Moving the Page
- Hover over the page link.
- Click and drag the double arrow to the left of the page to move it to the correct position on the page.
Edit or Delete a Page
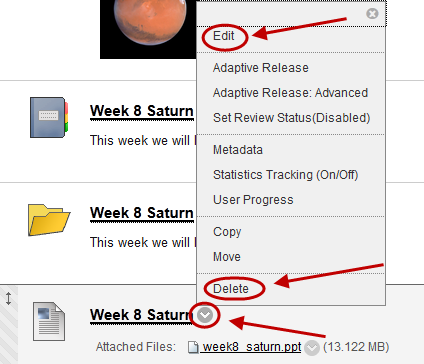
- Hover over the page title.
- Click on the arrow to the right of the title.
- Select Edit OR Delete from the drop down list.
Note: Use the Breadcrumbs at the top of the page to navigate.

