Add an Item (Original)
Video Guide
Add an Item
Items can be used to combine a variety of different media (text, file links, web links, images) and added content directly to a Content Area. For more information on optimising file sizes, consult the Create a Small File Size guide.
A variety of different file types and mashups (YouTube videos, Flickr photos and SlideShare photos) can also be inserted into items.
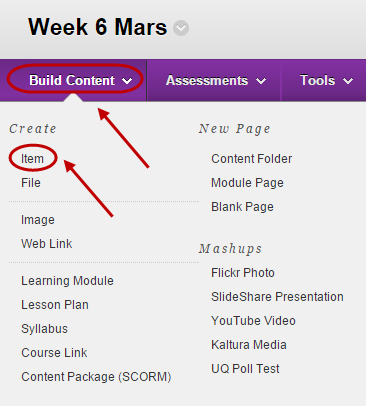
- Open the content area (i.e. Learning Resources or Assessment) where you need to insert the Item. If needed open the appropriate folder or learning module.
- Click on the Build Content button.
- Select Item from the drop down list.

Content Information
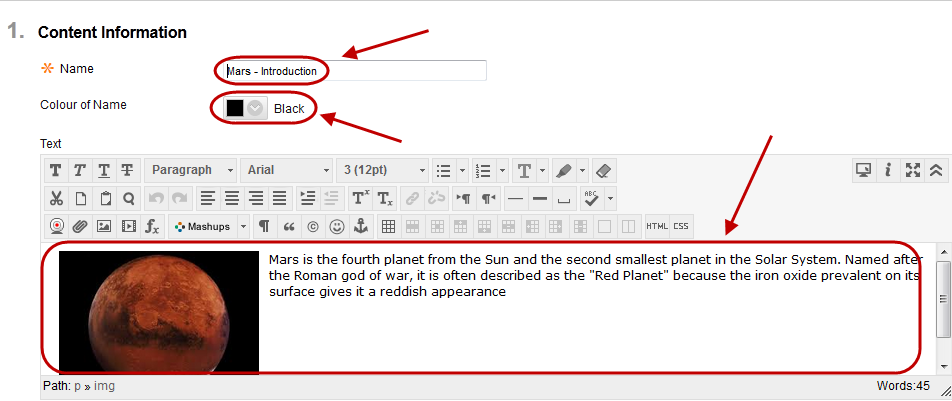
- Enter the title in the Name textbox.
- Optionally, select the font colour for the title from the Colour of Name drop down colour picker.
- You have the option to insert in the textbox editor:
- Text
- Images
- Emoticon
- Web links
- File links
- Videos: using EchoVideo
- Audio: using EchoVideo
- Flickr Photo
- SlideShare Presentation
- YouTube Video
Refer to the Text Editor and Video and Audio Upload tool pages.

Attachments
- Click on the Browse My Computer and browse to and open the require files OR
- Click on the Browse Course and select the checkboxes of the required files.
- Browse to and open the required files.
- Repeat for any other files you need to attach.
- If you need to remove a file, click on the Do not attach link.

Standard Options and Submit
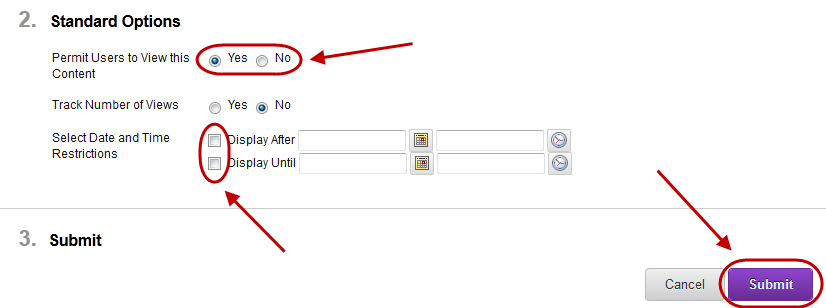
- Optionally, if you do not want students to view the content, select the No Permit Users to View this Content radio button.
- Optionally, if you need statistics on which students have viewed the content select Yes Track Number of Views radio button.
- Optionally, set Select Date and Time Restrictions:
- If required, select the Display After checkbox and enter the date using the Date Selection Calendar and enter the time using the Time Selection Menu.
- If required, select the Display Until checkbox and enter the date using the Date Selection Calendar and enter the time using the Time Selection Menu.
- Click on the Submit button.


Note: If you are uploading a large file you will see an upload indicator after clicking the Submit button. Once the upload is completed the page will refresh automatically.

